2013 CADILLAC SRX tow
[x] Cancel search: towPage 301 of 432

Black plate (33,1)Cadillac SRX Owner Manual - 2013 - CRC - 11/9/12
Vehicle Care 10-33
10. Reinstall the taillamp cover bysnapping it into place.
11. Push the push pin to secure the taillamp cover.
License Plate Lamp
To replace one of these bulbs:
1. Open the liftgate. See Liftgate
on page 2‑13.
Passenger Side Shown, Driver
Side Similar
2. Push the left end of the lamp assembly towards the right. 3. Turn the lamp assembly down to
remove from liftgate.
4. Turn the bulb socket (1)counterclockwise to remove from
lamp assembly (3).
5. Pull the bulb (2) straight out of the bulb socket.
6. Push the replacement bulb straight into the bulb socket and
turn the bulb socket clockwise to
install into lamp assembly.
7. Turn the lamp assembly into the liftgate engaging the clip side
first. 8. Push on the lamp side opposite
the clip until the lamp assembly
snaps into place.
Replacement Bulbs
Exterior Lamp Bulb
Number
Back-up Lamp Hyperclick PH16W
Daytime
Running Lamp 7443 ULL
Headlamp
High-Beam 9005LL
Headlamp
Low-Beam H11LL
License Plate Lamp W5WLL
Turn Signal Front 7444NA
Tail/Turn
Signal Rear 7440
For replacement bulbs not listed
here, contact your dealer.
Page 326 of 432

Black plate (58,1)Cadillac SRX Owner Manual - 2013 - CRC - 11/9/12
10-58 Vehicle Care
Anytime unusual wear is
noticed, rotate the tires as soon
as possible, check for proper tire
inflation pressure, and check for
damaged tires or wheels. If the
unusual wear continues after the
rotation, check the wheel
alignment. SeeWhen It Is Time
for New Tires on page 10‑59
and Wheel Replacement on
page 10‑64.
Use this rotation pattern when
rotating the tires. Do not include the compact
spare tire in the tire rotation.
Adjust the front and rear tires to
the recommended inflation
pressure on the Tire and
Loading Information label after
the tires have been rotated. See
Tire Pressure on page 10‑51
and
Vehicle Load Limits on
page 9‑10.
Reset the Tire Pressure Monitor
System. See Tire Pressure
Monitor Operation on
page 10‑54.
Check that all wheel nuts are
properly tightened. See “Wheel
Nut Torque” underCapacities
and Specifications on
page 12‑2.
{WARNING
Rust or dirt on a wheel, or on the
parts to which it is fastened, can
make wheel nuts become loose
after time. The wheel could come
off and cause an accident. When
changing a wheel, remove any
rust or dirt from places where the
wheel attaches to the vehicle. In
an emergency, a cloth or a paper
towel can be used; however, use
a scraper or wire brush later to
remove all rust or dirt.
Lightly coat the center of the
wheel hub with wheel bearing
grease after a wheel change or
tire rotation to prevent corrosion
or rust build-up. Do not get
grease on the flat wheel
mounting surface or on the
wheel nuts or bolts.
Page 333 of 432

Black plate (65,1)Cadillac SRX Owner Manual - 2013 - CRC - 11/9/12
Vehicle Care 10-65
Tire Chains
{WARNING
Do not use tire chains. There is
not enough clearance. Tire chains
used on a vehicle without the
proper amount of clearance can
cause damage to the brakes,
suspension, or other vehicle
parts. The area damaged by the
tire chains could cause loss of
control and a crash.
Use another type of traction
device only if its manufacturer
recommends it for the vehicle's
tire size combination and
road conditions. Follow that
manufacturer's instructions. To
avoid vehicle damage, drive slow
and readjust or remove the
traction device if it contacts the
vehicle. Do not spin the wheels.
If traction devices are used, install
them on the front tires.
If a Tire Goes Flat
It is unusual for a tire to blow out
while driving, especially if the tires
are maintained properly. SeeTires
on page 10‑42. If air goes out of a
tire, it is much more likely to leak
out slowly. But if there is ever a
blowout, here are a few tips about
what to expect and what to do:
If a front tire fails, the flat tire
creates a drag that pulls the vehicle
toward that side. Take your foot off
the accelerator pedal and grip the
steering wheel firmly. Steer to
maintain lane position, and then
gently brake to a stop, well off the
road, if possible.
A rear blowout, particularly on a
curve, acts much like a skid and
may require the same correction as
used in a skid. Stop pressing the
accelerator pedal and steer to
straighten the vehicle. It may be
very bumpy and noisy. Gently
brake to a stop, well off the road,
if possible.{WARNING
Driving on a flat tire will cause
permanent damage to the tire.
Re-inflating a tire after it has
been driven on while severely
underinflated or flat may cause a
blowout and a serious crash.
Never attempt to re-inflate a tire
that has been driven on while
severely underinflated or flat.
Have your dealer or an authorized
tire service center repair or
replace the flat tire as soon as
possible.
Page 346 of 432

Black plate (78,1)Cadillac SRX Owner Manual - 2013 - CRC - 11/9/12
10-78 Vehicle Care
8. Turn the extension with thewheel wrench clockwise to raise
the jack lift head until the jack
just fits under the vehicle.
9. Raise the vehicle by turning the
wheel wrench clockwise until the
slots in the jack head fit into the
metal flange located behind the
triangle on the plastic moulding. Notice:
Using a jack to raise the
vehicle without positioning it
correctly could damage your
vehicle. When raising your
vehicle on a jack, be sure to
position it correctly under the
frame and avoid contact with the
plastic molding.
10. Put the compact spare tire
near you.
Remove all of the wheel nuts.
11. Remove the flat tire.
{WARNING
Rust or dirt on a wheel, or on the
parts to which it is fastened, can
make wheel nuts become loose
after time. The wheel could come
off and cause an accident. When
changing a wheel, remove any
rust or dirt from places where the
wheel attaches to the vehicle. In
an emergency, a cloth or a paper
towel can be used; however, use
a scraper or wire brush later to
remove all rust or dirt.
Page 353 of 432

Black plate (85,1)Cadillac SRX Owner Manual - 2013 - CRC - 11/9/12
Vehicle Care 10-85
Notice:If the jumper cables are
connected or removed in the
wrong order, electrical shorting
may occur and damage the
vehicle. The repairs would not be
covered by the vehicle warranty.
Always connect and remove the
jumper cables in the correct
order, making sure that the
cables do not touch each other or
other metal.
Jumper Cable Removal
Reverse the sequence exactly when
removing the jumper cables.Towing
Towing the Vehicle
Notice: Incorrectly towing a
disabled vehicle may cause
damage. The damage would
not be covered by the vehicle
warranty. Do not lash or hook
to the chassis components
including the front and rear
subframes, suspension control
arms and links during towing and
recovery of a disabled vehicle or
to secure the vehicle to a flatbed
car carrier. Use the proper nylon
strap harnesses around the tires
to secure the flatbed car carrier.
Have the vehicle towed on a flatbed
car carrier. A wheel lift tow truck
could damage the vehicle.
Consult your dealer or a
professional towing service if the
disabled vehicle must be towed. To tow the vehicle behind another
vehicle for recreational purposes,
such as behind a motor home, see
“Recreational Vehicle Towing”
in this
section.
Recreational Vehicle
Towing
Recreational vehicle towing means
towing the vehicle behind another
vehicle –such as behind a motor
home. The two most common types
of recreational vehicle towing are
known as dinghy towing and dolly
towing. Dinghy towing is towing the
vehicle with all four wheels on the
ground. Dolly towing is towing the
vehicle with two wheels on the
ground and two wheels up on a
device known as a dolly.
Page 354 of 432

Black plate (86,1)Cadillac SRX Owner Manual - 2013 - CRC - 11/9/12
10-86 Vehicle Care
Here are some important things to
consider before recreational vehicle
towing:
.What is the towing capacity of
the towing vehicle? Be sure
to read the tow vehicle
manufacturer's
recommendations.
.What is the distance that will be
travelled? Some vehicles have
restrictions on how far and how
long they can tow.
.Is the proper towing equipment
going to be used? See your
dealer or trailering professional
for additional advice and
equipment recommendations.
.Is the vehicle ready to be
towed? Just as preparing the
vehicle for a long trip, make sure
the vehicle is prepared to be
towed.
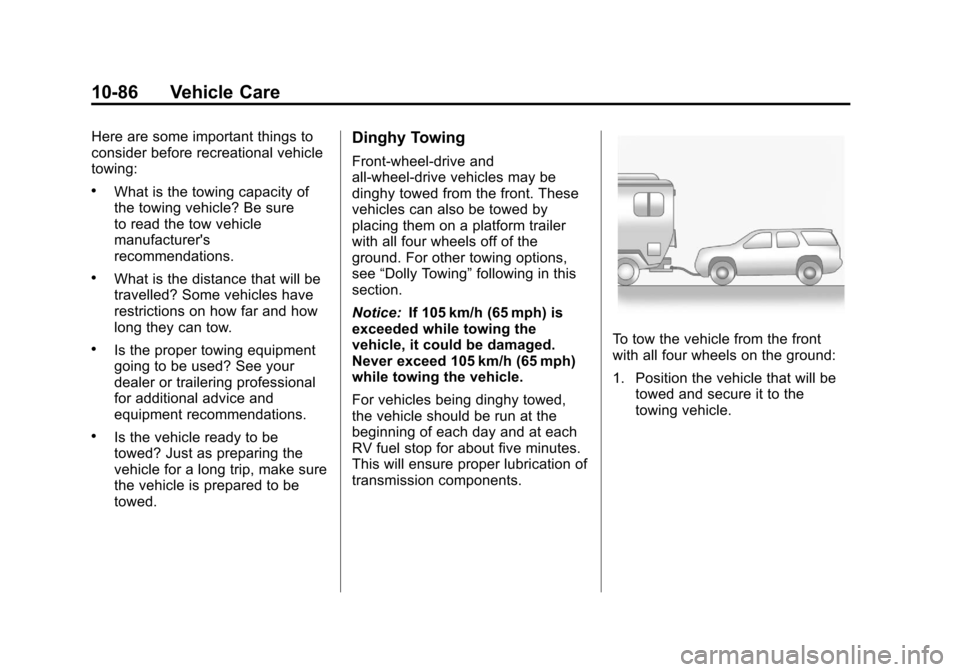
Dinghy Towing
Front-wheel‐drive and
all-wheel-drive vehicles may be
dinghy towed from the front. These
vehicles can also be towed by
placing them on a platform trailer
with all four wheels off of the
ground. For other towing options,
see“Dolly Towing” following in this
section.
Notice: If 105 km/h (65 mph) is
exceeded while towing the
vehicle, it could be damaged.
Never exceed 105 km/h (65 mph)
while towing the vehicle.
For vehicles being dinghy towed,
the vehicle should be run at the
beginning of each day and at each
RV fuel stop for about five minutes.
This will ensure proper lubrication of
transmission components.
To tow the vehicle from the front
with all four wheels on the ground:
1. Position the vehicle that will be towed and secure it to the
towing vehicle.
Page 355 of 432

Black plate (87,1)Cadillac SRX Owner Manual - 2013 - CRC - 11/9/12
Vehicle Care 10-87
2. Remove the shift lever boot bypulling up on the rear of the trim
plate.3. Use a small screw driver or toolto press and hold the manual
release button on the front right.
4. Put the vehicle in N (Neutral).
Notice: If the vehicle is towed
without performing each of the
steps listed under “Dinghy
Towing,” the automatic
transmission could be damaged.
Be sure to follow all steps of the
dinghy towing procedure prior to
and after towing the vehicle. Once the destination has been
reached:
1. Shift the vehicle to P (Park).
2. Reinstall the shift lever boot by
inserting the front edge and
pressing the rear of the trim
plate until it snaps into place.
3. Start the engine and let it idle for more than three minutes before
driving the vehicle.
Notice: Too much or too
little fluid can damage the
transmission. Be sure that the
transmission fluid is at the proper
level before towing with all four
wheels on the ground.
Notice: Do not tow a vehicle
with the front drive wheels on
the ground if one of the front
tires is a compact spare tire.
Towing with two different tire
sizes on the front of the vehicle
can cause severe damage to the
transmission.
Page 356 of 432

Black plate (88,1)Cadillac SRX Owner Manual - 2013 - CRC - 11/9/12
10-88 Vehicle Care
Dolly Towing (All-Wheel‐Drive
Vehicles)
All-wheel‐drive vehicles should not
be towed with two wheels on the
ground. To properly tow these
vehicles, they should be placed on
a platform trailer with all four wheels
off of the ground or dinghy towed
from the front. See Dinghy Towing
earlier in this section.
Dolly Towing (Front-Wheel‐
Drive Vehicles)
To tow the vehicle from the front
with the rear wheels on the ground,
do the following:
1. Put the front wheels on a dolly.
2. Move the shift lever to P (Park).See Shifting Into Park on
page 9‑20. 3. Set the parking brake.
4. Secure the vehicle to the dolly.
5. Follow the dolly manufacturer's
instructions for preparing the
vehicle and dolly for towing.
6. Release the parking brake.
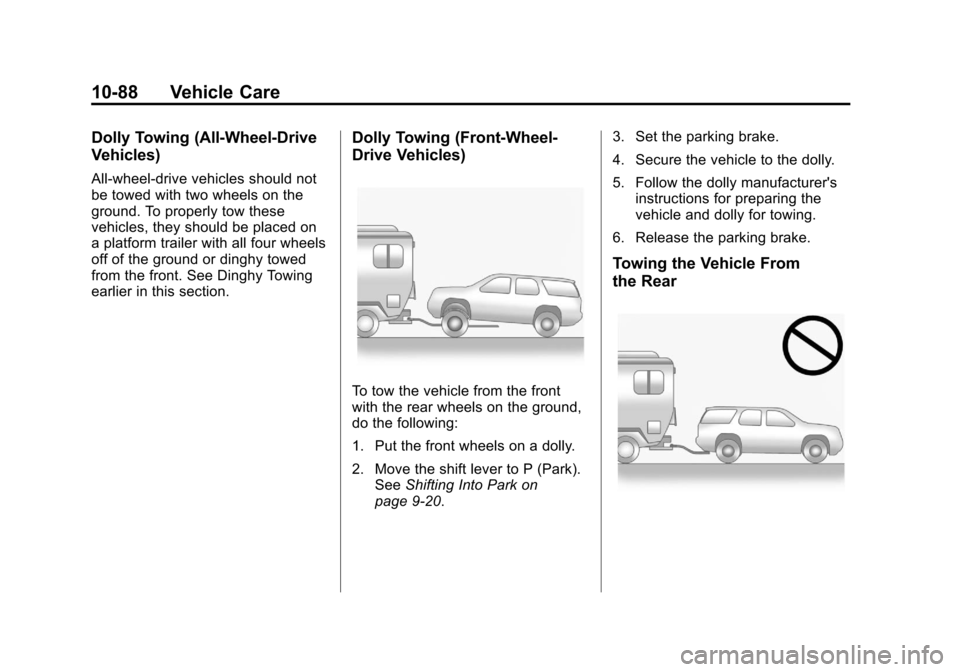
Towing the Vehicle From
the Rear