2013 BMW X1 XDRIVE 28I seats
[x] Cancel search: seatsPage 43 of 291
AdjustingVehicle equipment
This chapter describes all series equipment as
well as country-specific and special equipment
offered for this model series.Therefore, it also
describes equipment that may not be found in
your vehicle, for instance due to the selected
special equipment or the country version. This
also applies to safety-related functions and sys‐
tems.
Sitting safely
The ideal seating position can make a vital con‐
tribution to relaxed, fatigue-free driving.
The seating position plays an important role in
an accident in combination with:▷Safety belts, refer to page 45.▷Head restraints, refer to page 46.▷Airbags, refer to page 85.
Seats
Note before adjusting Do not adjust the seat while driving
Never attempt to adjust the driver's seat
while driving.
The seat could respond with unexpected move‐
ment and the ensuing loss of vehicle control
could lead to an accident.◀
Do not incline the backrest too far to the
rear
Do not incline the backrest on the front passen‐
ger side too far to the rear during driving. Oth‐
erwise, there is the danger of sliding under the
safety belt in an accident. This would eliminate
the protection normally provided by the belt.◀
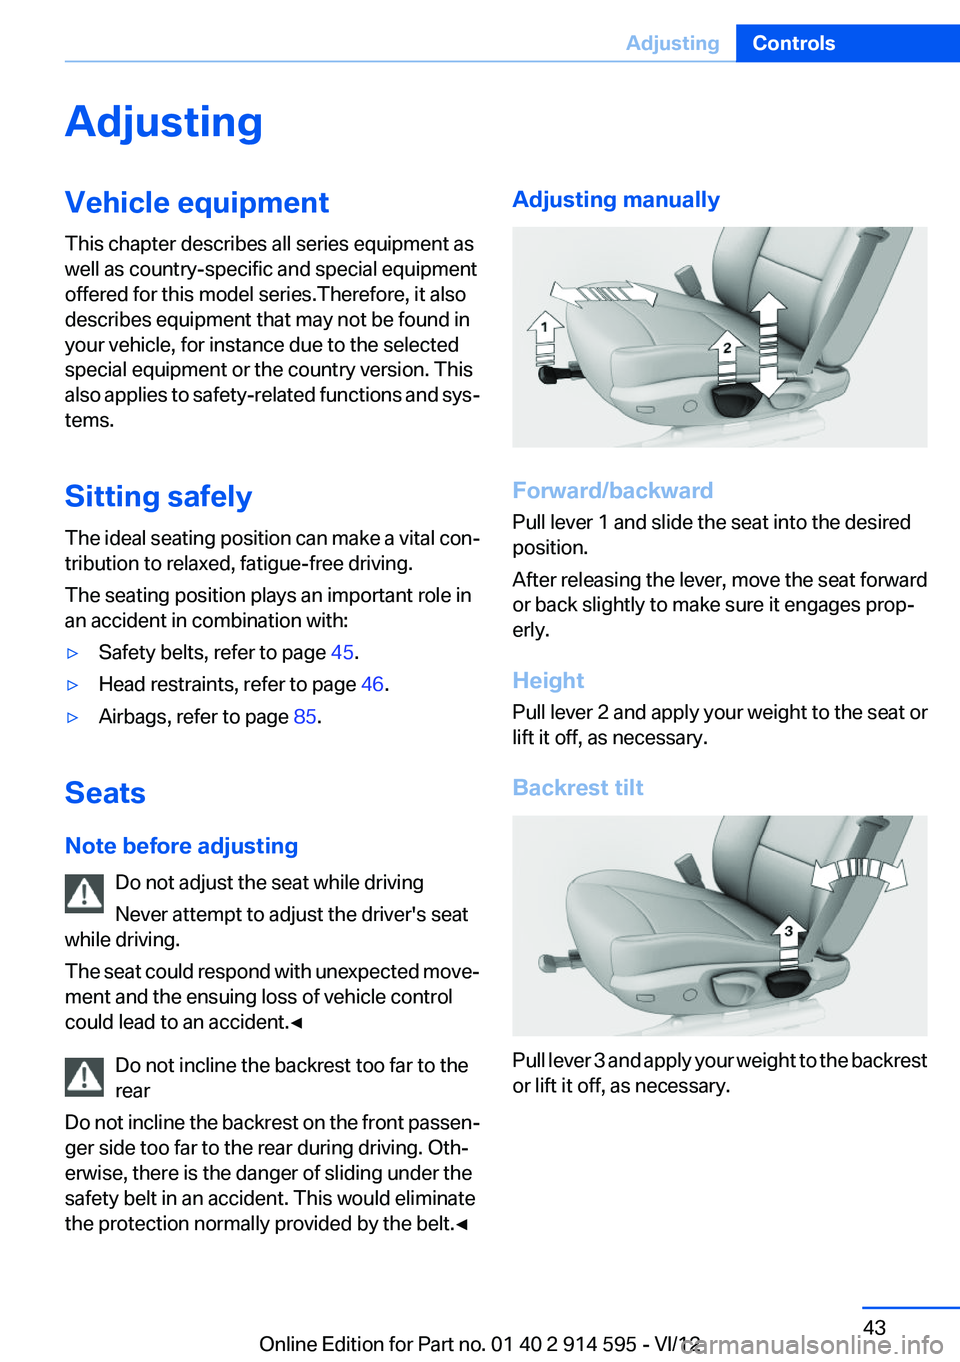
Adjusting manually
Forward/backward
Pull lever 1 and slide the seat into the desired
position.
After releasing the lever, move the seat forward
or back slightly to make sure it engages prop‐
erly.
Height
Pull lever 2 and apply your weight to the seat or
lift it off, as necessary.
Backrest tilt
Pull lever 3 and apply your weight to the backrest
or lift it off, as necessary.
Seite 43AdjustingControls43
Online Edition for Part no. 01 40 2 914 595 - VI/12
Page 45 of 291
The width of the backrest can be changed with
the side wings to adjust the side support to your
own needs.
Press front or rear section of switch.
The backrest width decreases or increases.
Adjusting the rear seat backrests
Adjust the backrest tilt, refer to page 115.
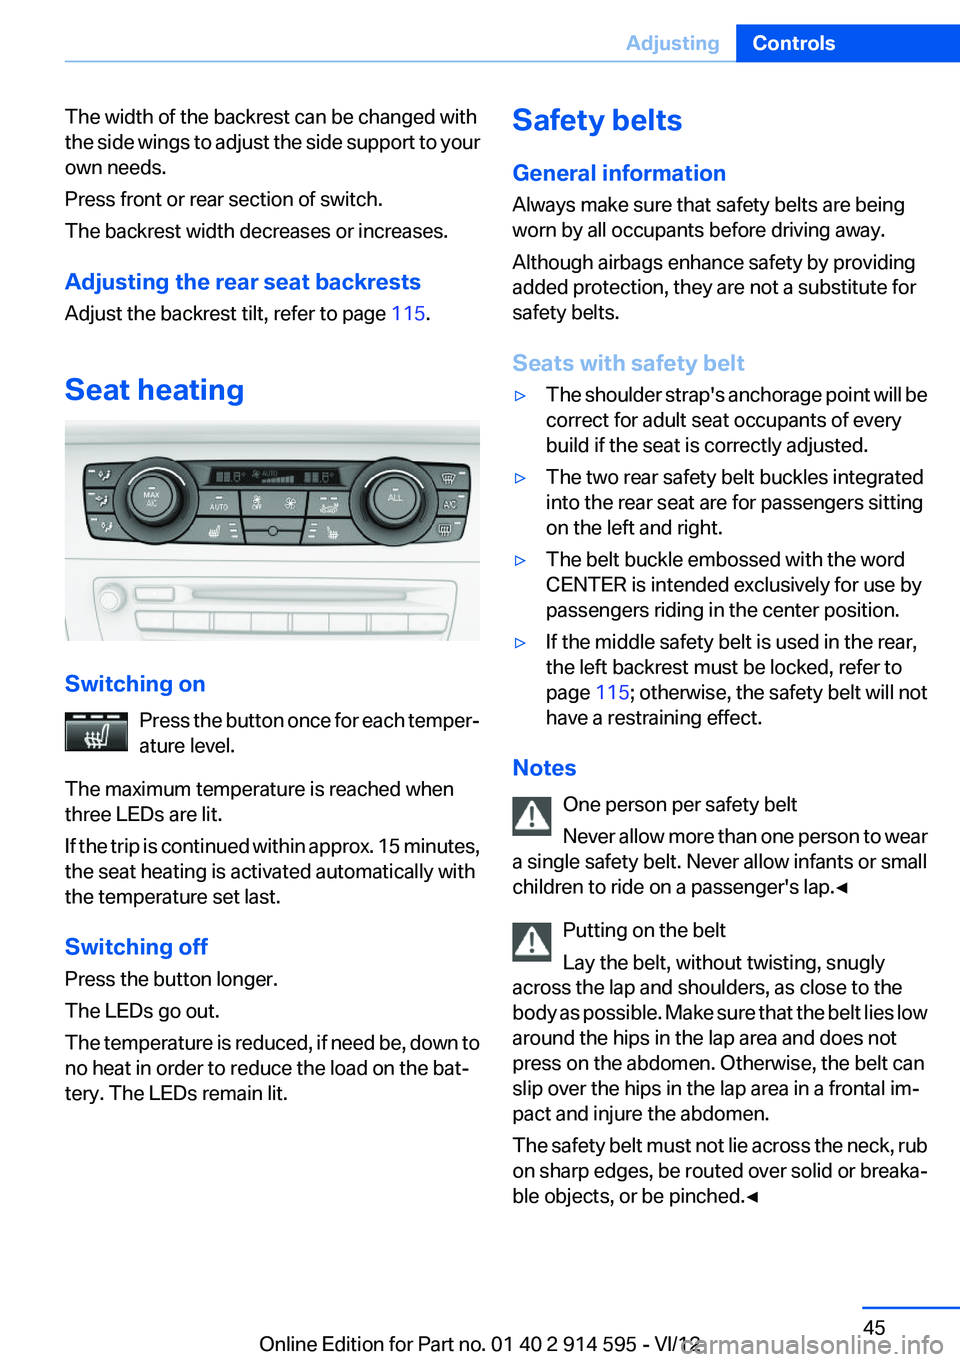
Seat heating
Switching on Press the button once for each temper‐
ature level.
The maximum temperature is reached when
three LEDs are lit.
If the trip is continued within approx. 15 minutes,
the seat heating is activated automatically with
the temperature set last.
Switching off
Press the button longer.
The LEDs go out.
The temperature is reduced, if need be, down to
no heat in order to reduce the load on the bat‐
tery. The LEDs remain lit.
Safety belts
General information
Always make sure that safety belts are being
worn by all occupants before driving away.
Although airbags enhance safety by providing
added protection, they are not a substitute for
safety belts.
Seats with safety belt▷The shoulder strap's anchorage point will be
correct for adult seat occupants of every
build if the seat is correctly adjusted.▷The two rear safety belt buckles integrated
into the rear seat are for passengers sitting
on the left and right.▷The belt buckle embossed with the word
CENTER is intended exclusively for use by
passengers riding in the center position.▷If the middle safety belt is used in the rear,
the left backrest must be locked, refer to
page 115; otherwise, the safety belt will not
have a restraining effect.
Notes
One person per safety belt
Never allow more than one person to wear
a single safety belt. Never allow infants or small
children to ride on a passenger's lap.◀
Putting on the belt
Lay the belt, without twisting, snugly
across the lap and shoulders, as close to the
body as possible. Make sure that the belt lies low
around the hips in the lap area and does not
press on the abdomen. Otherwise, the belt can
slip over the hips in the lap area in a frontal im‐
pact and injure the abdomen.
The safety belt must not lie across the neck, rub
on sharp edges, be routed over solid or breaka‐
ble objects, or be pinched.◀
Seite 45AdjustingControls45
Online Edition for Part no. 01 40 2 914 595 - VI/12
Page 46 of 291

Reduction of restraining effect
Avoid wearing clothing that prevents the
belt from fitting properly, and pull the shoulder
belt periodically to readjust the tension across
your lap; otherwise, the retention effect of the
safety belt may be reduced.◀
Buckling the belt
Make sure you hear the latch plate engage in the
belt buckle.
Unbuckling the belt
1.Hold the belt firmly.2.Press the red button in the belt buckle.3.Guide the belt back into its reel.
Safety belt reminder for the driver's and
front passenger seat
The indicator lamp lights up and a sig‐
nal sounds. In addition, a message ap‐
pears on the Control Display. Check
whether the safety belt has been fas‐
tened correctly.
The safety belt reminder is active at speeds
above approx. 5 mph/8 km/h. It can also be ac‐
tivated if objects are placed on the front pas‐
senger seat.
Damage to safety belts
In the case of strain caused by accidents or
damage:
Have the safety belts, including the safety belt
tensioners, replaced and have the belt anchors
checked.
Checking and replacing safety belts
Have the work performed only by your
service center; otherwise, it cannot be ensured
that this safety feature will function properly.◀
Head restraints
Correctly adjusted head restraints
A correctly adjusted head restraint reduces the
risk of spinal injury in the event of an accident.
Adjusting the head restraint
Correctly adjust the head restraints of all
occupied seats; otherwise, there is an increased
risk of injury in an accident.◀
Height
Adjust the head restraint so that its center is ap‐
prox. at ear level.
Distance
Adjust the distance so that the head restraint is
as close as possible to the back of the head.
Front
Height adjustment▷To raise: pull.▷To lower: press the button, arrow 1, and
push the head restraint down.Seite 46ControlsAdjusting46
Online Edition for Part no. 01 40 2 914 595 - VI/12
Page 52 of 291
Mounting LATCH child restraint fixing
systems1.Mount the child restraint fixing system; refer
to the operating instructions of the system.2.Ensure that both LATCH anchors are prop‐
erly connected.
Child restraint fixing system with a
tether strap
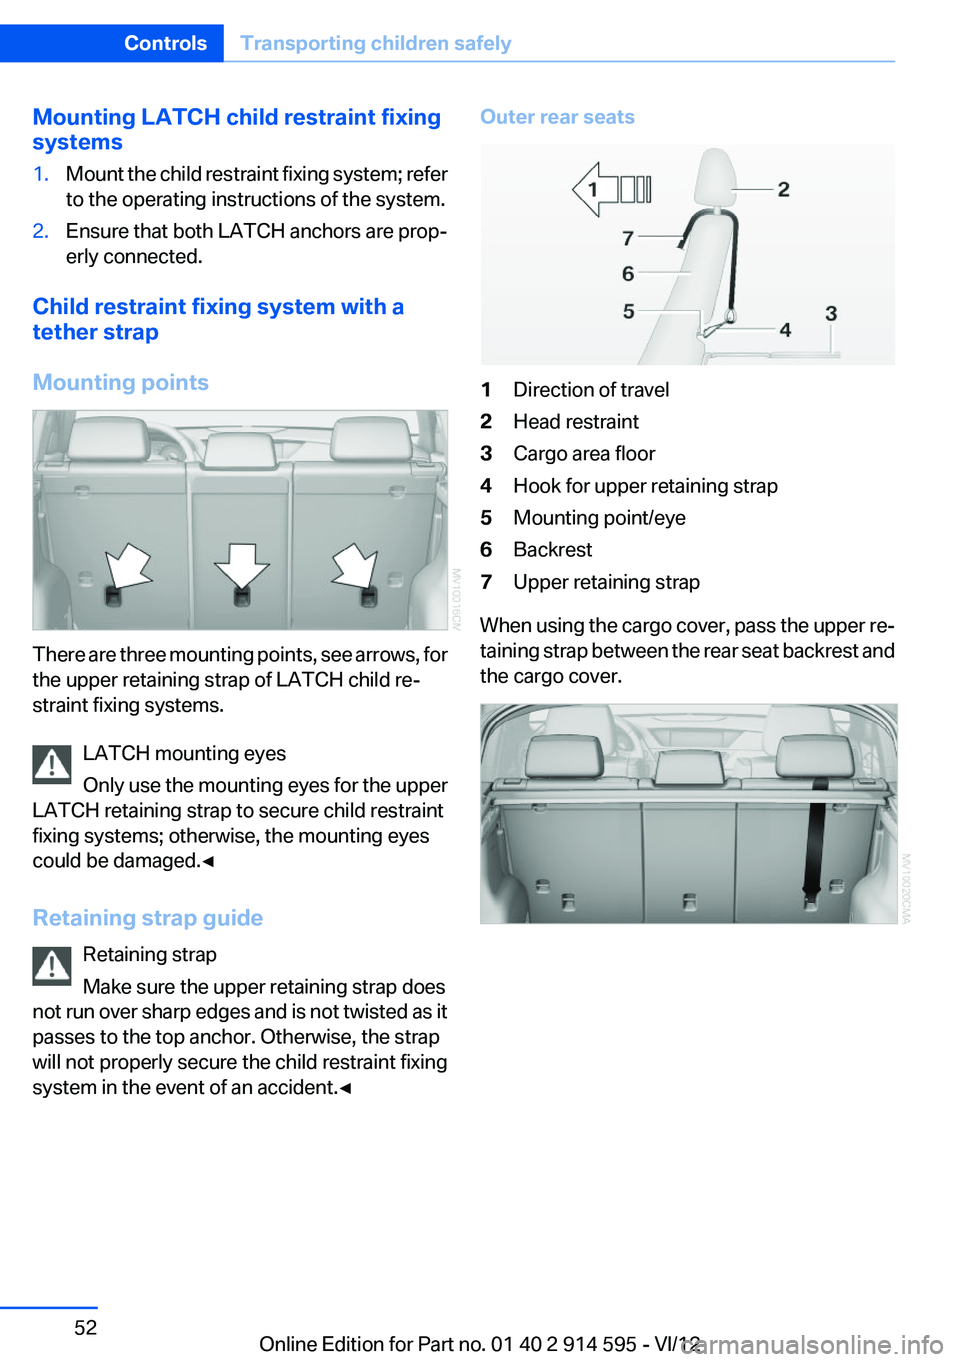
Mounting points
There are three mounting points, see arrows, for
the upper retaining strap of LATCH child re‐
straint fixing systems.
LATCH mounting eyes
Only use the mounting eyes for the upper
LATCH retaining strap to secure child restraint
fixing systems; otherwise, the mounting eyes
could be damaged.◀
Retaining strap guide Retaining strap
Make sure the upper retaining strap does
not run over sharp edges and is not twisted as it
passes to the top anchor. Otherwise, the strap
will not properly secure the child restraint fixing
system in the event of an accident.◀
Outer rear seats1Direction of travel2Head restraint3Cargo area floor4Hook for upper retaining strap5Mounting point/eye6Backrest7Upper retaining strap
When using the cargo cover, pass the upper re‐
taining strap between the rear seat backrest and
the cargo cover.
Seite 52ControlsTransporting children safely52
Online Edition for Part no. 01 40 2 914 595 - VI/12
Page 53 of 291
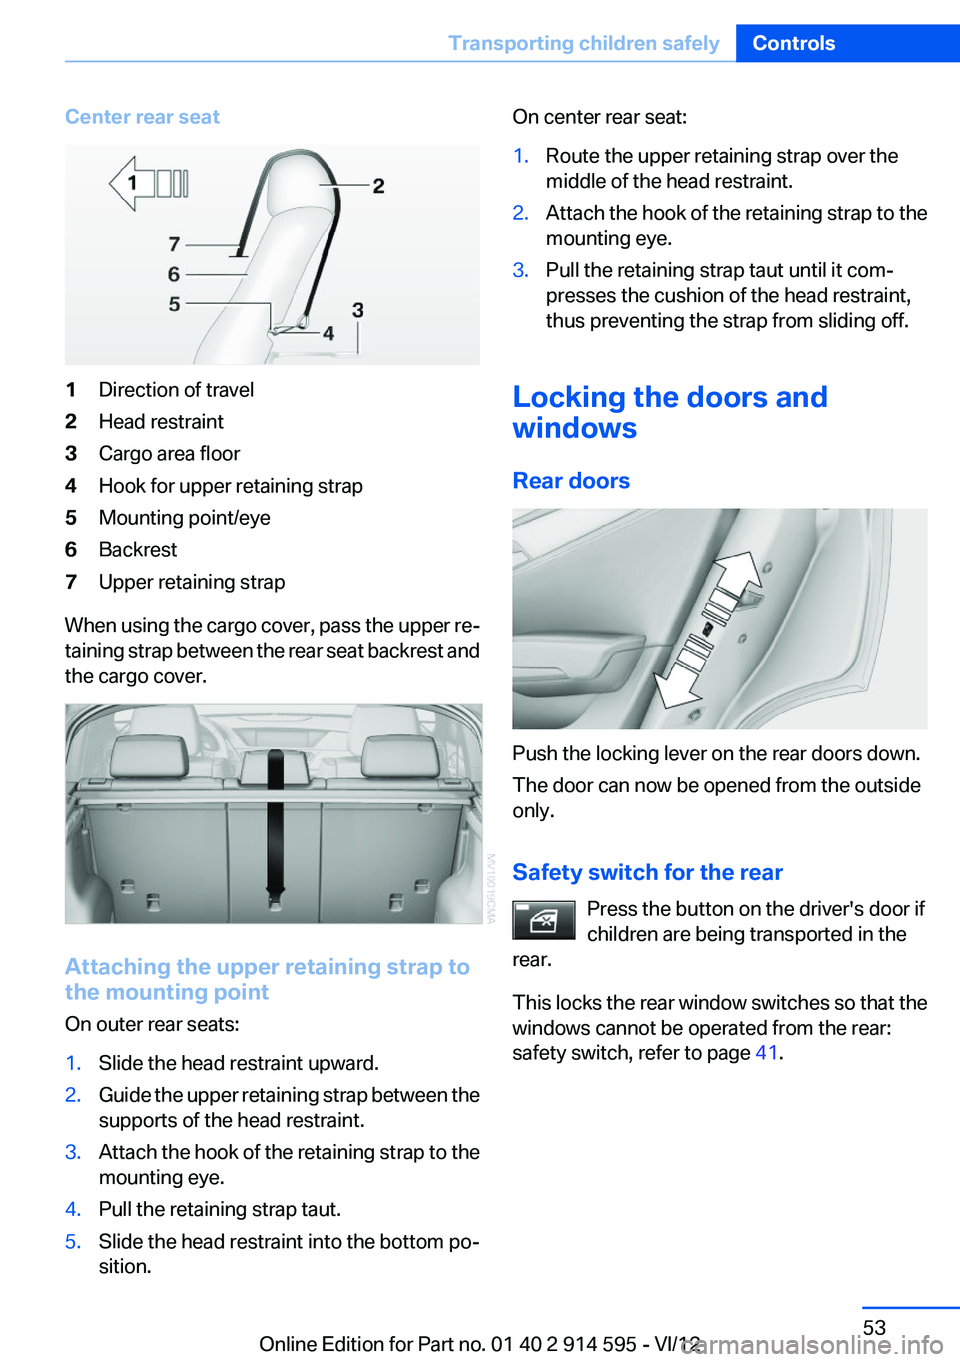
Center rear seat1Direction of travel2Head restraint3Cargo area floor4Hook for upper retaining strap5Mounting point/eye6Backrest7Upper retaining strap
When using the cargo cover, pass the upper re‐
taining strap between the rear seat backrest and
the cargo cover.
Attaching the upper retaining strap to
the mounting point
On outer rear seats:
1.Slide the head restraint upward.2.Guide the upper retaining strap between the
supports of the head restraint.3.Attach the hook of the retaining strap to the
mounting eye.4.Pull the retaining strap taut.5.Slide the head restraint into the bottom po‐
sition.On center rear seat:1.Route the upper retaining strap over the
middle of the head restraint.2.Attach the hook of the retaining strap to the
mounting eye.3.Pull the retaining strap taut until it com‐
presses the cushion of the head restraint,
thus preventing the strap from sliding off.
Locking the doors and
windows
Rear doors
Push the locking lever on the rear doors down.
The door can now be opened from the outside
only.
Safety switch for the rear Press the button on the driver's door if
children are being transported in the
rear.
This locks the rear window switches so that the
windows cannot be operated from the rear:
safety switch, refer to page 41.
Seite 53Transporting children safelyControls53
Online Edition for Part no. 01 40 2 914 595 - VI/12
Page 86 of 291

Protective action
Airbags are not triggered in every impact situa‐
tion, e.g., in less severe accidents or rear-end
collisions.
Information on how to ensure the optimal
protective effect of the airbags▷Keep at a distance from the airbags.▷Always grasp the steering wheel on the
steering wheel rim, holding your hands at
the 3 o'clock and 9 o'clock positions, to keep
the danger of injury to your hands or arms as
low as possible if the airbag is triggered.▷There should be no people, animals, or ob‐
jects between an airbag and a person.▷Do not use the cover of the front airbag on
the front passenger side as a storage area.▷Keep the dashboard and window on the
front passenger side clear, i.e., do not cover
with adhesive labels or coverings, and do not
attach holders such as for navigation instru‐
ments and mobile phones.▷Make sure that the front passenger is sitting
correctly, i.e., keeps his or her feet and legs
in the footwell; otherwise, leg injuries can
occur if the front airbag is triggered.▷Do not place slip covers, seat cushions or
other objects on the front passenger seat
that are not approved specifically for seats
with integrated side airbags.▷Do not hang pieces of clothing, such as jack‐
ets, over the backrests.▷Make sure that occupants keep their heads
away from the side airbag and do not rest
against the head airbag; otherwise, injuries
can occur if the airbags are triggered.▷Do not remove the airbag restraint system.▷Do not remove the steering wheel.▷Do not apply adhesive materials to the air‐
bag cover panels, cover them or modify
them in any way.▷Never modify either the individual compo‐
nents or the wiring in the airbag system. This
also applies to steering wheel covers, the
dashboard, the seats, the roof pillars and the
sides of the headliner.◀
Even when all instructions are followed closely,
injury from contact with the airbags cannot be
ruled out in certain situations.
The ignition and inflation noise may lead to
short-term and, in most cases, temporary hear‐
ing impairment in sensitive individuals.
In the case of a malfunction, deactivation
and after triggering of the airbags
Do not touch the individual components imme‐
diately after the system has been triggered; oth‐
erwise, there is the danger of burns.
Only have the airbags checked, repaired or dis‐
mantled and the airbag generator scrapped by
your service center or a workshop that has the
necessary authorization for handling explosives.
Non-professional attempts to service the sys‐
tem could lead to failure in an emergency or un‐
desired triggering of the airbag, either of which
could result in injury.◀
Warnings and information on the airbags are
also found on the sun visors.
Automatic deactivation of the front
passenger airbags
The system determines whether the front pas‐
senger seat is occupied by measuring the re‐
sistance of the human body.
The front and side airbags on the front passen‐
ger side are activated or deactivated accordingly
by the system.
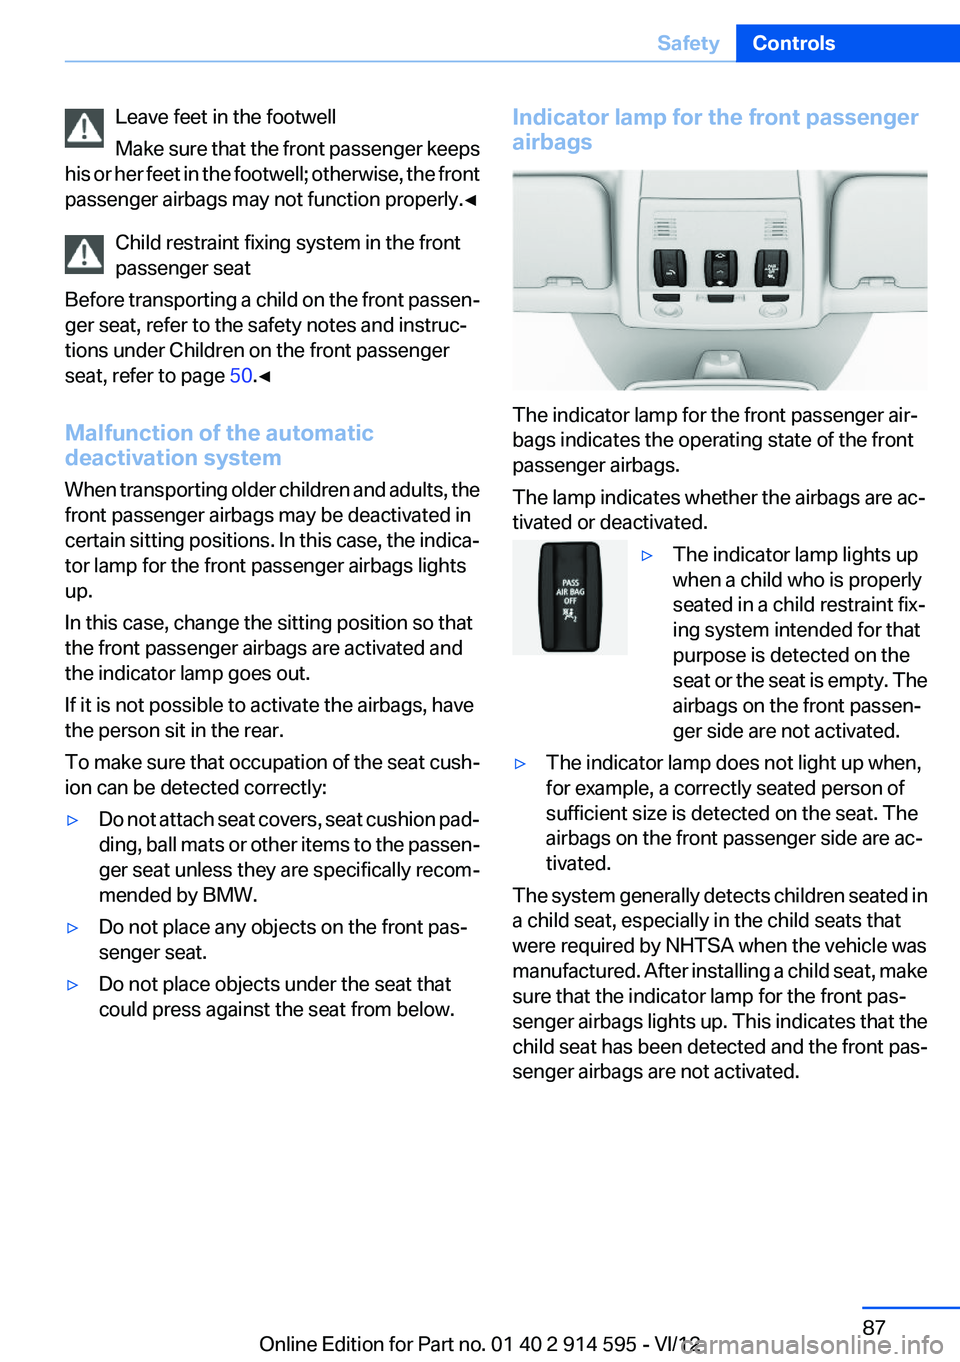
The indicator lamp above the interior rearview
mirror shows the current status of the front pas‐
senger airbags, deactivated or activated, refer to
Front passenger airbag indicator lamp below.
Seite 86ControlsSafety86
Online Edition for Part no. 01 40 2 914 595 - VI/12
Page 87 of 291
Leave feet in the footwell
Make sure that the front passenger keeps
his or her feet in the footwell; otherwise, the front
passenger airbags may not function properly.◀
Child restraint fixing system in the front
passenger seat
Before transporting a child on the front passen‐
ger seat, refer to the safety notes and instruc‐
tions under Children on the front passenger
seat, refer to page 50.◀
Malfunction of the automatic
deactivation system
When transporting older children and adults, the
front passenger airbags may be deactivated in
certain sitting positions. In this case, the indica‐
tor lamp for the front passenger airbags lights
up.
In this case, change the sitting position so that
the front passenger airbags are activated and
the indicator lamp goes out.
If it is not possible to activate the airbags, have
the person sit in the rear.
To make sure that occupation of the seat cush‐
ion can be detected correctly:▷Do not attach seat covers, seat cushion pad‐
ding, ball mats or other items to the passen‐
ger seat unless they are specifically recom‐
mended by BMW.▷Do not place any objects on the front pas‐
senger seat.▷Do not place objects under the seat that
could press against the seat from below.Indicator lamp for the front passenger
airbags
The indicator lamp for the front passenger air‐
bags indicates the operating state of the front
passenger airbags.
The lamp indicates whether the airbags are ac‐
tivated or deactivated.
▷The indicator lamp lights up
when a child who is properly
seated in a child restraint fix‐
ing system intended for that
purpose is detected on the
seat or the seat is empty. The
airbags on the front passen‐
ger side are not activated.▷The indicator lamp does not light up when,
for example, a correctly seated person of
sufficient size is detected on the seat. The
airbags on the front passenger side are ac‐
tivated.
The system generally detects children seated in
a child seat, especially in the child seats that
were required by NHTSA when the vehicle was
manufactured. After installing a child seat, make
sure that the indicator lamp for the front pas‐
senger airbags lights up. This indicates that the
child seat has been detected and the front pas‐
senger airbags are not activated.
Seite 87SafetyControls87
Online Edition for Part no. 01 40 2 914 595 - VI/12
Page 116 of 291
Observe the instructions concerning the
safety belt
Observe the instructions concerning the safety
belt, refer to page 45. Otherwise, personal pro‐
tection may be compromised.◀
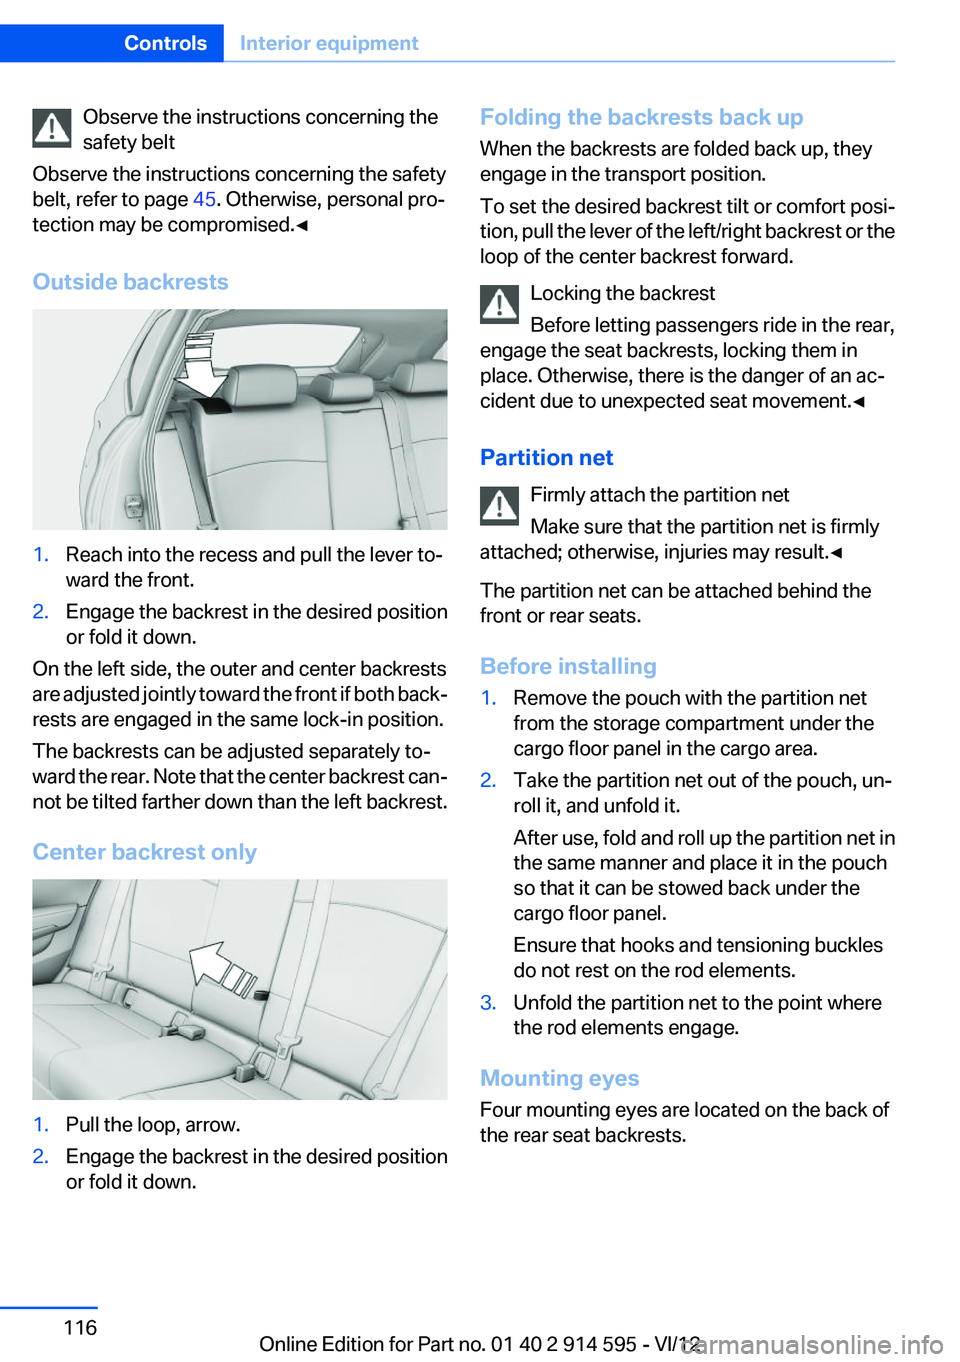
Outside backrests1.Reach into the recess and pull the lever to‐
ward the front.2.Engage the backrest in the desired position
or fold it down.
On the left side, the outer and center backrests
are adjusted jointly toward the front if both back‐
rests are engaged in the same lock-in position.
The backrests can be adjusted separately to‐
ward the rear. Note that the center backrest can‐
not be tilted farther down than the left backrest.
Center backrest only
1.Pull the loop, arrow.2.Engage the backrest in the desired position
or fold it down.Folding the backrests back up
When the backrests are folded back up, they
engage in the transport position.
To set the desired backrest tilt or comfort posi‐
tion, pull the lever of the left/right backrest or the
loop of the center backrest forward.
Locking the backrest
Before letting passengers ride in the rear,
engage the seat backrests, locking them in
place. Otherwise, there is the danger of an ac‐
cident due to unexpected seat movement.◀
Partition net Firmly attach the partition net
Make sure that the partition net is firmly
attached; otherwise, injuries may result.◀
The partition net can be attached behind the
front or rear seats.
Before installing1.Remove the pouch with the partition net
from the storage compartment under the
cargo floor panel in the cargo area.2.Take the partition net out of the pouch, un‐
roll it, and unfold it.
After use, fold and roll up the partition net in
the same manner and place it in the pouch
so that it can be stowed back under the
cargo floor panel.
Ensure that hooks and tensioning buckles
do not rest on the rod elements.3.Unfold the partition net to the point where
the rod elements engage.
Mounting eyes
Four mounting eyes are located on the back of
the rear seat backrests.
Seite 116ControlsInterior equipment116
Online Edition for Part no. 01 40 2 914 595 - VI/12