2013 BMW X1 XDRIVE 28I change time
[x] Cancel search: change timePage 96 of 291

Deactivating DTCPress the button again.
TRACTION and the indicator lamp in
the instrument cluster go out.
For better control The indicator lamp flashes: DTC con‐
trols the drive forces and brake forces.
The indicator lamp lights up: DSC and
DTC has failed.
DTC activated: The indicator lamp lights up and TRAC‐
TION appears in the instrument cluster.
DTC is activated.
Performance Control
Performance Control enhances the agility of
your vehicle. To enhance performance during
sporty driving, the rear wheel on the inside of the
curve is braked while the resulting braking effect
is largely compensated by engine intervention.
xDrive
xDrive is the all-wheel-drive system of your ve‐
hicle. The combined effects of xDrive and DSC
further optimize the traction and dynamic driv‐
ing characteristics. The 4-wheel drive system
xDrive variably distributes the drive forces to the
front and rear axle depending on the driving sit‐
uation and prevailing road conditions.
Hill Descent Control HDC
The concept
HDC is a downhill driving assistant that auto‐
matically controls vehicle speed on steep down‐
hill gradients. Without requiring brake applica‐
tion, the vehicle moves at slightly more than
twice walking speed.
You can activate the Hill Descent Control at
speeds below approx. 22 mph/35 km/h. When
driving downhill at below approx.
22 mph/35 km/h, the vehicle reduces its speed
to approx. twice walking speed and keeps it con‐
stant.
While you are actively braking, the system is on
standby. The system does not brake the vehicle
during this time.
Increasing or reducing speed
The speed can be changed in the range from
roughly twice walking speed to approx.
15 mph/25 km/h by pressing the accelerator or
brake pedal lightly.
A target speed within the same range can be
specified using the lever of the cruise control.1Increasing speed2Decreasing speedSeite 96ControlsDriving stability control systems96
Online Edition for Part no. 01 40 2 914 595 - VI/12
Page 107 of 291

Press the left or right side of the button:
decrease or increase air volume.
The selected air volume is shown on the display
of the automatic climate control.
The air volume of the automatic climate control
may be reduced automatically to save battery
power.
Automatic recirculated air mode/
recirculated air mode
You can respond to unpleasant odors or pollu‐
tants in the immediate environment by tempo‐
rarily suspending the supply of outside air. The
system then recirculates the air currently within
the vehicle.
Press the button repeatedly to select
an operating mode:▷LEDs off: outside air flows in continuously.▷Left LED on, automatic recirculated-air con‐
trol: a sensor detects pollutants in the out‐
side air and controls the shutoff automati‐
cally.▷Right LED on, recirculated air mode: the
supply of outside air into the vehicle is per‐
manently blocked.
If the windows are fogged over, switch off
the recirculated-air mode and press the
AUTO button to utilize the condensation
sensor. Make sure that air can flow onto the
windshield.
Continuous recirculated-air mode
The recirculated air mode should not be
used for an extended period of time, as the air
quality inside the vehicle deteriorates steadily. ◀
Via the button on the steering wheel
A button on the steering wheel can be used to
quickly switch between recirculated air mode
and the previous setting.
ALL program
Press the button.
The current temperature setting for the
driver's side is transferred to the front passenger
side.
If the temperature setting is changed on the
driver's side, the temperature on the front pas‐
senger side changes as well.
The program is switched off if the setting is
changed on the front passenger side or the but‐
ton is pressed again.
Defrosting and defogging windows Press the button.
Ice and condensation are quickly re‐
moved from the windshield and the front side
windows.
For this purpose, also switch on the cooling
function.
Cooling function
The passenger compartment can only be
cooled with the engine running.
Press the button.
The air is cooled and dehumidified and
– depending on the temperature setting –
warmed again.
Depending on the weather, the windshield may
fog up briefly when the engine is started.
The cooling function is switched on automati‐
cally with the AUTO program.
When using the automatic climate control, con‐
densation water, refer to page 128, develops
that exits underneath the vehicle.
Rear window defroster Press the button.
The rear window defroster switches off
automatically after a certain period of time.Seite 107ClimateControls107
Online Edition for Part no. 01 40 2 914 595 - VI/12
Page 108 of 291
Switching the system on/off
Switching off Press and hold the left button or, with
the setting at the lowest level, press the
left button.
All displays are cleared except for the rear win‐
dow defroster if it is switched on.
When the automatic climate control is switched
off, the supply of outside air is suspended. If the
air quality deteriorates or the window fogs over,
switch the system back on and increase the air
flow rate.
Switching on
Press any button, except for the buttons for the
ALL program or rear window heating.
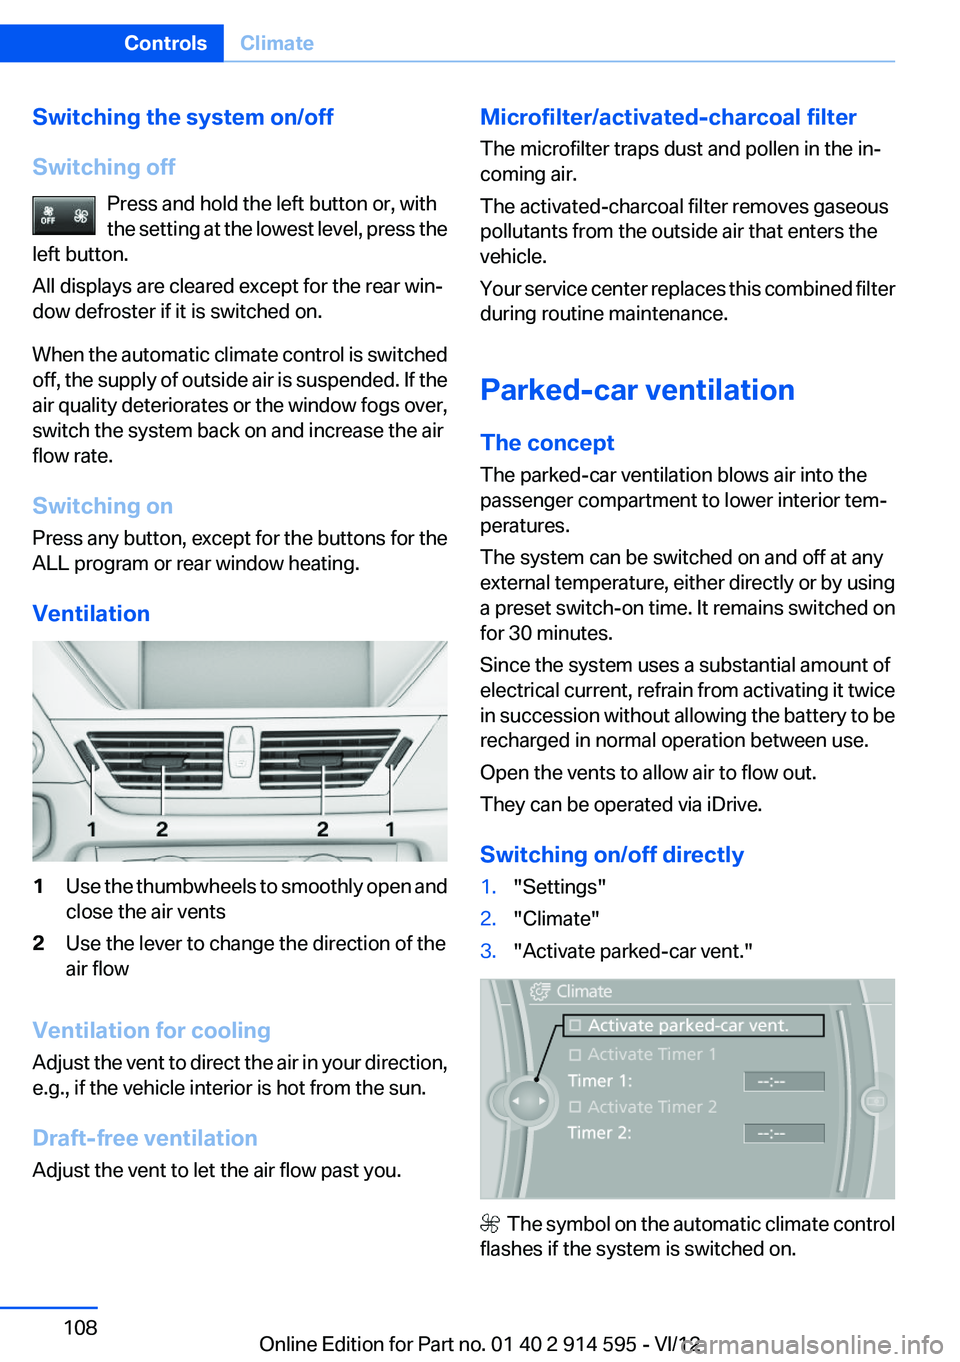
Ventilation1Use the thumbwheels to smoothly open and
close the air vents2Use the lever to change the direction of the
air flow
Ventilation for cooling
Adjust the vent to direct the air in your direction,
e.g., if the vehicle interior is hot from the sun.
Draft-free ventilation
Adjust the vent to let the air flow past you.
Microfilter/activated-charcoal filter
The microfilter traps dust and pollen in the in‐
coming air.
The activated-charcoal filter removes gaseous
pollutants from the outside air that enters the
vehicle.
Your service center replaces this combined filter
during routine maintenance.
Parked-car ventilation
The concept
The parked-car ventilation blows air into the
passenger compartment to lower interior tem‐
peratures.
The system can be switched on and off at any
external temperature, either directly or by using
a preset switch-on time. It remains switched on
for 30 minutes.
Since the system uses a substantial amount of
electrical current, refrain from activating it twice
in succession without allowing the battery to be
recharged in normal operation between use.
Open the vents to allow air to flow out.
They can be operated via iDrive.
Switching on/off directly1."Settings"2."Climate"3."Activate parked-car vent."
The symbol on the automatic climate control
flashes if the system is switched on.
Seite 108ControlsClimate108
Online Edition for Part no. 01 40 2 914 595 - VI/12
Page 111 of 291
distance depends on the particular hand-
held transmitter.4.Press the button of the desired function on
the hand-held transmitter and the button
being programmed on the interior rearview
mirror simultaneously and hold. The LED on
the interior rearview mirror flashes slowly at
first.5.When the LED flashes more rapidly, release
both buttons. Rapid flashing indicates that
the button on the interior rearview mirror has
been programmed.
If the LED does not flash faster after 60 sec‐
onds, change the distance between the in‐
terior rearview mirror and the hand-held
transmitter and repeat the step. Multiple tri‐
als at different distances may be necessary.
Wait at least 15 seconds between trials.6.To program additional functions on other
buttons, repeat steps 3 to 5.
The systems can be operated with the buttons
on the interior rearview mirror.
Special characteristics of alternating-
code radio systems
If the system cannot be operated after repeated
programming, check whether the system to be
operated uses an alternating-code system.
Read the operating instructions of the system or
press and hold the programmed button on the
interior rearview mirror. If the LED on the interior
rearview mirror flashes rapidly at first and then
lights up continuously for 2 seconds, the system
is equipped with an alternating-code system.
This flashing LED pattern repeats itself for ap‐
prox. 20 seconds.
In systems with an alternating-code system, the
Universal Garage Door Opener and the system
must be additionally synchronized.
Please obtain additional information on syn‐
chronization in the operating instructions of the
system being set up.
The systems will be easier to synchronize with
the aid of a second person.
Synchronization:1.Park the vehicle within range of the remote-
controlled system.2.Program the corresponding button on the
interior rearview mirror as described.3.Identify and press the synchronization but‐
ton on the system being set up. You have
approx. 30 seconds for the next step.4.Press and hold the button on the interior
rearview mirror for approx. 3 seconds and
then release it. Repeat this step up to three
times if necessary to complete the synchro‐
nization procedure. When synchronization
is completed, the programmed function is
executed.
Reprogramming individual buttons
1.Switch on the ignition.2.Hold the hand-held transmitter at a distance
of approx. 1 to 3 in/2.5 to 8 cm from the
memory buttons.
The required distance depends on the par‐
ticular hand-held transmitter.3.Press the memory button of the Universal
Garage Door Opener.4.If the LED flashes slowly after approx.
20 seconds, press the transmit button on
the hand-held transmitter.5.Release both buttons when the LED flashes
rapidly.
If the LED does not flash rapidly after approx.
60 seconds, change the distance and repeat
the step.
Canada: if the LED does not flash rapidly af‐
ter approx. 60 seconds, change the distance
and repeat the step. If programming was
aborted by the hand-held transmitter, hold
down the memory button and press and re‐
lease the button on the hand-held transmit‐
ter several times for 2 seconds.Seite 111Interior equipmentControls111
Online Edition for Part no. 01 40 2 914 595 - VI/12
Page 149 of 291
Destination guidanceVehicle equipment
This chapter describes all series equipment as
well as country-specific and special equipment
offered for this model series.Therefore, it also
describes equipment that may not be found in
your vehicle, for instance due to the selected
special equipment or the country version. This
also applies to safety-related functions and sys‐
tems.
Starting destination
guidance1."Navigation"2.Make a destination entry, refer to page 140.3."Accept destination"4."Start guidance"
The route is shown on the Control Display.
The distance to the destination/intermediate
destination and the estimated time of arrival are
displayed in the map view.
Terminating destination
guidance
1."Navigation"2."Map"3. "Guidance"4."Stop guidance"
Continuing destination
guidance
If the destination was not reached during the last
trip, destination guidance can be resumed.
"Resume guidance"
Route criteria
General information▷The route calculated can be influenced by
selecting certain criteria.▷The route criteria can be changed when the
destination is entered and during destina‐
tion guidance.▷Road types are part of the navigation data
and are taken into consideration when plan‐
ning a route, e.g., avoid highways.▷The recommended route may differ from the
route you would take based on personal ex‐
perience.▷The settings are stored for the remote con‐
trol currently in use.▷Destination guidance with traffic bulletins,
refer to page 155.
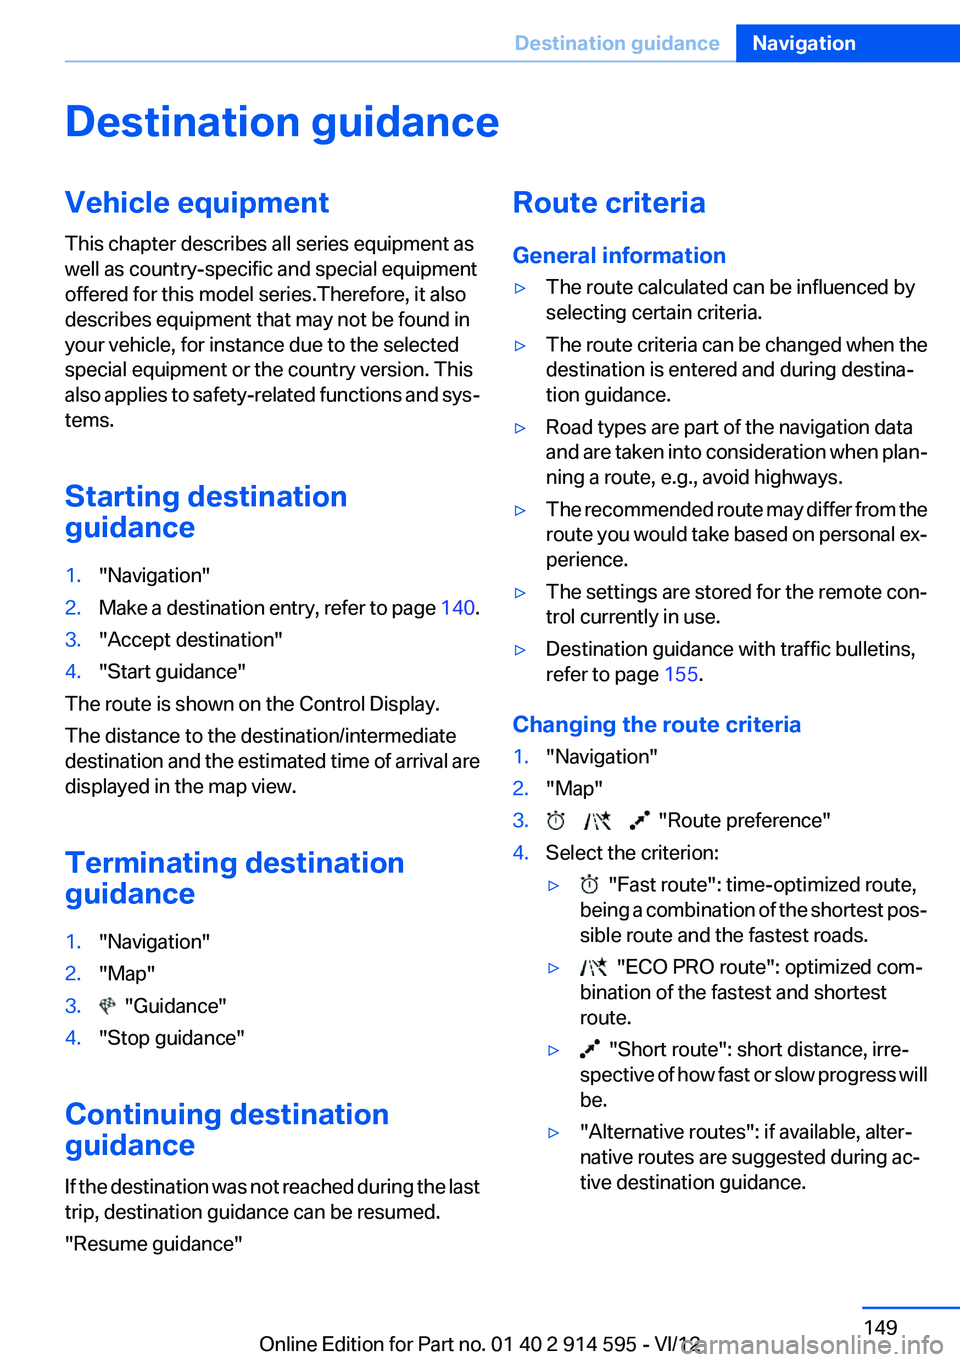
Changing the route criteria
1."Navigation"2."Map"3. "Route preference"4.Select the criterion:▷ "Fast route": time-optimized route,
being a combination of the shortest pos‐
sible route and the fastest roads.▷ "ECO PRO route": optimized com‐
bination of the fastest and shortest
route.▷ "Short route": short distance, irre‐
spective of how fast or slow progress will
be.▷"Alternative routes": if available, alter‐
native routes are suggested during ac‐
tive destination guidance.Seite 149Destination guidanceNavigation149
Online Edition for Part no. 01 40 2 914 595 - VI/12
Page 152 of 291
5Current location6Upper status field7Lower status field
Lines in the map
Streets and routes are displayed in different col‐
ors and styles depending on their classification.
Dashed lines represent railways and ferry con‐
nections. Country borders are indicated by thin
lines.
Traffic obstructions
Small triangles along the planned route indicate
route sections with traffic obstructions, depend‐
ing on the map scale. The direction of the trian‐
gles indicates the direction of the obstruction.
The traffic signs indicate the significance of the
obstruction.
▷Red traffic sign: the obstruction affects the
planned route or direction.▷Grey traffic sign: the obstruction does not
affect the planned route or direction.
Traffic bulletins, refer to page 153.
Planned route
After destination guidance is started, the plan‐
ned route is displayed on the map.
Status fields
Show/hide: press the controller.
▷Upper status field: time, telephone, and en‐
tertainment details.▷Lower status field: symbol for active desti‐
nation guidance, status of traffic bulletins,
time of arrival, and distance to destination.
Function bar
The following functions are available in the func‐
tion bar:
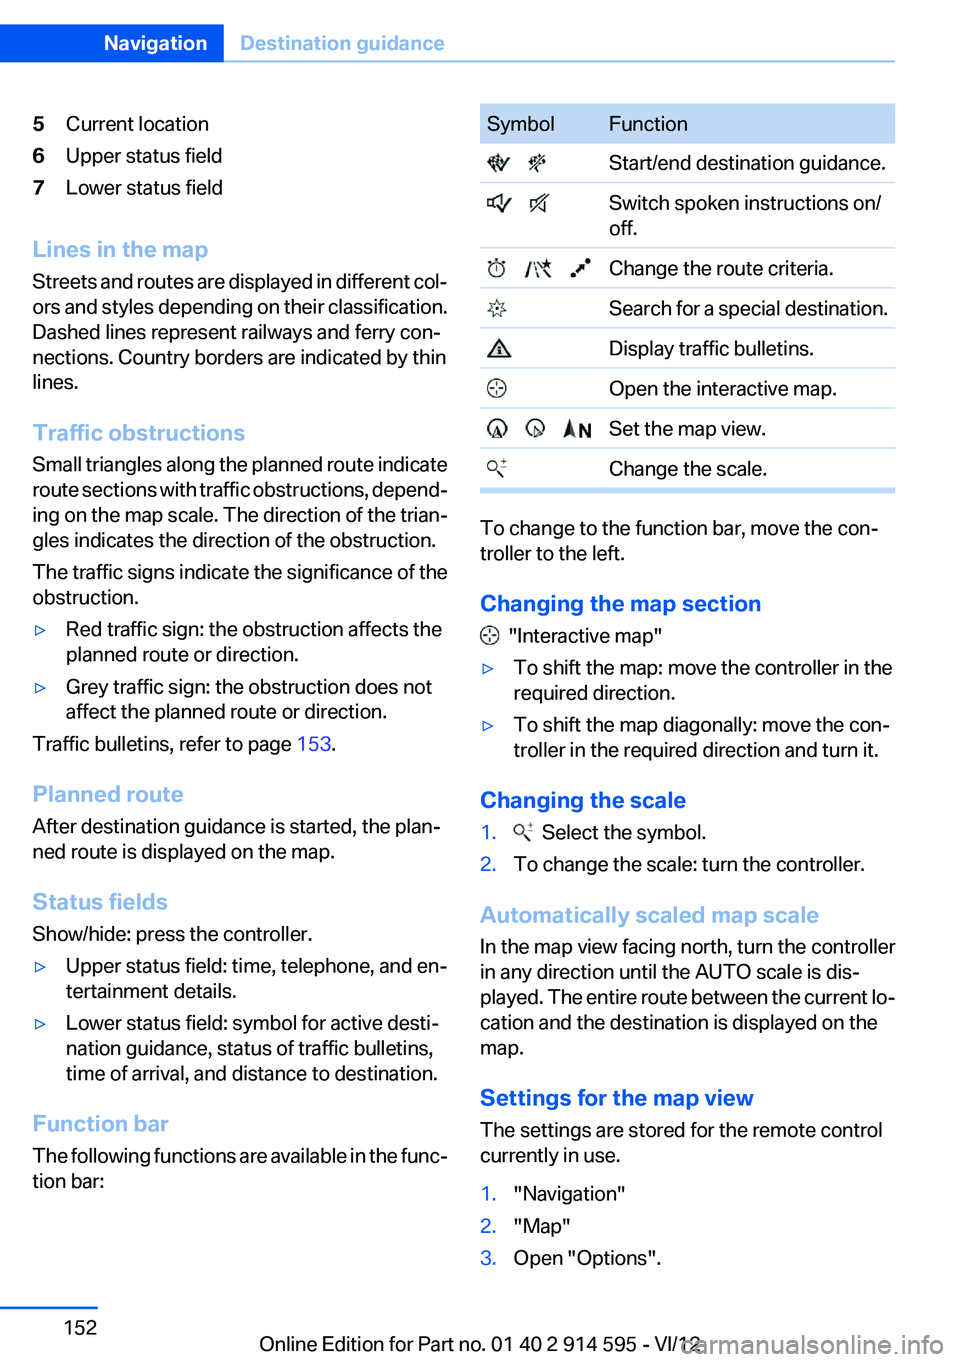
SymbolFunction Start/end destination guidance. Switch spoken instructions on/
off. Change the route criteria. Search for a special destination. Display traffic bulletins. Open the interactive map. Set the map view. Change the scale.
To change to the function bar, move the con‐
troller to the left.
Changing the map section
"Interactive map"
▷To shift the map: move the controller in the
required direction.▷To shift the map diagonally: move the con‐
troller in the required direction and turn it.
Changing the scale
1. Select the symbol.2.To change the scale: turn the controller.
Automatically scaled map scale
In the map view facing north, turn the controller
in any direction until the AUTO scale is dis‐
played. The entire route between the current lo‐
cation and the destination is displayed on the
map.
Settings for the map view
The settings are stored for the remote control
currently in use.
1."Navigation"2."Map"3.Open "Options".Seite 152NavigationDestination guidance152
Online Edition for Part no. 01 40 2 914 595 - VI/12
Page 153 of 291
4."Settings"5.To set the map view:▷"Day/night mode"
Select and create the necessary settings
depending on the light conditions.
"Traffic conditions/gray map" active: the
setting is disregarded.▷"Satellite images"
Depending on availability and resolution,
satellite images are displayed at scales of
approx. 1 mile to 600 miles/2 km to
1,000 km.▷"Perspective view in 3D"
Prominent areas that are contained in the
navigation data are displayed on the map in
3D.▷"Traffic conditions/gray map"
The map is optimized for displaying traffic
bulletins, refer to page 154.
Symbols for the special destinations are no
longer displayed.
Map view for splitscreen
The map view can be selected for the split
screen independently from the main screen.
1.Open "Options".2."Split screen"3.Move the controller to the right repeatedly
until the split screen is selected.4.Select "Split screen content" or the scale.5.Select the map view.▷"Arrow display"▷"Map facing north"▷"Map direction of travel"▷"Map view with perspective"▷"Position"▷"Exit ramp view": selected blind drive‐
ways are displayed three dimensionally.▷"Traffic conditions/gray map"6.To change the scale: select the split screen
and turn the controller.
Traffic bulletins
At a glance
▷Display the traffic bulletins from radio sta‐
tions that broadcast the TI Traffic Informa‐
tion of a traffic information service. Informa‐
tion on traffic obstructions and hazards is
updated continuously.
Certain BMW models equipped with navi‐
gation have the capability to display real-
time traffic information. If your system has
this capability the following additional terms
and conditions apply:
An End-User shall no longer have the right
to use the Traffic Data in the event that the
End-User is in material breach of the terms
and conditions contained herein.
A. Total Traffic Network, a division of Clear
Channel Broadcasting, Inc. (“Total Traffic
Network”) holds the rights to the traffic in‐
cident data and RDS-TMC network through
which it is delivered. You may not modify,
copy, scan or use any other method to re‐
produce, duplicate, republish, transmit or
distribute in any way any portion of traffic in‐
cident data. You agree to indemnify, defend
and hold harmless BMW of North America,
LLC. (“BMW NA”) and Total Traffic Net‐
work, Inrix, Inc (and their affiliates) against
any and all claims, damages, costs or other
expenses that arise directly or indirectly out
of (a) your unauthorized use of the traffic in‐
cident data or the RDS-TMC network, (b)
your violation of this directive and/or (c) any
unauthorized or unlawful activities by you in
connection herewith.
B. Total Traffic Network traffic data is infor‐
mational only. User assumes all risk of use.
Total Traffic Network, BMW NA, and their
suppliers make no representations aboutSeite 153Destination guidanceNavigation153
Online Edition for Part no. 01 40 2 914 595 - VI/12
Page 164 of 291
3.Open "Options".4."HD Radio Reception"
The setting is stored for the remote control cur‐
rently in use.
This symbol is displayed in the status line
when the audio signal is digital.
When tuning to a station with a digital signal, it
may take several seconds for the station to be
played back in digital quality.
In areas in which the station is not continuously
received in digital mode, the playback switches
between analog and digital reception. In this
case, switch off digital radio reception.
Displaying additional information
Some stations broadcast additional information
on the current track, such as the name of the ar‐
tist.
1.Select the desired station.2.Open "Options".3."Station info"
Selecting a substation
This symbol indicates that a main station also
broadcasts additional substations. The station
name of the main station ends in HD1. Station
names of the substations end in HD2, HD3, etc.
1.Select the desired station.2.Press the controller.3.Select the substation.
When reception is poor, the substation is muted.
Satellite radio
General information
The channels are offered in predefined pack‐
ages. The packages must be enabled by tele‐
phone.
Navigation bar overviewSymbolFunction Change the list view. Select the category. Direct channel entry Timeshift Open the My Favorites category/
open a favorite. Manage the favorites. Traffic Jump
The functions of the navigation bar symbols can
also be stored on the programmable memory
buttons, refer to page 23.
Managing a subscription
To be able to enable or unsubscribe from the
channels, you must have reception. It is usually
at its best when you have an unobstructed view
of the sky. The channel name is displayed in the
status line.
Enabling channels
The Unsubscribed Channels category contains
all disabled channels.
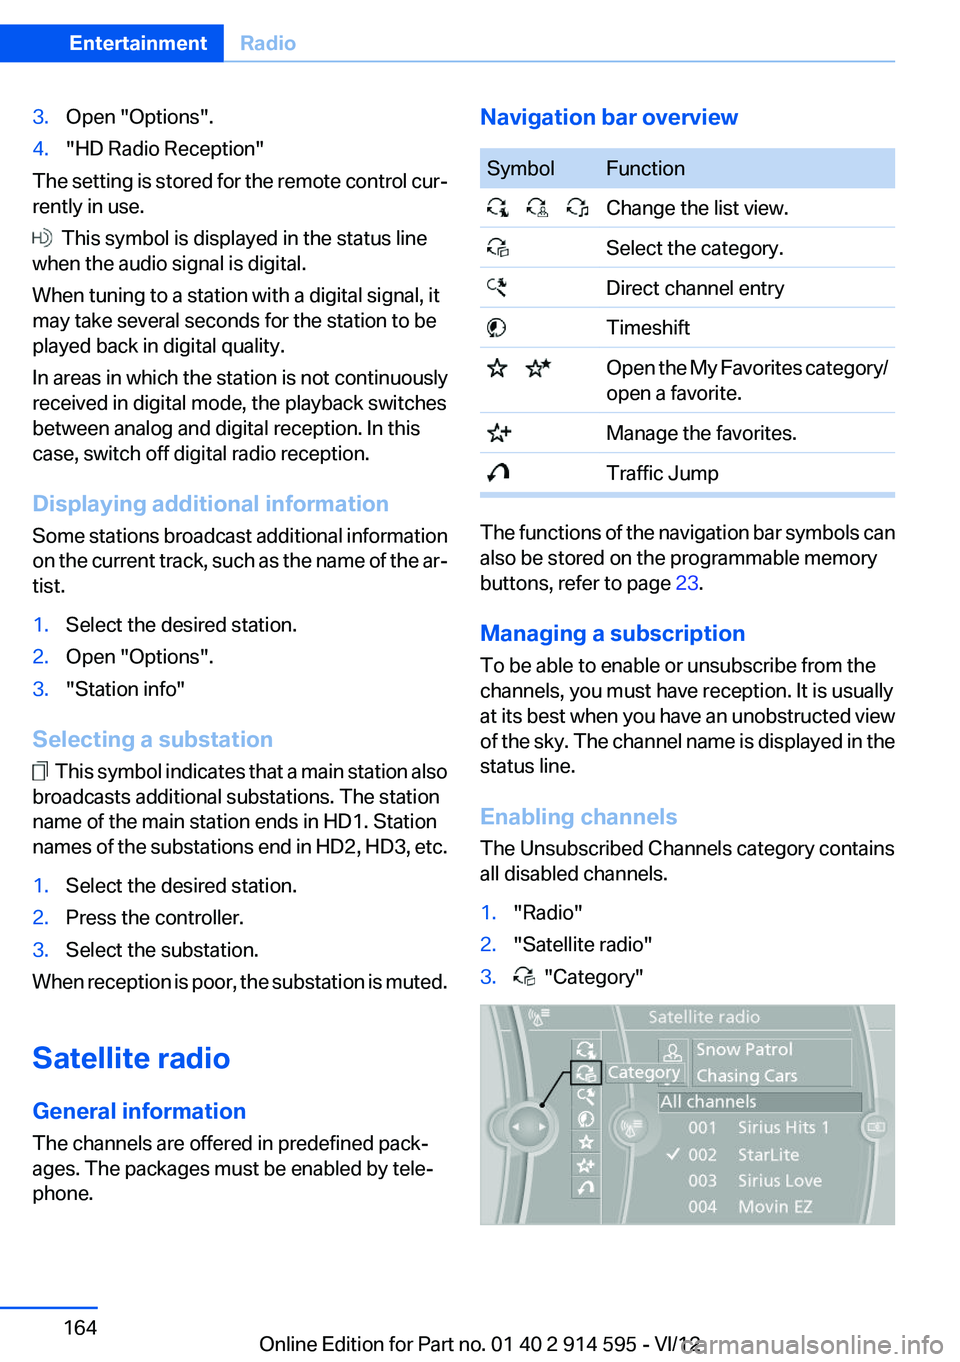
1."Radio"2."Satellite radio"3. "Category"Seite 164EntertainmentRadio164
Online Edition for Part no. 01 40 2 914 595 - VI/12