2013 BMW 535I XDRIVE GRAN TURISMO ECU
[x] Cancel search: ECUPage 22 of 240
Voice activation systemVehicle equipment
All standard, country-specific and optional
equipment that is offered in the model series is
described in this chapter. Therefore, equipment
is also described that is not available in a vehicle,
e. g., because of the selected optional equip‐
ment or country variant. This also applies for
safety-related functions and systems.
The concept▷Most functions that are displayed on the
Control Display can be operated by spoken
commands via the voice activation system.
The system prompts you to make your en‐
tries.▷Functions that can only be used when the
vehicle is stationary cannot be operated us‐
ing the voice activation system.▷The system uses a special microphone on
the driver's side.▷›...‹ Verbal instructions in the Owner's
Manual to use with the voice activation sys‐
tem.
Requirements
Via the Control Display, set a language that is
also supported by the voice activation system
so that the spoken commands can be identified.
Set the language, refer to page 95.
Using voice activation
Activating the voice activation system
1. Press the button on the steering
wheel.2.Wait for the signal.3.Say the command.
The command is displayed in the instrument
cluster.
This symbol in the instrument cluster indi‐
cates that the voice activation system is active.
If no other commands are available, operate the
function in this case via iDrive.
Terminating the voice activation
system
Briefly press the button on the steering
wheel or ›Cancel‹.
Possible commands
Most menu items on the Control Display can be
voiced as commands.
The available commands depend on which
menu is currently displayed on the Control Dis‐
play.
Short commands exist for many functions.
Some list entries, e.g., Phone book entries, can
also be selected via the voice activation system.
Speak these list entries exactly as they are dis‐
played in the respective list.
Having possible commands read aloud
You can have the available commands read out
loud for you: ›Voice commands‹
For example, if the "Settings" menu is displayed,
the commands for the settings are read out loud.
Executing functions using short
commands
Functions on the main menu can be performed
directly by means of short commands, nearly ir‐
respective of which menu item is currently se‐
lected, e.g., ›Vehicle status‹.
Seite 22At a glanceVoice activation system22
Online Edition for Part no. 01 40 2 917 498 - II/13
Page 26 of 240
Opening via the iDrive
To move directly from the application on the
Control Display to the options menu:1. Press the button or move the controller
to the right repeatedly until the "Options"
menu is displayed.2."Display Owner's Manual"
Opening when a Check Control
message is displayed
Directly from the Check Control message on the
Control Display:
"Display Owner's Manual"
Changing between a function and the
Owner's Manual
To change from a function, e.g., radio, to the
Owner's Manual on the Control Display and to
switch between the two displays:
1. Press the button or move the controller
to the right repeatedly until the "Options"
menu is displayed.2."Display Owner's Manual"3.Select the desired page in the Owner's
Manual.4. Press the button again to return to the
function displayed last.5. Press the button to return to the page
of the Owner's Manual displayed last.
To switch back and forth repeatedly between
the function displayed last and the page of the
Owner's Manual displayed last, repeat steps 4
and 5. This opens a new panel every time.
Programmable memory buttons
General information
The Owner's Manual can be stored on the pro‐
grammable memory buttons and called up di‐
rectly.
Storing1."Owner's Manual" Select via the iDrive.2. Press the desired button for more
than 2 seconds.
Executing
Press the button.
The Owner's Manual is displayed im‐
mediately.
Seite 26At a glanceIntegrated Owner's Manual in the vehicle26
Online Edition for Part no. 01 40 2 917 498 - II/13
Page 31 of 240
The storage compartment contains a switch for
separately securing the tailgate, refer to
page 41.
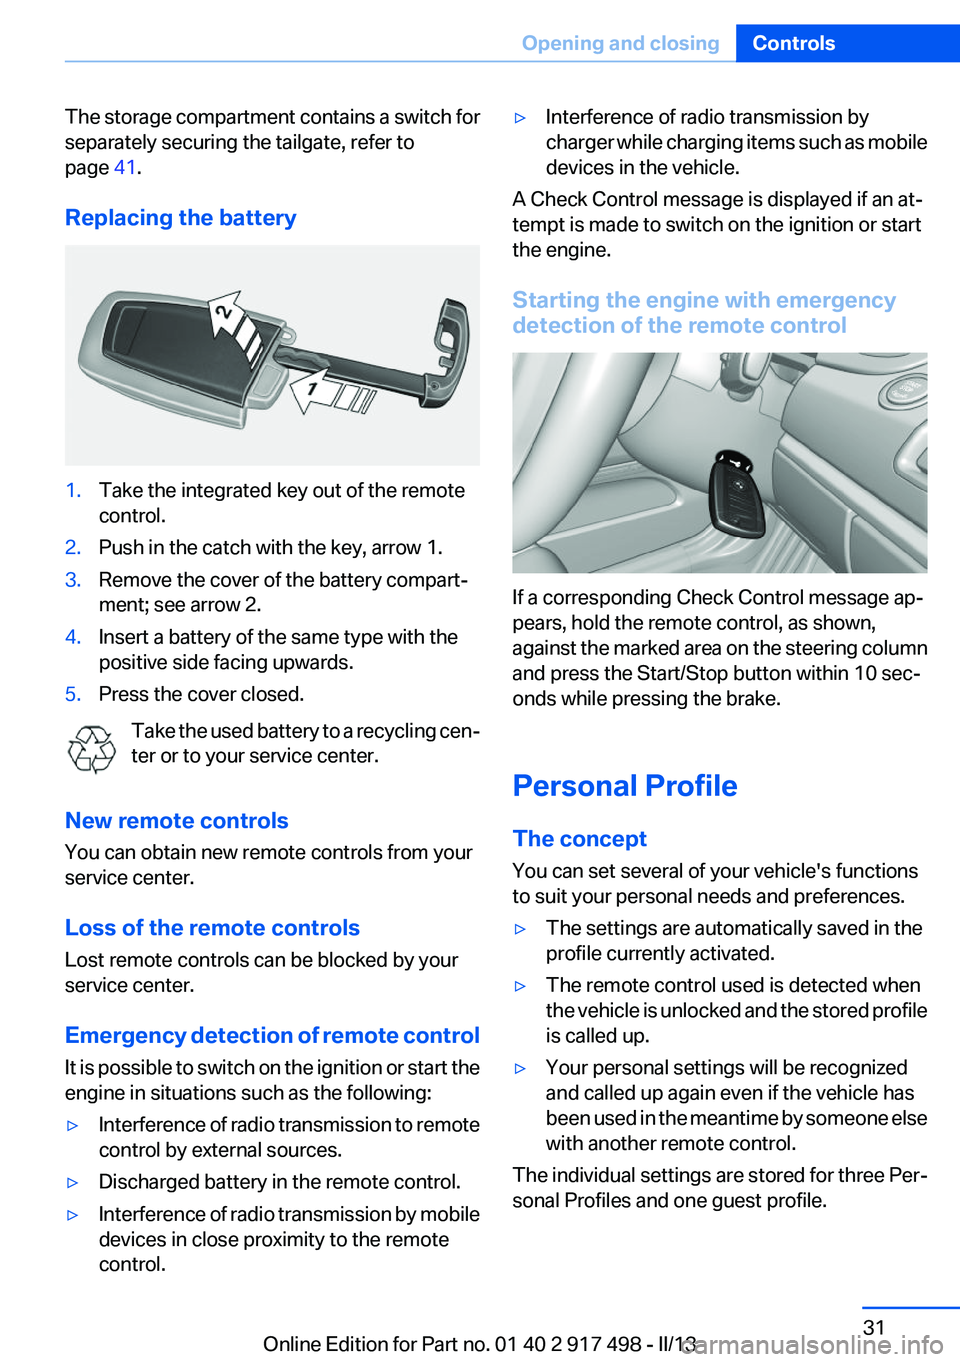
Replacing the battery1.Take the integrated key out of the remote
control.2.Push in the catch with the key, arrow 1.3.Remove the cover of the battery compart‐
ment; see arrow 2.4.Insert a battery of the same type with the
positive side facing upwards.5.Press the cover closed.
Take the used battery to a recycling cen‐
ter or to your service center.
New remote controls
You can obtain new remote controls from your
service center.
Loss of the remote controls
Lost remote controls can be blocked by your
service center.
Emergency detection of remote control
It is possible to switch on the ignition or start the
engine in situations such as the following:
▷Interference of radio transmission to remote
control by external sources.▷Discharged battery in the remote control.▷Interference of radio transmission by mobile
devices in close proximity to the remote
control.▷Interference of radio transmission by
charger while charging items such as mobile
devices in the vehicle.
A Check Control message is displayed if an at‐
tempt is made to switch on the ignition or start
the engine.
Starting the engine with emergency
detection of the remote control
If a corresponding Check Control message ap‐
pears, hold the remote control, as shown,
against the marked area on the steering column
and press the Start/Stop button within 10 sec‐
onds while pressing the brake.
Personal Profile
The concept
You can set several of your vehicle's functions
to suit your personal needs and preferences.
▷The settings are automatically saved in the
profile currently activated.▷The remote control used is detected when
the vehicle is unlocked and the stored profile
is called up.▷Your personal settings will be recognized
and called up again even if the vehicle has
been used in the meantime by someone else
with another remote control.
The individual settings are stored for three Per‐
sonal Profiles and one guest profile.
Seite 31Opening and closingControls31
Online Edition for Part no. 01 40 2 917 498 - II/13
Page 33 of 240
Exporting profiles
Most settings of the active profile and the saved
contacts can be exported.
This can be helpful for securing and retrieving
personal settings, before delivering the vehicle
to a workshop for example.1."Settings"2."Profiles"3."Export profile"4.USB interface, refer to page 163: "USB
device"
Using the guest profile
The guest profile can be used to make individual
settings without affecting the three Personal
Profiles.
This can be useful for drivers who are using the
vehicle temporarily and do not have their own
profile.
1."Settings"2."Profiles"3.The current profile is selected.4.Open "Guest".5.Adjust the settings.
Note: the guest profile cannot be renamed.
Display profile list during start
The profile list can be displayed during each
start for selecting the desired profile.
1."Settings"2."Profiles"3.Open "Options".4."Display user list at startup"
Personal Profile settings
The following functions and settings can be
stored in a profile.
More information on the settings can be found
under:
▷Active Cruise Control: collision warning.▷Collision warning: warning time, last setting
on/off.▷Exterior mirror position.▷CD/Multimedia: audio source listened to
last.▷Unlocking/locking of the vehicle: settings.▷Driving Dynamics Control: sport program.▷Driver's seat position: automatic retrieval af‐
ter unlocking.▷Programmable memory buttons: assign‐
ment.▷Head-up Display: selection, brightness, po‐
sition and rotation of the display.▷Headlamp courtesy delay feature: time set‐
ting.▷Tone: tone settings.▷Automatic climate control: settings.▷Steering wheel position.▷Navigation: map views, route criteria, voice
output on/off.▷Night Vision with pedestrian detection: se‐
lection of functions and type of display.▷Park Distance Control PDC: adjusting the
signal tone volume.▷Radio: stored stations, station listened to
last, special settings.▷Backup camera: selection of functions and
type of display.▷Side View: selection of the display type.▷Language on the Control Display.▷Lane departure warning: last setting, on/off.▷Active Blind Spot Detection: last setting, on/
off.▷Daytime running lights: current setting.▷Triple turn signal activation.▷Locking the vehicle: after a brief period or
after starting to drive.Seite 33Opening and closingControls33
Online Edition for Part no. 01 40 2 917 498 - II/13
Page 37 of 240
In order to terminate this alarm, unlock vehicle
with the remote control, or switch on the igni‐
tion, if necessary, by emergency detection of the
remote control.
In some vehicle equipment versions, only the
driver's door can be unlocked or locked via the
door lock.
Locking the doors and tailgate at once
To lock all doors and the tailgate at once:1.With the doors closed, lock the vehicle using
the button for the central locking system in
the interior.2.Unlock and open the driver's or front pas‐
senger door.3.Lock the vehicle.▷Lock the driver's door using the
integrated key in the door lock, or▷Press down the lock button of the front
passenger door and close the door from
the outside.
The fuel filler flap can only be locked using the
remote control.
Manual operation
If an electrical malfunction occurs, lock or unlock
the vehicle using the integrated key via the door
lock on the driver's door.
Opening and closing: from the
inside
Locking and unlocking
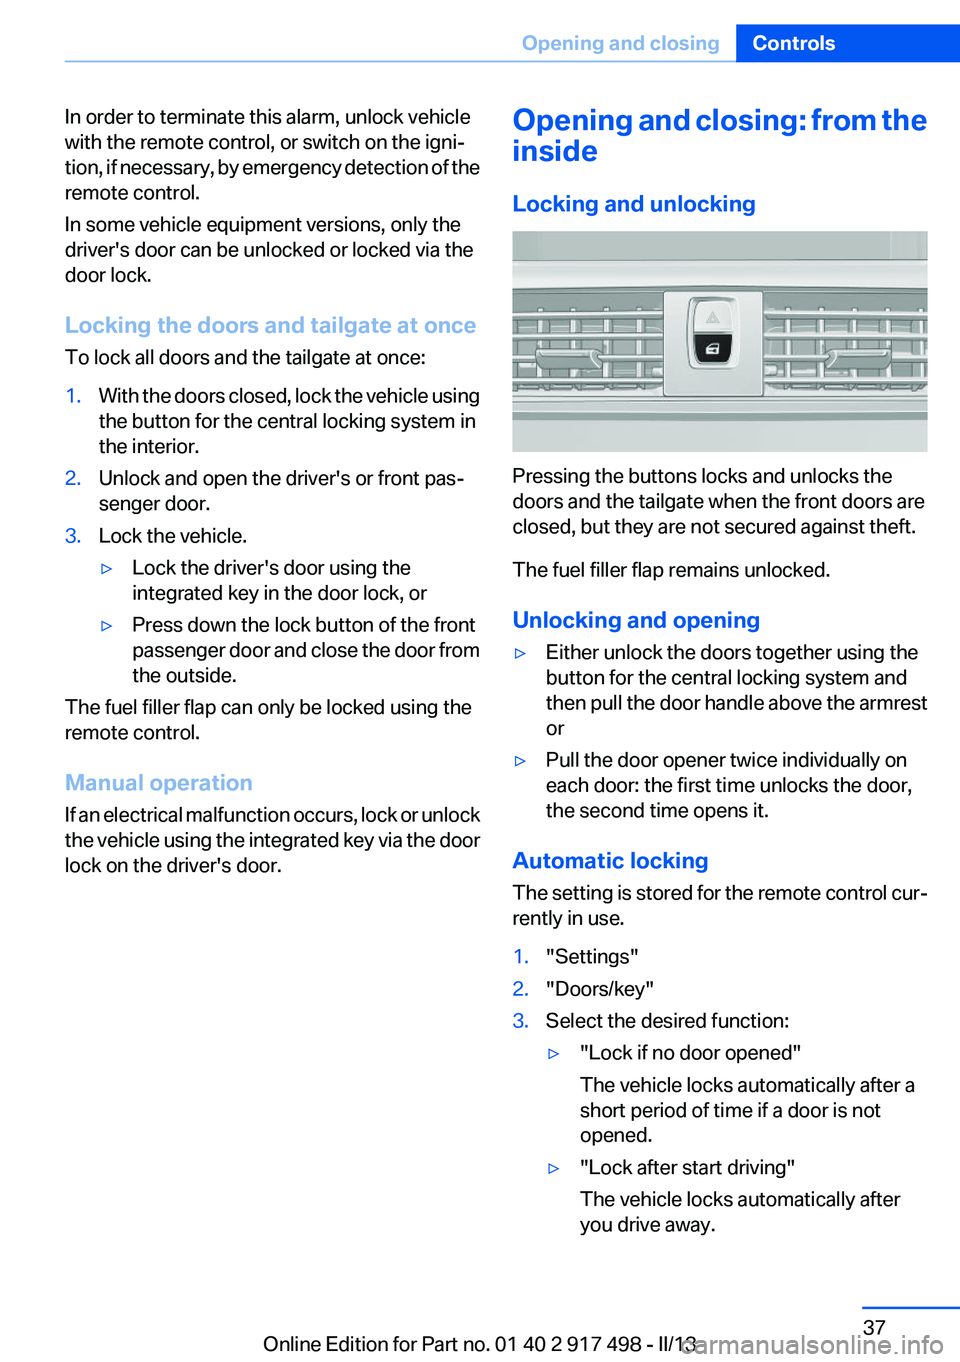
Pressing the buttons locks and unlocks the
doors and the tailgate when the front doors are
closed, but they are not secured against theft.
The fuel filler flap remains unlocked.
Unlocking and opening
▷Either unlock the doors together using the
button for the central locking system and
then pull the door handle above the armrest
or▷Pull the door opener twice individually on
each door: the first time unlocks the door,
the second time opens it.
Automatic locking
The setting is stored for the remote control cur‐
rently in use.
1."Settings"2."Doors/key"3.Select the desired function:▷"Lock if no door opened"
The vehicle locks automatically after a
short period of time if a door is not
opened.▷"Lock after start driving"
The vehicle locks automatically after
you drive away.Seite 37Opening and closingControls37
Online Edition for Part no. 01 40 2 917 498 - II/13
Page 41 of 240
Manual operation
In the event of an electrical malfunction, operate
the unlocked tailgate manually with a slow and
smooth motion.
Do not operate the tailgate manually if it is
blocked
If the tailgate is blocked, do not operate it man‐
ually as the tailgate may otherwise become
damaged and injury may result.
Contact your service center.◀
Locking separately
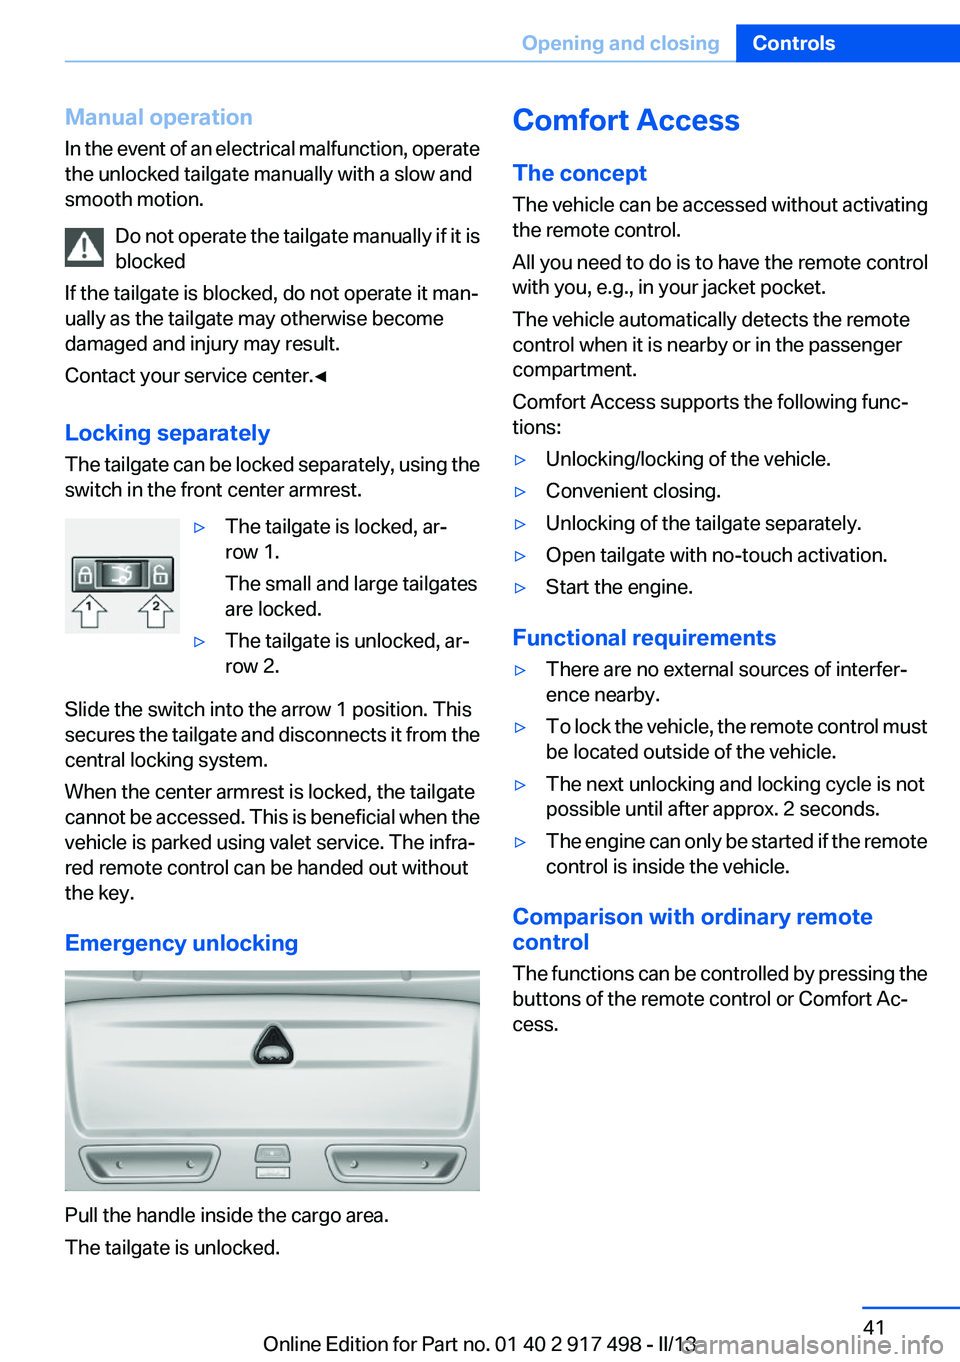
The tailgate can be locked separately, using the
switch in the front center armrest.▷The tailgate is locked, ar‐
row 1.
The small and large tailgates
are locked.▷The tailgate is unlocked, ar‐
row 2.
Slide the switch into the arrow 1 position. This
secures the tailgate and disconnects it from the
central locking system.
When the center armrest is locked, the tailgate
cannot be accessed. This is beneficial when the
vehicle is parked using valet service. The infra‐
red remote control can be handed out without
the key.
Emergency unlocking
Pull the handle inside the cargo area.
The tailgate is unlocked.
Comfort Access
The concept
The vehicle can be accessed without activating
the remote control.
All you need to do is to have the remote control
with you, e.g., in your jacket pocket.
The vehicle automatically detects the remote
control when it is nearby or in the passenger
compartment.
Comfort Access supports the following func‐
tions:▷Unlocking/locking of the vehicle.▷Convenient closing.▷Unlocking of the tailgate separately.▷Open tailgate with no-touch activation.▷Start the engine.
Functional requirements
▷There are no external sources of interfer‐
ence nearby.▷To lock the vehicle, the remote control must
be located outside of the vehicle.▷The next unlocking and locking cycle is not
possible until after approx. 2 seconds.▷The engine can only be started if the remote
control is inside the vehicle.
Comparison with ordinary remote
control
The functions can be controlled by pressing the
buttons of the remote control or Comfort Ac‐
cess.
Seite 41Opening and closingControls41
Online Edition for Part no. 01 40 2 917 498 - II/13
Page 46 of 240
The window closes without pinch protec‐
tion.
Safety switch
The following functions can be locked simulta‐
neously, using the switch:
▷Opening and closing of the rear windows
using the switches in the rear.▷Operation of the roller sunblinds using the
switches in the rear.▷Adjustment of the power rear seats.▷Adjustment of the power head restraints in
the rear.
Switching on and off
Press the button.
The LED lights up if the safety function
is switched on.
Safety switch for rear operation
Press the safety switch when transporting
children in the rear; otherwise, injury may result
if the windows are closed without supervision. ◀
Roller sunblinds
General information
The safety switch in the driver's door can be
used to prevent children, for example, from op‐
erating the roller blinds using the switches in the
rear.
Press the safety switch in the driver's door. The
LED lights up if the safety function is switched
on.
If you are no longer able to move the roller blinds
after having activated them consecutively a
number of times, the system is blocked for a
limited time to prevent overheating. Let the sys‐
tem cool.
The roller sunblinds cannot be moved at low in‐
terior temperatures.
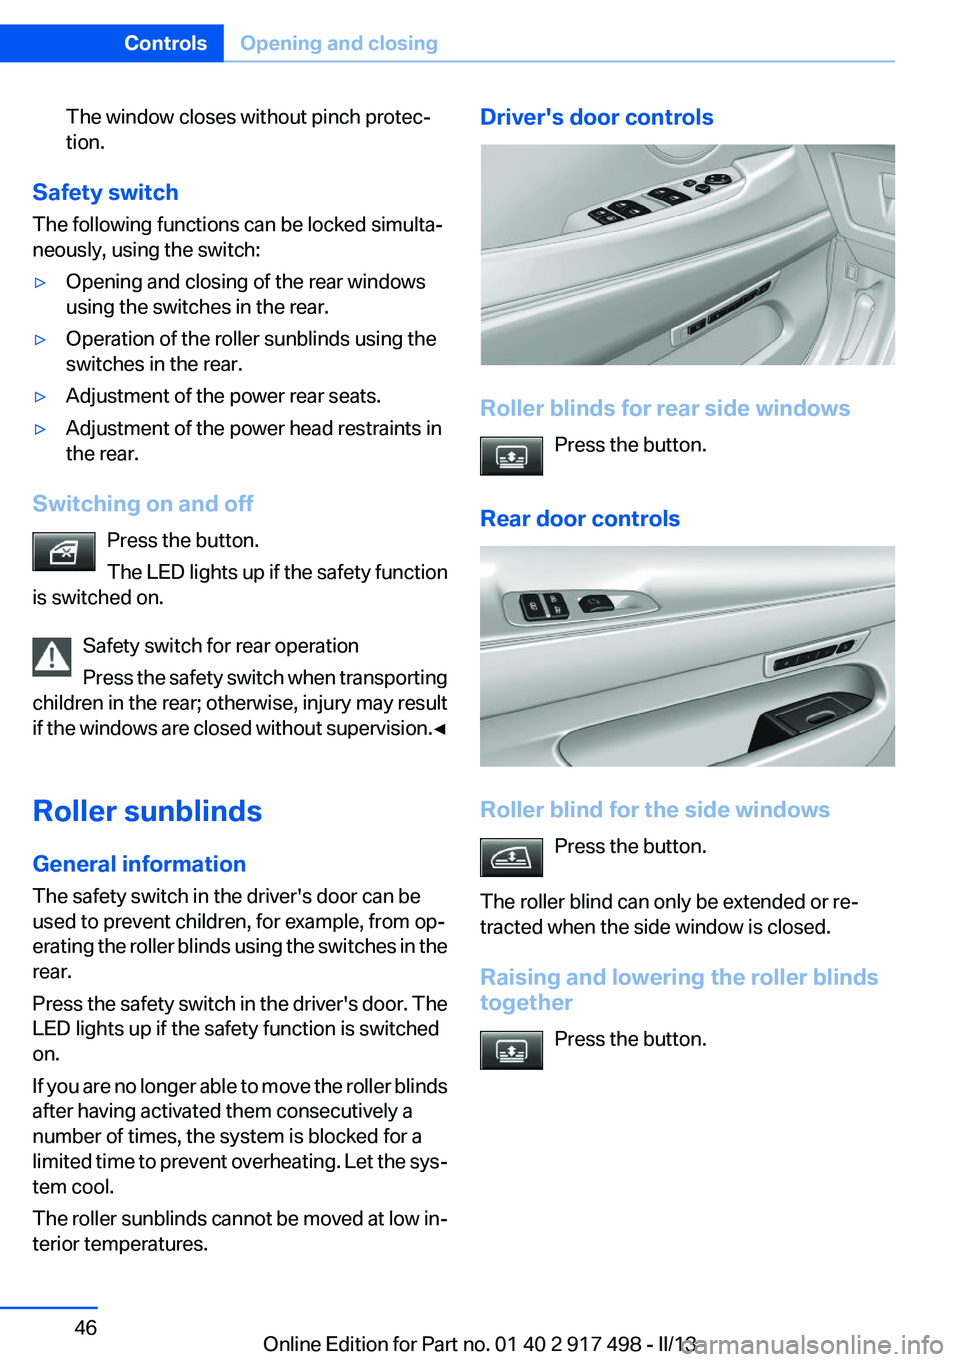
Driver's door controls
Roller blinds for rear side windows
Press the button.
Rear door controls
Roller blind for the side windows Press the button.
The roller blind can only be extended or re‐
tracted when the side window is closed.
Raising and lowering the roller blinds
together
Press the button.
Seite 46ControlsOpening and closing46
Online Edition for Part no. 01 40 2 917 498 - II/13
Page 63 of 240
Transporting children safelyVehicle equipment
All standard, country-specific and optional
equipment that is offered in the model series is
described in this chapter. Therefore, equipment
is also described that is not available in a vehicle,
e. g., because of the selected optional equip‐
ment or country variant. This also applies for
safety-related functions and systems.
The right place for children
Note Children in the vehicle
Do not leave children unattended in the
vehicle; otherwise, they could endanger them‐
selves and other persons, e.g., by opening the
doors.◀
Children should always be in the rear
Accident research shows that the safest place
for children is in the back seat.
Transporting children in the rear
Only transport children younger than
13 years of age or shorter than 5 ft/150 cm in the
rear in child restraint fixing systems provided in
accordance with the age, weight and size of the
child; otherwise, there is an increased risk of in‐
jury in an accident.
Children 13 years of age or older must wear a
safety belt as soon as a suitable child restraint
fixing system can no longer be used, due to their
age, weight and size.◀
Children on the front passenger seat
Should it ever be necessary to use a child re‐
straint fixing system in the front passenger seat,
make sure that the front, knee and side airbags
on the front passenger side are deactivated. Au‐tomatic deactivation of front passenger airbags,
refer to page 104.
Note Deactivated front passenger airbags
If a child restraint fixing system is used in
the front passenger seat, the front passenger
airbags must be deactivated; otherwise, there is
an increased risk of injury to the child when the
airbags are triggered, even with a child restraint
fixing system.◀
Installing child restraint fixing
systems
Before mounting
If the rear seat backrests are adjustable or can
be folded down:
Lock the rear seat backrests in position
Before mounting child restraint fixing sys‐
tems, place the seat backrest as far as possible
at an angle at which the child seat is resting
firmly against the backrest and all backrests can
be locked securely in place. Otherwise, the child
seat will not be as stable as it should be, and
there is increased danger of injury due to unex‐
pected movement of the seat backrest.◀
Notes Manufacturer's information for child re‐
straint fixing systems
To select, mount and use child restraint fixing
systems, observe the information provided by
the system manufacturer; otherwise, the pro‐
tective effect can be impaired.◀Seite 63Transporting children safelyControls63
Online Edition for Part no. 01 40 2 917 498 - II/13