2013 BMW 135I CONVERTIBLE width
[x] Cancel search: widthPage 52 of 284
51
Adjustments
Controls
Electrical adjustment
Observe the adjustment instructions
above to ensure the best possible per-
sonal protection. <
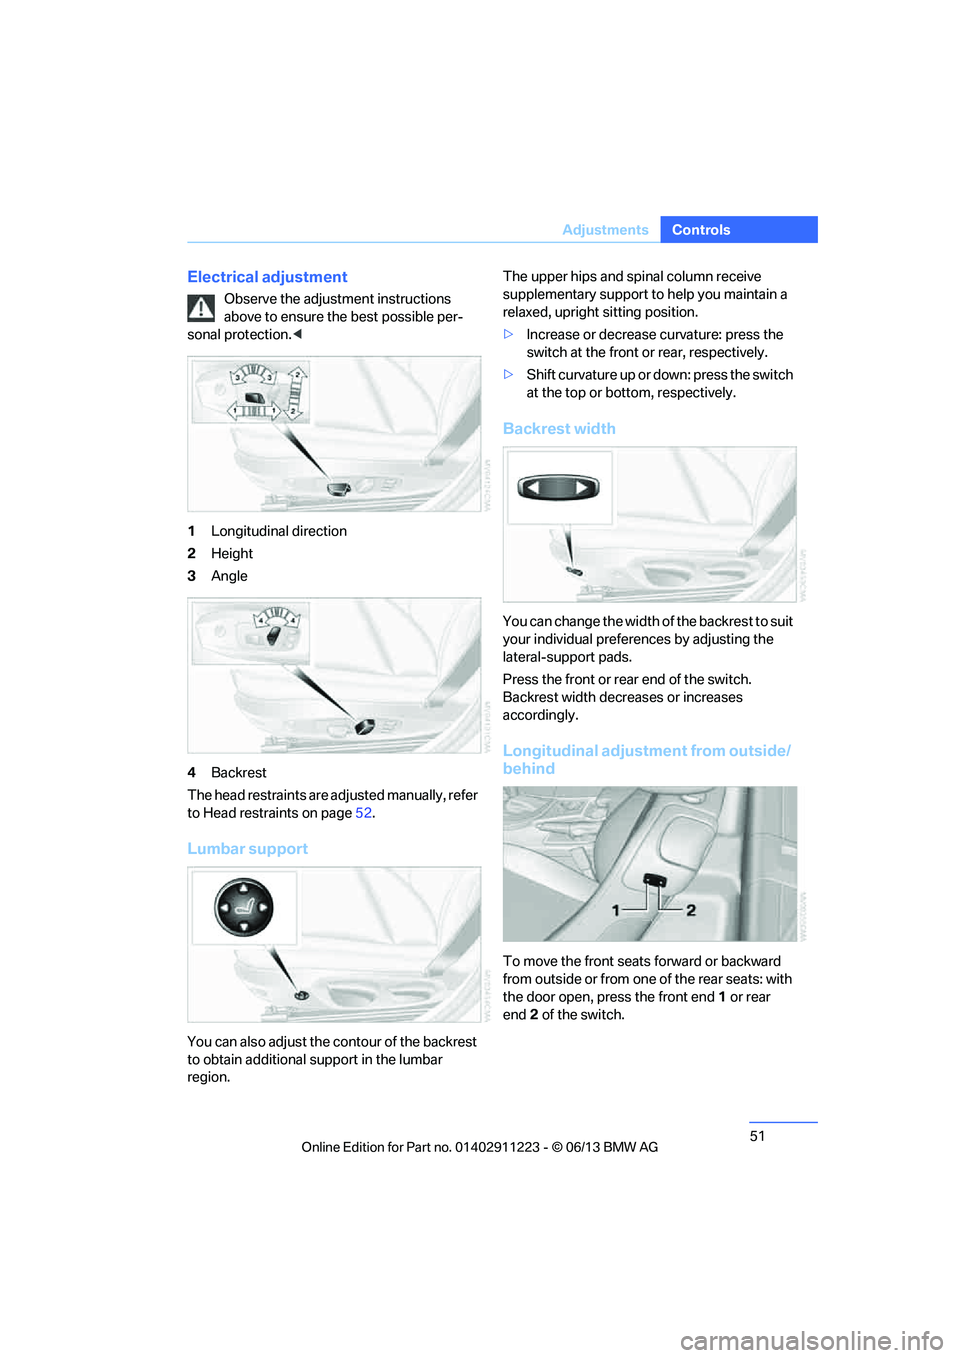
1 Longitudinal direction
2 Height
3 Angle
4 Backrest
The head restraints are adjusted manually, refer
to Head restraints on page 52.
Lumbar support
You can also adjust the contour of the backrest
to obtain additional support in the lumbar
region. The upper hips and spinal column receive
supplementary support to help you maintain a
relaxed, upright sitting position.
>
Increase or decrease curvature: press the
switch at the front or rear, respectively.
> Shift curvature up or down: press the switch
at the top or bottom, respectively.
Backrest width
You can change the width of the backrest to suit
your individual prefer ences by adjusting the
lateral-support pads.
Press the front or rear end of the switch.
Backrest width decreases or increases
accordingly.
Longitudinal adjustment from outside/
behind
To move the front seats forward or backward
from outside or from one of the rear seats: with
the door open, press the front end 1 or rear
end 2 of the switch.
00320051004F004C00510048000300280047004C0057004C005200510003
Page 55 of 284
54
ControlsAdjustments
Seat heating
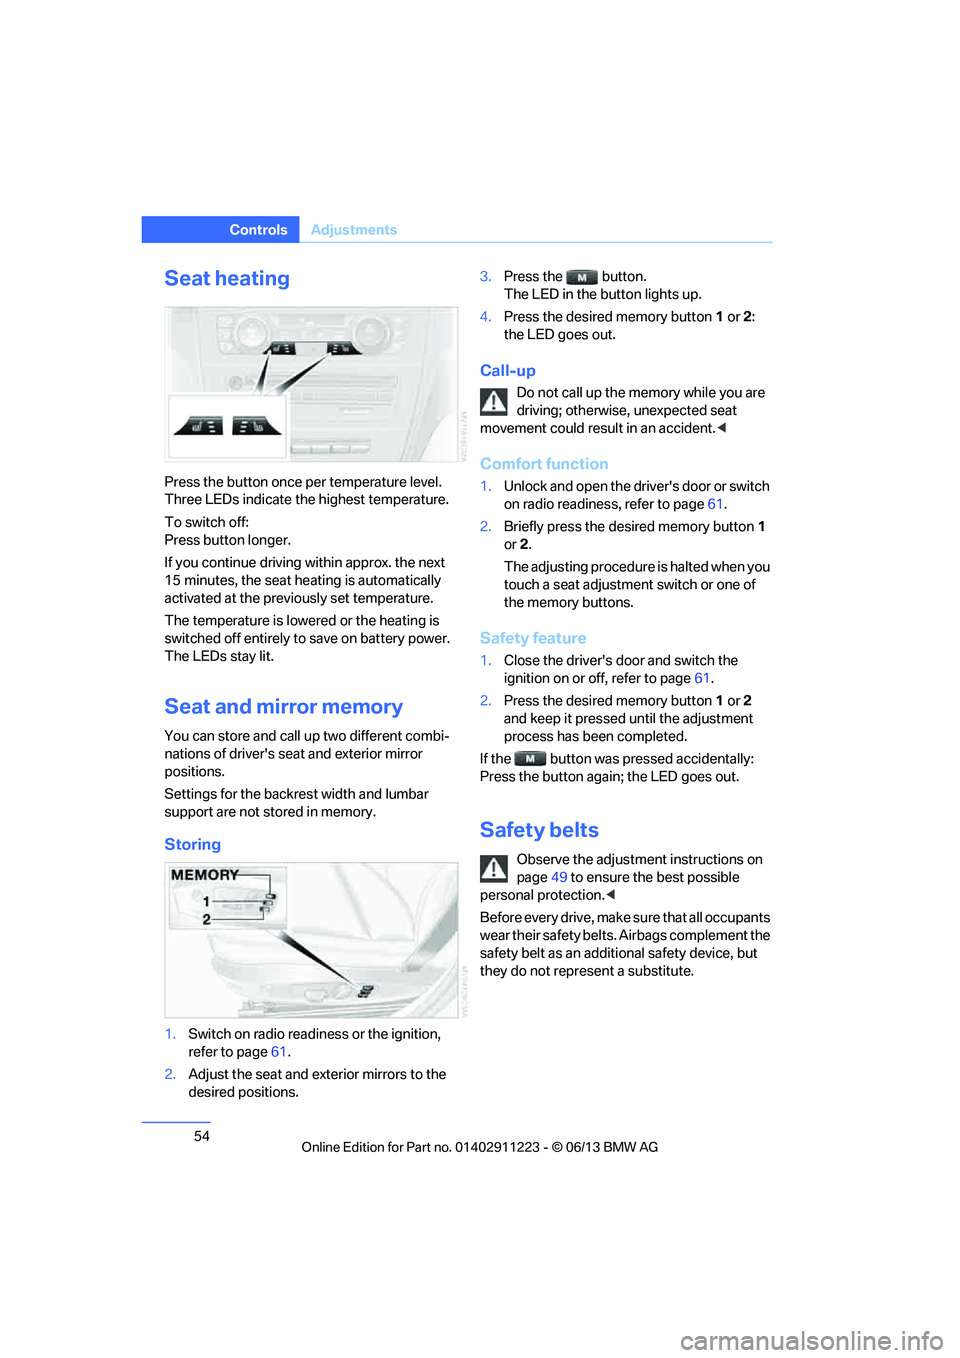
Press the button once per temperature level.
Three LEDs indicate the highest temperature.
To switch off:
Press button longer.
If you continue driving within approx. the next
15 minutes, the seat he ating is automatically
activated at the previously set temperature.
The temperature is lowered or the heating is
switched off entirely to save on battery power.
The LEDs stay lit.
Seat and mirror memory
You can store and call up two different combi-
nations of driver's seat and exterior mirror
positions.
Settings for the backrest width and lumbar
support are not stored in memory.
Storing
1. Switch on radio readin ess or the ignition,
refer to page 61.
2. Adjust the seat and exterior mirrors to the
desired positions. 3.
Press the button.
The LED in the button lights up.
4. Press the desired memory button 1 or 2:
the LED goes out.
Call-up
Do not call up the me mory while you are
driving; otherwise, unexpected seat
movement could result in an accident. <
Comfort function
1.Unlock and open the driver's door or switch
on radio readiness, refer to page 61.
2. Briefly press the desired memory button 1
or 2.
The adjusting procedure is halted when you
touch a seat adjustment switch or one of
the memory buttons.
Safety feature
1. Close the driver's door and switch the
ignition on or off, refer to page 61.
2. Press the desired memory button 1 or 2
and keep it pressed until the adjustment
process has been completed.
If the button was pr essed accidentally:
Press the button again; the LED goes out.
Safety belts
Observe the adjustment instructions on
page 49 to ensure the best possible
personal protection. <
Before every drive, make sure that all occupants
wear their safety belts. Airbags complement the
safety belt as an additi onal safety device, but
they do not repres ent a substitute.
00320051004F004C00510048000300280047004C0057004C005200510003
Page 59 of 284
58
ControlsTransporting children safely
Transporting children safely
Vehicle equipment
In this chapter, all pr oduction, country, and
optional equipment that is offered in the model
range is described. As a result, some equip-
ment described may not be available in a partic-
ular vehicle, for example due to the options or
national-market version selected. This also
applies to safety related functions and systems.
The right place for children
Do not leave children unattended in the
vehicle; otherwise, they could endanger
themselves and/or other persons by opening
the doors, for example. <
Children should always sit in the rear
Accident research has shown that the safest
place for children is on the rear seat.
Children under the age of 13 or smaller
than 5 ft/150 cm may be transported only
in the rear in suitable child restraint systems
appropriate for their age, weight and size. Oth-
erwise, there is an increase d risk of injury in the
event of an accident. <
Children 13 years of age or older must be buck-
led in with a safety belt as soon as there no
longer is any child rest raint system that is
appropriate for their age, size and weight.
Children in the front passenger seat
Should it be necessa ry to use a child
restraint system on the front passenger
seat, the front and side airbags for the front pas-
senger must be deactivated. Otherwise, a child
traveling on that seat will face a significant risk
of injury if the airbags are triggered off, even
with a child restraint system. <
For more information on automatic deactivation
of the front passenger airbags refer to page 97.
Installing child restraint
systems
Observe the child restraint system manu-
facturer's instructions when selecting,
installing and using child restraint systems.
Otherwise, the protective effect may be
diminished. <
Standard child restraint systems are designed
to be secured with a lap be lt or with the lap-belt
section of a lap-and-shou lder belt. Incorrectly
or improperly installed child restraint systems
can increase the risk of injury to children.
Always follow the installa tion instructions for
the system with the greatest care.
On the front passenger seat
After installing a child restraint system on
the front passenger seat, make sure that
the front and side airb ags for the front passen-
ger are deactivated; ot herwise, there is an
increased risk of injury if the airbags deploy.<
Seat position
Before installing a child restraint system, move
the front passenger seat as far back and up as
possible to obtain the best possible position for
the belt. Do not change the seat position after
this.
Backrest width
The backrest width of the front passenger
seat must be at its widest possible set-
ting. Do not change the setting after installing
the child seat; otherwise, the child seat's stabil-
ity on the front passenger seat is limited. <
1. Adjust the backrest width to its widest
setting, refer to page 51.
2. Install the child seat.
00320051004F004C00510048000300280047004C0057004C005200510003
Page 229 of 284
228
MobilityWheels and tires
Tire identification marks
Knowledge of the labeling on the side of the tire
makes it easier to identify and choose the right
tires.
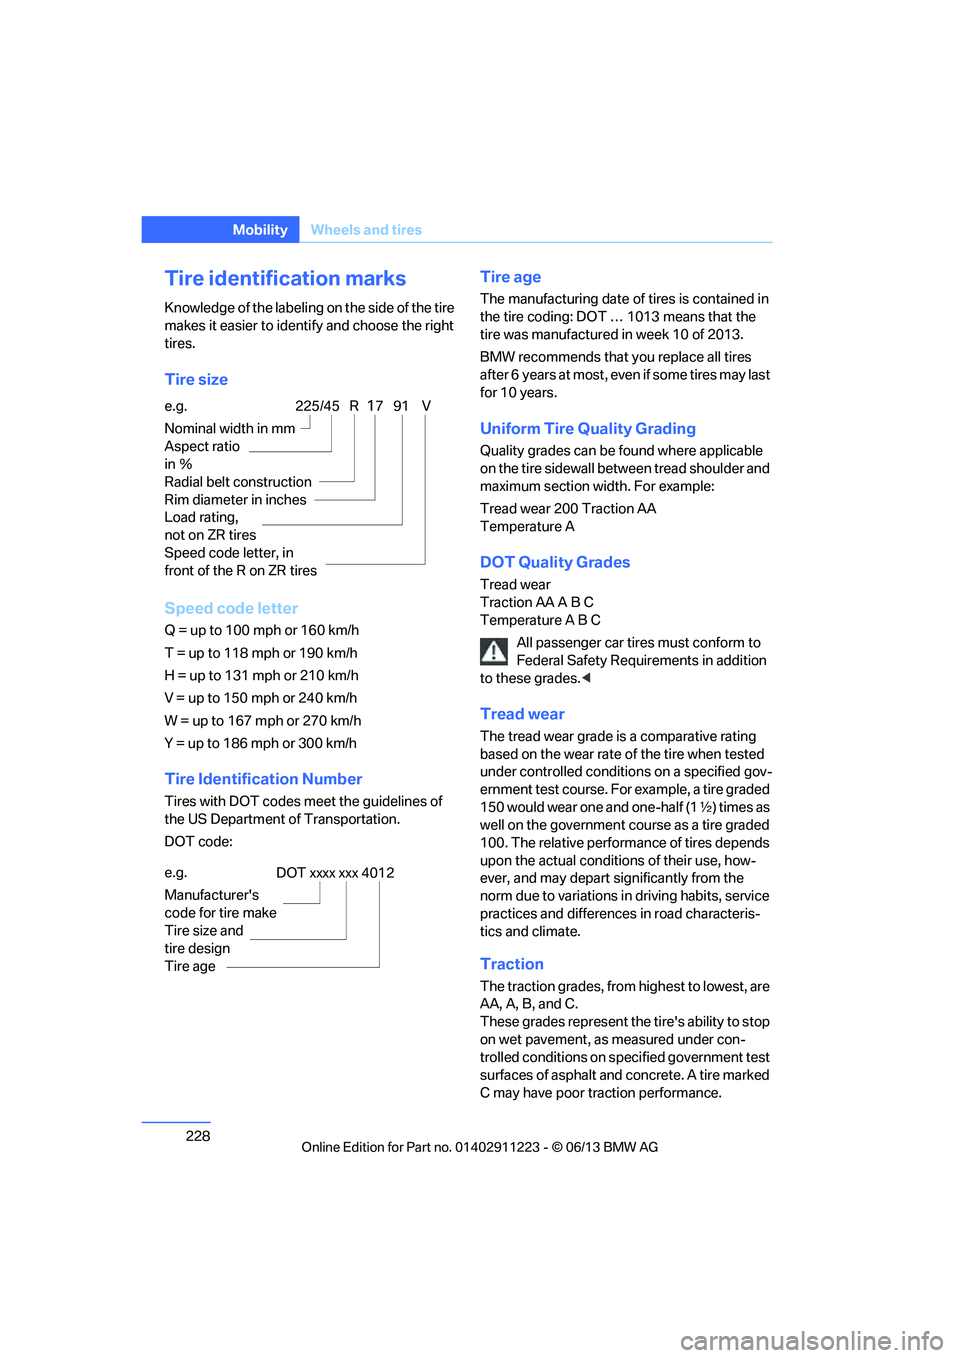
Tire size
Speed code letter
Q = up to 100 mph or 160 km/h
T = up to 118 mph or 190 km/h
H = up to 131 mph or 210 km/h
V = up to 150 mph or 240 km/h
W = up to 167 mph or 270 km/h
Y = up to 186 mph or 300 km/h
Tire Identification Number
Tires with DOT codes meet the guidelines of
the US Department of Transportation.
DOT code:
Tire age
The manufacturing date of tires is contained in
the tire coding: DOT … 1013 means that the
tire was manufactured in week 10 of 2013.
BMW recommends that you replace all tires
after 6 years at most, even if some tires may last
for 10 years.
Uniform Tire Quality Grading
Quality grades can be found where applicable
on the tire sidewall betw een tread shoulder and
maximum section width. For example:
Tread wear 200 Traction AA
Temperature A
DOT Quality Grades
Tread wear
Traction AA A B C
Temperature A B C
All passenger car tires must conform to
Federal Safety Requir ements in addition
to these grades. <
Tread wear
The tread wear grade is a comparative rating
based on the wear rate of the tire when tested
under controlled conditio ns on a specified gov-
ernment test course. For example, a tire graded
150 would wear one and one-half (1 γ) times as
well on the government course as a tire graded
100. The relative performance of tires depends
upon the actual conditio ns of their use, how-
ever, and may depart significantly from the
norm due to variations in driving habits, service
practices and differences in road characteris-
tics and climate.
Traction
The traction grades, from highest to lowest, are
AA, A, B, and C.
These grades represent the tire's ability to stop
on wet pavement, as measured under con-
trolled conditions on specified government test
surfaces of asphalt and concrete. A tire marked
C may have poor traction performance.
e.g.
Nominal width in mm
Aspect ratio
in
Ξ
Radial belt construction
Rim diameter in inches
Load rating,
not on ZR tires
Speed code letter, in
front of the R on ZR tires
225/45 R1791 V
e.g.
Manufacturer's
code for tire make
Tire size and
tire design
Tire ageDOT xxxx xxx 4012
00320051004F004C00510048000300280047004C0057004C005200510003
Page 240 of 284
239
Care
Mobility
Care
Vehicle equipment
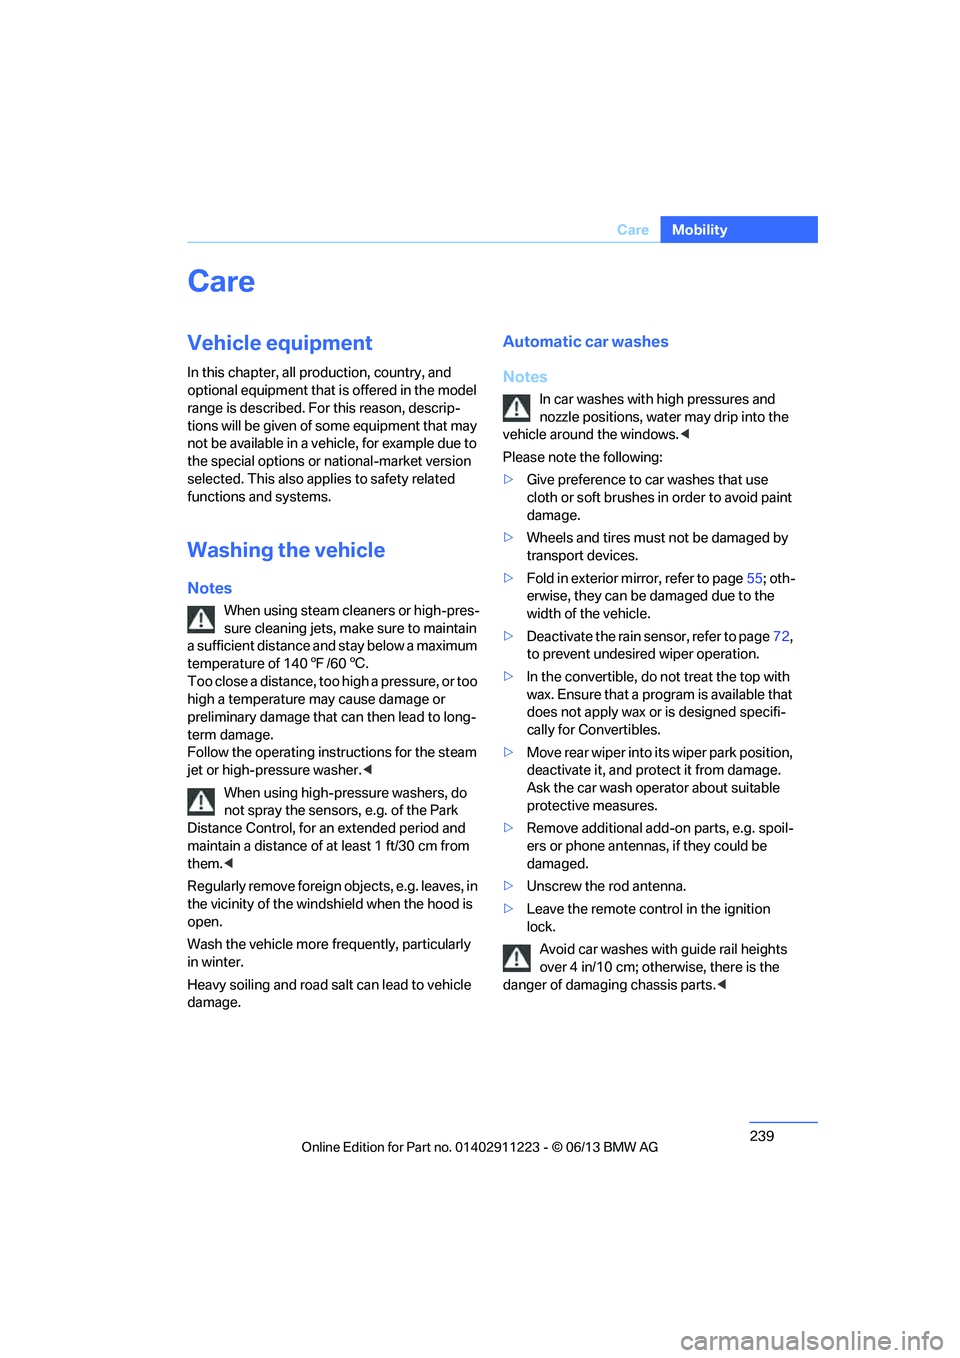
In this chapter, all production, country, and
optional equipment that is offered in the model
range is described. For this reason, descrip-
tions will be given of some equipment that may
not be available in a vehi
cle, for example due to
the special options or national-market version
selected. This also app lies to safety related
functions and systems.
Washing the vehicle
Notes
When using steam cleaners or high-pres-
sure cleaning jets, make sure to maintain
a sufficient distance and stay below a maximum
temperature of 140 7/60 6.
Too close a distance, too high a pressure, or too
high a temperature may cause damage or
preliminary damage that can then lead to long-
term damage.
Follow the operating inst ructions for the steam
jet or high-pressure washer. <
When using high-pressure washers, do
not spray the sensors, e.g. of the Park
Distance Control, for an extended period and
maintain a distance of at least 1 ft/30 cm from
them. <
Regularly remove foreign objects, e.g. leaves, in
the vicinity of the windsh ield when the hood is
open.
Wash the vehicle more frequently, particularly
in winter.
Heavy soiling and road salt can lead to vehicle
damage.
Automatic car washes
Notes
In car washes with high pressures and
nozzle positions, wate r may drip into the
vehicle around the windows. <
Please note the following:
> Give preference to car washes that use
cloth or soft brushes in order to avoid paint
damage.
> Wheels and tires must not be damaged by
transport devices.
> Fold in exterior mirror, refer to page 55; oth-
erwise, they can be damaged due to the
width of the vehicle.
> Deactivate the rain sensor, refer to page 72,
to prevent undesired wiper operation.
> In the convertible, do not treat the top with
wax. Ensure that a program is available that
does not apply wax or is designed specifi-
cally for Convertibles.
> Move rear wiper into its wiper park position,
deactivate it, and protect it from damage.
Ask the car wash operator about suitable
protective measures.
> Remove additional add-on parts, e.g. spoil-
ers or phone antennas, if they could be
damaged.
> Unscrew the rod antenna.
> Leave the remote cont rol in the ignition
lock.
Avoid car washes with guide rail heights
over 4 in/10 cm; otherwise, there is the
danger of damaging chassis parts. <
00320051004F004C00510048000300280047004C0057004C005200510003
Page 259 of 284

258
ReferenceTechnical data
Technical data
Vehicle equipment
In this chapter, all pr oduction, country, and
optional equipment that is offered in the model
range is described. For this reason, descrip- tions will be given of some equipment that may
not be available in a vehi
cle, for example due to
the special options or national-market version
selected. This also app lies to safety related
functions and systems.
Dimensions
Coupe
Width with mirrors in/mm75.6/1,919
Width without mirrors in/mm68.8/1,748
Height
Height, 135i in/mm
in/mm56.0/1,423
55.4/1,408
Length in/mm172.2/4,373
Wheelbase in/mm104.7/2,660
Smallest turning circle dia. ft/m35.1/10.7
Convertible
Width with mirrors in/mm75.6/1,919
Width without mirrors in/mm68.8/1,748
Height
Height, 135i in/mm
in/mm55.6/1,411
54.8/1,392
Length in/mm172.2/4,373
Wheelbase in/mm104.7/2,660
Smallest turning circle dia. ft/m35.1/10.7
00320051004F004C00510048000300280047004C0057004C005200510003
Page 270 of 284
269
Everything from A to Z
Reference
Average speed
77
Avoid highways in
navigation 143
Avoiding unintentional alarms 40
Axle loads, refer to Weights 259
B
Backrests, refer to Seats 50
Backrest width adjustment 51
Back seats, refer to Rear seats
– adjusting head restraints 52
Backup lamp, replacing bulb 247
Bag for skis, refer to Ski bag 118
Band-aids, refer to First aid
pouch 251
Bar, refer to Tow-starting, towing away 253
Base plate for telephone or mobile phone
– refer to Snap-in adapter 199
Bass, tone control 155
Battery 248
– charging 248
– disposal 42,249
– jump starting 251
– replacing 248
– temporary power failure 248
Battery renewal
– remote control for vehicle 41
Being towed 253
Belts, refer to Safety belts 54
Belt tensioner, refer to Safety
belts 54
Beverage holders, refer to Cupholders 116
Blower, refer to Air volume 108 Bluetooth, activating/
deactivating 189
Bluetooth audio 180
– disconnecting an audio connection 183
– pairing device 181
– playback 182
– unpairing device 183
– what to do if … 183
BMW Assist 212
– updating 216
BMW Info 206
BMW Maintenance System 237
BMW Online 214
Bottle holders, refer to
Cupholders 116
Brake Assist, refer to Dynamic Brake Control 89
Brake fluid
– service requirements 80
Brake Force Display 96
Brake lamps
– brake force display 96
– replacing bulb 247
Brake pads, breaking in 124
Brake pedal, refer to Braking safely 126
Bra k
e rotors 127
– brakes 124
– breaking in 124
Brakes
– ABS 89
– BMW Maintenance
System 237
– braking safely 126
– breaking in 124
– parking brake 63
– service requirements 80Brake system
124
– BMW Maintenance
System 237
– breaking in 124
– disc brakes 127
Breakdown services, refer to Roadside Assistance 251
Breaking in the clutch 124
Break-in period 124
Bulb changing, refer to Lamps and bulbs 243
Button for starting the engine 61
Buttons on the steering
wheel 13
C
Calendar 207
– displaying appointment 207
– selecting calendar day 207
California Proposition 65
warning 6
Call
– accepting 193
– ending 193
– muting the microphone 195
– rejecting 193
Calling, refer to Phone numbers, dialing 194
Calls
– with multiple parties 194
Can holders, refer to Cupholders 116
Capacities 259
Capacity of the trunk 259
Car battery, refer to Vehicle
battery 248
Car care, refer to Care 239
00320051004F004C00510048000300280047004C0057004C005200510003
Page 283 of 284

282
ReferenceEverything from A to Z
W
Warning and indicator
lamps 15
Warning messages, refer to
Check Control 84
Warning triangle 251
Washer fluid 72
Washer fluid filler neck 73
Waste tray, refer to Ashtray 116
Water on roads, refer to Driving through water 126
Water penetration 239
Waveband on radio 157
Wear indicators in tires, refer
to Minimum tread depth 229
Weights 259
Welcome lamps 101
Wheelbase, refer to Dimensions 258
Wheels, new 230
Wheels and tires 223
Width, refer to Dimensions 258
Wind deflector 47
Windows 42
– convenient opening and
closing 34
– convenient opening and closing with Comfort
Access 40
– opening, closing 42
– pinch protection system 43
Window washer system 71
Windshield
– cleaning 72
– defrosting and removing condensation 109
Windshield wash
– filling capacity, reservoir 259Windshield wash
er reservoir,
refer to Washer fluid filler
neck 73
Windshield wa sher system
– spray nozzles 72
– washer fluid 73
Windshield wiper blades, changing 243
Windshield wipers, refer to Wiper system 71
Winter tires 231
– setting speed limit 86
– storage 231
Wiper blade replacement 243
Wiper system 71
Wrench/screwdriver, refer to
Onboard vehicle tool kit 243
X
Xenon lamps
– replacing bulb244
00320051004F004C00510048000300280047004C0057004C005200510003