2013 BMW 135I CONVERTIBLE lights
[x] Cancel search: lightsPage 8 of 284

7
Notes
If the vehicle is not maintained according to
these specifications, this
could result in serious
damage to the vehicle. Such damage is not
covered by the BMW New Vehicle Limited
Warranty.
Data memory
A variety of electronic components in your vehi-
cle include data storag e devices, which store
technical information on the condition of your
vehicle, events and errors, either temporarily or
permanently. In general, this technical informa-
tion documents the condition of a component, a
module, a system or the surroundings:
> Operating conditions of system compo-
nents, e.g., fill levels.
> Status messages regarding the vehicle and
of its individual components, such as wheel
rpm/vehicle speed, resp onse delay, lateral
acceleration.
> Malfunctions and defects in the major sys-
tem components, such as the lights and
brakes.
> Responses of the vehicle in special driving
situations, such as the deployment of an
airbag, the utilization of stability control
systems.
> Environmental conditions, such as
temperature.
These data are exclusively of a technical nature
and are used for the detection and correction of
errors, as well as the optimization of vehicle
functions. Motion profiles of traveled routes can
not be deduced from these data. If services are
required, such as repair services, service pro-
cesses, warranty claims and quality assurance,
then this technical information can be read out
by employees of service departments, includ-
ing the manufacturer, from the event and error
data storage devices by using special diagnos-
tic equipment. There, if necessary, you will receive further informatio
n. After remedying an
error, the information in the error memory is
deleted or progressively overwritten.
When using the vehicle, situations are conceiv-
able in which this techni cal data, in conjunction
with other information, such as accident
reports, vehicle damage, witness statements,
etc. - possibly with the assistance of an expert -
could be traced to pa rticular individuals.
Additional functions that are agreed upon
contractually with the cu stomer, such as vehi-
cle tracking in case of emergency, permit the
transmission of certain vehicle data from the
vehicle.
Reporting safety defects
For US customers
The following only app lies to vehicles owned
and operated in the US.
If you believe that your vehicle has a defect
which could cause a crash or could cause injury
or death, you should immediately inform the
National Highway Traffic Safety Administration,
NHTSA, in addition to notifying BMW of North
America, LLC, P.O. Box 1227, Westwood, New
Jersey 07675-1227, Telephone 1-800-831-
1117.
If NHTSA receives sim ilar complaints, it may
open an investigation, and if it finds that a safety
defect exists in a group of vehicles, it may order
a recall and remedy campaign. However,
NHTSA cannot become involved in individual
problems between you, yo ur center, or BMW of
North America, LLC.
To contact NHTSA, you may call the Vehicle
Safety Hotline toll-free at 1-888-327-4236
(TTY: 1-800-424-9153); go to
http://www.safercar.gov; or write to: Adminis-
trator, NHTSA, 400 Seventh Street, SW.,
Washington, DC 20590. You can also obtain
other information about motor vehicle safety
from http://www.safercar.gov
00320051004F004C00510048000300280047004C0057004C005200510003
Page 34 of 284

33
Opening and closing
Controls
mum of four remote cont
rols. They are stored
for two remote controls if Comfort Access is in
use.
Personal Profile settings
For more information on specific settings, refer
to the specified pages.
> Programming the Programmable memory
keys, refer to page 25
> Response of the central locking system
when the car is unlocked, refer to page 34
> Automatic locking of th e vehicle, refer to
page 37
> Automatic call-up of th e driver's seat posi-
tion, refer to page 54
> Triple turn signal activation, refer to
page 71
> Settings for the display on the Control
Display and in the instrument cluster:
>12h/24h format of the clock, refer to
page 82
> Date format, refer to page 84
> Brightness of the Control Display, refer
to page 87
> Language of the Contro l Display, refer to
page 87
> Units of measure for fuel consumption,
distance covered/remaining distances,
and temperature, refer to page 80
> Show visual warning for Park Distance
Control PDC, refer to page 88
> Light settings:
>Welcome lamps, refer to page 101
> Pathway lighting, refer to page 101
> Daytime running lights, refer to
page 101
> High-beam Assistant, refer to page 102
> Automatic climate control: activating/deac-
tivating AUTO program, air conditioning
and automatic recirculated air control,
setting temperature, air volume and
distribution, refer to page 107 ff>
Entertainment:
>Tone control, refer to page 155
> Speed-dependent volume control, refer
to page 156
Central locking system
The concept
The central locking system functions when the
driver's door is closed.
The system simultaneously engages and
releases the locks on the following:
>Doors
> Trunk lid
> Fuel filler flap
Operating from outside
>Via the remote control
> Using the door lock
> In cars with Comfort Access, via the handles
on the driver's door or the front passenger
door
At the same time as locking and unlocking via
the remote control:
> Welcome lights, the inte rior light, and the
courtesy lighting are switched on or off.
> Alarm system, refer to page 38, is armed or
disarmed.
Operating from inside
By means of the button fo r central locking, refer
to page 37.
In the event of a sufficien tly severe accident, the
central locking system unlocks automatically. In
addition, the hazard warning flashers and inte-
rior lamps come on.
00320051004F004C00510048000300280047004C0057004C005200510003
Page 42 of 284

41
Opening and closing
Controls
Convertible: window and convertible
top operation
With the ignition at radio readiness or beyond,
you can open and close the windows and the
convertible top when a remote control is
located inside the vehicle.
Unlocking the trunk lid separately
Press the button on the ou
tside of the trunk lid.
This corresponds to pressing the button. If the vehicle detects that a remote con-
trol has been accident ally left inside the
locked vehicle after the trunk lid is closed, the
lid will reopen. The haza rd warning flashers
flash and a signal sounds. <
Switching on radio readiness
Pressing the Start/Stop button switches on
radio readiness.
Do not depress the brake or the clutch; other-
wise, the engine will start immediately.
Starting the engine
The engine can be started or the ignition can be
switched on when a remote control is inside the
vehicle. It is not necessa ry to insert a remote
control into the ignition lock, refer to page 61.
Switching off the engine in cars with
automatic transmission
The engine can only be switched off when the
selector lever is in po sition P, refer to page 63.
To switch the engine off when the selector lever
is in position N, the remote control must be in
the ignition lock.
Malfunctions
Local radio waves can in terfere with the func-
tion of Comfort Access, for example when a
mobile phone is in the immediate vicinity of the
remote control or by when a mobile phone is
being charged in the vehicle. If this happens, open and close the vehicle via
the buttons on the remote control or using the
integrated key. To star
t the engine afterward,
insert the remote control into the ignition lock.
Warning lamps
The warning lamp in the instrument
cluster lights up when you attempt to
start the engine: the engine cannot
be started. The remote co ntrol is not inside the
vehicle or is malfunctio ning. Take the remote
control with you inside the vehicle or have it
checked. If necessary, insert another remote
control into the ignition lock.
The warning lamp in the instrument
cluster lights up wh ile the engine is
running: the remote control is no
longer inside the vehicle. After the engine is
switched off, the engine can only be restarted
within approx. 10 seconds.
The indicator lamp in the instrument
cluster comes on and a message
appears on the Control Display:
replace the battery in the remote control.
Replacing the battery
The remote control for Comfort Access con-
tains a battery that will need to be replaced from
time to time.
1. Take the integrated ke y out of the remote
control, refer to page 32.
2. Remove the cover.
00320051004F004C00510048000300280047004C0057004C005200510003
Page 46 of 284

45
Opening and closing
Controls
Before opening and closing
>
Comply with the sa fety precautions
described above.
> Ensure that the trunk partition is folded
down and engaged on both sides, refer to
page 118; otherwise, it will not be possible
to open the convertible top.
> Ensure that the cargo does not press
against the trunk partition from below.
> Ensure that the tr unk lid is closed.
Opening and closing
Convertible top operation with Comfort Access,
also refer to page 34.
As of radio readiness, refer to page 61:
To conserve battery power, if possible
operate the convertible top only while the
engine is running.
Prior to closing the conv ertible top, check for
and remove all debris from the windshield
frame; otherwise, the closing of the top may be
hampered. <
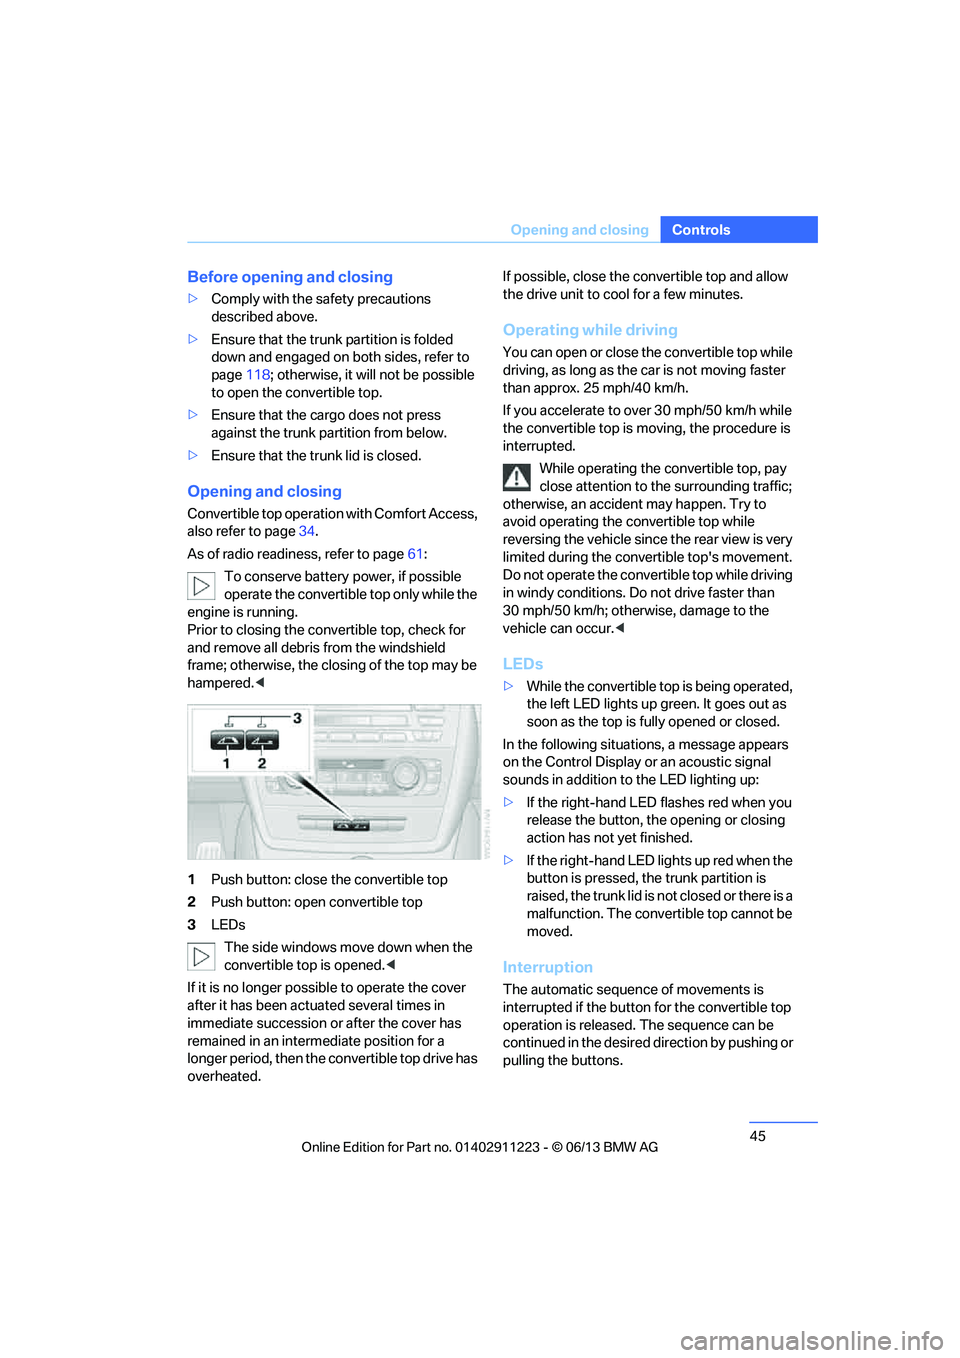
1 Push button: close the convertible top
2 Push button: open convertible top
3 LEDs
The side windows move down when the
convertible top is opened. <
If it is no longer possible to operate the cover
after it has been actuated several times in
immediate succession or after the cover has
remained in an interm ediate position for a
longer period, then the convertible top drive has
overheated. If possible, close the convertible top and allow
the drive unit to cool for a few minutes.
Operating while driving
You can open or close the convertible top while
driving, as long as the car is not moving faster
than approx. 25 mph/40 km/h.
If you accelerate to ov
er 30 mph/50 km/h while
the convertible top is moving, the procedure is
interrupted.
While operating the convertible top, pay
close attention to the surrounding traffic;
otherwise, an accident may happen. Try to
avoid operating the convertible top while
reversing the vehicle since the rear view is very
limited during the convertible top's movement.
Do not operate the convertible top while driving
in windy conditions. Do not drive faster than
30 mph/50 km/h; otherwise, damage to the
vehicle can occur. <
LEDs
>While the convertible top is being operated,
the left LED lights up green. It goes out as
soon as the top is fully opened or closed.
In the following situations, a message appears
on the Control Display or an acoustic signal
sounds in addition to the LED lighting up:
> If the right-hand LED flashes red when you
release the button, th e opening or closing
action has not yet finished.
> If the right-hand LED lights up red when the
button is pressed, the trunk partition is
raised, the trunk lid is not closed or there is a
malfunction. The convertible top cannot be
moved.
Interruption
The automatic sequence of movements is
interrupted if the button for the convertible top
operation is released. The sequence can be
continued in the desired direction by pushing or
pulling the buttons.
00320051004F004C00510048000300280047004C0057004C005200510003
Page 55 of 284

54
ControlsAdjustments
Seat heating
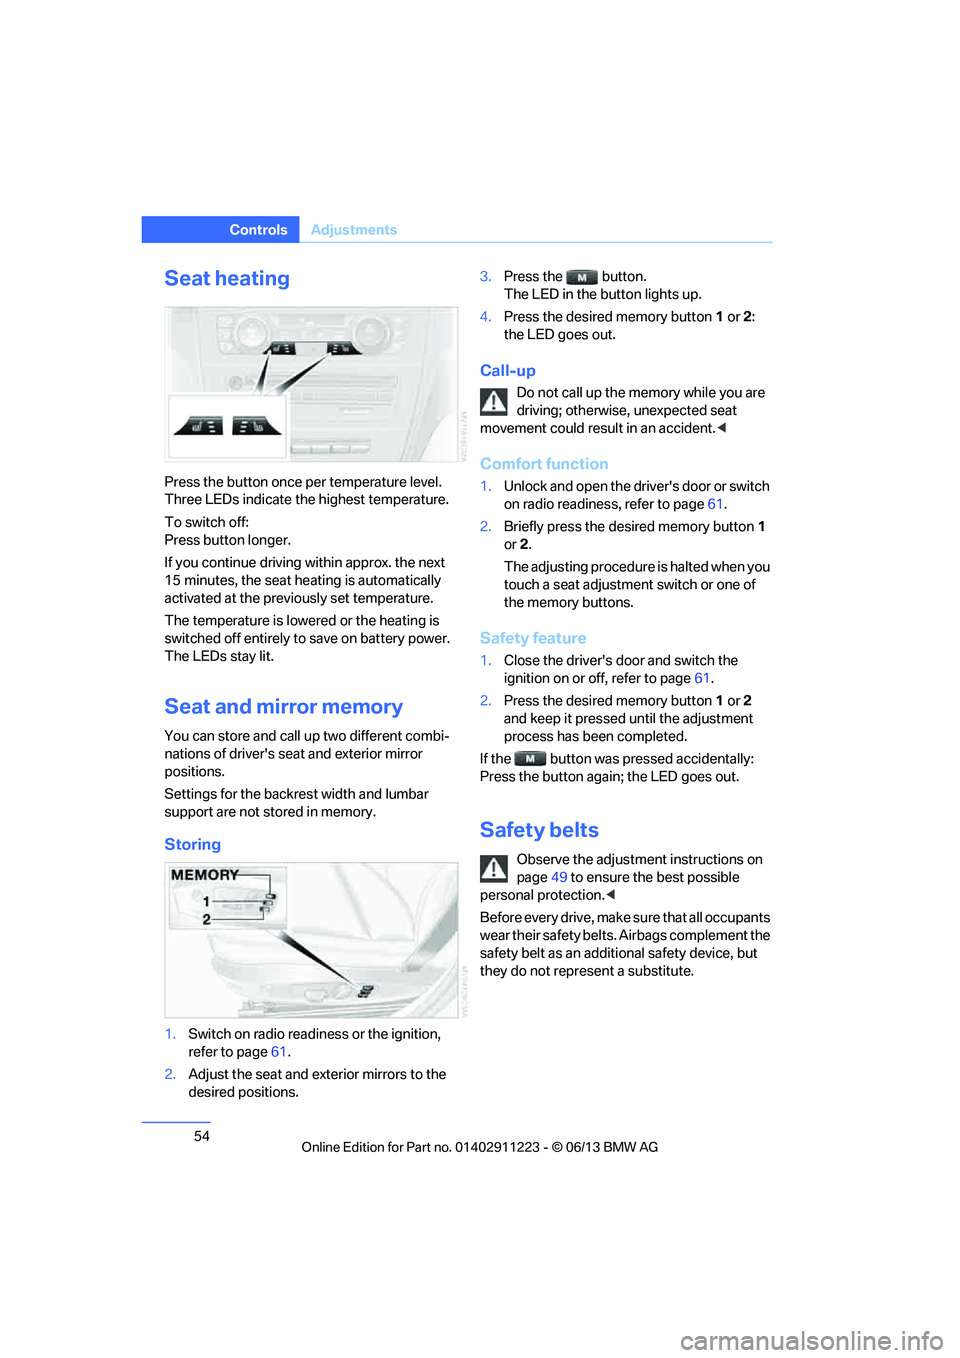
Press the button once per temperature level.
Three LEDs indicate the highest temperature.
To switch off:
Press button longer.
If you continue driving within approx. the next
15 minutes, the seat he ating is automatically
activated at the previously set temperature.
The temperature is lowered or the heating is
switched off entirely to save on battery power.
The LEDs stay lit.
Seat and mirror memory
You can store and call up two different combi-
nations of driver's seat and exterior mirror
positions.
Settings for the backrest width and lumbar
support are not stored in memory.
Storing
1. Switch on radio readin ess or the ignition,
refer to page 61.
2. Adjust the seat and exterior mirrors to the
desired positions. 3.
Press the button.
The LED in the button lights up.
4. Press the desired memory button 1 or 2:
the LED goes out.
Call-up
Do not call up the me mory while you are
driving; otherwise, unexpected seat
movement could result in an accident. <
Comfort function
1.Unlock and open the driver's door or switch
on radio readiness, refer to page 61.
2. Briefly press the desired memory button 1
or 2.
The adjusting procedure is halted when you
touch a seat adjustment switch or one of
the memory buttons.
Safety feature
1. Close the driver's door and switch the
ignition on or off, refer to page 61.
2. Press the desired memory button 1 or 2
and keep it pressed until the adjustment
process has been completed.
If the button was pr essed accidentally:
Press the button again; the LED goes out.
Safety belts
Observe the adjustment instructions on
page 49 to ensure the best possible
personal protection. <
Before every drive, make sure that all occupants
wear their safety belts. Airbags complement the
safety belt as an additi onal safety device, but
they do not repres ent a substitute.
00320051004F004C00510048000300280047004C0057004C005200510003
Page 58 of 284

57
Adjustments
Controls
Steering wheel
Adjustments
Do not adjust the steering wheel position
while the car is in motion; otherwise, there
is a risk of an accident due to unexpected
movement. <
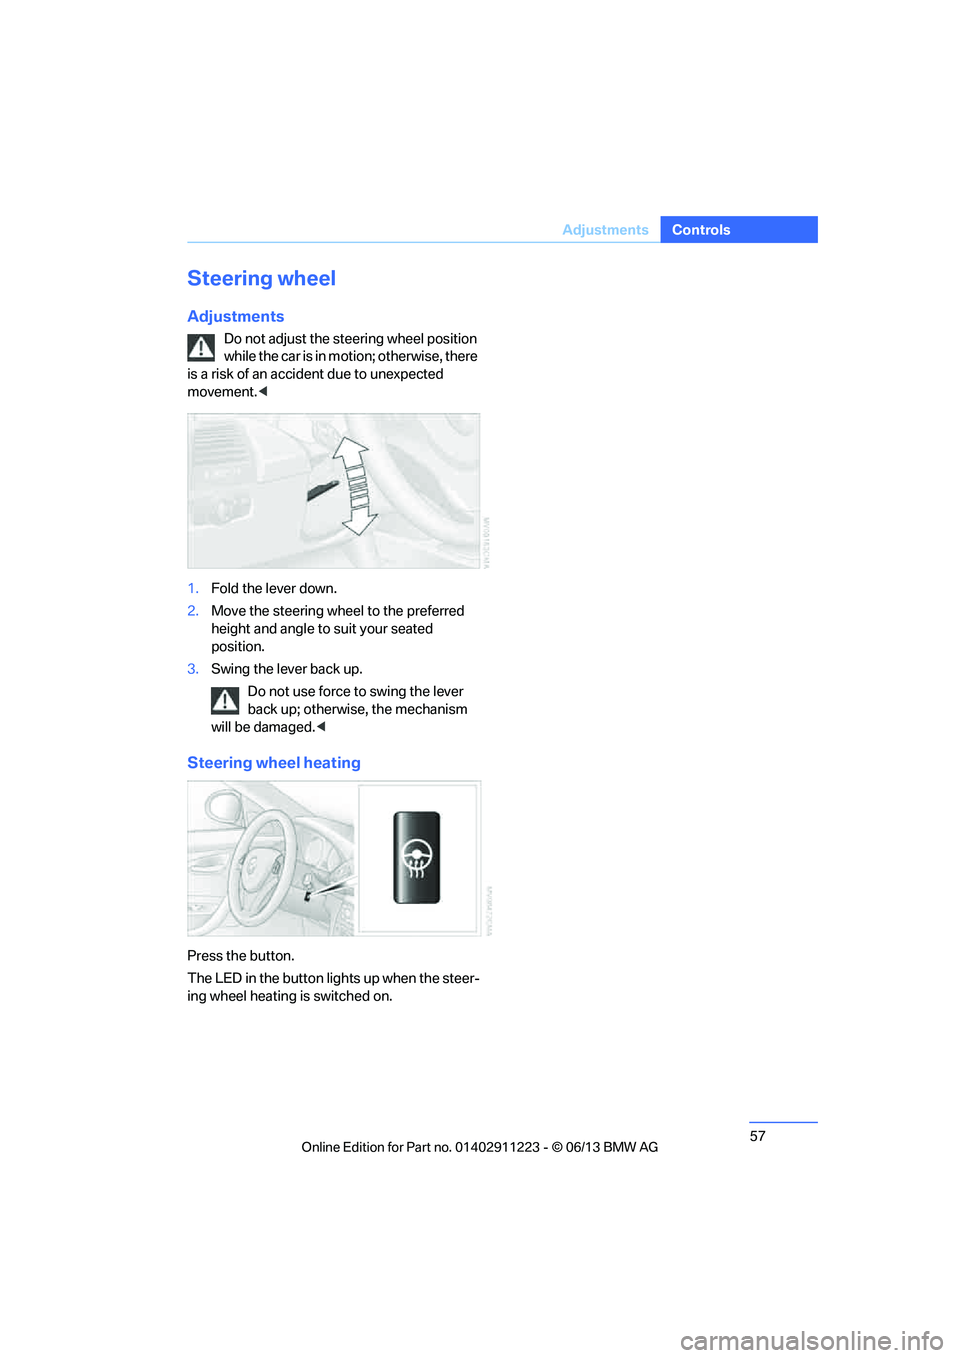
1. Fold the lever down.
2. Move the steering wheel to the preferred
height and angle to suit your seated
position.
3. Swing the lever back up.
Do not use force to swing the lever
back up; otherwise, the mechanism
will be damaged. <
Steering wheel heating
Press the button.
The LED in the button lights up when the steer-
ing wheel heating is switched on.
00320051004F004C00510048000300280047004C0057004C005200510003
Page 67 of 284

66
ControlsDriving
>To upshift, briefly pull the right shift
paddle +.
> To downshift, briefly pull the left shift
paddle –.
Upshifts and downshifts are executed only
when they will result in a plausible combination
of engine and vehicle speed; thus, for example,
a downshift that would cause the engine to
overrev will not be exec uted by the system.
The gear selected is briefly displayed in the
instrument cluster, followed again by the gear
actually in use.
Overriding selector lever lock
If the selector lever will not move out of
position P even though the ignition is switched
on, the brake is depressed, and the button on
the selector lever is pre ssed, the selector lever
lock can be overridden:
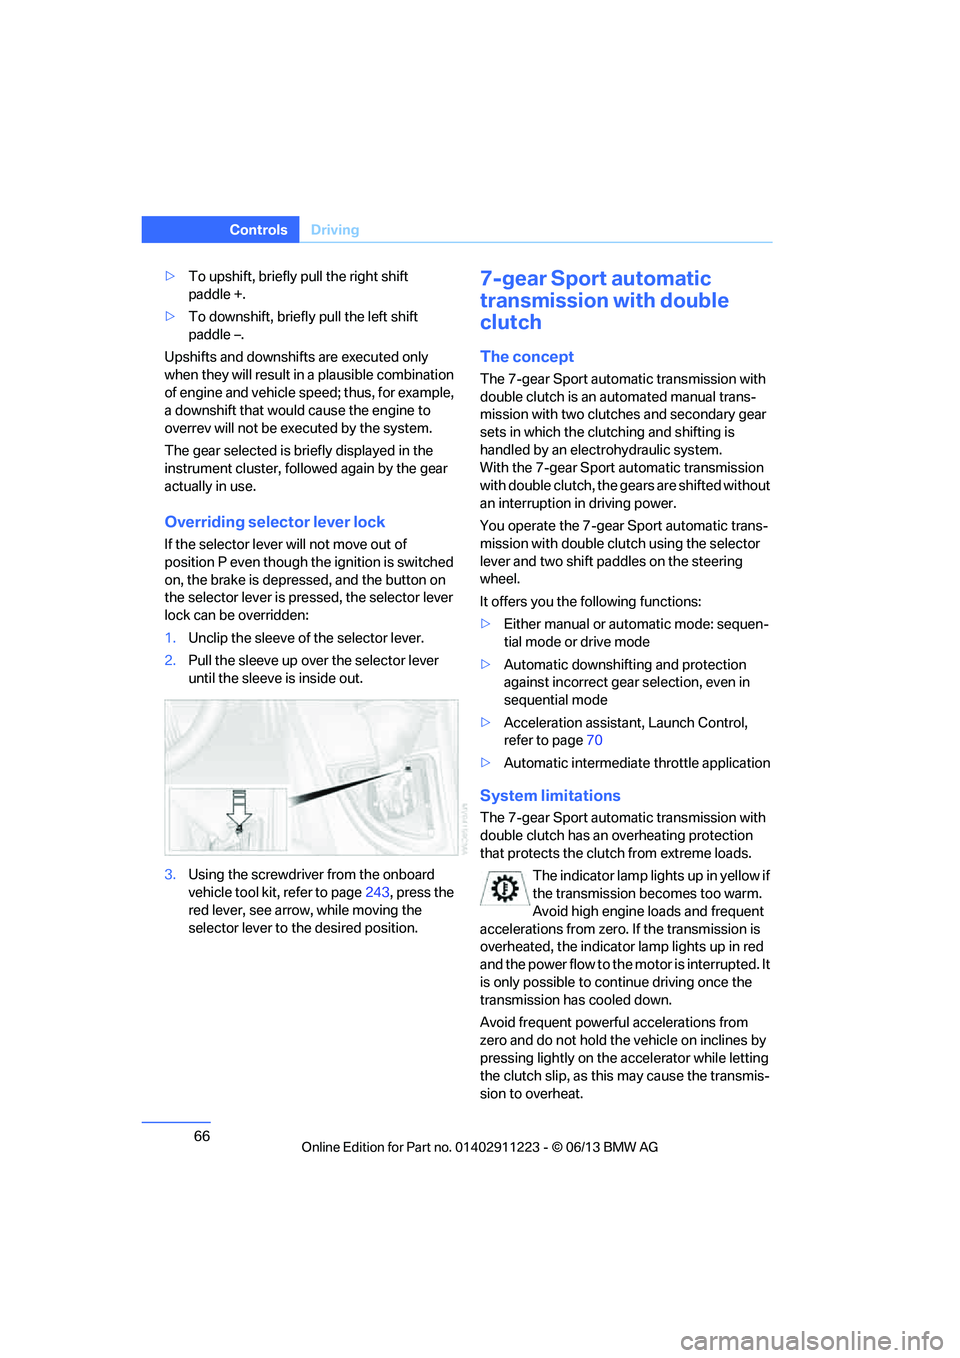
1. Unclip the sleeve of the selector lever.
2. Pull the sleeve up over the selector lever
until the sleeve is inside out.
3. Using the screwdriver from the onboard
vehicle tool kit, refer to page 243, press the
red lever, see arrow, while moving the
selector lever to the desired position.
7-gear Sport automatic
transmission with double
clutch
The concept
The 7-gear Sport automatic transmission with
double clutch is an automated manual trans-
mission with two clutches and secondary gear
sets in which the clutching and shifting is
handled by an electr ohydraulic system.
With the 7-gear Sport automatic transmission
with double clutch, the gears are shifted without
an interruption in driving power.
You operate the 7-gear Sport automatic trans-
mission with double clutch using the selector
lever and two shift paddles on the steering
wheel.
It offers you the following functions:
> Either manual or au tomatic mode: sequen-
tial mode or drive mode
> Automatic downshifting and protection
against incorrect gear selection, even in
sequential mode
> Acceleration assistan t, Launch Control,
refer to page 70
> Automatic intermediate throttle application
System limitations
The 7-gear Sport automatic transmission with
double clutch has an overheating protection
that protects the clutch from extreme loads.
The indicator lamp lights up in yellow if
the transmission becomes too warm.
Avoid high engine loads and frequent
accelerations from zero. If the transmission is
overheated, the indicator lamp lights up in red
and the power flow to the motor is interrupted. It
is only possible to continue driving once the
transmission has cooled down.
Avoid frequent powerful accelerations from
zero and do not hold the vehicle on inclines by
pressing lightly on the accelerator while letting
the clutch slip, as this may cause the transmis-
sion to overheat.
00320051004F004C00510048000300280047004C0057004C005200510003
Page 70 of 284

69
Driving
Controls
>
To upshift, briefly pull the right shift
paddle +.
> To downshift, briefly pull the left shift
paddle –.
Driving dynamics control
The driving dynamics control permits you, at
the push of a button, to have your BMW react in
an even more sporty fashion when driving:
> Optimal use is made of the engine's speed
range.
> Gear changes occur more quickly.
> The engine reacts more spontaneously to
accelerator pe dal movements.
Activating the system
Press the SPORT button.
The LED in the button lights up.
Deactivating the system
>Press the SPORT button again
> Switch off the engine
The LED in the button goes out.
Manually unlocking parking lock
In the event of a power supply interrup-
tion such as a discharged or discon-
nected battery or an elec trical malfunction, the
parking lock must be ma nually unlocked; other-
wise, the rear wheels are immobilized and the
vehicle cannot be towed. <
Only unlock the parkin g lock manually for
towing and make sure to set the parking brake
forcefully beforehand so that the vehicle cannot
roll. Lock the parking lock again after the vehicle
is parked.
Releasing
1. Unclip the sleeve of the selector lever.
2. Pull the sleeve up over the selector lever
until the sleeve is inside out.
3. Using the allen wrench from the tool kit,
refer to page 243, rotate the cover until it
reaches the stop, arrow 1, and remove,
arrow 2.
4. Insert allen wrench into the opening,
arrow 1.
00320051004F004C00510048000300280047004C0057004C005200510003