Page 72 of 284

71
Driving
Controls
Turn signals/
headlamp flasher
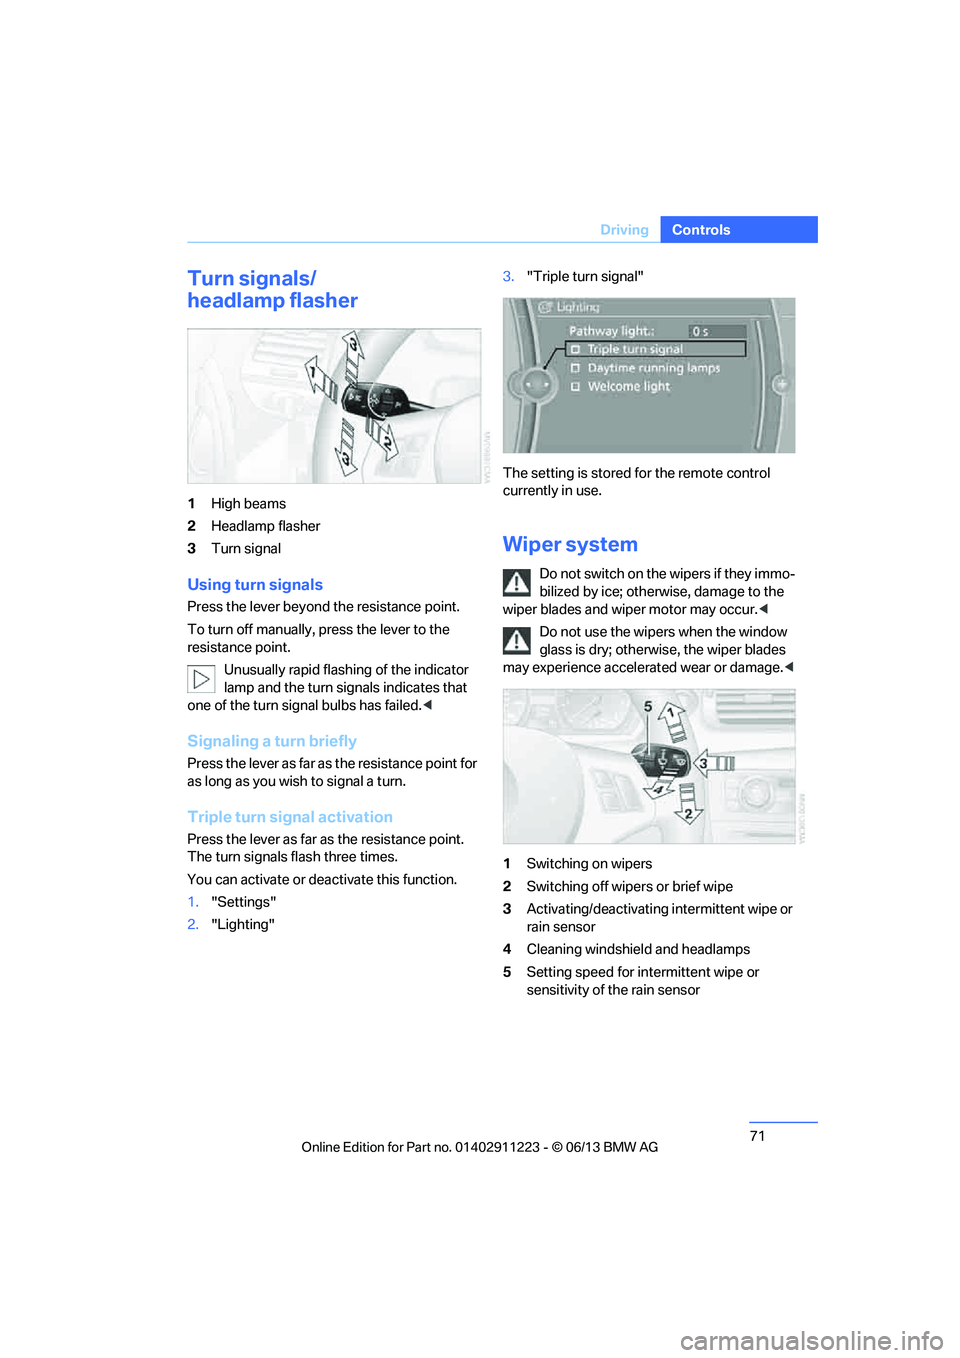
1
High beams
2 Headlamp flasher
3 Turn signal
Using turn signals
Press the lever beyond the resistance point.
To turn off manually, press the lever to the
resistance point.
Unusually rapid flashing of the indicator
lamp and the turn signals indicates that
one of the turn signal bulbs has failed. <
Signaling a turn briefly
Press the lever as far as the resistance point for
as long as you wish to signal a turn.
Triple turn signal activation
Press the lever as far as the resistance point.
The turn signals flash three times.
You can activate or deactivate this function.
1. "Settings"
2. "Lighting" 3.
"Triple turn signal"
The setting is stored for the remote control
currently in use.
Wiper system
Do not switch on the wipers if they immo-
bilized by ice; otherw ise, damage to the
wiper blades and wiper motor may occur. <
Do not use the wipers when the window
glass is dry; otherwis e, the wiper blades
may experience accelerated wear or damage.<
1 Switching on wipers
2 Switching off wipers or brief wipe
3 Activating/deactivating intermittent wipe or
rain sensor
4 Cleaning windshield and headlamps
5 Setting speed for intermittent wipe or
sensitivity of the rain sensor
00320051004F004C00510048000300280047004C0057004C005200510003
Page 247 of 284

246
MobilityReplacing components
Turn signals, front
PY21W bulb, 21 watts
The turn signal bulb can be changed via a cover
in the wheel arch.
1.Turn the respecti ve wheel inwards.
2. Using a coin, turn both locks of the cover all
the way to the left, arrows 1, and remove the
cover.
3. Turn the bulb holder to the left and remove
it, arrow 2.
4. Apply gentle pressure to the bulb while
turning it to the left for removal and
replacement.
5. Insert the bulb holder and lock it by turning
it to the right.
6. Attach the cover by positioning the bottom
edge first and then turn ing both locks all the
way to the right.
Side turn signals
W5W bulb, 5 watts
1. Press the rear edge of the lamp toward the
front with your fingertip, arrow 1 and pivot it
out, arrow 2. 2.
While simultaneously lifting the retaining
tab, rotate bulb hold er to the left and
remove.
3. Remove lamp and replace it.
To install, insert front end of the lamp and press
into place at the back.
Tail lamps with halogen headlamps
> Turn signal:
PY21W bulb, 21 watts
> Backup lamp:
W16W bulb, 16 watts
> Brake lamps:
P21W bulb, 21 watts
> Brake Force Display lamp:
H21W bulb, 21 watts
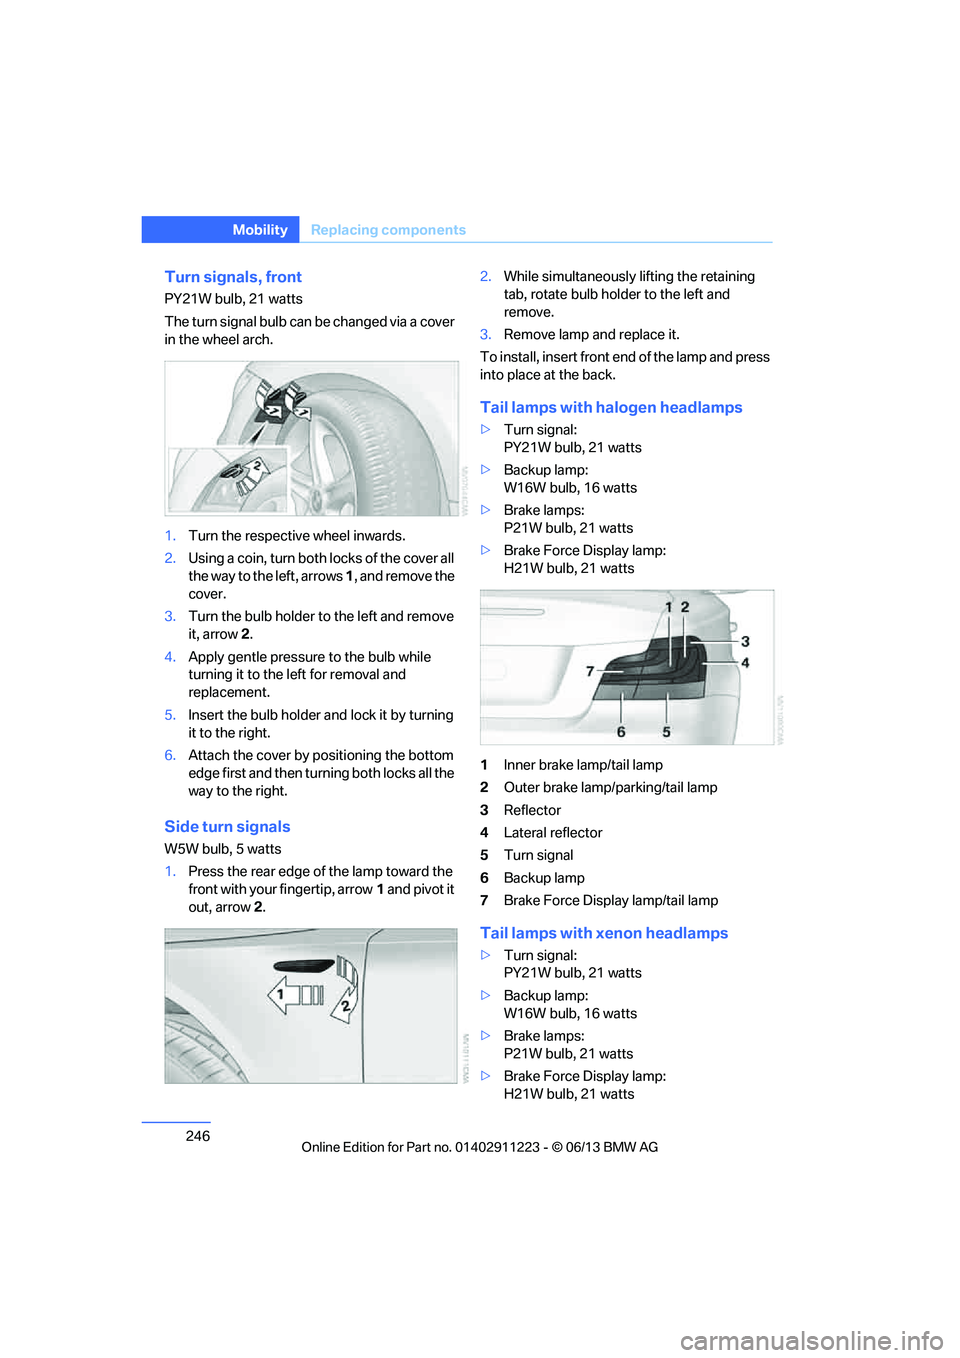
1 Inner brake lamp/tail lamp
2 Outer brake lamp/parking/tail lamp
3 Reflector
4 Lateral reflector
5 Turn signal
6 Backup lamp
7 Brake Force Display lamp/tail lamp
Tail lamps with xenon headlamps
>Turn signal:
PY21W bulb, 21 watts
> Backup lamp:
W16W bulb, 16 watts
> Brake lamps:
P21W bulb, 21 watts
> Brake Force Display lamp:
H21W bulb, 21 watts
00320051004F004C00510048000300280047004C0057004C005200510003
Page 248 of 284

247
Replacing components
Mobility
1
Roadside parking lamp and tail lamp LED
2 Inner brake lamp
3 Outer brake lamp
4 Reflector
5 Lateral reflector
6 Turn signal
7 Backup lamp
8 Brake Force Display lamp
Replacing tail lamps
Outer brake lamp
The outer brake lamp can be accessed through
a single socket.
The figure shows the right side of the vehicle.
1.Remove the cover from the panel of the
trunk.
2. Turn the bulb holder to the left, see arrow,
and remove it.
3. Apply gentle pressure to the bulb while
turning it to the left for removal and
replacement. 4.
Attach the bulb holder and turn it all the way
in the opposite direction.
5. Reattach the cover.
With Xenon headlamps, the parking/tail
lamp uses LED techno logy. After replac-
ing the bulb, ensure that the bulb holder is prop-
erly seated; otherwise, the roadside parking
lamp/tail lamp may not work. <
Inner brake lamp, turn signal, backup
lamp and Brake Force Display lamp
The bulbs are integrated in a single bulb holder.
1.Remove the cover from the panel of the
trunk.
2. Detach the bulb holder by pressing
together the clips, see arrows, and remove
it.
3. Brake lamps and turn signal: apply gentle
pressure to the bulb wh ile turning it to the
left for removal and replacement.
4. Backup lamp: pull the bulb out of the socket
and replace it.
5. Attach the bulb holder and let it snap into
place.
6. Reattach the cover.
License plate lamps, center brake
lamp, and parking/tail lamp
These lamps use LED technology for operation.
If they malfunction, please contact your BMW
center.
00320051004F004C00510048000300280047004C0057004C005200510003
Page 282 of 284

281
Everything from A to Z
Reference
Transmission
– 7-gear Sport automatic
transmission with double
clutch 66
– automatic transmission with
Steptronic 64
– idle position 67
– launch control 70
– manually unlocking parking lock 69
– manual transmission 64
– reverse gear 67
Transporting children safely 58
Transport securing devices, refer to Securing cargo 128
Tread depth, refer to Minimum tire tread 229
Trip, deleting 142
Trip, storing 142
Trip-distance counter, refer to Trip odometer 75
Triple turn signal activation 71
Trip odometer 75
Trips, changing 142
Trunk
– capacity 259
– comfort access 41
– enlarging, refer to Through- loading system 117
– lamp, refer to Interior
lamps 104
– opening from outside 38
Trunk lid 37
– comfort access 41
– emergency release 38
– opening from outside 38
– unlocking with remote control 35
Trunk net, refer to Securing
cargo 128 Turning circle, refer to
Dimensions 258
Turn signal 71
– indicator lamp 14
Turn signals
– replacing bulbs 246
– triple turn signal 71
Tying down loads, refer to
Cargo loading 128
U
Underbody protection, refer to
Caring for your vehicle 239
Uniform Tire Quality Grading/ UTQR 228
Units
– average fuel consumption 80
Units of measure
– temperature 80
Universal garage door opener,
refer to Integrated universal
remote control 111
Unlatching, refer to
Unlocking 34
Unlocking
– from inside 37
– from outside 34
– trunk lid 41
– without remote control, refer
to Comfort Access 40
Unlocking without a key, refer to Comfort Access 40
Updating software 184
Updating the navigation data 132
USB audio interface 178
USB interface 115
Using contact data 208
V
VCD168
Vehicle
– battery 248
– breaking in 124
– cargo loading 127
– decommissioning, refer to
Vehicle storage 242
– dimensions 258
– identification number, refer
to Engine compartment 232
– parking 63
– weight 259
Vehicle equipment 5
Vehicle jack 248
Vehicle storage 242
Ventilation 109
– draft-free 109
Ventilation when parked, refer to Parked car ventilation 110
Vents, refer to Ventilation 109
Video menu 168
Video playback 168,180
Voice, refer to Destination
guidance through voice
instructions 145
Voice commands
– overview 27
– short commands 260
– telephone 197
Voice instructions from navigation system 145
– repeating 145
– switching on/off 145
– volume 145
Voice phone book 198
Volume 154
– audio sources 154
– fuel tank, refer to
Capacities 259
– mobile phone 193
– voice instructions 145
Volume compensation, tone control 156
00320051004F004C00510048000300280047004C0057004C005200510003