2013 AUDI S4 SEDAN engine overheat
[x] Cancel search: engine overheatPage 13 of 294
Instrument s and warning /indicator lights 11
,&_ WARNING
- Always observe the warning in
¢ page 208, Engine compartment, be
fore opening the hood and checking the
engine coolant level.
- Never open the engine hood if you see or
hear steam, or if you see engine coolant
dripping from the engine compartment.
You could burn yourself. Let the engine cool off first so that you cannot hear or
see any steam or engine coolant .
(D Note
-Mounting additional lights or accessories
in front of the air inlets reduces the cool
i ng effect of the radiator. At h igh outside
temperatures or high engine load, the
engine could overheat.
- The front spo iler has been designed to
properly distribute the cooling air when
the veh icle is moving. If the spoiler is
damaged, this could reduce the cooling
effect and the engine could then over
heat. Ask your authorized Audi dealer for
assistance.
Tachometer (engine rev counter)
The tachometer indicates the engine RPM
(revolutions per minutes).
If engine RPM d rops be low 1,500 , you should
downshift to the next lower gear. The red area
at the end of the scale indicates maximum
permissible engine RPM after the break-in pe
riod. Before reaching this area, move these
lector lever to position D/S or ease your foot
off the accelerator pedal.
(D Note
The tachometer needle@¢ page 10,
fig . 3
shou ld only briefly be in the red
zone: you could damage your engine! The
beg inning of the red zone varies depend
ing on the engine.
@) For the sake of the environment
Upshifting early saves fuel and reduces en
gine noise.
~ button
You can perform different functions with this
button.
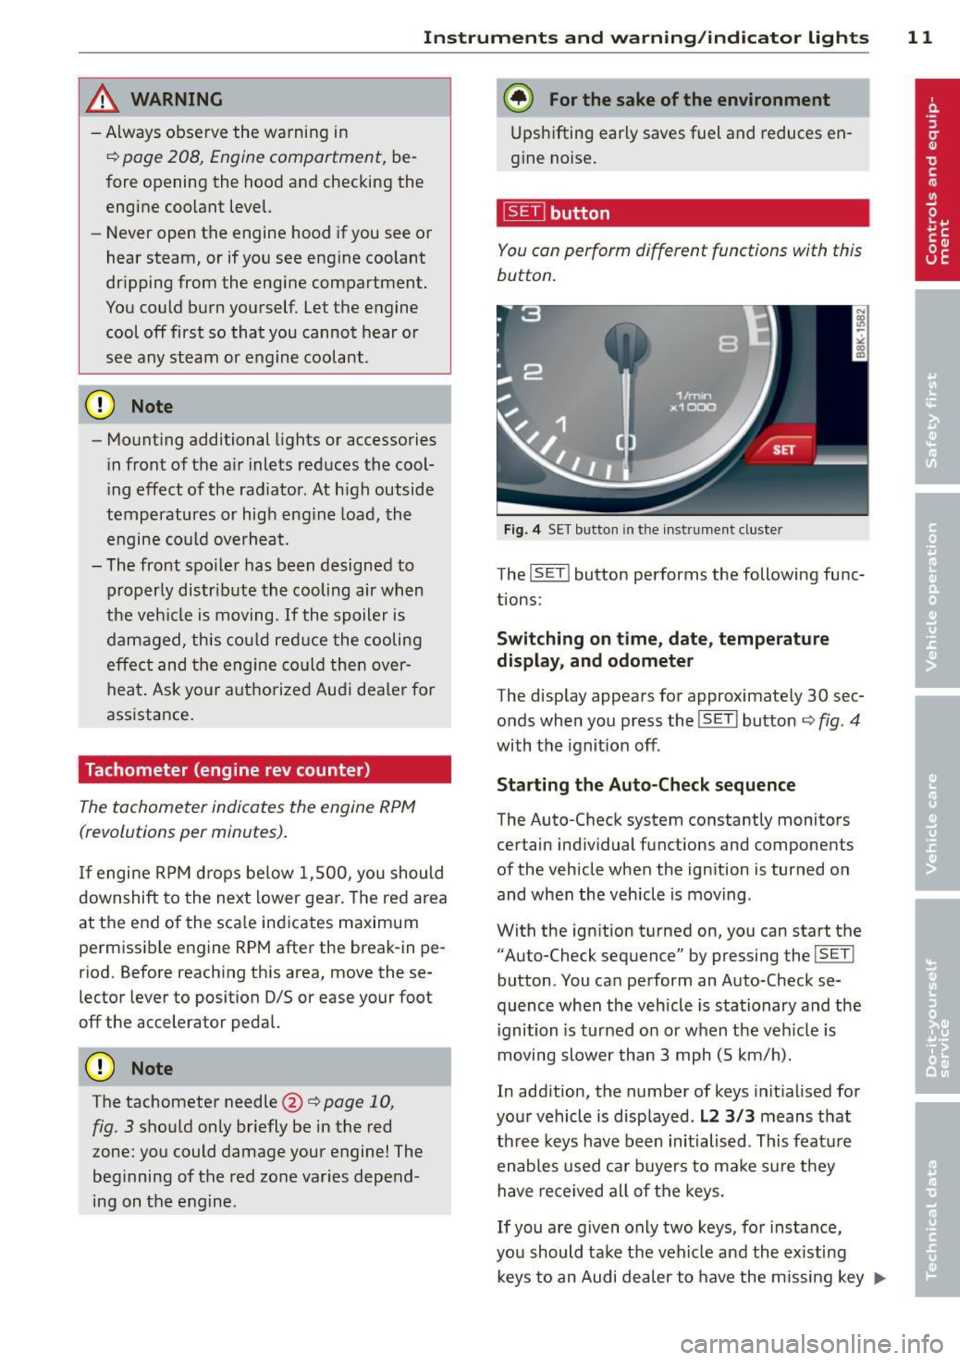
Fig. 4 SET button in th e in strument cluste r
The !SET ! button performs the following func
tions:
Switching on time, date, temperature
display , and odometer
The display appears for approximately 30 sec
onds when you press the
!SET I button ¢ fig. 4
with the ignition off.
Starting the Auto-Check sequence
The Auto-Check system constantly monitors
certain individual functions and components
of the vehicle when the ignition is turned on
and when the vehicle is moving .
With the ignition turned on, you can start the "Auto-Check sequence" by pressing the
! SET !
button . You can perform an Auto-Check se
quence when the vehicle is stationary and the
ignition is turned on or when the veh icle is
moving slower than 3 mph (5 km/h).
In addition, the number of keys init ialised for
your vehicle is disp layed .
L2 3/3 means that
three keys have been initialised. This feature
enables used car buyers to ma ke sure they
have received all of the keys.
If you are given only two keys, for instance,
you should take the vehicle and the existing
keys to an Audi dea ler to have the missing key
II>-
Page 15 of 294

Instrument s and warnin g/indic ator ligh ts 13
(D Note
Never run the tank completely dry! An ir
reg ular supply of fuel can cause eng ine
m isfiring and fuel could enter into the ex
haust system. The catalyt ic converter
could the n overheat and be damaged .
Warning/indicator
Lights
Description
The indicator lights in the instrument cluster
blink or turn on . They indicate functions or
malfunct ions ¢,&. .
Messages may appear with some indicator
lights. A warning signal will sound at the
same time . The messages disappear again af
ter a short t ime . To display a message again ,
pressthelSE T!button
¢ page 11. If severa l
malfunc tions occu r, each of the indica to r/
warn ing lamps will be d isplayed in succession
for abo ut two seconds at a time .
Some ind icators lights in the disp lay can turn
on in several colors.
_& WARNING
- F ailure to heed warning lights and o ther
impor tant vehicle info rmation may result
in serious persona l injury o r vehicle dam
age.
- Whenever sta lled or stopped for repair,
move the vehicle a safe distance off the
road, stop the engine, and turn on the
eme rgency flasher¢
page 46.
-The e ngine compartment of any motor
vehicle is a potentially hazardous area.
Before you check anything in the engine
compartment, stop the engine and let it
cool down. Always exercise extreme cau
t ion when wor king under the hood
¢ page 208, Engine compartment
(D Tips
Ma lfunctions or faults w ill be identified ei
ther with a red symbo l (pr io rity 1 -Dan- ger!) or with a yellow symbol (prio
rit y 2 -
Warning).
' Overview
Some indicator lights t urn on briefly to check
the function of that system when you switch
the ignit ion on . These systems are marked
with a../ in the fo llow ing tables . If one of
these indicator lights does not tu rn on, there
i s a ma lf u nct ion in that system.
Red indicator lights
Red symbo ls indicate a prior ity ma lfunction -
Danger!
- Pull off the road .
- Stop the vehicle.
- Tur n off the engi ne.
- Check t he malfunc tioning system. Contac t
your author ized A udi dealer or a q ualified
workshop for assistance.
USA models :
Brake system../
¢page 15
----~r~
Canada models:
Brake system ../
¢page 15
USA mod els :
Elec tromech anical parki ng br ake
¢ page 16
Canada models:
Electromechanical parking brake
¢page 16
Safety be lts
¢ page 17
Electromechanical steering ../
¢page 188
Battery
¢page 17
Engine oil pressure
¢page 17
Eng ine oil level
¢page 17
Page 18 of 294

16 Instrum ent s and w arn ing /indic ato r light s
possible to set the parking brake or release
it once it has been set. Seek professional as
s istance .
(USA models): If the warning light
1111 and
the warning light
liJ appear together, imme
diate ly contact your authorized Audi dealer or
qua lified workshop to have all brake pads in
spected
¢ page 20.
When the light comes on, an audib le warning
signal is also given .
A WARNING
-Always observe the warnings in
¢ page 208, Engine compartment, be
fore opening the hood and checking the brake flu id .
- Driv ing with low brake fluid is a safety
hazard. Stop the car and get professional
assistance.
- USA models: If the 1111 warn ing light,
the
G1 warning light and the m;B warn
ing light come on together, the rear
wheels co uld lock up first unde r hard
braking. Rear wheel lock-up can cause
loss of vehicle con tro l an d an accident .
Have your vehicle repai red immedia tely
by your aut ho rized Audi dea le r or a quali
fied workshop. Drive slowly and avoid sudden, hard brake applications.
- Canada models: If the brake warn ing
light ., the
DJ warning light and the
ABS warning light
BJ come on together,
the rear wheels could lock up first unde r
hard braking. Rear wheel lock-up can
cause loss of vehicle control and an acc i
dent . Have yo ur vehicle repaired immed i
ately by your authori zed A udi dealer or a
qu alifie d wo rkshop. Dr ive slowly and
avo id su dden, hard brake appli cat ions.
- If the brake warning/indicator light does
no t go out afte r a few se con ds and the
par king brake is released, or lights up
whi le you are driving, the fluid level in
the brake f luid reservoir is too low. If you
believe that it is safe to do so, proceed
immediately at low speed to the nearest
authorized Audi dealer or qualified repair facility and have the brake system in
spected.
- Always keep in mind that after severa l
brake applications, you will need greater
pressure on the brake pedal to stop your
veh icle. Do not rely on strained brakes to
respond with max imum stopping power
in critical s ituations . You must allow for
increased braking distances. The extra
d istance used up by fading bra kes could
le ad to an ac cident.
:l~/(®) Electromechanical parking brake
The warning/indicator light monitors the
electromechanical parking brake .
If the indicator light. (USA models)/ .
(Canada models) turns on, the pa rking brake
was set. If the parking brake is set when the
ignition is off, the ind icator light turns off af
ter abo ut 20 seconds.
The wa rning/i ndicator lig ht will go out when
the pa rking brake is re leased .
• (USA models ) /. (Can ada model s) Cau
tion: Vehicle parked too ste ep
If the indicator light b links and the message
appears, there is not enough braking power to
keep the vehicle from roll ing . The brakes have
overheated . The veh icle cou ld roll away eve n
o n a sma ll incline .
Press brake pedal to release parking bra ke
To re lease the parking brake, press the brake
pedal and press t he button(® or start driving
with starting assist at the same time
¢ page 78.
Please relea se park ing brake
T o re lease the par king b rake manually , p ress
t h e b rake peda l and press the button{®) at
the same time. The pa rking brake on ly releas
es automatically if the driver's safety be lt is
fastened.
Ill Parking brake!
If the 11,1 indicator light turns on and t his
message appears, the re is a parki ng b rake
Page 83 of 294
.. Select : ICAR lfunction button> Car systems
control button > Driver assist > Speed
warning.
Warning thresho ld 2 can be set in the speed
range starting from 20 mph to 150 mph (30
km/h to 240 km/h). Settings can each be ad
justed in intervals of 6 mph (10 km/h).
Cruise control
Switching on
The cruise control system makes it possible to
drive at a constant speed starting at 20 mph (30 km/h).
®
f
®t
0
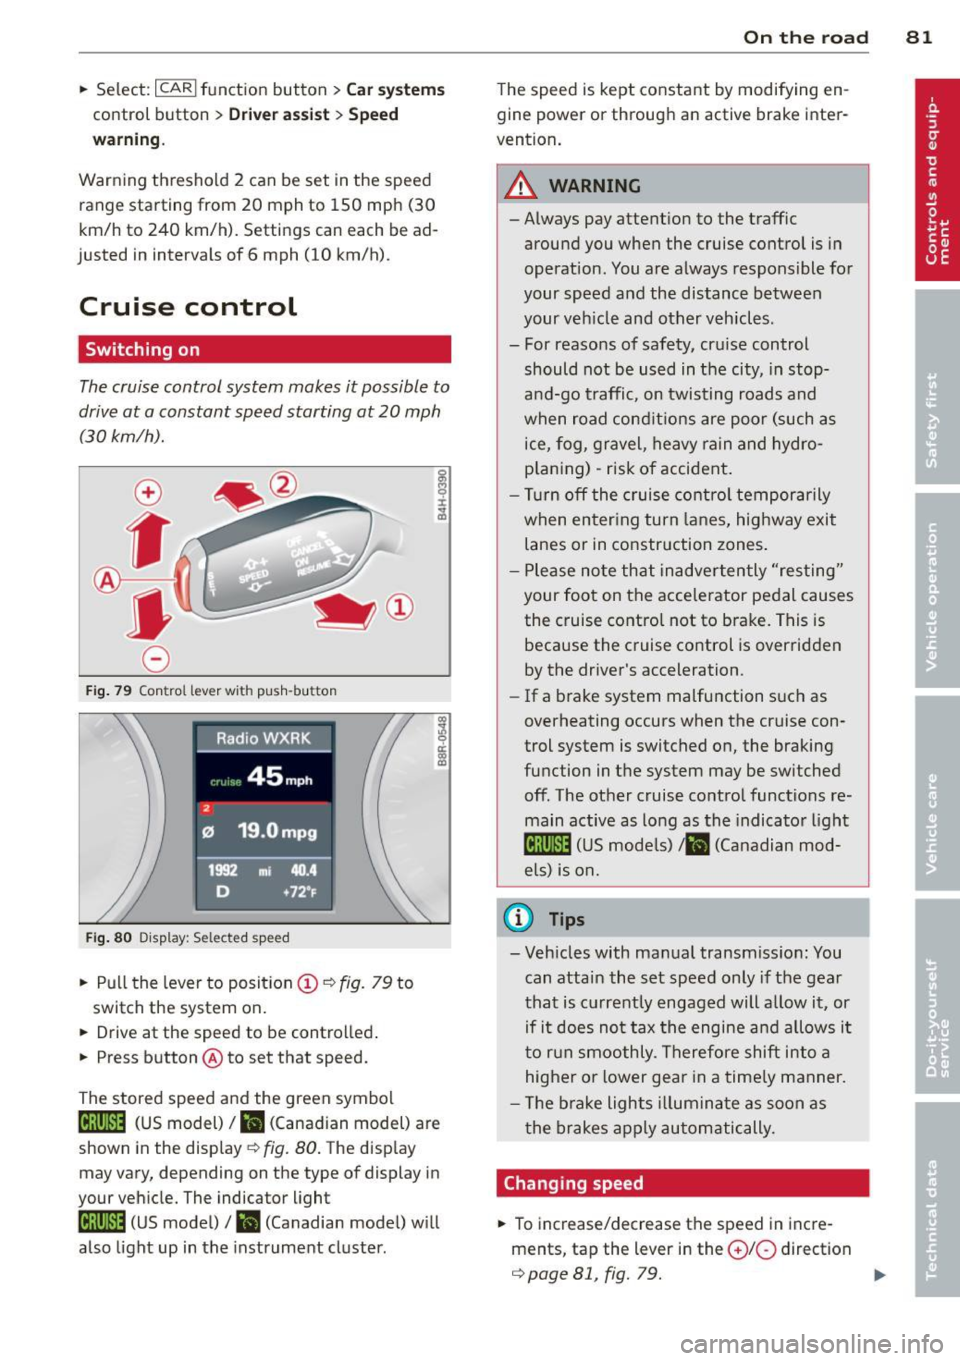
Fig. 79 Con tro l lev er w it h push-bu tton
Fig. 80 D isplay : S ele ct ed speed
.. Pull the lever to position (D ¢ fig. 79 to
switch the system on.
.. Drive at the speed to be controlled .
.. Press button @to set that speed.
The stored speed and the green symbol
[ij;jl)~i~ (US model)/ .. (Canadian model) are
shown in the display ¢ fig. 80. The display
may vary, depending on the type of display in
your vehicle. The indicator light
[ij;(l)~i~ (US model)/ B (Canadian model) w ill
also light up in the instrument cluster.
On the road 81
The speed is kept constant by modifying en
gine power or through an active brake inter
vention.
_& WARNING
- Always pay attent ion to the traffic
around you when the cruise control is in
operation. You are always responsible for
your speed and the distance between
your veh icle and other vehicles .
- For reasons of safety, cru ise control
should not be used in the city, in stop
and-go traffic, on twisting roads and
when road conditions are poor (such as
ice, fog, gravel, heavy rain and hydro
p lani ng) -risk of accident.
- Turn off the cruise control temporarily
when enter ing turn lanes, highway exit
lanes or in construction zones .
- Please note that inadvertently "resting"
your foot on the accelerator pedal causes
the cruise control not to brake. This is
because the cruise control is overridden
by the driver's acceleration .
-If a brake system malfunction such as
overheating occurs when the cruise con
trol system is switched on, the braking
function in the system may be switched off. The other cruise control functions re
main active as long as the indicato r light
lijj(l )~i~ (US models) li'I (Canadian mod
e ls ) is on.
@ Tips
-Veh icles with manual transmiss ion: You
can attain the set speed only if the gear
that is currently engaged will allow it, or
if it does not tax the engine and allows i t
to run smoothly. Therefore shift into a
higher or lower gear in a timely manner.
- The brake lights illuminate as soon as
the brakes apply automatically.
Changing speed
.. To increase/decrease the speed in incre
ments, tap the lever in the
0 10 direction
¢ page 81, fig. 79. Ill>
Page 90 of 294
88 Transmission
Manual shift program
Applies to vehicles: with multitronic or tiptron ic
Using the manual shift program you can
manually select gears .
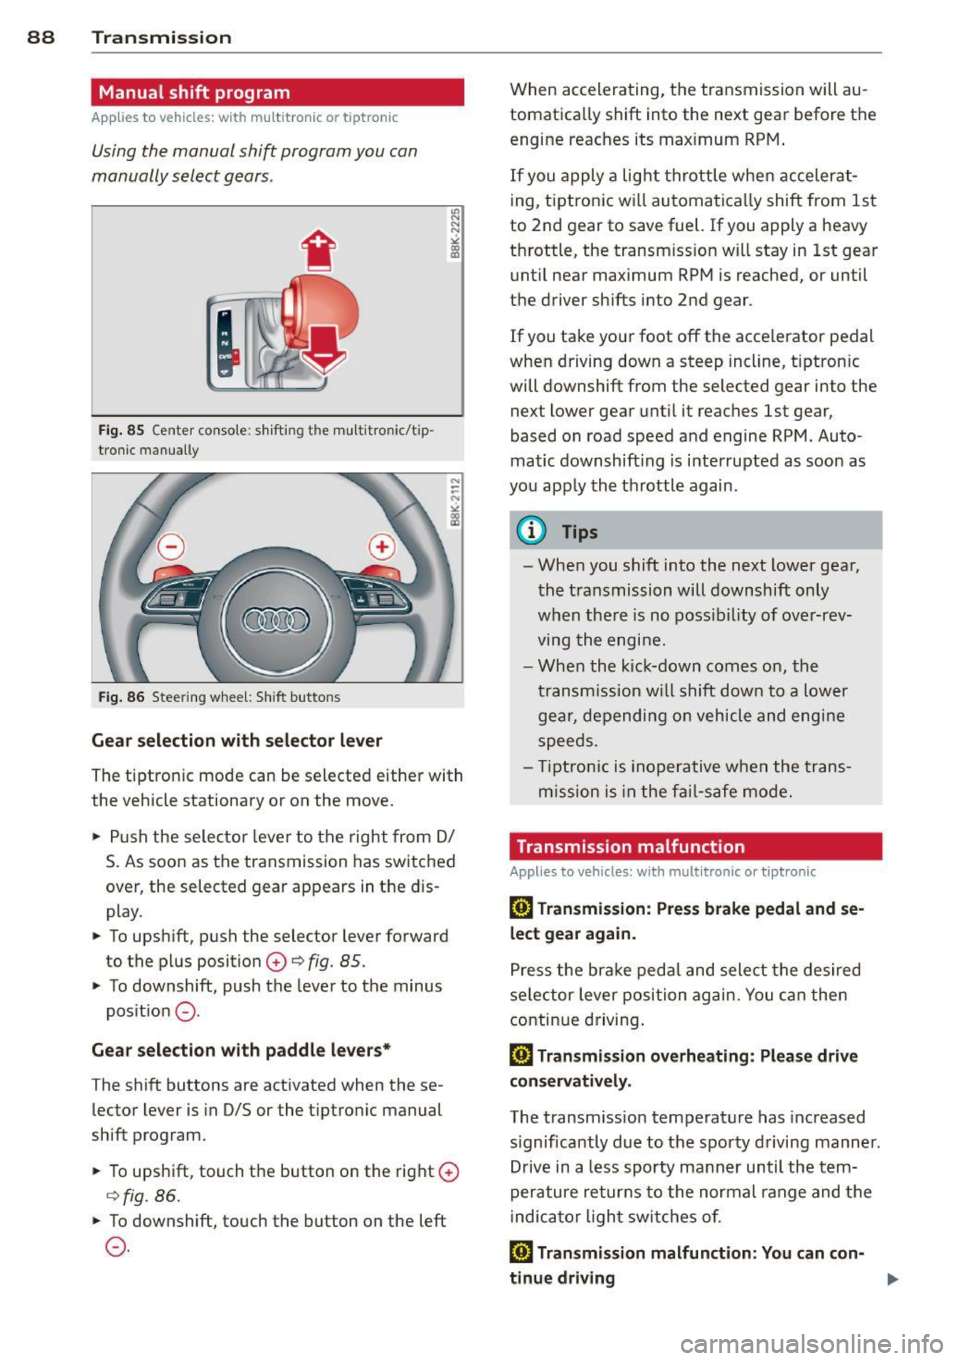
Fig. 85 Center console : shift ing t he multitro nic/t ip ·
tronic manual ly
Fig . 86 Steering wheel: Shift buttons
Gear selection with selector lever
"' N
N
~
" a> CD
The tiptronic mode can be selected either with
the vehicle stationary or on the move .
.,. Push the selector lever to the right from
DI
S. As soon as the transmission has switched
over , the selected gear appears in the dis
play.
.,. To upshift, push the selector lever forward
to the plus position
0 ¢ fig. 85 .
.,. To downshift, push the lever to the minus
position
0 -
Gear selection with paddle levers*
The shift buttons are activated when these
lector lever is in D/S or the tiptronic manual
shift program.
.,. To upshift, touch the button on the right
0
¢fig . 86.
.,. To downshift, touch the button on the left
0-
When accelerating, the transmission will au
tomatically shift into the next gear before the
engine reaches its maximum RPM .
If you apply a light throttle when accelerat
ing, tiptronic will automatically shift from 1st
to 2nd gear to save fuel. If you apply a heavy
throttle, the transm iss ion will stay in 1st gear
until near maximum RPM is reached, or until
the driver shifts into 2nd gear .
If you take your foot off the accelerator pedal
when driving down a steep incline, tiptronic
will downshift from the selected gear into the
next lower gear until it reaches 1st gear,
based on road speed and engine RPM . Auto ·
matic downshifting is interrupted as soon as
you apply the throttle again .
(D Tips
-When you shift into the next lower gear,
the transmission will downshift only
when there is no possibility of over-rev
ving the engine.
- When the kick-down comes on, the
transmission will shift down to a lower
gear, depending on vehicle and engine
speeds .
- Tiptronic is inoperative when the trans
m ission is in the fail-saf e mode.
Transmission malfunction
Applies to vehicles: with mult itronic or tiptronic
[O] Transmission: Press brake pedal and se
lect gear again .
Press the brake pedal and select the desired
selector lever position again. You can then
continue driving.
[O] Transmission overheating: Please drive
conservatively.
The transmission temperature has increased
s ignificantly due to the sporty driving manner.
Drive in a less sporty manner until the tern·
perature returns to the normal range and the
indicator light switches of.
[O] Transmission malfunction: You can con-
tinue driving ..,.
Page 94 of 294
92 Transmi ssion
• Wait a moment until the transm ission
shifts . You wi ll notice a slight movement
when the gear engages.
• Re lease the brake pedal and press the accel
erator pedal
c::> .&, .
Stopping t empora ril y
• Press the brake peda l to prevent the vehicle
from moving, for example at traffic lights .
• Do not press the accelerator pedal when do -
ing this.
P a rk ing
If the selector lever is not in the P position
when you open the driver's door, the vehicle
could ro ll. The message
T ran smi ssio n: Car
m ay roll! Shift to p ark!
appears.
• Press and ho ld the brake pedal
c::> .&, .
• Activate the parking brake .
• Hold t he interlock button down, place the
selector lever in the
P position and release
the interlock button.
Stopping on an inclin e
• Always press the b rake peda l to hold the ve
hicle in p lace and prevent it from "rolling
back" c::>
.&,. Do not try to prevent the ve hicle
from "ro lling back" when a gear is engaged
by increasing the engine speed
c::> (D.
Starting on an incline
• Activate the parking brake .
• With the driving gear se lected, press the ac
celerator pedal carefully. The parking brake
will release automat ically if your seat be lt is
fastened.
Dr ivin g on an incline: Under certain circum
stances, such as driving in the mountains, it may be useful to sw itch temporarily to the
manual shift program in order to adjust the
gears to the driving conditions by hand
c::> & .
On slopes, activate the parking brake first and
then move the selector lever to the P posit ion.
This prevents the lock ing mechanism from be
ing loaded too heav ily and w ill make it easier
to move the selector leve r out of P .
A WARNING
-Never leave your vehicle with the engine
running while in gear. If you must leave
your veh icle when the engine is running,
activate the pa rking brake and move the
selecto r lever to P .
- Powe r is still transmitted to the w heels
when the engine is runn ing at idle. To
p revent the vehicle from "c reeping", you
m ust keep your foot on the brake when
the engine is running and the selector
lever is in D/S or R or "t iptronic" mode is
selected.
- Do not press the accelerator pedal when changing the se lector lever position
while the veh icle is stationary and the
engine is running.
- Never sh ift into R or
P while driving .
- Before driving down a steep s lope, re-
duce your speed and shift into a lower
gear with "tiptronic".
- Do not ride the brakes o r press the bra ke
pedal too often or too long. Constant
brak ing ca uses the brakes to overheat
and substantially reduces braking per
formance, increases braking d istance or
causes complete failure of the brake sys
tem.
- To preve nt the vehicle from ro lling back
when stopp ing on inclines, always hold it
in place with the b rake pedal or parking
b rake.
- Never hold the vehicle on an incline with
a slipping clutc h. T he clutch opens auto
mat ica lly when it becomes too hot from
the overload. An indica tor l amp
mJ ill u
minates and a driver message appears
c::>
page 95 when the clutc h is overload
ed .
(D Note
-When s topping on an incl ine, do no t try
to hold t he vehicle in place by pressing
the acce lerator pedal while a driving gear
is se lected. This can cause the S t ron ic
transm ission to overheat and can dam
age it. Activate t he parking brake or
Page 187 of 294
ESC includes and/or works together with the
anti-lock brake system (ABS), brake assist sys
tem, anti -slip regulation (ASR) , e lectronic dif
ferential lock (EDL), dynamic steering* and electronic i nteraxle differential lock* /selective
wheel torque control* . ESC is switched on all
the t ime. I n certain s ituations when you need
less traction, you can switch
off ASR by press
i ng the button~~
page 186, fig. 159 or
~ page 186, fig. 160. Be sure to sw itch ASR
on again when you no longer need less trac
tion.
Anti-lock b ra king s ystem (ABS)
ABS prevents the wheels from locking up
when braking. The vehicle can still be steered
even d uring hard brak ing . Apply ste ady p res
sure to the brake pedal. Do not pump the ped
a l. A pulsing in the brake peda l indicates t hat
the system is he lping you to brake the vehicle .
Brake assist system
The brake assist system can decrease bra king
d istance. It increases braking power when the
d river presses the brake pedal quick ly in eme r
gency situations . You must press and hold the
brake peda l until the situation is over. In
veh icles w ith adaptive cru ise contro l*, the
brake assist system is more sensit ive if the
d istance detected to the veh icle ahead is too
small.
Anti- slip regulati on (ASR)
ASR reduces engine power when the drive
wheels begin to spin and adapts the force to
the road condit ions. This makes it eas ier to
start, accelerate and drive up hills.
Elect ronic diffe renti al lo ck (EDL )
The ED L brakes wheels that are spinning and
transfers the drive power to the other drive
wheel or wheels if the vehicle is equipped with
all-wheel drive*. This function is available up
to about 60 mph (100 km/h) .
In extreme cases, EDL automatica lly switches
off to help keep the brake on the braked whee l
from overheating. EDL w ill switch on again au-
Intellig ent technolog y 185
tomat ica lly when conditions have returned to
norma l.
Dynamic steering*
On vehicles with dynam ic steering*, ESC helps
stab il ize the s teer ing in crit ica l sit uat io ns.
Electronic interaxle differential lock* /
selective wheel torque control*
T he electronic i nteraxle differential lock (front
whee l dr ive) or the se lective whee l to rque
control (all-whee l dr ive) opera tes when dr iv
ing thro ugh curves. The front wheel on the in
side of the c urve or both whee ls on the inside
of the curve are braked selectively as needed .
This min imizes sliding in the front wheels and
allows for more precise driving through
cu rves . The applicable system may not acti
vate when dr iv ing in wet or snowy conditions.
A WARNING
- ESC, ABS , ASR, EDL dynam ic steering*
a nd the elect ronic interaxle differential
loc k* /se lective wheel torque control*
function cannot overcome the laws of
physics. This is especially important on
slippery or wet roads . If the systems be
gin acting to stabilize your vehicle, you
should immediately change yo ur speed
to match the road and traff ic conditions.
Do not let the increased safety provided
by these systems tempt you to take risks .
Doing so will increase the risk of a loss of
veh icle contro l, col lision and ser ious per
sonal injuries.
- Always adapt your speed to road, traffi c
and wea ther conditions. The risk of los
ing con tro l of the vehicle increases when
driving too fast, espec ially through
curves and on slippery or wet roads, and
when dr iv ing too close to vehicles up
ahead. ESC, ABS, the brake ass ist sys
tem, ASR, EDL dynam ic steering* and the
electronic interaxle differentia l lock*/se
lective whee l torque control* function
cannot prevent collisions.
•
•
Page 190 of 294
188 Intelligent technology
200 kilometers) of normal city driving.
You can compensate for this by pressing
the brake pedal more firmly. This also applies later when new pads are instal
led .
- You should perform braking maneuvers
for the purpose of cleaning the brake
system only if road conditions permit.
Other road users must not be put at risk -
you may cause an acc ident!
- Before descending a steep grade, reduce
speed and shift transmission into a lower
gear or lowe r driving range. Do not ride
the brakes or hold the pedal down too
long or too often. This could cause the
brakes to get hot and diminish braking
efficiency.
- Do not "ride the brakes" by resting your
foot on the pedal when you do not intend
to brake . This may cause the brakes to
overheat, premature wear and increased
stopping distance.
- Under certain climatic and operating
conditions such as passing through wa
ter, driving in heavy rain or after washing
the vehicle, the effectiveness of the
brakes can be reduced. In winter, ice can
accumulate on the brake pads, linings,
discs and drums. Carefully apply brakes
for a test. Brakes will dry and ice coat
ings will be cleaned off after a few care
ful brake applications.
- Driving for an extended period of time on
salt-covered roads without using your
brakes can also affect braking efficiency.
Clean off accumulated salt coating from
brake discs and pads with a few careful
brake applications.
- If you damage the front spoiler, or if you
install a different spoiler, be sure the air
flow to the front brakes is not obstruct
ed . Otherwise the brake system could
overheat reducing the effectiveness of
the entire brake system.
- Failure of one brake c ircuit will impair
the braking capability resulting in an in
creased stopping distance. Avoid driv ing
the vehicle and have it towed to the near- est authorized Audi dealer or
qualified
workshop.
- Never let the vehicle roll to a stop with
the engine shut off.
- If the brake booster is not working, for
example when towing your vehicle, or
because the brake booster has somehow
been damaged, the brake pedal must be
pressed considerably harder to make up
for the lack of booster assistance.
Electro-mechanical
power assist, dynamic
steering
The electro-mechanical power assist helps
the driver when steering.
Power steering adapts electronically based on
the vehicle speed .
Indicator lights and messages
• Steering defective! Do not drive vehicle!
If this indicator light turns on and stays on
and this message appears, the power steering
may have failed.
Do
not continue driving . See your authorized
Audi dealer or other qualified repair facility
for assistance.
E!"4 Dynamic steering: System fault! You can
continue driving
If the indicator light turns on and the mes
sage appears, the steering may be more diffi
cult to move or more sensitive than usual. The
steering wheel may also be at an angle when
driving straight .
Drive slowly to your authorized Audi dealer or
qualified workshop to have the malfunction
corrected .
ls!'fl Dynamic steering: initializing
If this driver message appears and the indica
tor light is flashing on the instrument panel,
dynamic steering* is being reinitialized. Once
you start the engine after this is finished, the ..,..