Page 23 of 260

22
System Setup
Voice Control System
Your vehicle has a voice control system that allows hands-free operation of most of
the navigation system functions. You can also control the audio and climate control
system, and make and rece ive phone calls using Bluetooth ® HandsFreeLink®.
The voice control system uses the d (Talk) and K (Back) buttons on the steering
wheel and a microphone near the map lights on the ceiling.
A “Voice Info” feature provides a tutorial that explains how to use the voice control
system.
2 Voice Help P. 5
Command Input
If the system does not understand a command or you wait too long to give a
command, the system asks y ou to repeat the command.
When you give a command, the system ge nerally either repeats the command as a
confirmation or asks you for further informa tion. If you do not wish to hear this
feedback, you can turn it off. However, list ening to the feedback will help familiarize
you with the way the system expe cts commands to be phrased.
2Basic Settings P. 26
If the system cannot perform a command or the command is not appropriate for the
screen you are on, the system beeps.
On character input screens, a list of possi ble characters is displayed if the system
does not recognize your command.
You can find out which voice commands are available for a particular screen using
the d Help command. The system will disp lay and read the list of available
commands to you.
1 d (Talk) Button
When you press the d (Talk) button, a helpful
prompt asks what you would like to do. Press
and release the d (Talk) button again to bypass
this prompt and give a command.
1 Command Input
The audio system is muted while using the voice
control system.
RDX_KA-31TX4800.book Page 22 Monday, January 30, 2012 11:32 PM
QRG
Page 25 of 260

24
System Setup
Interface Settings
Display and Volume Settings
HINFO button Set up
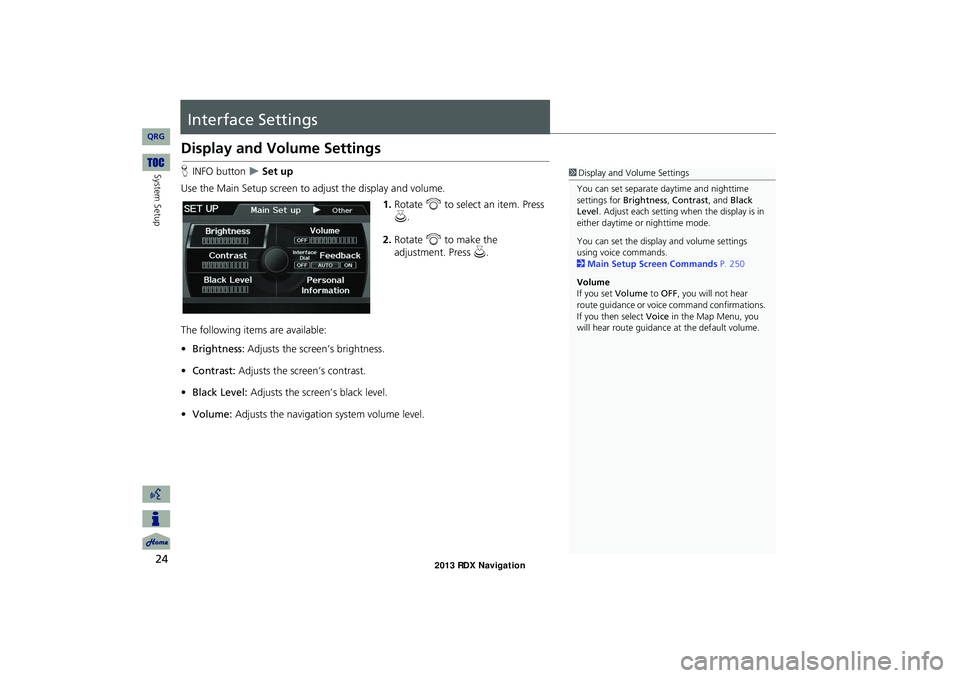
Use the Main Setup screen to ad just the display and volume.
1.Rotate i to select an item. Press
u .
2. Rotate i to make the
adjustment. Press u.
The following item s are available:
• Brightness: Adjusts the screen’s brightness.
• Contrast: Adjusts the screen’s contrast.
• Black Level: Adjusts the screen’s black level.
• Volume: Adjusts the navigation system volume level.1Display and Volume Settings
You can set separate daytime and nighttime
settings for Brightness, Contrast, and Black
Level . Adjust each setting when the display is in
either daytime or nighttime mode.
You can set the display and volume settings
using voice commands.
2 Main Setup Screen Commands P. 250
Volume
If you set Volume to OFF, you will not hear
route guidance or voic e command confirmations.
If you then select Voice in the Map Menu, you
will hear route guidance at the default volume.
RDX_KA-31TX4800.book Page 24 Monday, January 30, 2012 11:32 PM
QRG
Page 27 of 260

26
Interface SettingsBasic Settings
System Setup
Basic Settings
HINFO button Set up Other Basic Settings
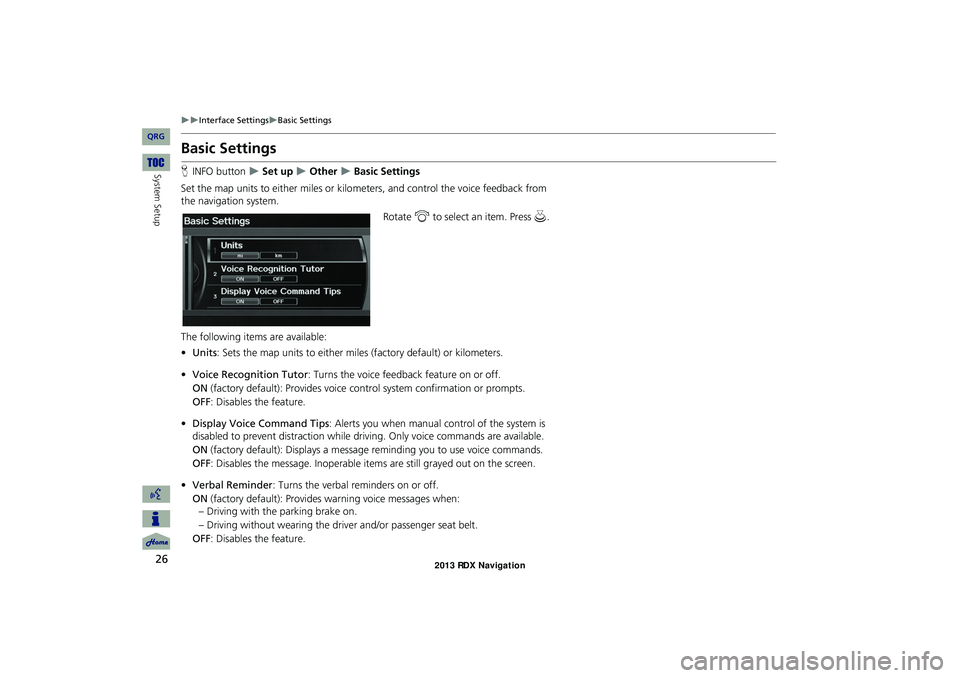
Set the map units to either miles or kilo meters, and control the voice feedback from
the navigation system.
Rotate i to select an item. Press u .
The following item s are available:
• Units : Sets the map units to ei ther miles (factory default) or kilometers.
• Voice Recognition Tutor : Turns the voice feedback feature on or off.
ON (factory default): Provides voice control system confirmation or prompts.
OFF : Disables the feature.
• Display Voice Command Tips : Alerts you when manual control of the system is
disabled to prevent distraction while driv ing. Only voice commands are available.
ON (factory default): Displays a messag e reminding you to use voice commands.
OFF : Disables the message. Inoperable items are still grayed out on the screen.
• Verbal Reminder : Turns the verbal reminders on or off.
ON (factory default): Provides warning voice messages when:
– Driving with the parking brake on.
– Driving without wearing the driv er and/or passenger seat belt.
OFF : Disables the feature.
RDX_KA-31TX4800.book Page 26 Monday, January 30, 2012 11:32 PM
QRG
Page 29 of 260
28
Interface SettingsColor
System Setup
HINFO button Set up Other Color Map Color
Set separate map colors for Day and Night modes. 1.Rotate i to select Day or Night .
Press u.
2. Rotate i to select a color for the
map screen. Press u.
H INFO button
Set up Other Color Menu Color
Set separate menu colors for Day and Night modes. 1.Rotate i to select Day or Night .
Press u.
2. Rotate i to select a color for the
menu screens. Press u.
■Map Color1 Map Color
For Day mode
Set to WHITE (factory default is BEIGE ) to obtain
the best daytime display contrast.
For Night mode
Set to BLACK (factory default) to obtain the best
nighttime display contrast.
■ Menu Color1 Menu Color
For Day mode
Set to WHITE (factory default) to obtain the best
daytime display contrast.
For Night mode
Set to BLACK (factory default) to obtain the best
nighttime display contrast.
RDX_KA-31TX4800.book Page 28 Monday, January 30, 2012 11:32 PM
QRG
Page 30 of 260
29
Interface SettingsColor
System Setup
Set the screen brightness separately for Day and Night modes. Press the a
(Display mode) button to cycle through the display modes (Day to Night to Off).
1. Press the a button.
The Brightness bar is displayed
for a few seconds.
Rotate i to adjust the
brightness. Press u.
2. Press the a button again.
Repeat the procedure to switch
the display modes.
■Switching Display Mode Manually1 Switching Display Mode Manually
A visual guide helps y ou see the difference
between Day an d Night modes.
2 Day or Night Mode P. 11
Recommended Settings
•Select mid-range for the dash illumination.
•Select WHITE for the map Day display and
BLACK for the map Night display.
Continued
RDX_KA-31TX4800.book Page 29 Monday, January 30, 2012 11:32 PM
QRG
Page 31 of 260

30
Interface SettingsColor
System SetupIllumination
controlPriorityOperation
a button1Selects Day, Night, or Off display mode. This button has
the highest priority and overrides all other display control
adjustments listed below.
Remember: Once you press this button, you assume full
manual control of the display mode until the power mode
Sunlight sensor
(see your
Owner’s Manual
for location)
2 If the sunlight sensor detects daylight and the headlights
are turned on, the system automatically overrides the
Night display and displays the Day display mode.
Remember: If desired, use the a button to override
this automatic choice.
Dash illumination
adjustment
buttons (see your
Owner’s Manual
for location)
3When headlights are turned on, and you wish to have the
Day display mode, adjust the illumination to the full
brightness setting (beeps).
Remember: Adjust the dash brightness back to mid-range
to allow auto switching by sensing the headlights are on or
off.
Headlights
(Auto/On/Off)
4 When turned on, the display changes to Night display
mode. The previous three controls listed above can
“cancel” this function.
Remember: Use the a button, or adjust the dash
illumination to full brightness, to set the display to your
desired choice.
Screen color
choice
N/AThe user can select the color of the screen that will be
displayed for the Day and Night display modes described
above.
Remember: For best contrast, ensure that the map color is
white for Day and black for Night.
RDX_KA-31TX4800.book Page 30 Monday, January 30, 2012 11:32 PM
QRG
is set to VEHICLE OFF (LOCK).
Page 32 of 260
31
Interface SettingsLanguage
System Setup
Language
HINFO button Set up Other Language
Set the system language used on all scr eens. You can choose from three languages:
English , Français (French), Español (Spanish).
Rotate i to select the system
language. Press u.1Language
Voice confirmation of ci ties and streets only
occurs when English is the system language.
When Français or Español is selected, some
messages continue to be displayed in English.
RDX_KA-31TX4800.book Page 31 Monday, January 30, 2012 11:32 PM
QRG
Page 33 of 260
32
Interface SettingsWallpapers Setting
System Setup
Wallpapers Setting
HINFO button Set up Other Wallpapers Setting
Select, delete, and import wallpaper pi ctures for display on the screen.
Rotate i to select an item. Press u .
The following item s are available:
• Select wallpaper picture : Sets the desired picture for the wallpaper.
2Selecting a Wallpaper Picture P. 33
• Delete pictures on HDD : Deletes pictures on the Hard Disc Drive.
2Deleting Pictures from HDD P. 35
• Import pictures from USB : Stores pictures on the Hard Disc Drive.
2Importing Pictures from USB P. 34
RDX_KA-31TX4800.book Page 32 Monday, January 30, 2012 11:32 PM
QRG