Page 286 of 617

Use only compatible iPods with the
latest software. iPods that are not
compatible will not work in this audio
unit.
NOTE:●Do not connect your iPod using a
hub.●Do not keep the iPod and dock
connector cable in the vehicle.
Direct sunlight and high heat will
damage it.●Do not use an extension cable
between the USB adapter cable
equipped with your vehicle and
your dock connector.●We recommend backing up your
data before playing it.●Some devices cannot be powered
or charged via the USB adapter, if
this is the case use the accessory
adapter to supply power to your
device.
Connecting an iPod1. Unclip the USB connector by
pulling it up, and pull out the USB
adapter cable in the console
compartment.
2. Connect your dock connector to
the iPod correctly and securely.
3. Install the dock connector to the
USB adapter cable securely.
USB CONNECTOR
USB ADAPTER CABLE
DOCK CONNECTOR
USB ADAPTER CABLE
Playing an iPod
®(Models with navigation system)
28012/07/17 18:10:57 13 ACURA MDX MMC North America Owner's M 50 31STX660 enu
Page 294 of 617

To Play a USB Flash Memory
Device
This audio system can select and
play the audio files on a USB flash
memory device with the same
controls used for the disc player. To
play a USB flash memory device,
connect it to the USB adapter cable
in the console compartment, then
press the USB/AUX button until you
see‘‘USB’’in the display. The
ignition switch must be in
ACCESSORY (I) or ON (II) position.The audio system reads and plays
the audio files on the USB flash
memory device in MP3, WMA or
ACC
ᤳformats.
ᤳ: Only AAC format files recorded
with iTunes are playable on this
audio unit.
The recommended USB flash
memory devices are 256 MB or
higher, and formatted with the FAT
file system. Some digital audio
players may be compatible as well.
Some USB flash memory devices
(such as devices with security
lockout features, etc.) will not work
in this audio unit.
NOTE:
●Do not use a device such as a card
reader or hard drive as it or your
files may be damaged.
●Do not connect your USB flash
memory device using a hub.●Do not use an extension cable to
the USB adapter cable equipped
with your vehicle.●Do not keep a USB flash memory
device in the vehicle. Direct
sunlight and high heat will damage
it.●We recommend backing up your
data before playing a USB flash
memory device.●Some devices cannot be powered
or charged via the USB adapter, if
this is the case use the accessory
adapter to supply power to your
device.●Depending on the type and
number of files, it may take some
time before they begin to play.
Playing a USB Flash Memory Device (Models with navigation system)28812/07/17 18:10:57 13 ACURA MDX MMC North America Owner's M 50 31STX660 enu
Page 297 of 617

To Select a File from Folder and File
ListsYou can also select a folder or file
from the list by using the interface
dial. Press the AUDIO button to
show the audio display on the
navigation screen. Use the interface
dial to highlight the file, then press
ENTER to set your selection.
Push the selector up to display the
folder list screen, then turn the
interface dial to select a folder. Press
ENTER to set your selection.
If you have more than one layer of
folders (folders within folders), you
can also see each folder on the
screen.To go back to the normal playing
display, press the AUDIO button.
Pressing the CANCEL button goes
back to the previous screen and
pressing the MAP/GUIDE button
cancels the audio mode display.
To Select Repeat, Random or Scan
Mode:Push the interface selector down to
display the AUDIO MENU.
You can select any type of repeat,
random or scan mode on the audio
menu screen.
Move the interface selector up to
select BACK to show the USB
screen, or press the CANCEL button
to return to the previous screen.
CONTINUED
Playing a USB Flash Memory Device (Models with navigation system)
291
Features
12/07/17 18:10:57 13 ACURA MDX MMC North America Owner's M 50 31STX660 enu
Page 322 of 617

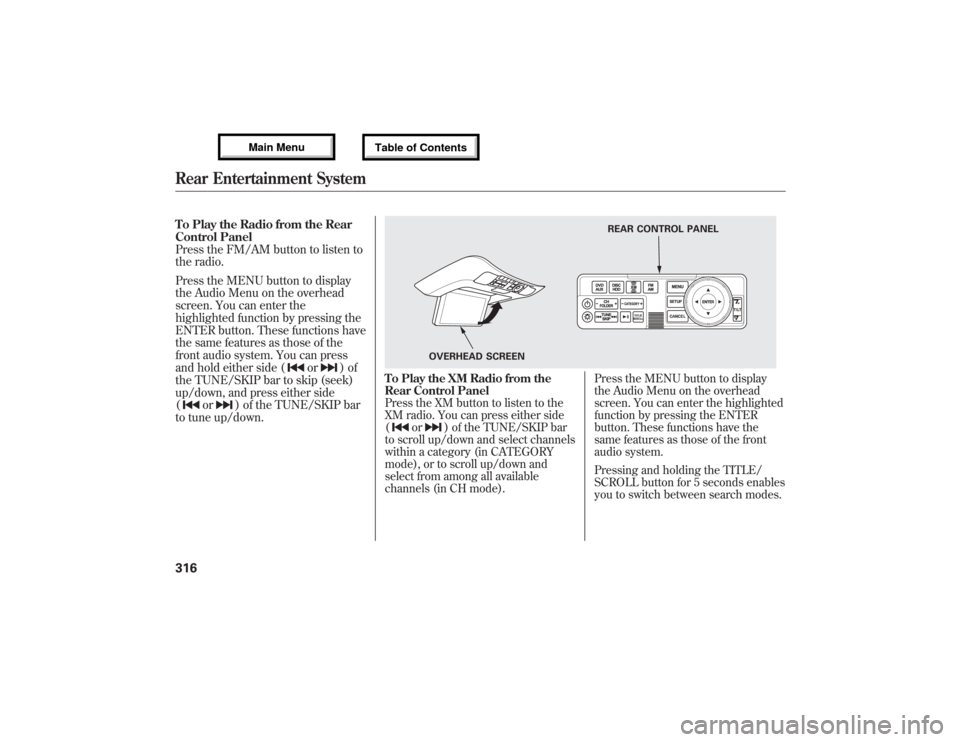
To Play the Radio from the Rear
Control Panel
Press the FM/AM button to listen to
the radio.
Press the MENU button to display
the Audio Menu on the overhead
screen. You can enter the
highlighted function by pressing the
ENTER button. These functions have
the same features as those of the
front audio system. You can press
and hold either side (
or
)of
the TUNE/SKIP bar to skip (seek)
up/down, and press either side
(
or
) of the TUNE/SKIP bar
to tune up/down.
To Play the XM Radio from the
Rear Control PanelPress the XM button to listen to the
XM radio. You can press either side
(
or
) of the TUNE/SKIP bar
to scroll up/down and select channels
within a category (in CATEGORY
mode), or to scroll up/down and
select from among all available
channels (in CH mode).Press the MENU button to display
the Audio Menu on the overhead
screen. You can enter the highlighted
function by pressing the ENTER
button. These functions have the
same features as those of the front
audio system.
Pressing and holding the TITLE/
SCROLL button for 5 seconds enables
you to switch between search modes.
REAR CONTROL PANEL
OVERHEAD SCREEN
Rear Entertainment System31612/07/17 18:10:57 13 ACURA MDX MMC North America Owner's M 50 31STX660 enu
Page 323 of 617

To Play a Disc, HDD, USB, or
iPod
®from the Rear Control Panel
Press the MENU button to display
the Audio Menu on the overhead
screen. Use the interface dial to
highlight REPEAT, RANDOM, or
SCAN on the screen. You can enter
the highlighted function by pressing
the ENTER button. These functions
have the same features as those of
the front audio system.
When TITLE/SCROLL button is
pressed, the title scrolls. When it's
pushed again, scrolling stops.To Play a DVD from the Rear
Control Panel
The video screen is for use by rear
seat passengers only. The driver and
front seat passenger should not try to
view the screen while driving.
Press the REAR PWR button in the
front panel or press the
button in
the rear control panel when REAR
PWR is on. The overhead screen will
open to the position it was last set.
You can tilt the screen at nine
different angles from 90 to 130
degrees using the tilt button in the
rear control panel. The default
setting is 100 degrees.
Press the
button when you want
to pause the DVD. Press this button
again to go back to PLAY.
Press thebutton to skip to the
beginning of the next chapter. Press
the
button to return to the
beginning of the current chapter.Press the
button again quickly to
go to the previous chapter.
To move rapidly within a chapter,
press and hold the
or
button.
The system will continue to move
through the chapter. Press the
button to move forward, or thebutton to move backward. Release
the button when the system reaches
the point you want.
To select the menu on the DVD,
press the MENU button. Use the
interface dial to turn to the desired
menu selection, then press the
ENTER button to enter your
selection.
CONTINUED
Rear Entertainment System
317
Features
12/07/17 18:10:57 13 ACURA MDX MMC North America Owner's M 50 31STX660 enu
Page 324 of 617

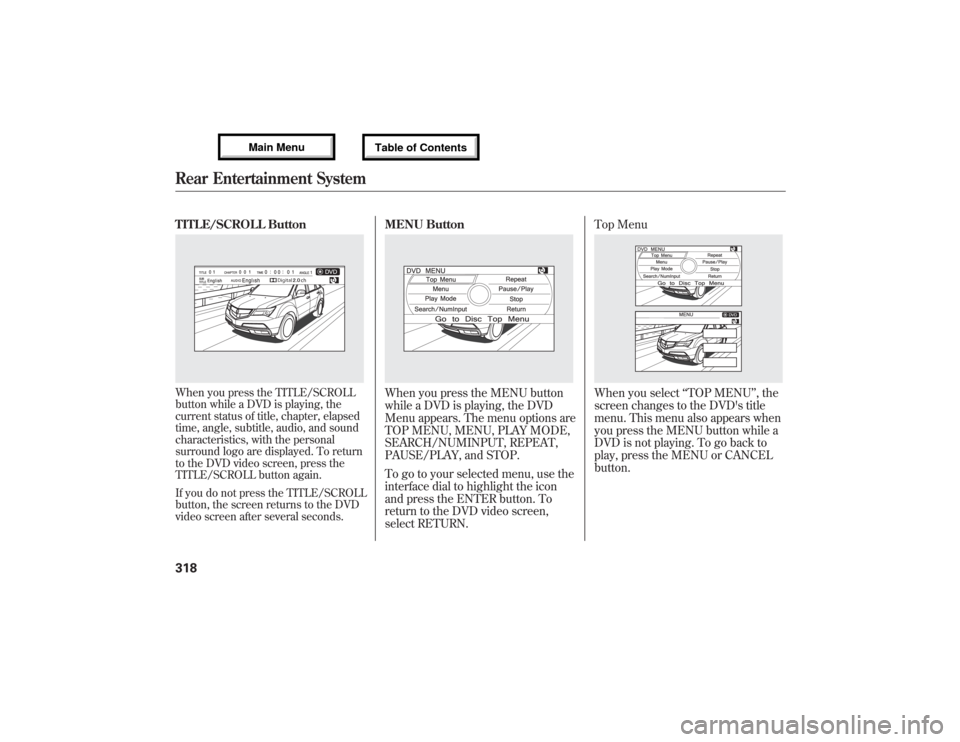
TITLE/SCROLL ButtonWhen you press the TITLE/SCROLL
button while a DVD is playing, the
current status of title, chapter, elapsed
time, angle, subtitle, audio, and sound
characteristics, with the personal
surround logo are displayed. To return
to the DVD video screen, press the
TITLE/SCROLL button again.
If you do not press the TITLE/SCROLL
button, the screen returns to the DVD
video screen after several seconds.
MENU ButtonWhen you press the MENU button
while a DVD is playing, the DVD
Menu appears. The menu options are
TOP MENU, MENU, PLAY MODE,
SEARCH/NUMINPUT, REPEAT,
PAUSE/PLAY, and STOP.
To go to your selected menu, use the
interface dial to highlight the icon
and press the ENTER button. To
return to the DVD video screen,
select RETURN.Top Menu
When you select‘‘TOP MENU’’, the
screen changes to the DVD's title
menu. This menu also appears when
you press the MENU button while a
DVD is not playing. To go back to
play, press the MENU or CANCEL
button.
Rear Entertainment System31812/07/17 18:10:57 13 ACURA MDX MMC North America Owner's M 50 31STX660 enu
Page 325 of 617
MenuWhen you select‘‘MENU’’with the
interface dial, the screen changes to
the DVD's title menu.Play Mode
When you select‘‘PLAY MODE’’
with the interface dial, you can
change the DVD's Audio, Subtitle or
Angle setting.
‘‘Audio’’To change the Audio setting,
highlight‘‘Audio’’from the play
mode menu with the
or
button.
A submenu of the dubbed language
appears. You can select another
language by turning the interface
dial. The sound characteristics
(Dolby Digital, LPCM, MPEG Audio,
dts) recorded with the selected
language is also displayed next to the
language.
CONTINUED
Rear Entertainment System
319
Features
12/07/17 18:10:57 13 ACURA MDX MMC North America Owner's M 50 31STX660 enu
Page 326 of 617
The selectable languages vary from
DVD to DVD, and this feature may
not be available on some DVDs.
To go back to play, press the MENU
or CANCEL button.
‘‘Subtitle’’To change the DVD's subtitle,
highlight‘‘Subtitle’’from the play
mode menu with the
or
button.
You can see the available subtitles
with the interface dial.
To go back to play, press the MENU
or CANCEL button.
‘‘Angle’’To change the view angle, highlight
‘‘Angle’’from the play mode menu
with the
or
button. You can see
the available angle options with the
interface dial.
If there are no multiple angles
available on the DVD, you cannot
change from‘‘Angle 1’’.
To go back to play, press the MENU
or CANCEL button.
Rear Entertainment System32012/07/17 18:10:57 13 ACURA MDX MMC North America Owner's M 50 31STX660 enu