2013 Acura MDX light
[x] Cancel search: lightPage 190 of 617

When you set the temperature to its
lower limit (
) or its upper limit
(
), the system runs at full cooling
or heating only. It does not regulate
the interior temperature.
When you press a fan control button,
the fan is taken out of AUTO mode.
When the indicator in the dual
button is on, the driver's side and
passenger's side temperature can be
controlled independently (see page
189).
When the indicator in the rear button
is on, the temperature of the rear
passenger compartment can be
controlled independently (see page
189).
On models with navigation systemIn the Auto mode, the vehicle's
interior temperature is independently
regulated for the driver, front
passenger, and rear passengers
according to each adjusted
temperature. The system also
regulates each temperature based on
the information of the sun light
sensor and the sun's position which
is updated automatically by the
navigation's global positioning
system (GPS). For example, if the
driver's side of the vehicle is getting
too much sun, the system will adjust
to a lower temperature.
Dual ButtonYou can set the temperatures for the
driver's side and the passenger's side
separately when this button is
pressed (indicator is on). When the
indicator in the DUAL button is off,
the temperatures for both sides are
synchronized to the driver's side set
temperature. When defrost mode is
selected, dual mode operation is
canceled.
Climate Control System18412/07/17 18:10:57 13 ACURA MDX MMC North America Owner's M 50 31STX660 enu
Page 197 of 617

Sunlight and Temperature
SensorsTo regulate the interior temperature
and humidity, the climate control
system has two sensors. A sunlight
sensor is located in the top of the
dashboard and a temperature/
humidity sensor is next to the
steering column. Do not cover the
sensors or spill any liquid on them.
SUNLIGHT SENSOR
TEMPERATURE/HUMIDITY SENSOR
Climate Control System
191
Features
12/07/17 18:10:57 13 ACURA MDX MMC North America Owner's M 50 31STX660 enu
Page 202 of 617

Adjusting the Sound
Press the TUNE (SOUND) knob
repeatedly to display the BASS,
TREBLE, FADER, BALANCE,
SUBWOOFER, CENTER, and SVC
(speed-sensitive volume
compensation) settings.
BASS-Adjusts the bass.
TREBLE-Adjusts the treble.
FADER-Adjusts the front-to-back
strength of the sound.
BALANCE-Adjusts the side-to-
side strength of the sound.
SUBWOOFER-Adjusts the
strength of sound from the
subwoofer speaker.
CENTER-Adjusts the strength of
sound from the center speaker.SVC-Adjusts the volume level
based on the vehicle speed.
Each mode is shown in the display as
it changes. Turn the TUNE knob to
adjust the setting to your liking.
When the level reaches the center,
you will see‘‘C’’in the display.
The system will return to the audio
display about 5 seconds after you
stop adjusting a mode.
Speed-sensitive Volume
Compensation (SVC)The SVC mode controls the volume
based on vehicle speed. The faster
you go, the louder the audio volume
becomes. As you slow down, the
audio volume decreases.
The SVC has four modes: SVC OFF,
SVC LOW, SVC MID, and SVC
HIGH. Turn the TUNE knob to
adjust the setting to your liking. If
you feel the sound is too loud,
choose low. If you feel the sound is
too quiet, choose high.Audio System Lighting
You can use the instrument panel
brightness control buttons to adjust
the illumination of the audio system
(see page 133). The audio system
illuminates when the parking lights
are on, even if the radio is off.
Playing the AM/FM Radio (Models without navigation system)19612/07/17 18:10:57 13 ACURA MDX MMC North America Owner's M 50 31STX660 enu
Page 218 of 617

Interface Dial
Most audio system functions can still
be controlled by standard buttons,
dials, and knobs, but some functions
can only be accessed using the
interface dial. The interface dial has
two parts, a knob and a selector.
The knob turns left and right. Use it
to make selections or adjustments to
a list or menu on the screen.
The selector can be pushed left,
right, up, down, and in. Use the
selector to scroll through lists, to
select menus, and to highlight menu
items. When you make a selection,
push the center of the selector
(ENTER) to go to that selection.Personalization Setting
When you unlock the doors with
your remote and turn the audio
system on, the driver's ID (Driver 1
or Driver 2) is detected, and the
radio presets and sound level
settings (see page 222) are turned to
the respective memorized mode
automatically.
Voice Control System
The audio system, including the
music search feature Song By
Voice™, can be operated by the voice
control. See the navigation system
manual for complete details.
KNOB ENTER
SELECTOR
Audio System (Models with navigation system)21212/07/17 18:10:57 13 ACURA MDX MMC North America Owner's M 50 31STX660 enu
Page 222 of 617

Preset-Each preset button or
preset icon can store one frequency
on AM and two frequencies on FM.To store a preset memory location:1. Select the desired band, AM or
FM. FM1 and FM2 let you store
two sets of FM frequencies with
the preset buttons (on-screen
icons).
2. Use the tune, skip (seek), scan, or
RDS function to tune the radio to a
desired station.
3. Press the preset button, and hold it
until you hear a beep. You can also
store frequencies with the
interface dial. Select the preset
icon you want to store the
frequency on, then press ENTER
on the interface selector, and hold
it for more than 2 seconds.
4. Repeat steps 1 through 3 to store a
total of six stations on AM and
twelve stations on FM.
AUTO SELECT-If you are
traveling and can no longer receive
your preset stations, you can use the
auto select feature to find stations in
the local area.
Push the interface selector down to
scroll down the navigation screen,
highlight A.SEL, then press ENTER
on the interface selector. You will see
A.SEL on the audio display (if
selected), and the system goes into
auto select mode for several seconds.You can also press the A.SEL button.
You will see A.SEL on the audio
display and the navigation screen,
and the system goes into scan mode
for several seconds. The system
stores the frequencies of six AM and
twelve FM stations in the preset
buttons.
You will see‘‘0’’displayed if auto
select cannot find a strong station for
every preset button. If you do not like
the stations auto select has stored,
you can store other frequencies on
the preset buttons (icons) as
previously described.
To cancel auto select, select A.SEL
on the audio menu again and turn
the interface dial to select A.SEL
OFF, or press the A.SEL button
again. This restores the presets you
originally set.
A.SEL ICON A.SEL INDICATOR
Playing the AM/FM Radio (Models with navigation system)21612/07/17 18:10:57 13 ACURA MDX MMC North America Owner's M 50 31STX660 enu
Page 243 of 617

It is possible to select up to 999 files
for inclusion in CD-Rs and CD-RWs,
and up to 3,500 files for inclusion in
DVD-Rs and DVD-RWs.Do not use discs with adhesive labels.
The label can curl up and cause the disc
to jam in the unit.Manufactured under license under
U.S. Patent’s: 5,451,942; 5,956,674;
5,974,380; 5,978,762; 6,487,535 &
other U.S. and worldwide patents
issued & pending. DTS and DTS
Digital Surround are registered
trademarks and the DTS logos and
Symbol are trademarks of DTS, Inc.
All Rights Reserved. Reverse
engineering or disassembly is
prohibited.To Load a Disc
Insert a disc about halfway into the
disc slot. The drive will pull the disc
in the rest of the way to play it. You
operate the disc player with the same
controls used for the radio. The
number of the current track is shown
in the display. When playing a disc in
MP3, WMA or AAC, the numbers of
the current folder and file are shown.
The system will continuously play a
disc until you change modes.
For information on how to handle
and protect compact discs, see page
247.To Play a Disc
Select the disc player by pressing the
DISC button. The system will begin
playing the last selected track in the
disc. You will see the current track
position highlighted.
Title information will be displayed by
a list when the information is found
in the Gracenote
ᤎAlbum Info
(Gracenote
ᤎMedia Database) on the
built-in hard disk drive. When you
play a CD recorded with text data,
you will see the genre, artist name,
album and track name on the screen.
When you play MP3/WMA/AAC
discs, you will see the genre, artist
name, album name and track name
on the screen. If the disc was not
recorded with this information, it will
not be displayed.
CONTINUED
Playing a Disc (Models with navigation system)
237
Features
12/07/17 18:10:57 13 ACURA MDX MMC North America Owner's M 50 31STX660 enu
Page 253 of 617

General Information●When using CD-R, CD-RW, DVD-R
or DVD-RW discs, use only high
quality discs labeled for audio use.●When recording a CD-R, CD-RW,
DVD-R or DVD-RW the recording
must be closed for it to be used by
the disc player.●When using DVD-R/RW discs,
they should meet DVD verification
standards.●Play only standard, round, 5-inch
(12 cm) discs. Smaller or odd-
shaped discs may jam in the drive
or cause other problems.●Handle your discs properly to
prevent damage and skipping.
Do not use discs with adhesive labels.
The label can curl up and cause the disc
to jam in the unit.Protecting Discs
When a disc is not being played,
store it in its case to protect it from
dust and other contamination. To
prevent warpage, keep discs out of
direct sunlight and extreme heat.
To clean a disc, use a clean soft cloth.
Wipe across the disc from the center
to the outside edge.
A new disc may be rough on the
inner and outer edges. The small
plastic pieces causing this roughness
can flake off and fall on the recording
surface of the disc, causing skipping
or other problems. Remove these
pieces by rubbing the inner and
outer edges with the side of a pencil
or pen.Never try to insert foreign objects in
the disc player.
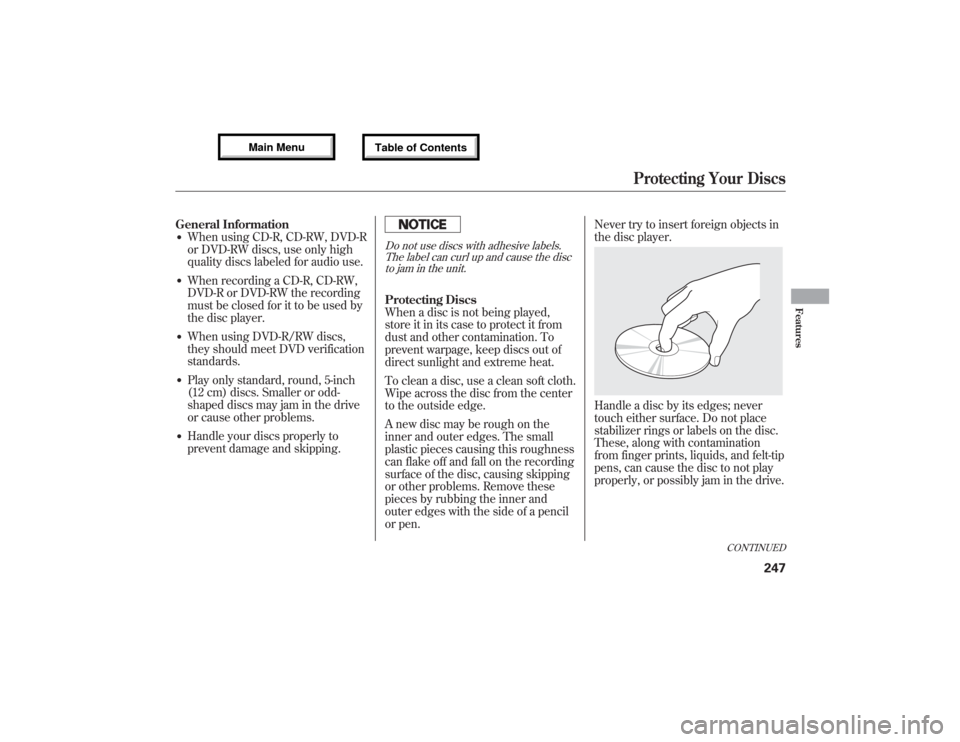
Handle a disc by its edges; never
touch either surface. Do not place
stabilizer rings or labels on the disc.
These, along with contamination
from finger prints, liquids, and felt-tip
pens, can cause the disc to not play
properly, or possibly jam in the drive.
CONTINUED
Protecting Your Discs
247
Features
12/07/17 18:10:57 13 ACURA MDX MMC North America Owner's M 50 31STX660 enu
Page 257 of 617

The Hard Disc Drive (HDD) Audio
function can record tracks from
music CDs to the navigation system's
hard disc. This function also allows
for various playing methods, such as
playing recorded tracks on an artist-
by-artist or genre-by-genre basis. For
example, you can play the tracks that
you want to listen to in any order that
you like for each playlist.
NOTE:●Only recordings from a standard
CD-DA (44.1 kHz, 16 bit stereo
PCM digital sound data) to HDD
are supported.●Digital music files, such as MP3,
WMA, AAC etc., in CD-R, DVD-R
and USB flash memory devices
cannot be copied to HDD.
Likewise, digital music files
recorded to HDD cannot be copied
to CD-R, DVD-R and USB devices.
●Music data recorded on HDD can
only be used for personal
enjoyment.●Data is recorded using ultra-
efficient compression technology,
therefore, sound quality may vary
slightly from the original.●Title information will be displayed
when the information is found in
the Gracenote
®Album Info
(Gracenote
®Media Database) on
the built-in hard disk drive. See
page 275.
●Recording function from following
media is not supported.
–
CD-DA which prohibits the copy
by SCMS
–
CD-DA with copy control
–
SACD (Super Audio CD)
–
DTS-CD
–
DVD-A
–
CD-R/RW
–
DVD-R/RW
–
Copy controlled CDs (Playback
cannot be guaranteed)
–
DTS-CDs (Only enabled for
playback)
If the HDD is ever replaced, all data
will be lost and stored music will not
be recovered.
CONTINUED
Playing Hard Disc Drive (HDD) Audio (Models with navigation system)
251
Features
12/07/17 18:10:57 13 ACURA MDX MMC North America Owner's M 50 31STX660 enu