2013.5 PEUGEOT 5008 light
[x] Cancel search: lightPage 51 of 404

2
Multifunction screens49
"Trip computer" menu
Alert log
This summarises the active warning messages, displaying them in succession in the multifunction screen
Status of functions
This summarises the status of the functions present on the vehicle.
Press the "MENU" button to gain access to the general menu. Press the arrows, then the "OK" button to select the "Trip computer" menu.
Once this menu has been selected, you can consult information concerning the status of the vehicle (alert log, status of the functions...).
Defi ne the vehicle parameters
Once this menu has been selected, you can activate or deactivate the following equipment (according to country): - wiper linked with reverse gear (see " Visibility" section), - selective unlocking (see the "Access" section), - guide-me-home lighting (see the " Visibility" section), - interior mood lighting (see the " Visibility" section), - directional headlamps (see the "Visibility" section), - automatic or manual parking brake (see the "Driving" section), - ...
"Personalisation-
Configuration" menu
Once this menu has been selected, you can gain access to the following functions: - define the vehicle parameters, - display configuration, - choice of language.
On the "Trip computer" menu, select one of the applications:
This allows you to enter an approximate value for the distance to the final destination.
Enter the distance to the destination
Page 52 of 404

Multifunction screens
50
Display confi guration
Once this menu has been selected, you have access to the following settings: - brightness-video setting, - date and time setting, - selection of the units.
Adjusting the date and time Press the " " or " " button to select the "Display configuration" menu, then the "OK" button.
Press the " " or " " button, to select the "Adjust date and time" line, then on the "OK" button. Press the " " or " " button to select the setting to modify. Conform by pressing the "OK" button then adjust the setting and confirm again to save the modification.
Example: setting of the duration of the guide-me-home lighting
Press the " " or " " buttons, then the " OK " button to select the menu required.
Press the " " or " " buttons, then the " OK " button to select the "Guide-me-home headlamps" line.
Press the " " or " " buttons to set the value required (15, 30 or 60 seconds), then press the " OK " button to confirm.
Press the " " or " " buttons, then the " OK " button to select the " OK " box and confirm or press the " < ] arrow " button to cancel.
"Telephone" menu
With the audio equipment switched on, once this menu has been selected you can configure your Bluetooth hands-free kit (pairing), consult the various telephone directories (calls log, services...) and manage your communications (pick up, hang up, call waiting, secret mode...).
For more information on the telephone application, refer to the PEUGEOTConnect Sound (RD5) section.
For safety reasons, configuration of the multifunction screen by the driver must only be done when stationary.
Choice of language
Once this menu has been selected, you can change the screen display language.
Adjust the settings one by one, confirming with the " OK " button. Press the " " or " " button, then the "OK"button to select the "OK" box and confirm, or the "Back" button to cancel.
Page 54 of 404

Multifunction screens
52
"SETUP" menu (PEUGEOT Connect PEUGEOT Connect PEUGEOT
Media Navigation (NG4 3D))
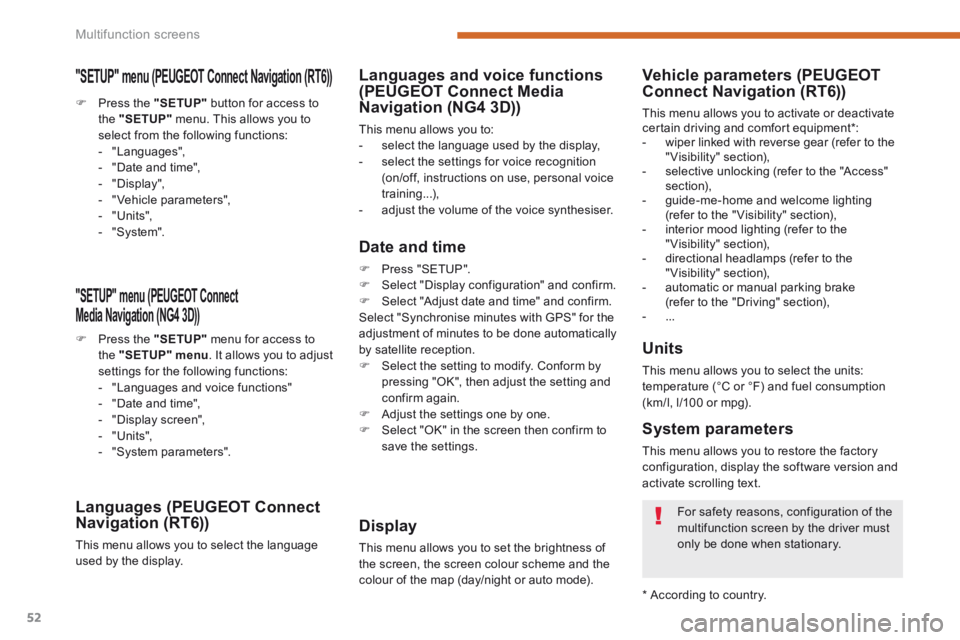
Press the "SETUP" menu for access to the "SETUP" menu . It allows you to adjust settings for the following functions: - "Languages and voice functions" - "Date and time", - "Display screen", - "Units", - "System parameters".
Languages (PEUGEOT Connect Navigation (RT6))
This menu allows you to select the language used by the display.
Languages and voice functions (PEUGEOT Connect Media Navigation (NG4 3D))
This menu allows you to: - select the language used by the display, - select the settings for voice recognition (on/off, instructions on use, personal voice training...), - adjust the volume of the voice synthesiser.
Date and time
Press "SETUP". Select "Display configuration" and confirm. Select "Adjust date and time" and confirm. Select "Synchronise minutes with GPS" for the adjustment of minutes to be done automatically by satellite reception. Select the setting to modify. Conform by pressing "OK", then adjust the setting and confirm again. Adjust the settings one by one.
Select "OK" in the screen then confirm to save the settings.
Display
This menu allows you to set the brightness of the screen, the screen colour scheme and the colour of the map (day/night or auto mode).
Units
This menu allows you to select the units: temperature (°C or °F) and fuel consumption (km/l, l/100 or mpg).
System parameters
This menu allows you to restore the factory configuration, display the software version and activate scrolling text.
For safety reasons, configuration of the multifunction screen by the driver must
only be done when stationary.
* According to country.
Vehicle parameters (PEUGEOTConnect Navigation (RT6))
This menu allows you to activate or deactivate certain driving and comfort equipment * : - wiper linked with reverse gear (refer to the "Visibility" section), - selective unlocking (refer to the "Access" section), - guide-me-home and welcome lighting (refer to the " Visibility" section), - interior mood lighting (refer to the "Visibility" section), - directional headlamps (refer to the "Visibility" section), - automatic or manual parking brake (refer to the "Driving" section), - ...
Press the "SETUP" button for access to the "SETUP" menu. This allows you to select from the following functions: - "Languages", - "Date and time", - "Display", - " Vehicle parameters", - "Units", - "System".
"SETUP" menu (PEUGEOT Connect Navigation (RT6)) PEUGEOT Connect Navigation (RT6)) PEUGEOT
Page 62 of 404

Comfort
60
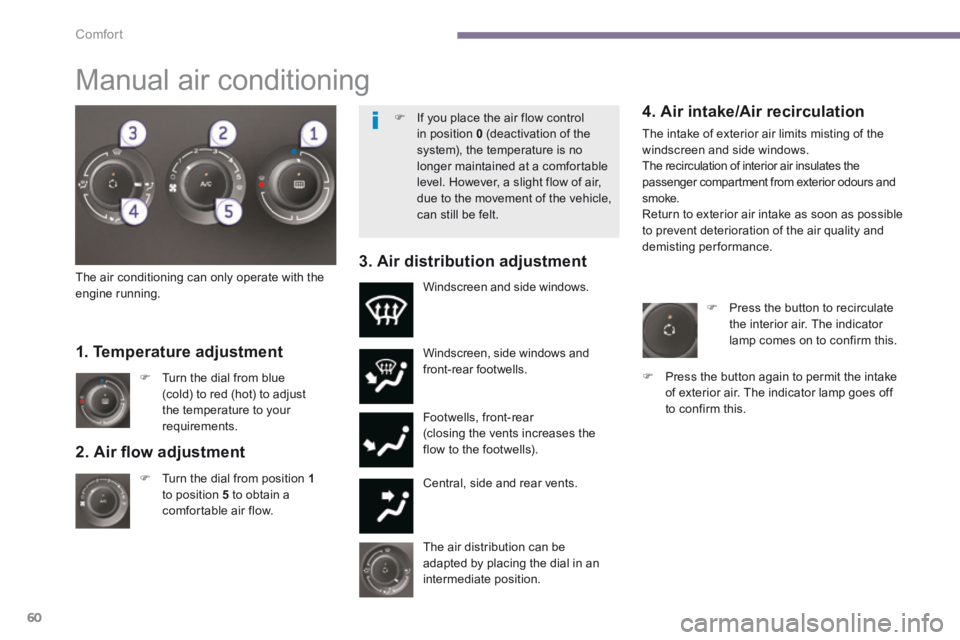
2. Air fl ow adjustment
Turn the dial from position 1to position 5 to obtain a comfortable air flow.
Windscreen, side windows and front-rear footwells.
Footwells, front-rear (closing the vents increases the flow to the footwells).
Central, side and rear vents.
Turn the dial from blue (cold) to red (hot) to adjust the temperature to your requirements.
Windscreen and side windows.
1. Temperature adjustment
The air distribution can be adapted by placing the dial in an intermediate position.
The air conditioning can only operate with the engine running.
4. Air intake/Air recirculation
The intake of exterior air limits misting of the windscreen and side windows. The recirculation of interior air insulates the passenger compartment from exterior odours and smoke. Return to exterior air intake as soon as possible to prevent deterioration of the air quality and demisting performance. 3. Air distribution adjustment
Press the button to recirculate the interior air. The indicator lamp comes on to confirm this.
Press the button again to permit the intake of exterior air. The indicator lamp goes off to confirm this.
Manual air conditioning
If you place the air flow control in position 0 (deactivation of the system), the temperature is no longer maintained at a comfortable level. However, a slight flow of air, due to the movement of the vehicle, can still be felt.
Page 67 of 404

3
Comfort65
Switching the system off/on
Turn the air flow control to the left until all of the indicator lamps go off. This action switches off all of the functions of the system. Temperature related comfort is no longer guaranteed but a slight flow of air, due to the movement of the vehicle, can still be felt. Turn the air flow dial to the right or press the "AUTO" button to reactivate the system with the values set before it was switched off.
9. Rear ventilation (Rear)
Press this button to allow the air to circulate towards the rear. The temperature will be equal to the left-hand comfort value for the rear left passengers and equal to the right-hand comfort value for the rear right passengers. The indicator lamp in the button comes on.
8. Air recirculation
Press this button to recirculate the interior air. The indicator lamp comes on.
- Air closed/intake (automatic mode). Press this button, the warning lamp comes on.
7. Air fl ow adjustment
Turn this control to the left to decrease the air flow or to the right to increase the air flow.
The air flow indicator lamps, between the two fans, come on progressively according to the value requested.
With Stop & Start, when demisting has been activated, the STOP mode is not available.
Avoid driving for prolonged periods with the system off.
- Forced closing of the air intake (manual mode). Press this button to recirculate the interior air, the warning lamp come on.
Air recirculation enables the passenger compartment to be isolated from exterior odours and smoke.
As soon as possible, press the "auto" button to allow the intake of exterior air and avoid the misting of windows.
Page 74 of 404

Comfort
72
2 nd row seats
Forwards-backwards adjustment
Lift the control A Lift the control A Lift the control , located at the front of the seat, then adjust the seat to the position desired.
"Comfort" position
The three 2 nd row seats are independent of each other and all the same width. They all have a "comfort" position. Placing a seat in the "comfort" position
Pull on the control B and guide the seat rearwards. The backrest reclines and the seat base moves for ward slightly.
Returning the seat to the initial position
Pull on the control B and allow the seat to come for wards.
Always supervise any movements of seats by children.
Page 75 of 404

3
Comfort73
Flat floor
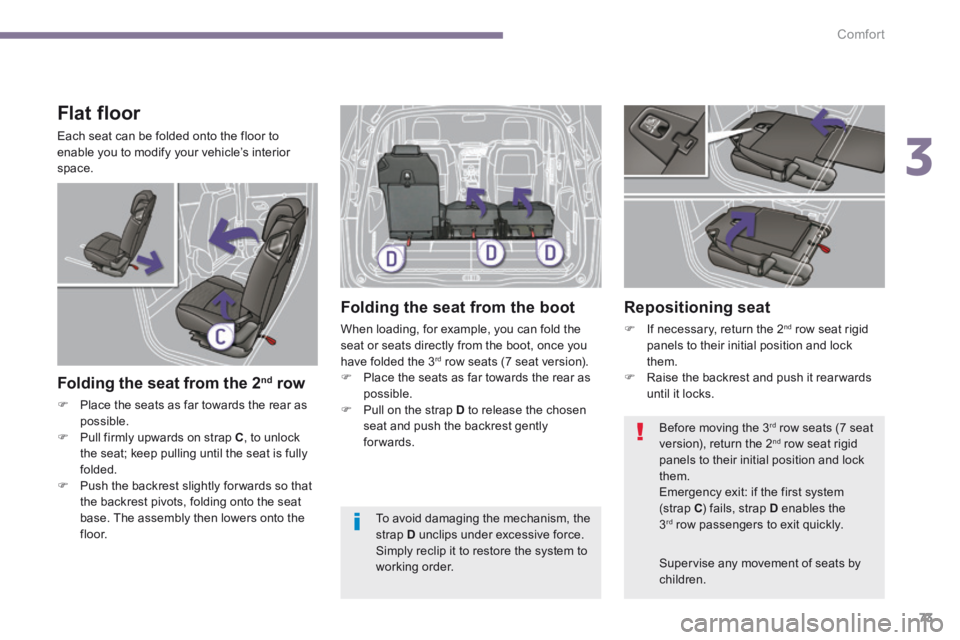
Each seat can be folded onto the floor to enable you to modify your vehicle’s interior space.
Folding the seat from the 2 nd row
Place the seats as far towards the rear as possible. Pull firmly upwards on strap C , to unlock the seat; keep pulling until the seat is fully folded. Push the backrest slightly for wards so that the backrest pivots, folding onto the seat base. The assembly then lowers onto the f l o o r.
Folding the seat from the boot
When loading, for example, you can fold the seat or seats directly from the boot, once you have folded the 3 rd row seats (7 seat version). Place the seats as far towards the rear as possible. Pull on the strap D to release the chosen seat and push the backrest gently forwards.
Repositioning seat
If necessary, return the 2 nd row seat rigid panels to their initial position and lock them. Raise the backrest and push it rear wards until it locks.
Supervise any movement of seats by children.
Before moving the 3 rd row seats (7 seat version), return the 2 nd row seat rigid panels to their initial position and lock them. Emergency exit: if the first system (strap C ) fails, strap D enables the 3 rd row passengers to exit quickly. To avoid damaging the mechanism, the strap D unclips under excessive force. Simply reclip it to restore the system to working order.
Page 81 of 404

3
Comfort79
Adjustment
Adjust the mirror so that the glass is directed correctly in the "day" position.
Manual day/night model
Day/night position
Pull the lever to change to the "night" anti-dazzle position. Push the lever to change to the normal "day" position.
Rear view mirror
Adjustable mirror providing a central rearward view. Equipped with an anti-dazzle system, which darkens the mirror glass and reduces the nuisance to the driver caused by the sun, headlamps from other vehicles...
Automatic day/night model
By means of a sensor, which measures the light from the rear of the vehicle, this system automatically and progressively changes between the day and night uses.
In order to ensure optimum visibility during your manoeuvres, the mirror lightens automatically when reverse gear is engaged.
As a safety measure, the mirrors should be adjusted to reduce the "blind spot".