2013.5 PEUGEOT 5008 ECO mode
[x] Cancel search: ECO modePage 45 of 404

1
Monitoring43
Total distance recorder
System which measures the total distance travelled by the vehicle during its life.
Lighting dimmer
System for manual adjustment of the brightness of the instrument panel in relation to the exterior brightness. The total and trip distances are displayed for thirty seconds when the ignition is switched off, when the driver's door is opened and when the vehicle is locked or unlocked.
Trip distance recorder
System which measures a distance travelled during a day or other period since it was reset to zero by the driver.
With the ignition on, press the button until zeros appear.
Deactivation
When the lighting is off, or in day mode on vehicles fitted with daytime running lamps, pressing the button does not have any effect.
Activation
When the vehicle lighting is on: press the button to change the brightness of the instrument panel, when the lighting reaches the minimum setting, release the button, then press again to increase it, or when the lighting reaches the maximum setting, release the button, then press again to reduce it, when the lighting reaches the level of brightness required, release the button.
To conform to legislation in the country you are crossing, change the units of distance (miles or km) via the configuration menu.
When the vehicle lighting is on, you cannot switch the instrument panel lighting off but you can adjust it to minimum.
Page 47 of 404

2
Multifunction screens45
Vehicle confi guration
Options
Once the "Options" menu has been selected, you can start diagnostics of the status of the equipment (active, not active, faulty).
Languages
Once the "Languages" menu has been selected, you can change the language used by the display (Français, Italiano, Nederlands, Portugues, Portugues-Brasil, Türkçe, Deutsch, English, Espanol).
Date and time
Once the "Display settings" menu has been selected, you can gain access to the following settings: - ye a r, - month, - d ay, - h o u r, - minutes, - 12 or 24 hour mode. Units
Once the "Units" menu has been selected, you can change the units for: - temperature (°C or °F), - fuel consumption (l/100 km, mpg or km/l).
Once you have selected a setting, press the "OK" button to change its value.
Wait for approximately ten seconds without any action to allow the changed data to be recorded or press the "ESC" button to cancel. The screen then returns to the normal display.
Once the " Vehicle configuration" menu has been selected, you can activate or deactivate the following equipment (according to country): - wiper linked with reverse gear (refer to the "Visibility" section), - selective unlocking (refer to the " Access" section), - "guide-me-home" and welcome lighting (refer to the " Visibility" section), - interior mood lighting (refer to the "Visibility" section), - directional headlamps (refer to the "Visibility" section), - automatic or manual parking brake (refer to the "Driving" section), - parking space sensors (se the "Driving" section), - ...
For safety reasons, configuration of the multifunction screen by the driver must only be done when stationary.
Page 49 of 404

2
Multifunction screens47
Date and time
Once the "DATE AND TIME" menu has been selected, you can gain access to the following settings: - ye a r, - month, - d ay, - h o u r, - minutes, - 12 or 24 hour mode.
Languages
Once the "Languages" menu has been selected, you can change the language used by the display.
Units
Once the "Units" menu has been selected, you can change the units of the following parameters: - temperature (°C or °F), - fuel consumption (l/100 km, mpg or km/l).
Once you have selected a setting, press t h e " " or " " buttons to change its value.
Press the " " or " " buttons to switch respectively to the previous or next setting. Press the "OK" button to record the change and return to the normal display or press the " < ] arrow" button to cancel.
Vehicle confi guration
Once the " Vehicle Configuration" menu has been selected, you can activate or deactivate the following equipment (according to country): - wiper linked with reverse gear (refer to the "Visibility" section), - selective unlocking (refer to the "Access" section), - guide-me-home and welcome lighting (refer to the " Visibility" section), - interior mood lighting (refer to the "Visibility" section), - directional headlamps (refer to the "Visibility" section), - automatic or manual parking brake (refer to the "Driving" section), - ...
Options
Once the "Options" menu has been selected, you can start diagnostics of the status of the equipment (active, not active, faulty).
For safety reasons, configuration of the multifunction screen by the driver must only be done when stationary.
Page 52 of 404

Multifunction screens
50
Display confi guration
Once this menu has been selected, you have access to the following settings: - brightness-video setting, - date and time setting, - selection of the units.
Adjusting the date and time Press the " " or " " button to select the "Display configuration" menu, then the "OK" button.
Press the " " or " " button, to select the "Adjust date and time" line, then on the "OK" button. Press the " " or " " button to select the setting to modify. Conform by pressing the "OK" button then adjust the setting and confirm again to save the modification.
Example: setting of the duration of the guide-me-home lighting
Press the " " or " " buttons, then the " OK " button to select the menu required.
Press the " " or " " buttons, then the " OK " button to select the "Guide-me-home headlamps" line.
Press the " " or " " buttons to set the value required (15, 30 or 60 seconds), then press the " OK " button to confirm.
Press the " " or " " buttons, then the " OK " button to select the " OK " box and confirm or press the " < ] arrow " button to cancel.
"Telephone" menu
With the audio equipment switched on, once this menu has been selected you can configure your Bluetooth hands-free kit (pairing), consult the various telephone directories (calls log, services...) and manage your communications (pick up, hang up, call waiting, secret mode...).
For more information on the telephone application, refer to the PEUGEOTConnect Sound (RD5) section.
For safety reasons, configuration of the multifunction screen by the driver must only be done when stationary.
Choice of language
Once this menu has been selected, you can change the screen display language.
Adjust the settings one by one, confirming with the " OK " button. Press the " " or " " button, then the "OK"button to select the "OK" box and confirm, or the "Back" button to cancel.
Page 54 of 404

Multifunction screens
52
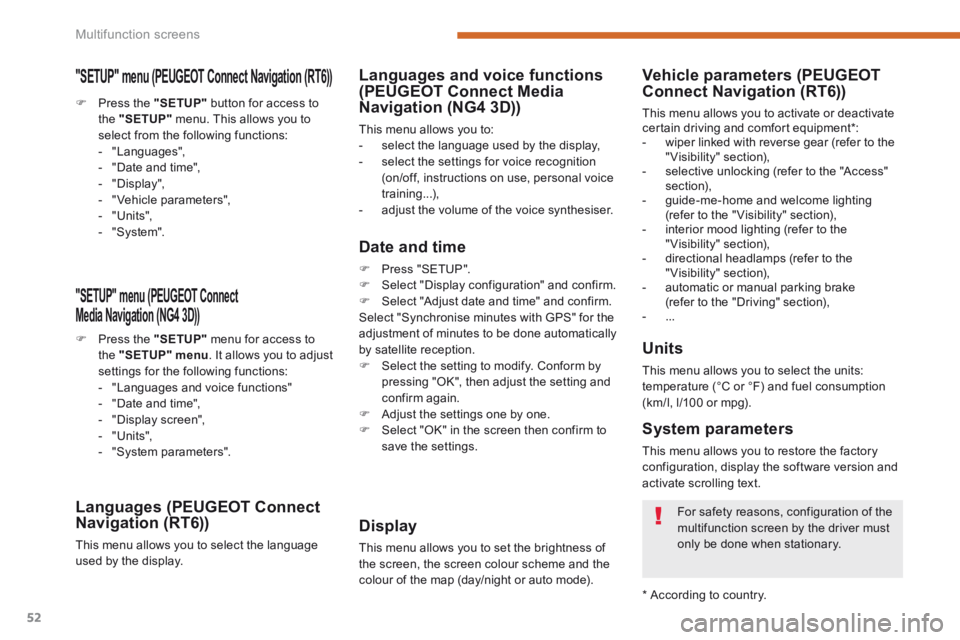
"SETUP" menu (PEUGEOT Connect PEUGEOT Connect PEUGEOT
Media Navigation (NG4 3D))
Press the "SETUP" menu for access to the "SETUP" menu . It allows you to adjust settings for the following functions: - "Languages and voice functions" - "Date and time", - "Display screen", - "Units", - "System parameters".
Languages (PEUGEOT Connect Navigation (RT6))
This menu allows you to select the language used by the display.
Languages and voice functions (PEUGEOT Connect Media Navigation (NG4 3D))
This menu allows you to: - select the language used by the display, - select the settings for voice recognition (on/off, instructions on use, personal voice training...), - adjust the volume of the voice synthesiser.
Date and time
Press "SETUP". Select "Display configuration" and confirm. Select "Adjust date and time" and confirm. Select "Synchronise minutes with GPS" for the adjustment of minutes to be done automatically by satellite reception. Select the setting to modify. Conform by pressing "OK", then adjust the setting and confirm again. Adjust the settings one by one.
Select "OK" in the screen then confirm to save the settings.
Display
This menu allows you to set the brightness of the screen, the screen colour scheme and the colour of the map (day/night or auto mode).
Units
This menu allows you to select the units: temperature (°C or °F) and fuel consumption (km/l, l/100 or mpg).
System parameters
This menu allows you to restore the factory configuration, display the software version and activate scrolling text.
For safety reasons, configuration of the multifunction screen by the driver must
only be done when stationary.
* According to country.
Vehicle parameters (PEUGEOTConnect Navigation (RT6))
This menu allows you to activate or deactivate certain driving and comfort equipment * : - wiper linked with reverse gear (refer to the "Visibility" section), - selective unlocking (refer to the "Access" section), - guide-me-home and welcome lighting (refer to the " Visibility" section), - interior mood lighting (refer to the "Visibility" section), - directional headlamps (refer to the "Visibility" section), - automatic or manual parking brake (refer to the "Driving" section), - ...
Press the "SETUP" button for access to the "SETUP" menu. This allows you to select from the following functions: - "Languages", - "Date and time", - "Display", - " Vehicle parameters", - "Units", - "System".
"SETUP" menu (PEUGEOT Connect Navigation (RT6)) PEUGEOT Connect Navigation (RT6)) PEUGEOT
Page 59 of 404

2
Multifunction screens57
Trip computer, a few definitions
When the range falls below 20 miles (30 km), dashes are displayed. After filling with at least 5 litres of fuel, the range is recalculated and is displayed when it exceeds 60 miles (100 km).
Range
(miles or km) The distance which can still be travelled with the fuel remaining in the tank. Related to the average fuel consumption over the last few miles (kilometres) travelled.
Current fuel consumption
(mpg or l/100 km or km/l) Calculated over the last few seconds.
Average fuel consumption
(mpg or l/100 km or km/l) Calculated since the last trip computer reset.
Distance travelled
(miles or km) Calculated since the last trip computer reset.
Average speed
(mph or km/h) Calculated since the last trip computer reset.
Stop & Start time counter
(minutes/seconds or hours/minutes) If your vehicle is fitted with Stop & Start, a time counter calculates the time spent in STOP mode during a journey. It resets to zero every time the ignition is switched on with the key.
Distance remaining to destination
(miles or km) This is the distance remaining to be travelled to the final destination. It is either calculated instantly by the navigation system, if guidance is activated, or entered by the user. If the distance is not entered, dashes are displayed in place of the digits.
If dashes are displayed continuously while driving in place of the digits, contact a PEUGEOT dealer or a qualified workshop.
This value may vary following a change in the style of driving or the relief, resulting in a significant change in the current fuel consumption.
This function is only displayed from 20 mph (30 km/h).
Page 65 of 404

3
Comfort63
The air conditioning only operates when the engine is running.
The driver and front passenger can each adjust the temperature to their requirements.
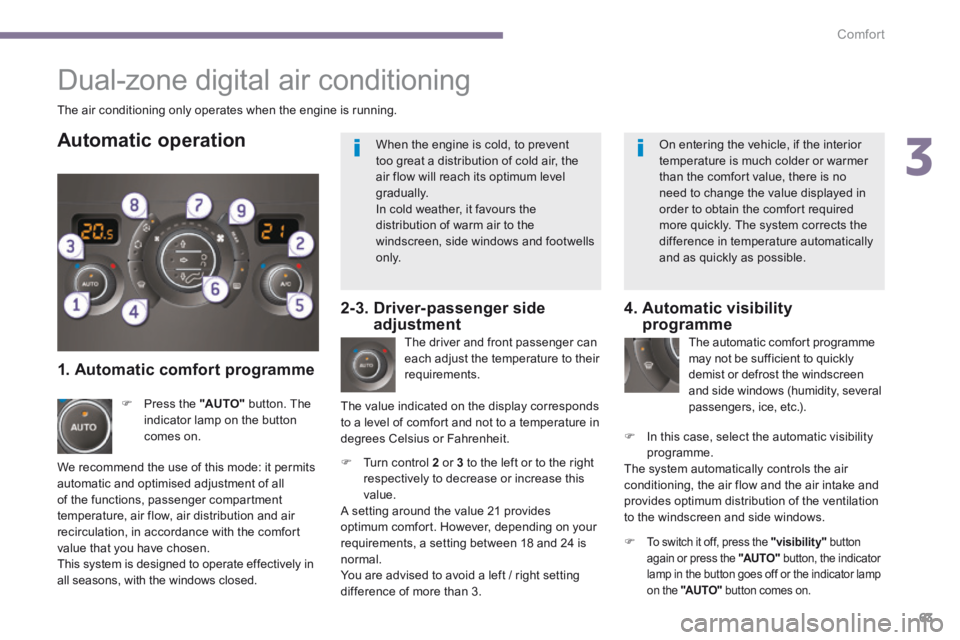
Turn control 2 or 3 to the left or to the right respectively to decrease or increase this value. A setting around the value 21 provides optimum comfort. However, depending on your requirements, a setting between 18 and 24 is normal. You are advised to avoid a left / right setting difference of more than 3.
4. Automatic visibility programme
The automatic comfort programme may not be sufficient to quickly demist or defrost the windscreen and side windows (humidity, several passengers, ice, etc.).
In this case, select the automatic visibility programme. The system automatically controls the air conditioning, the air flow and the air intake and provides optimum distribution of the ventilation to the windscreen and side windows.
Automatic operation
Press the "AUTO" button. The indicator lamp on the button comes on.
Dual-zone digital air conditioning
We recommend the use of this mode: it permits automatic and optimised adjustment of all of the functions, passenger compartment temperature, air flow, air distribution and air recirculation, in accordance with the comfort
value that you have chosen. This system is designed to operate effectively in all seasons, with the windows closed.
The value indicated on the display corresponds to a level of comfort and not to a temperature in degrees Celsius or Fahrenheit.
To switch it off, press the "visibility" button again or press the "AUTO" button, the indicator lamp in the button goes off or the indicator lamp
on the "AUTO" button comes on.
1. Automatic comfort programme
2-3. Driver-passenger side adjustment
When the engine is cold, to prevent too great a distribution of cold air, the air flow will reach its optimum level gradually. In cold weather, it favours the
distribution of warm air to the windscreen, side windows and footwells o n l y.
On entering the vehicle, if the interior temperature is much colder or warmer than the comfort value, there is no need to change the value displayed in order to obtain the comfort required
more quickly. The system corrects the difference in temperature automatically and as quickly as possible.
Page 70 of 404

Comfort
68
Before moving the seat backwards, ensure that there is nothing that might prevent the full travel of the seat, so
as to avoid the risk of of jamming the seat caused by the presence of objects on the floor behind the seat or rear passengers. If the seat jams, stop the movement immediately.
The electrical functions of the driver's seat are active approximately one minute after opening the front door. They are deactivated approximately one minute after the ignition is switched off and in economy mode. To reactivate them, switch on the ignition.
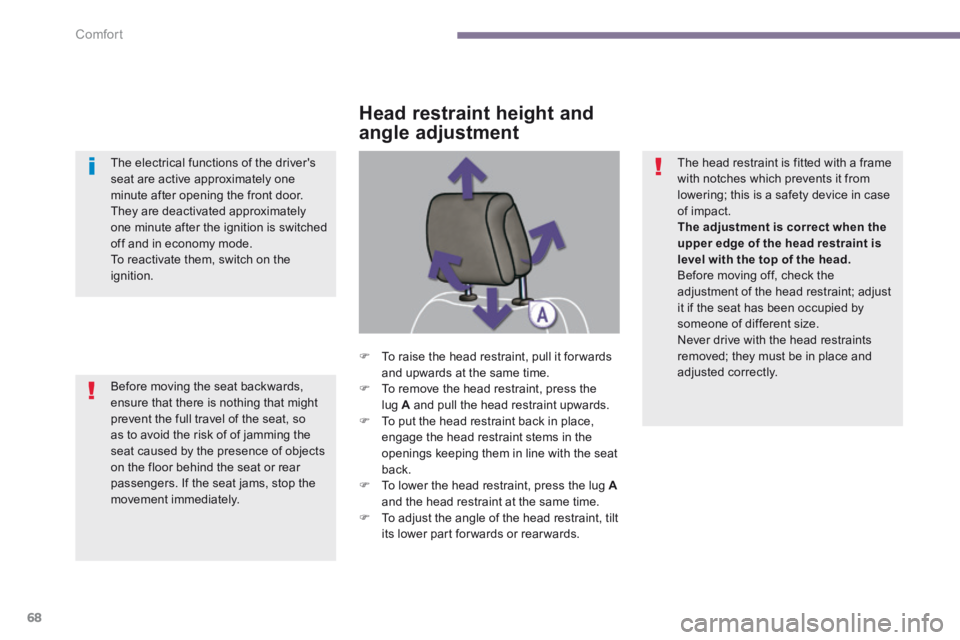
To raise the head restraint, pull it for wards and upwards at the same time. To remove the head restraint, press thelug A and pull the head restraint upwards. To put the head restraint back in place,
engage the head restraint stems in the openings keeping them in line with the seat back. To lower the head restraint, press the lug Aand the head restraint at the same time. To adjust the angle of the head restraint, tilt its lower part forwards or rearwards.
Head restraint height and
angle adjustment
The head restraint is fitted with a frame with notches which prevents it from lowering; this is a safety device in case of impact. The adjustment is correct when the upper edge of the head restraint is level with the top of the head. Before moving off, check the adjustment of the head restraint; adjust it if the seat has been occupied by someone of different size. Never drive with the head restraints removed; they must be in place and adjusted correctly.