2012 VOLKSWAGEN TRANSPORTER instrument cluster
[x] Cancel search: instrument clusterPage 316 of 486
Additional information and warnings:
• Volkswagen information system =>page 24
• Accessories, modifications, repairs and renewal of parts (information stored in the control units) =>page 394
A WARNING
The Intelligent technology used In the Driver Alert System cannot overcome the laws of physics, and functions only within the limits of the system. Do not let the extra conven-ience afforded by the Driver Alert System tempt you Into taking any risks when driving -this can cause accidents. During a long trip, plan regular and sufficient breaks.
• The driver Is responsible at all times for their fitness to drive.
• Never drive a vehicle when you are tired.
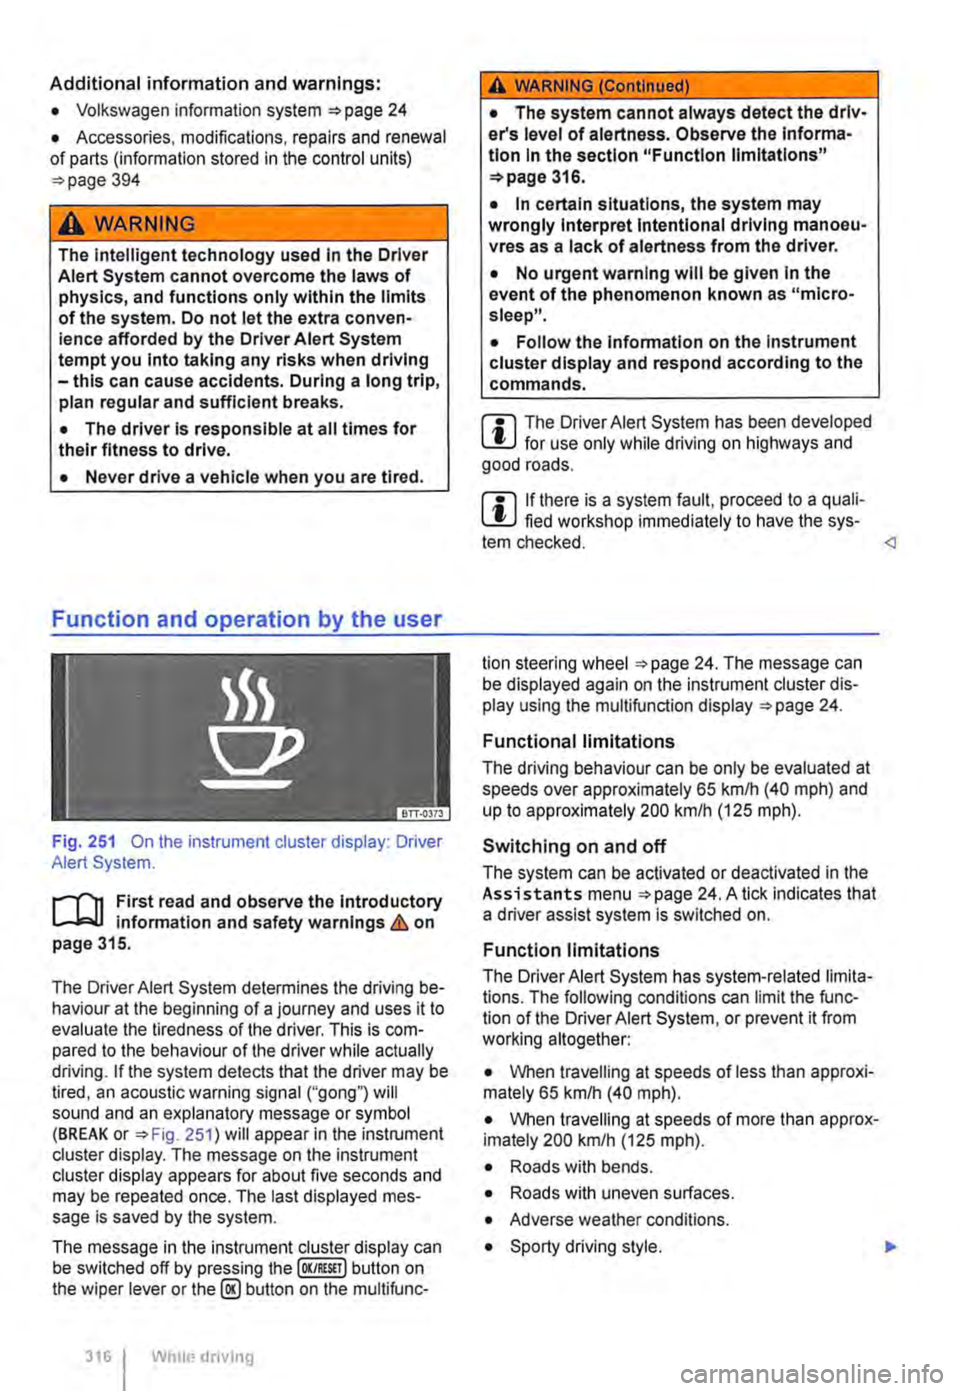
Fig. 251 On the instrument cluster display: Driver Alert System.
r--('n First read and observe the Introductory Information and safety warnings&. on page 315.
The Driver Alert System determines the driving be-haviour at the beginning of a journey and uses it to evaluate the tiredness of the driver. This is com-pared to the behaviour of the driver while actually driving. If the system detects that the driver may be tired, an acoustic warning signal ("gong") will sound and an explanatory message or symbol (BREAK or =>Fig. 251) will appear in the instrument cluster display. The message on the instrument cluster display appears for about five seconds and may be repeated once. The last displayed mes-sage is saved by the system.
The message in the instrument cluster display can be switched off by pressing the (OK/RESIT I button on the wiper lever or the@ button on the multifunc-
316 I Whole driving
A WARNING (Continued)
• The system cannot always detect the driv-er's level of alertness. Observe the Informa-tion In the section "Function limitations" =>page 316.
• In certain situations, the system may wrongly Interpret Intentional driving manoeu-vres as a lack of alertness from the driver.
• No urgent warning will be given In the event of the phenomenon known as "micro-sleep".
• Follow the Information on the Instrument cluster display and respond according to the commands.
m The Driver Alert System has been developed l!..J for use only while driving on highways and good roads.
m If there is a system fault, proceed to a quali-L!..J fied workshop immediately to have the sys-tem checked.
Functional limitations
The driving behaviour can be only be evaluated at speeds over approximately 65 kmlh (40 mph) and up to approximately 200 km/h (125 m ph).
Switching on and off
The system can be activated or deactivated in the Assistants menu =>page 24. A tick indicates that a driver assist system is switched on.
Function limitations
The Driver Alert System has system-related limita-tions. The following conditions can limit the func-tion of the Driver Alert System, or prevent it from working altogether:
• When travelling at speeds of less than approxi-mately 65 km/h (40 mph).
• When travelling at speeds of more than approx-imately 200 km/h (125 mph).
• Roads with bends.
• Roads with uneven surfaces.
• Adverse weather conditions.
• Sporty driving style. .,..
Page 319 of 486
A WARNING
The intelligent tyre monitoring system tech-nology cannot overcome the laws of physics, and functions only within the limits of the system. Incorrect handling of the wheels and tyres can lead to a sudden loss of pressure in the tyres, tread separation and even tyre blow-out.
• Check tyre pressures regularly and always maintain the specified tyre pressure value =>page 367. If the tyre pressure is too low, it is possible that the tyre temperature will in· crease to such an extent that the tread peels off and the tyre bursts.
• Always maintain correct cold tyre pres-sure as listed on the tyre pressure label =>page 367.
• Check tyre Inflation pressure regularly when the tyres are cold. Adjust tyre pressure in the cold tyre to the recommended tyre pressure for the tyres Installed on your vehi· cle as necessary.
• Check your tyres regularly for signs of wear or damage.
• Never exceed the top speed and load per-mitted for the fitted tyres.
CD
If valve caps are missing, the valve could be damaged. Always use valve caps that comply with the factory-fitted valve cap specifications. Always screw on valve caps fully. Do not use metal valve caps.
Indicator lamp
Under-inflated tyres will increase fuel con-W sumption and tyre wear. A higher tyre pres-sure generally reduces the fuel consumption. How-ever, the maximum tyre pressures specified by the manufacturer must always be adhered to.
m When new tyres are driven at high speeds for L!..J the first time, they can expand slightly and trigger a one-off pressure warning.
m Old tyres should only be replaced by tyres L!..J that have been approved by Volkswagen Commercial Vehicles for the vehicle type.
m Do not rely solely on the tyre monitoring sys-L!..J tern. Check your tyres regularly to ensure that they are properly inflated and have no signs of damage, such as punctures, cuts, cracks, and blis-ters. Remove any objects that become embedded in the tyre tread but have not penetrated into the body of the tyre itself.
m The tyre monitoring system is adjusted for L!..J the factory-recommended tyre pressures to be found on the tyre pressure label.
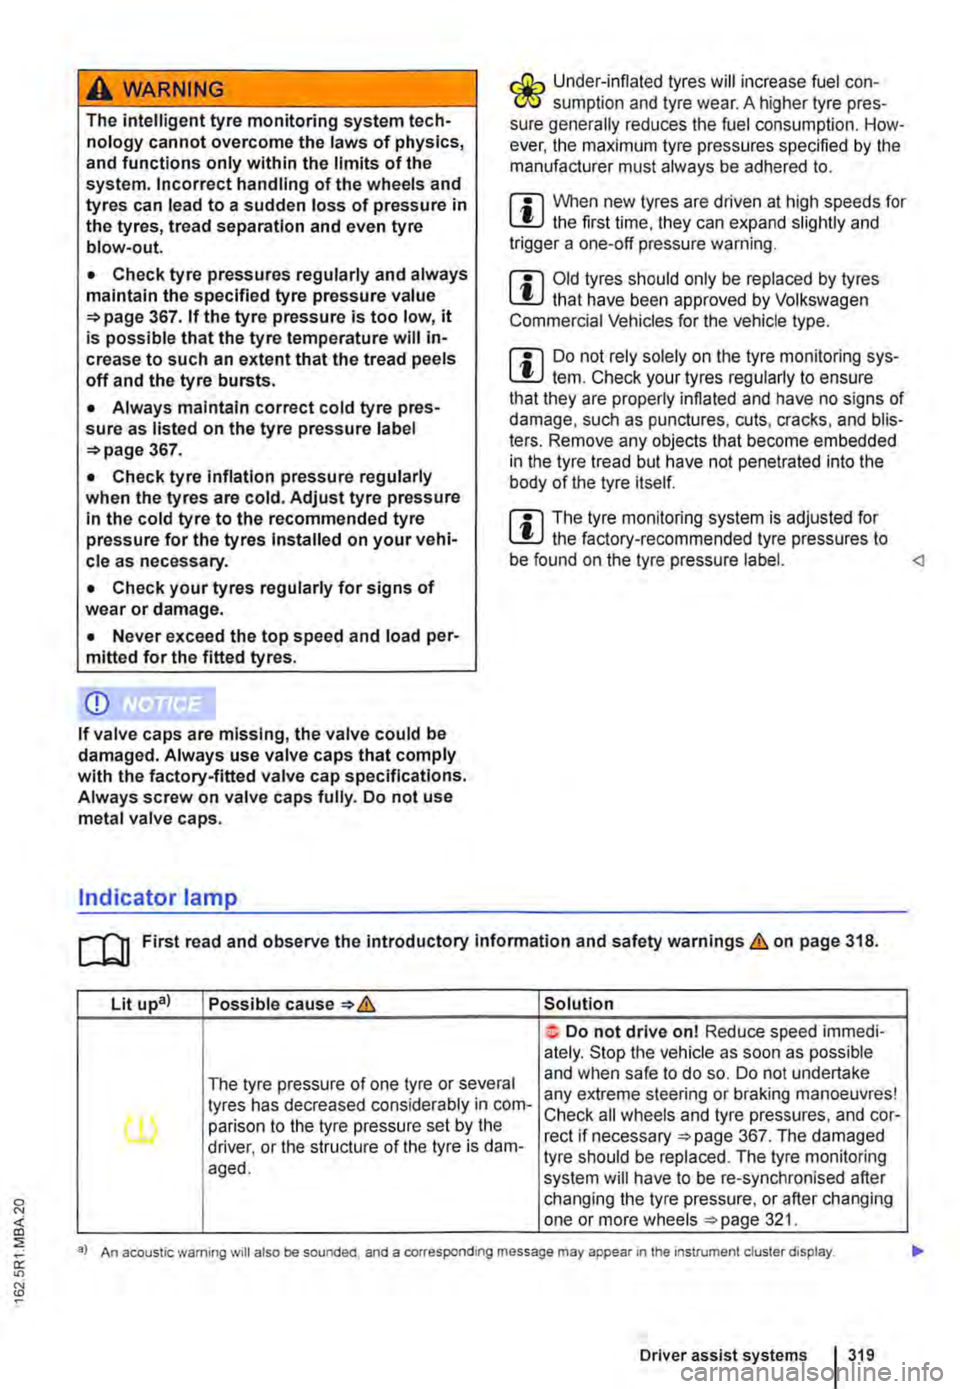
Lit upa) Possible cause=>& Solution
Do not drive on! Reduce speed immedi· ately. Stop the vehicle as soon as possible
The tyre pressure of one tyre or several and when safe to do so. Do not undertake
tyres has decreased considerably in com-any extreme steering or braking manoeuvres!
(l) parison to the tyre pressure set by the Check all wheels and tyre pressures, and cor-rect if necessary =>page 367. The damaged driver, or the structure of the tyre is dam-tyre should be replaced. The tyre monitoring aged. system will have to be re-synchronised after changing the tyre pressure, or after changing one or more wheels =>page 321.
a) An acoustic warning will also be sounded, and a corresponding message may appear 1n the instrument cluster display.
Driver assist systems I 319
Page 321 of 486

Function and control
Fig. 253 In the stowage compartment on the front passenger side: button for the tyre monitoring sys-tem.
l"'"""f'n First read and observe the Introductory l.-J,.:,LL Information and safety warnings & on page 318.
The tyre monitoring system uses data from the ASS sensors and other functions to check the speed of rotation and the rolling circumference of the individual wheels. The rolling circumference of the wheels changes, if the tyre pressure is too low. This is then shown by the tyre monitoring sys-tem ill in the instrument cluster.
The operation of the tyre monitoring system is im-paired:
• If the tyre pressure has been changed manual-ly.
• If the tyre has structural damage.
• If the vehicle Is loaded more heavily on one side.
• If the wheels on one axle are loaded more heavily, e.g. high load level.
• If snow chains have been fitted.
• If one wheel per axle has been changed.
• When driving with a heavy trailer attached.
• If you are driving under winter conditions or on unsurfaced roads.
• When driving fast with hard acceleration and braking manoeuvres.
Synchronising the tyre monitoring system
The tyre monitoring system will have to be re-synchronised after changing the tyre pressure, or after changing one or more wheels. This also ap-plies for changing the wheels, e.g. from the front to the rear, and for changing from summer tyres to winter tyres.
The saved values must be reset before the system can be resynchronised.
• Switch on the ignition, and while the vehicle is stationary
• Press and hold the =>Fig. 253 button until an acoustic confirmation signal is emitted.
• OR: with some vehicle equipment options, you can open menu option Tyre pressure in the in-strument cluster display and save the new tyre pressures there =>page 24.
Once the saved values have been reset, the sys-tem calibrates itself independently to the fitted tyres and the tyre pressures filled by the driver dur-ing normal vehicle operation. The calibrated values are adopted and monitored after a long journey at various speeds.
If the wheels are loaded more heavily than normal, e.g. if the vehicle is carrying heavy payload, the tyre pressure must be raised to the recommended full-load tyre pressure before synchronisation =>page 367.
m The tyre monitoring system stops working if l!.J there is a fault in the ESC or ASS =>page 269.
m When using snow chains, an incorrect dis-l!.J play may be shown as the snow chains in-crease the tyre circumference =>page 367.
Page 338 of 486
Programming the supplementary heating system
r('n First read and observe the introductory L-Wl Information and safety warnings & on page 332.
In vehicles with camping equipment (California), the supplementary heater is programmed via the central control panel =>page 192.
Setting the date
Before being used for the first time and if the vehi-cle battery has been disconnected and reconnec-ted, the date needs to be set.
• Press any button on the roof display to activate the roof display.
• Press button @!) until the date is displayed.
• Press button @!) again. The day flashes.
• Press the function button .... or T until the re-quired day is displayed.
• Press button @!) again to confirm the day. The month flashes.
• Proceed in the same way for the month and the year.
Time
The time is automatically taken from the instrument cluster.
Setting the start time
You can programme up to three different start times. Only one of these can be activated at a time.
The following steps must be carried out in less than 10 seconds as the procedure will otherwise be stopped.
• Press any button on the roof display to activate the roof display.
• Press until OFF is displayed.
• Press the @) button, press function button .... or T as often as necessary until ON is displayed.
• Press the@) button to confirm.
• Press the function button .... or T until the re-quired temperature or mode is displayed.
• Press the @!) button to confirm.
• Press the function button .... or T as often as necessary until the start time to be switched on or off is displayed.
338 I While dnvmg
• Press the function button .... or T until the re-quired day of week is displayed. If a day is not dis-played, no day has been programmed, only a time. The supplementary heater will then be switched on at this programmed time.
• Press the @) button to confirm the selected day of the week. The hour menu is displayed.
• Proceed in the same way for the hour, for mi-nutes as well as the operating duration.
• Press the @) button to confirm the settings. A summary of the settings is displayed.
The start time for which the changes have been made has been activated. To activate additional start times, press and hold down for several seconds, select the start time with the func-tion buttons .... or T and then proceed as descri-bed above.
Deactivating the start time
If changes have been made for a start time, this start time still remains activated. To deactivate the start time, proceed as follows:
• Press any button on the roof display to activate the roof display.
• Push and hold down button for several seconds, then press the@) button until an active start time that is to be deactivated is displayed.
• Press the function button .... or T as often as necessary until OFF is displayed.
• Press the @) button to confirm.
The start time has now been deactivated and is no longer shown on the roof display.
A WARNING
Never program the supplementary heating system so that Is switched on and run In un-ventllated or enclosed areas. The fumes from the supplementary heating system contain carbon monoxide, which Is an odourless and colourless poisonous gas. Carbon monoxide can cause people to lose consciousness. lt can also cause death.
Page 341 of 486
A WARNING (Continued)
CD
-Please ensure that the spare fuel can is· ter corresponds with the Industry stand· ard, for example AN SI or ASTM F852-86.
• Remove split fuel from all vehicle compo· nents as quickly as possible In order to avoid damage to the wheel housing, tyres and vehicle paint.
• • Filling up with petrol in a vehicle fitted with a diesel engine or refilling with diesel in vehicle equipped with a petrol engine can cause seri· ous ands expensive engine damage and dam· age to the fuel system that is not covered by
Indicator lamps and fuel gauge
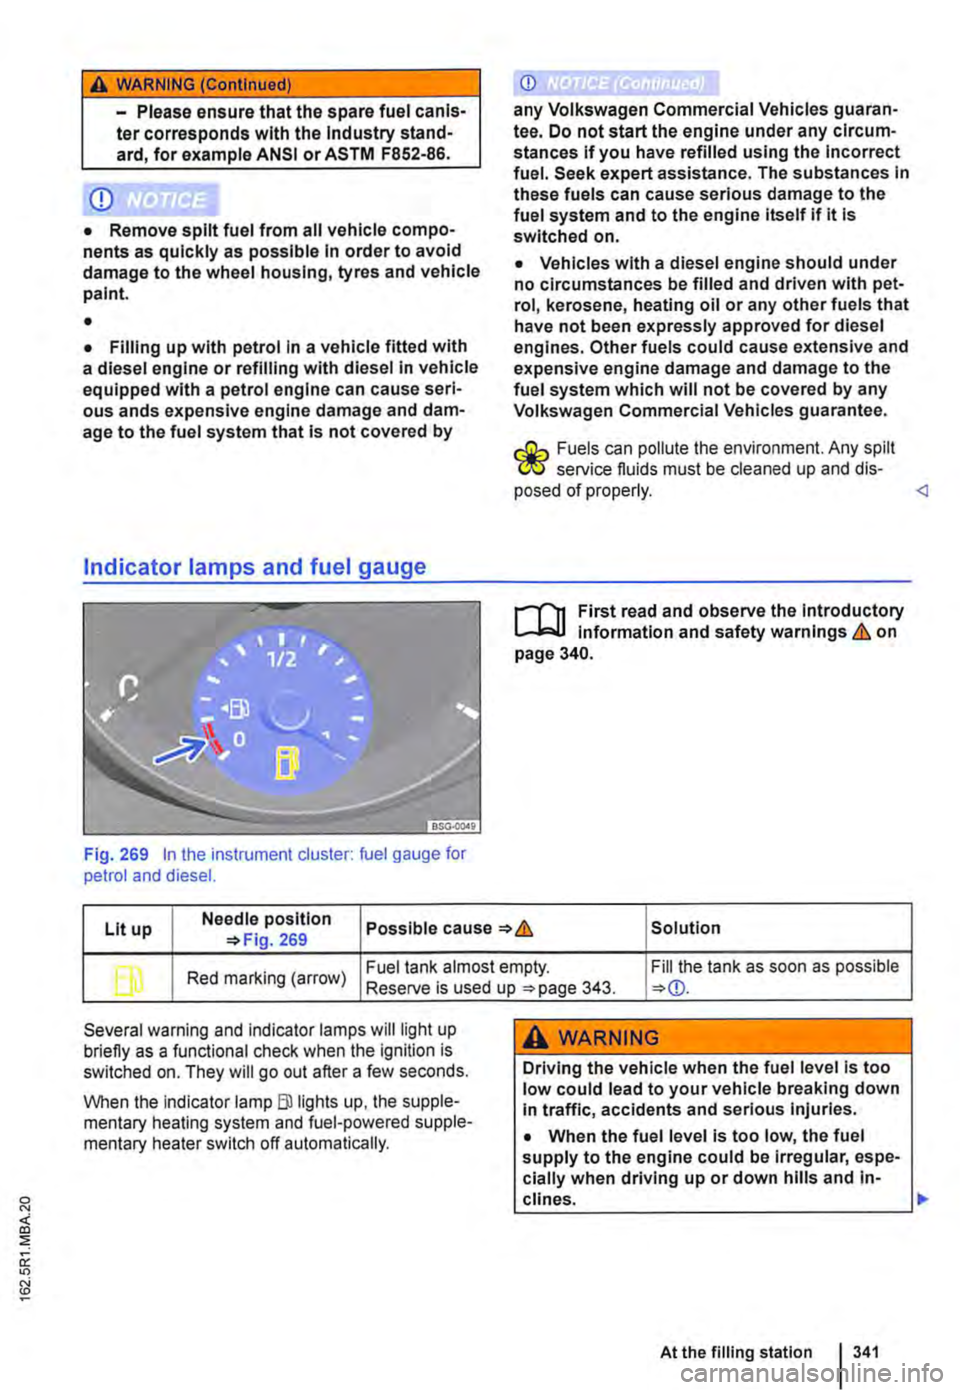
Fig. 269 In the instrument cluster: fuel gauge for petrol and diesel.
CD
any Volkswagen Commercial Vehicles guaran· tee. Do not start the engine under any circum-stances if you have refilled using the Incorrect fuel. Seek expert assistance. The substances In these fuels can cause serious damage to the fuel system and to the engine itself if it Is switched on.
• Vehicles with a diesel engine should under no circumstances be filled and driven with pet· rol, kerosene, heating oil or any other fuels that have not been expressly approved for diesel engines. Other fuels could cause extensive and expensive engine damage and damage to the fuel system which will not be covered by any Volkswagen Commercial Vehicles guarantee.
r.:Gh Fuels can pollute the environment. Any spilt W service fluids must be cleaned up and dis· posed of properly.
Lit up Needle position Possible cause & Solution 269
b Red marking (arrow) Fuel tank almost empty. Fill the tank as soon as possible Reserve is used up 343.
Several warning and indicator lamps will light up briefly as a functional check when the ignition is switched on. They will go out after a few seconds.
When the Indicator lamp Blllghts up, the supple-mentary heating system and fuel-powered supple-mentary heater switch off automatically.
A WARNING
Driving the vehicle when the fuel level is too low could lead to your vehicle breaking down In traffic, accidents and serious injuries.
• When the fuel level is too low, the fuel supply to the engine could be Irregular, espe-cially when driving up or down hills and in-clines. .,..
At the filling station 341
Page 346 of 486
CD
• Your vehicle is not suitable for use with bio-diesel and must not be filled up or driven with biodiesel. Failure to observe this point can re-sult in damage to the fuel system and engine.
• Some diesel manufacturers blend biodiesel with diesel fuel in compliance with European Standard 590 or an equivalent standard (in Ger-many). Use of this diesel is allowed and will not damage the engine or fuel system.
• The diesel engine has been developed for use with diesel only. For this reason, petrol, heating oil or other unsuitable fuels may not be used. These fuels can cause serious damage to the fuel system and engine.
CD
• The service life of the diesel particulate filter can be reduced considerably if diesels with a high sulphur content are used. A Voikswagen Commercial Vehicles dealership will be able to tell you which countries have diesel with a high sulphur content.
o:::n Introduction
This chapter contains information on the following subjects:
Warning and indicator lamps Refilling Ad Blue® ... 347
348
SCR catalysts can be used to reduce emissions from diesel engines (SCR = Selective Catalytic Re-duction). The SCR catalyst uses Ad Blue® urea sol-ution to convert nitrogen oxides into nitrogen and water.
If the vehicle is equipped with this kind of emission control system for diesel vehicles, the filler neck for the Ad Blue® tank is located below the filler cap for the fuel tank.
The Ad Blue® level should be checked within the scope of the service work Service schedule.
Information on AdBiue®
The Ad Blue® consumption figures depend on the individual driving style, the system's operating tem-perature and the ambient temperature that the ve-hicle is operated in.
The vehicle is fitted with a separate tank for Ad Bl-ue®. The Ad Blue® tank holds approximately 13 li-tres. For technical reasons, the capacity may be slightly larger when refilling using refill bottles.
The Ad Blue® tank must never run empty. As of a remaining distance of approximately 2,400 km. the instrument cluster display will indicate that the
346 While drivmg
Ad Blue® must be refilled 348. If the re-maining range is 0 km, the engine cannot be star-ted anymore 347.
The Ad Blue® trademark is held by the German As-sociation of the Automobile Industry (VDA) in the USA, Germany, the European Union and other countries.
Additional information and warnings:
• Fuel 343
• Accessories, modifications, repairs and renewal of parts 394
A WARNING
If the AdBiue® level is too low, the vehicle cannot be restarted after the Ignition has been switched off. Starting with jump leads is also not possible.
• Refill AdBiue® at the latest when the re-maining distance reaches approximately 1,000 km.
• Never allow the Ad Blue® tank to run emp-ty.
A WARNING
Ad Blue® is an Irritant and corrosive fluid that can damage the skin, eyes and breathing passages upon contact.
Page 348 of 486
![VOLKSWAGEN TRANSPORTER 2012 Owners Manual Refilling AdBiue®
Fig. 271 Behind the tank flap: filler cap of the Ad Blue tank unscrewed [A CD and attached in holder [[ ®. Fill the Ad Blue tank using a filler bottle [B@ or a filler nozzle C] @. VOLKSWAGEN TRANSPORTER 2012 Owners Manual Refilling AdBiue®
Fig. 271 Behind the tank flap: filler cap of the Ad Blue tank unscrewed [A CD and attached in holder [[ ®. Fill the Ad Blue tank using a filler bottle [B@ or a filler nozzle C] @.](/manual-img/18/55785/w960_55785-347.png)
Refilling AdBiue®
Fig. 271 Behind the tank flap: filler cap of the Ad Blue tank unscrewed [A CD and attached in holder [[ ®. Fill the Ad Blue tank using a filler bottle [B@ or a filler nozzle C] @.
,....-.('n First read and observe the Introductory 1.-J=,U Information and safety warnings & on page 346.
To refill with Ad Blue®, park the vehicle on a level surface and not on any kind of incline. The tank level gauge may not detect the refill quantity cor-rectly if the vehicle is not parked on a level surface.
Do not fill fuel and AdBiue® at the same lime.
If a message about the Ad Blue® level appears on the instrument cluster display, refill with at least 7 litres of Ad Blue®. A smaller amount of refill is insufficient. if no message about the AdBiue® level appears on the instrument cluster display, use any quantity to refill the tank to the maximum level.
Opening the tank filler neck
• Opening the tank flap.
• Unscrew the cap of the tank filler neck =>Fig. 271 anticlockwise.
• Fit the cap of the filler neck into the holder]) @.
Use only Ad Blue® that complies with the stand-ard ISO 22241-1.
Refilling using a refill bottle
• Please read the manufacturer's notes and infor-mation on the refill bottle.
• Observe the expiry date.
• Remove the screw top of the refill bottle.
• Place the neck of the refill bottle =>Fig. 271 [ID @ vertically onto the tank filler neck and turn it clockwise hand-tight.
• Push the refill bottle towards the filler neck, press and hold down.
348 While driving
• Wait until the contents of the refill bottle have entered the Ad Blue® tank. Do not crumple up or damage the refill bottle!
• Unscrew the refill bottle anticlockwise and lift it carefully up and out =>CD.
• When the Ad Blue® tank is full, Ad Blue® will no longer flow out of the bottle and into the tank.
Refilling using a filler bottle
• Please read the manufacturer's notes and infor-mation on the container.
• Observe the expiry date.
• Use the integrated spout.
• Refill at least 7 litres of AdBiue®. A smaller amount of refill is insufficient.
• Do overfill the tank. The Ad Blue® tank is com-pletely filled when Ad Blue® reaches the top level of tank filler neck.
Refilling using a filler nozzle
• The procedure for refilling with an Ad Blue® filler nozzle =>Fig. 271 @]@) is the same as for refilling the fuel tank with fuel =>CD.
• The Ad Blue® tank is full as soon as the (proper-ly operated) filler nozzle clicks off for the first time =>CD.
Closing the tank filler neck
• Screw the cap onto the tank filler neck =>Fig. 271 clockwise until it clicks into place.
• Close the tank flap.
Page 359 of 486
Warning lamp and coolant temperature display
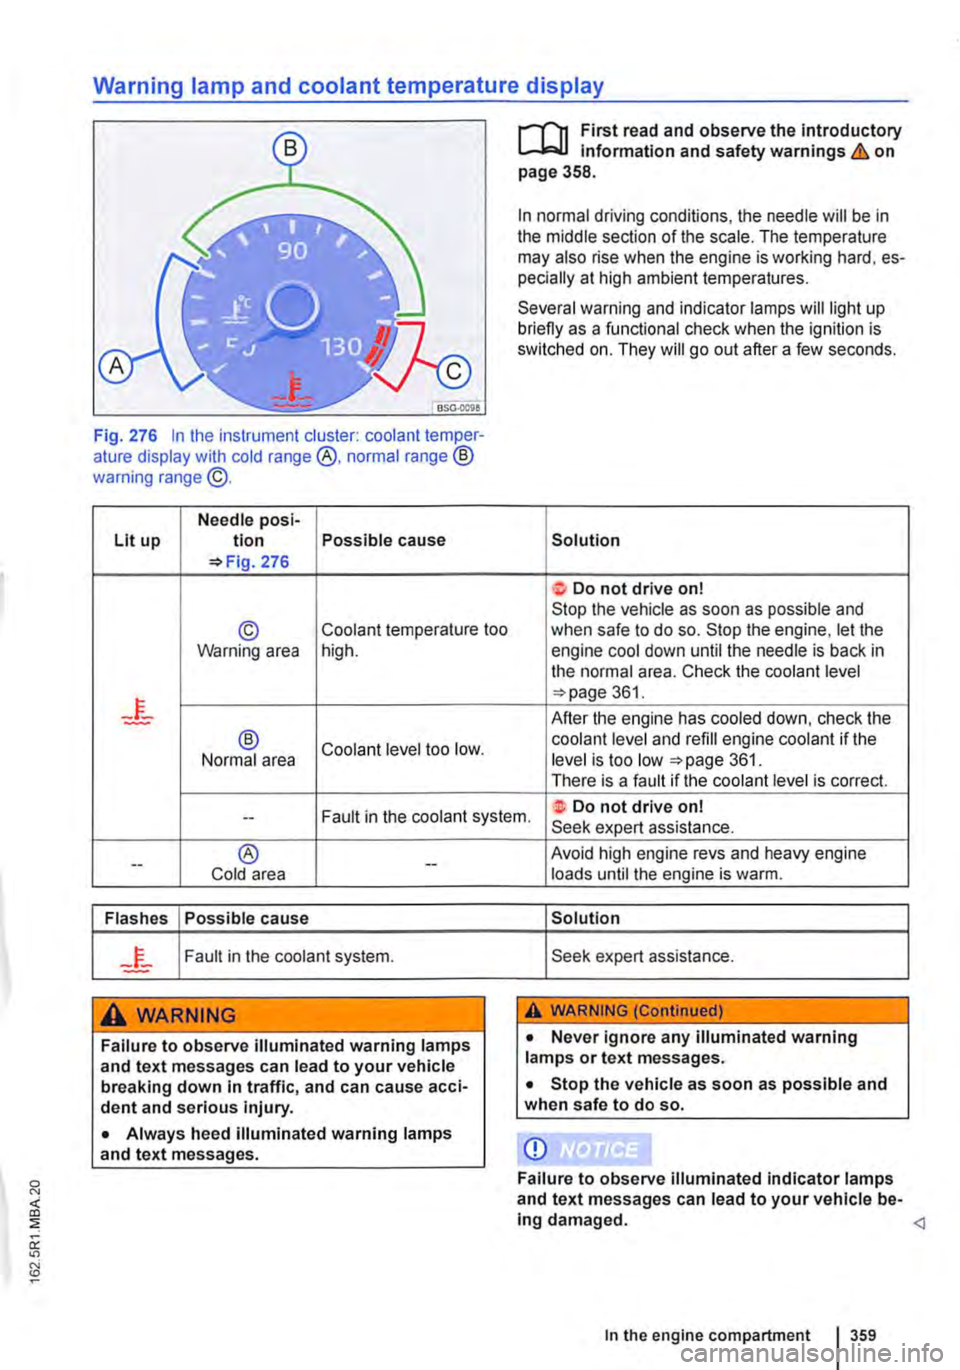
Fig. 276 In the instrument cluster: coolant temper-ature display with cold range @, normal range ® warning range @.
Needle posi-Lit up tion Possible cause =>Fig. 276
© Coolant temperature too Warning area high.
® Coolant level too low. Normal area
r-f"n First read and observe the introductory L,....J.:.lJ Information and safety warnings & on page 358.
In normal driving conditions, the needle will be in the middle section of the scale. The temperature may also rise when the engine is working hard, es-pecially at high ambient temperatures.
Several warning and indicator lamps will light up briefly as a functional check when the ignition is switched on. They will go out after a few seconds.
Solution
t Do not drive on! Stop the vehicle as soon as possible and when safe to do so. Stop the engine, let the engine cool down until the needle is back in the normal area. Check the coolant level =>page 361.
After the engine has cooled down, check the coolant level and refill engine coolant if the level is too low =>page 361. There is a fault if the coolant level is correct.
Fault in the coolant system. ·t Do not drive on! --Seek expert assistance.
--® Cold area --
Flashes Possible cause
Fault in the coolant system.
A WARNING
Failure to observe illuminated warning lamps and text messages can lead to your vehicle breaking down In traffic, and can cause acci-dent and serious injury.
• Always heed illuminated warning lamps and text messages.
Avoid high engine revs and heavy engine loads until the engine is warm.
Solution
Seek expert assistance.
A WARNING (Continued)
• Never ignore any illuminated warning lamps or text messages.
• Stop the vehicle as soon as possible and when safe to do so.
CD
Failure to observe illuminated indicator lamps and text messages can lead to your vehicle be-ing damaged.