2012 VOLKSWAGEN GOLF PLUS lock
[x] Cancel search: lockPage 115 of 541
first read and no te the introductory informatio n an d heed th e WARNINGS on page
Safe ty belt s for the rear seats and the fro nt
crash .
W hen
ever a child res traint is in stalled wi th a sa fe ty
b elt , the safe ty be lt must be loc ked so that b elt webbin g cannot unreel. The sw itc hable lock ing feature lets yo u l ock the belt so that a chil d strain t can be properly in stalle d and, for example, so th a t it ca nnot tip to th e si de w hen the ve hicle goes around a corner.
on the front
s eal
A lways carefull y fo llow the c hild res tra in t factu rer's instruct ions when insta llin g a c hild str ain t in your ve hicl e. B efo re trying to a
c hild restr aint on the fro nt passenger seat, be sure
t o follow th e specia l instructio ns and heed th e WARNINGS below. To activa te the s witc h abl e
lock in g feature:
the chil d restraint on
in exce ptiona l c ircu mstances, you must
senger seat so that availa b le safe ty belt length is
s u ffici ent to properly install the child restraint. Make su re the backrest is in the upright p osition.
Always
Mo ve the fron t passenger seat to the high est posit io n in th e seat's up and down adjustment ra nge and m ake sure th e backres t is in the upright
posit io n.
Move the front passenger seat to the rearmost
positi on in th e seat's fo re a nd aft adjustment
B efo re drivin g
ra nge . and as far away fro m the ai rbag as possib le,
b e fore installing th e fonvar d-facing child restraint.
I f a te ther stra p is bein g used to t ie t he ch ild
t h e safety belt upper anchorage for the rear
o utboar d seatin g positi on to the hi ghest ment position.
R o ute the safety be lt around or through the
c hild res traint using th e proper p ath fo r the safe ty
b elt as specified by th e chil d res traint turer.
M ak e sure that the re d r ele ase button faces
away from the chil d res train t so th a t it can b e buckle d quick ly.
Remove all slack fro m the la p belt po rtion of the safety belt and ho ld it tightly against the chi ld
rest rai nt.
th e child restra in t down wit h your full
weight t o make su re that th e child restrai nt w ill be properly in stalled w ith the safety belt re all y tig ht.
Activating the switchable locking feature
pull the sh o uld er be lt portio n of th e
sa fety belt the way out of the retractor.
W hil e keep ing your weigh t o n the child strain! , guide th e sh o ulder belt portio n of th e
s a fety belt back into the retractor until th e belt lies flat a nd is tig htened aga inst the chil d restraint.
You sh o uld hea r a noise as th e belt
w inds back in to the in ert ia reel o f th e safety belt tractor. Test the sw itch a bl e lock ing feature by
pullin g on th e belt. s h o ul d no lo nge r be able to
pull the belt ou t of the retracto r. T he sw itc habl e
l ock ing feature is now active.
o n th e sa fe ty belt to make su re the safe ty
belt is prope rly fa stened a n d tight.
Check th e child res traint for p roper in stallatio n
by pullin g on th e c hild re straint at th e place where the ve hicle's safety belt goes into the ch ild straint. The child restrai nt sh ou ld no t m ove ward or sideways by more than a bout one in ch (2.5 e m).
After ch eck ing to make su re that th e chil d
Page 116 of 541
weight-sens ing mat in side th e fron t passenger
seat, so that the front passenger airbag status is ways correct ly signaled by th e AJR BAG light. be s ure to read th e add it io n al
im portant in form ation an d heed the WARN INGS abo ut Advanced Airb ag Sys te m and the
the red button on t he s afe ty belt buckle.
T he belt tong ue will pop out of th e buckle.
Guide th e sa fe ty belt bac k by hand so that it
roll s easily
va te d i nadve rten tly, the safety be lt mu st b e
lf the
able
A lways make sure th at th e safety belt tra cto r i s locke d when in stallin g a child straint. An unlocked safe ty belt re tractor cannot h o ld the c hild restraint in pla ce during normal driving or in a c rash.
S itting properly and s a fel y
Alw ays buckle the child seat A loose child stra int can fly around during a sudden sto p or in
a c olli sion.
A lways make sure the seat bac k res t to which
th e c hild restraint is a tta ched is in an upri ght siti on and securely la tc h ed int o place and cannot f old fonvar d. attached to it could fly fonvard in a c olli sion or o th er em erge ncy tion.
A lways read and heed all WARN INGS
page lOl , Child safety r es traints . S pec ia l precaution s apply when in sta llin g a
c hild restra int on the fro nt passe nger seat
Never unfa sten your safe ty belt to deactivate
th e switch a bl e lockin g feature for a child stra int whil e the vehicl e is moving. w oul d
n o t b e res trained and c o ul d be seriou sly inju red in an acci dent.
Note
When in stallin g a child restra int , b e care ful not to
g et th e belt caught in th e s tru cture of the child straint and become damaged, es peci all y when the sw itchabl e loc kin g feature has bee n activated.
114 115
Page 117 of 541
Securing the
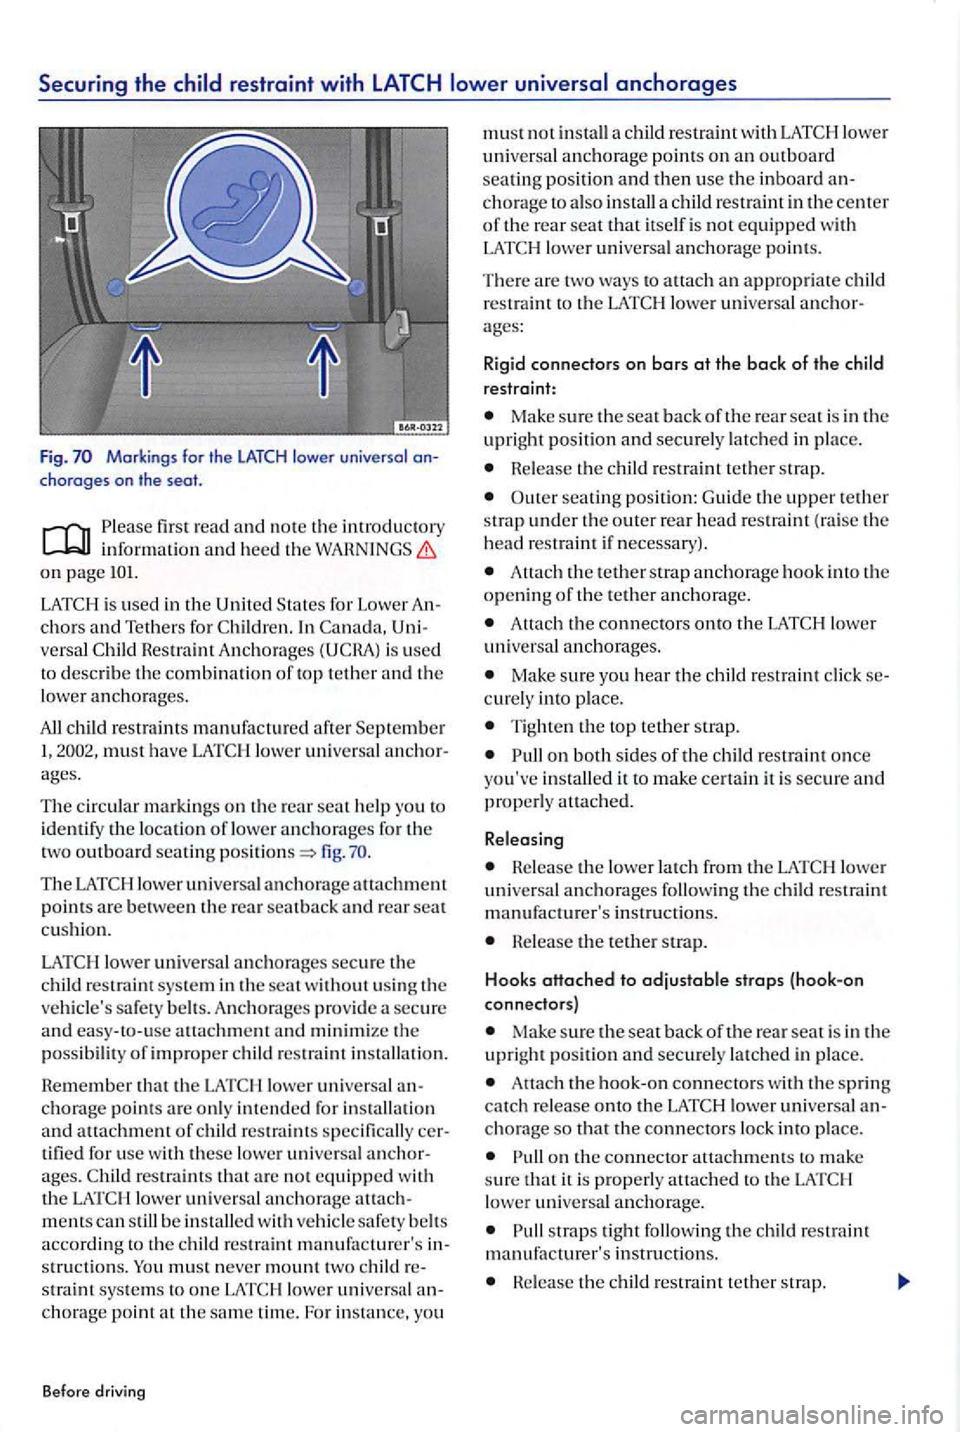
Markings for the LATCH lower universal choroges on the
firs t read and no te th e introducto ry inform ation heed th e W ARN INGS on page
In is used
to describe the combination of top tethe r a nd the
lower anc h ora ges .
All must have LATC H l ower universa l
fig.
restraint sys te m in the seat w ith out usi ng the
ve hicle's safety b elt s. Anch o rages prov ide a secure
a nd easy-to- use attachment a nd minimize the possib ility o f improper chil d restraint installa tio n.
R e m em
ber that the LAT C H lower u niversa l
restraint s specifically tifi ed for use w ith these lower unive rsal
mentscan still b e in stalle d w ith vehicl e safe ty belt s accord in g to t he c hild restraint manufa cturer's stru ctio ns. straint syste m s to one LA T C H lowe r universa l chorage point at the sam e tim e. For in sta nce, you
Before driving
must not in stall a child restraint with LA T C H lower unive rsal a n chorage p oints on a n outboard seatin g posi tion and then use the inboard ch o rage to also install a c hild restraint in the cente r
o f th e rea r seat that itself is no t equipped with LATC H lower unive rs al anchorage point s.
There are two ways to a ttach an approp riate restraint to the LATCH lower unive rsa l
Make sure the seat back oft h e rear seat i s in the upright positi on and securely latc h ed in place.
Hele ase th e c hild res tra int tethe r strap.
O uter seating positi on : G uid e th e upper t ether strap under the outer rear head res traint (raise the
h ead restra int if necessary) .
Attach the tether strap an ch o rage hook int o th e openin g of the tether anc h o rage.
Attach the connecto rs onto the LAT C H lower unive rsal a n ch o rages.
Ma ke sure you hear the restr aint click curely into p lace.
Ti ghten the top te th er stra p.
o n both si des of the c hild restraint once yo u've installed it to m ake certain it is secure a nd
p roperly auach ed.
Releasing
Helease the lower l atch from the LATC H lower
uni versa l a nchorages followin g the c hild restra int
m anufacturer's instru ctions.
Release the tethe r strap.
Hooks
attached to adjustable strops {hook-on
connectors)
Ma ke sure the seat back oft h e rea r seat is in the
u pright positi on and securely la tc h ed in place.
connecto rs w ith th e spring catc h re lease onto the LATCH lower universa l cho rage so that the connectors lock into p lace.
straps tight fo llo win g the c hild restrai nt
m an ufacture r's in str u ction s.
nele ase the child restraint tet he r stra p.
Page 120 of 541
Never attach two child restraint sys te m s to one top tether strap or top tether anchorage.
Neve r attach a child seat tether strap to a
Never use ch ild restraint top tether
pant restraints.
Never secure or a ttach any luggage or other items to the top teth er anchorages.
a tether o r other strap is used to attach a
c hild restraint to the front passenger seat, make
sure tha t it is not so tight that it causes th e
we ight-se nsing mat for the A dvanced Airbag
T he heavier weight registe red can make the
Advanced Airbag work as though an
adult wer e on the se at and deploy the Adva nced Airbag when it should be s uppressed causing rious or eve n fa tal injury to the child .
If yo u must ins tall a rearward-facin g child seat o n th e fron t passenger seat because of ce ptional circumstances, but th e BAG
Facility .
Note
If you leave the child restraint with the tether strap firml y installed for seve ral days, this could leave a mark on th e upholste ry o n th e seat cu shion and backre st in the area w he re the teth er
s tra p was installed. The upho ls tery would also be permanen tly stretched around th e tether strap.
This applies especiall y to leather seats .
Follow the c hild restraint manufacturer's struction s w he n installing or remo vin g
Unlo ck th e backrest and fold it slightl y ward.
Gu ide th e upper tethe r strap under or along both s ides of the head restraint (depending on th e
c hild restraint model) into th e luggage
the backres t back into its upright position and press it firmly into th e locking
the c hild restraint to the lower chorage points.
priate anch orage.
Tighten the tether strap firml y so that th e child
restraint lies secure ly agai nst the
first read and no te th e introdu ctory infor mation and heed th e o n page
The followin g are som e sou rces of ad ditional formation about child restraint sele ct io n.
advises that th e best child restraint is one that fits your child and fits in your ve hicl e, and whic h you use correctly and co nsis te ntly.
Try before you buy!
Tran sport Tel.: I oder I (613) 998-86 16, wenn man in der Regio n ist.
www .tc.gc.ca/ roadsa fe ty
Sitting properly and safely
Nat io nal Hi gh way Traffic
www.nhtsa.gov
National Tel.:
B e lt
www.carseat.org
Volkswagen
118 119
Page 126 of 541
may not come on in fog or heavy rain. You have to
s witch on the low-beam headlight s yourself.
cool o r h umid weather, th e in sid es of th e headligh ts , a nd turn sign als
can t e mporaril y fog up. Thi s is normal and does not affec t th e servi ce life of th e ve hicle's lighti ng
read and note t h e intr oductory
o n page
Instrum ent
page
Dynamic headlight range adjustment
ve hicles with the Adaptiv e Front Lighti ng th e hea dlight range is automati cally
adj uste d to the ve hicl e loading con dition once the
l ow bea ms are switch ed on.
H
eadli ghts that are aimed too high because of the way the vehicle is loaded can blind
Always adjust headli ght s to load ing
page
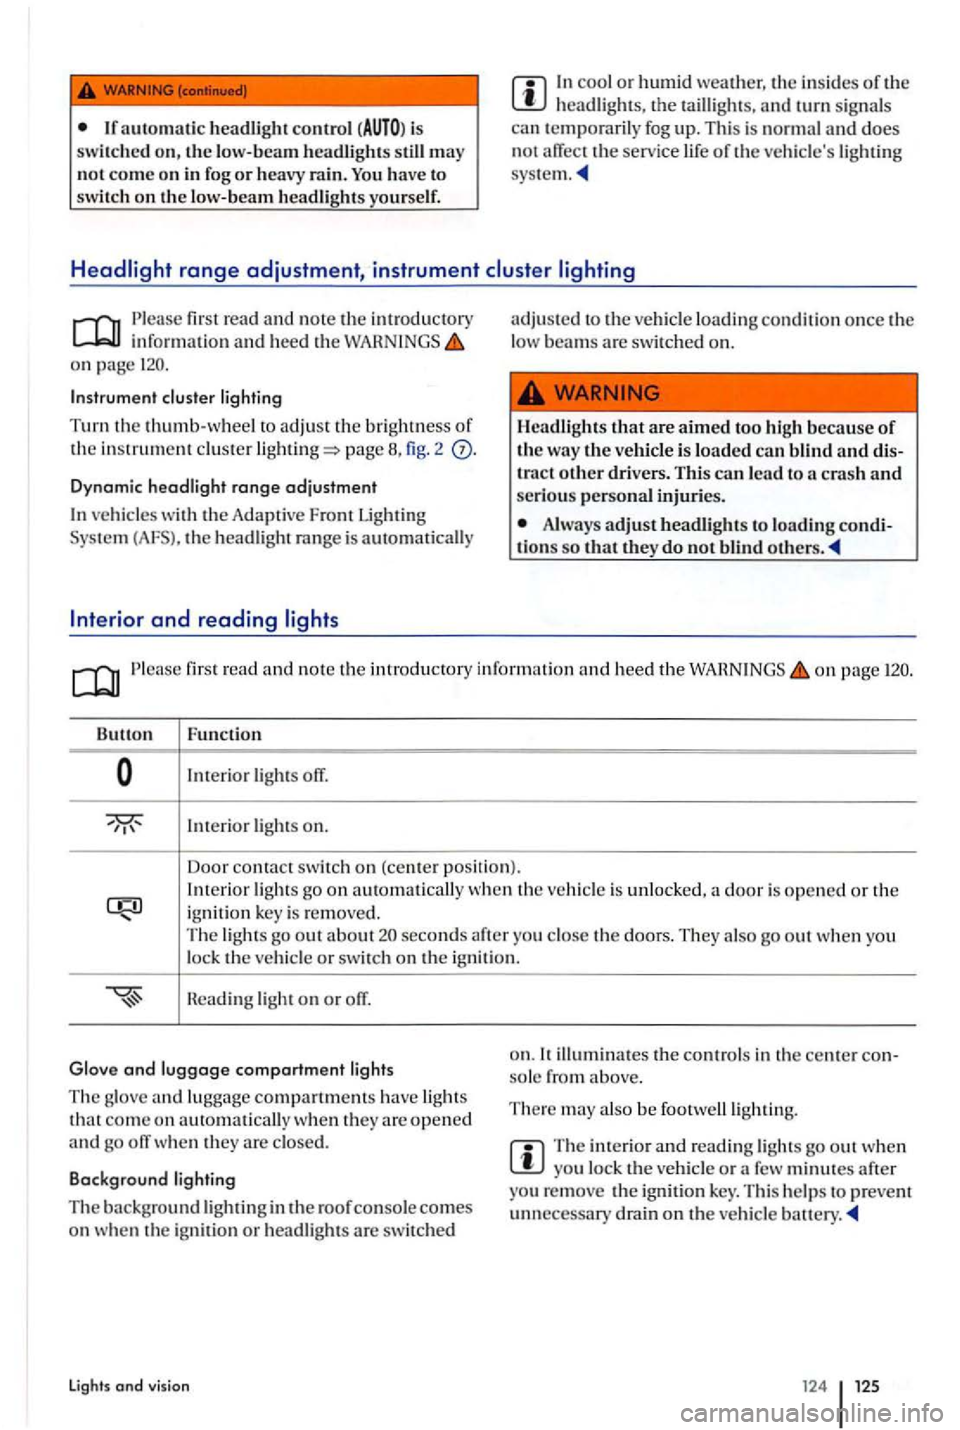
Int erior lig ht s off.
lmerior light s on.
Door conta ct
switch on (ce nter positio n). Int erior lig ht s go on wh en th e ve hicl e is unlock ed ,
seconds after th e doors. They also go out when you
lock th e
come on automati cally w hen they are open ed and go off when th ey are closed.
Background lighting
T he
background lighting in the roof console comes on w he n th e ig nit ion or headlig hts are s wit c hed
lights and v ision
o n . so le from above.
There m ay also be foo twe lllighting.
Th e interio r and rea din g lights go out when yo u lock the ve hicle or a few minutes aft er
yo u re m ove the ign ition key. Thi s help s to p reve nt
un necessary drain on the vehicl e
Page 127 of 541
Sun protection
Introduction
In this sectio n yo u'll
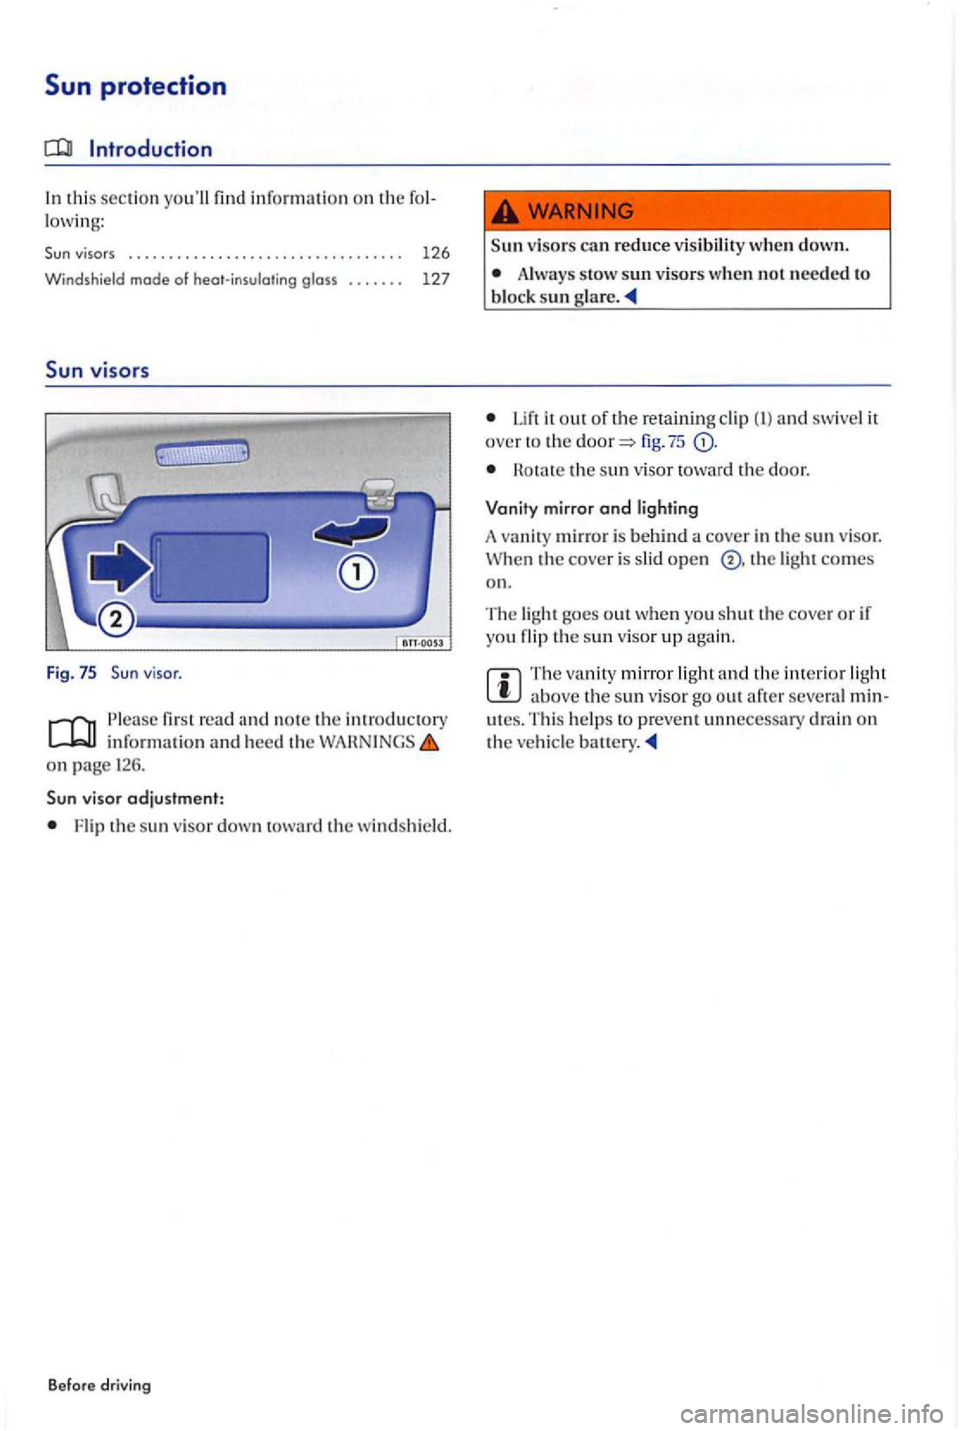
viso r.
P lease fir st read and no te th e introductory inrormatio n and heed th e on page 126.
v isor adjustment:
Flip th e s un visor down to wa rd the windshi eld.
Before driving
visors can reduce visibility when down.
Always stow sun visors when not needed to block sun g la re .
it out or the retaining clip and swivel it over to the fig. 75
H o ta te the sun visor toward the door.
Vanit y mirror
ond lighting
A
van ity mirror is behin d a cove r in th e s un v isor. When the cover is s lid open th e ligh t comes on.
T he light goes out when yo u shut th e cove r o r ir you the sun visor up again.
above th e sun visor go out artcr seve ral minutes. Thi s helps to prevent unnecessary drain on the ve hicle
Page 128 of 541
first read and no te th e introductory information and heed the WAHNINGS on page 126.
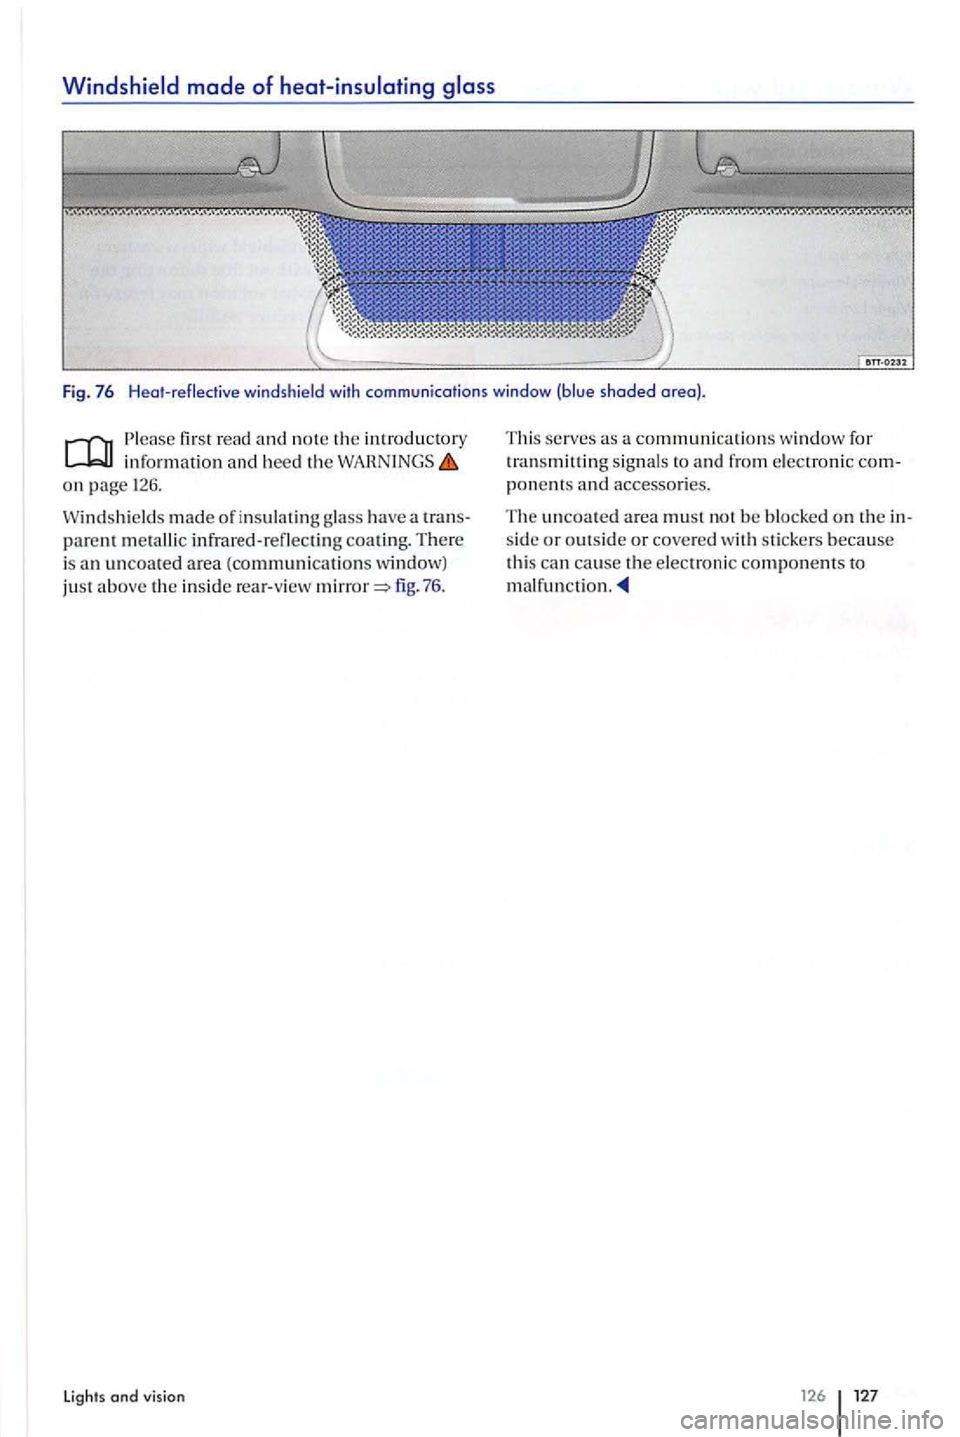
Windshi eld s made of in sulatin g glass have a transparent m etallic infrared-r eflecting coating. There is an uncoated area (communications window)
ju st above the insid e rear-v iew fig. 7 6 .
lights and vision
This serves as a communi cations window for
t ran smilling signal s to and from electronic components and accessories.
The uncoated area m ust not be blocked on th e in
s ide or outs ide or cove red with sticke rs because
thi s can cause the electronic components to
malfunction.
126 127
Page 136 of 541
Outside mirrors
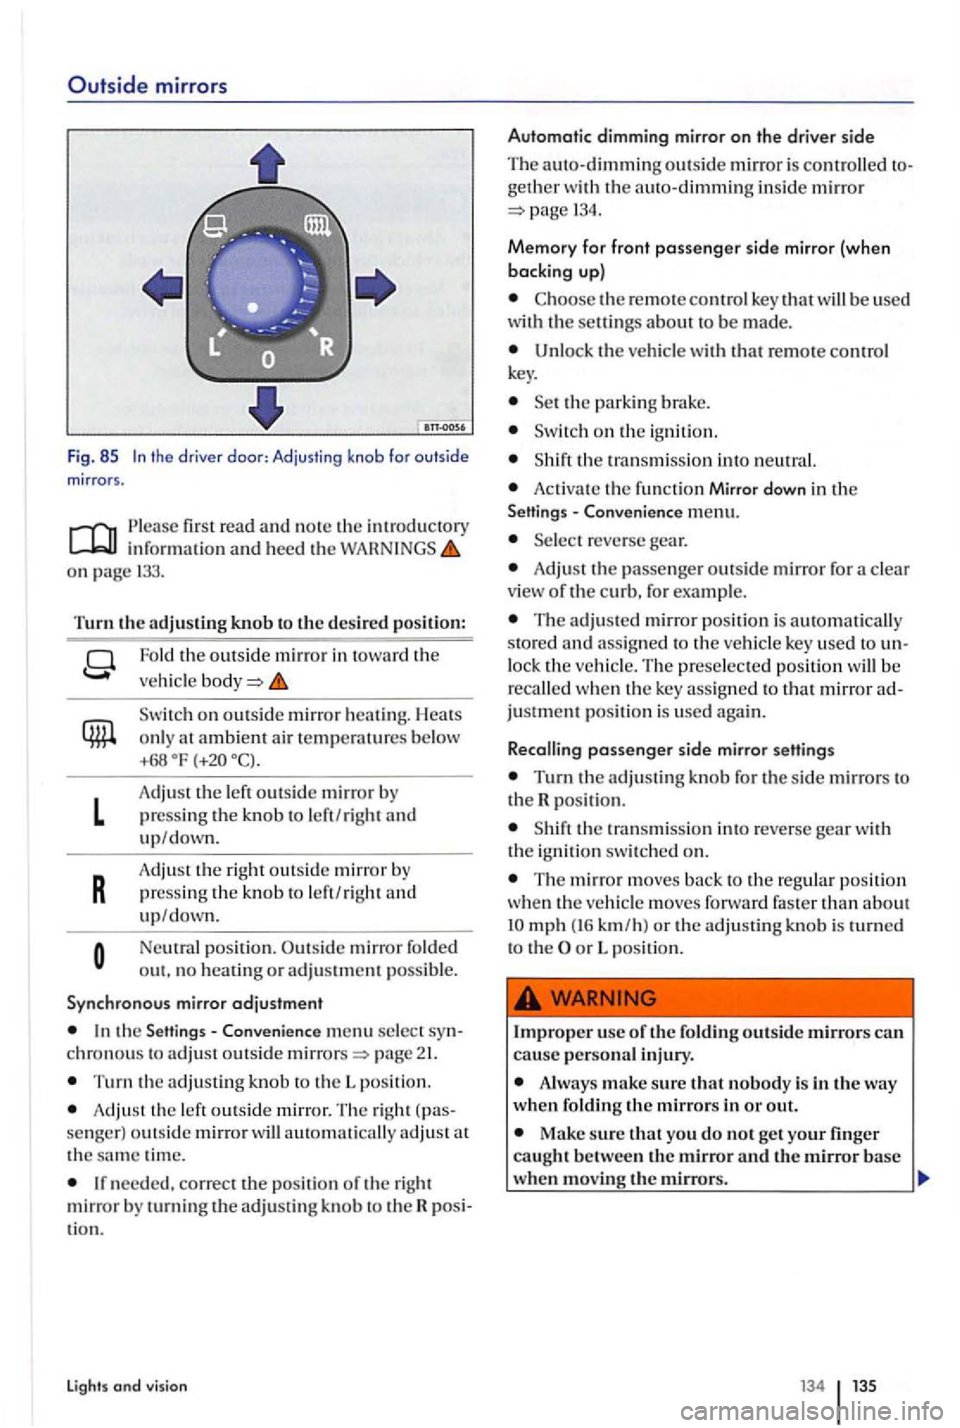
Fig. 85 the driver doo r: Adjusting knob for outside mirror s.
o n page 133.
Turn the adjusting knob to the desired po siti on :
L
R
Fold the outsi de mirror in toward the
veh i
cle
on outsid e mirror heating. Heats
o nl y at ambient air tempe ratures b e low +68
A dju st the left outside mirro r press ing the knob to le ft/righ t
pressing the knob to le ft/rig h t and up/down.
Neutral position . mirror fo ld ed out. no heatin g or adjustment possib le .
Syn ch rono us mirror adjustment
the Sett ing s- Conveni ence men u select chronous to adju st outside page
T urn the adj ustin g knob to th e L positi on.
Adjust th e left outs ide m irror. Th e righ t
th e sa m e tim e.
needed, correct the positi on of the right mirror turning the adjust in g kn ob to th e tio n.
Lights and vision
Automatic dimming mirror on the drive r side
Th e auto-dimming outs ide mirror is contr olled geth e r w ith the auto-dimming inside mirror 13 4.
Memory for front passenger sid e mirror (when
backing up)
the re m ote contr ol key that will be use d
with th e settin gs about be made.
Unloc k the veh icle with tha t re mote control
k ey.
o n the ign ition.
the transmiss ion into ne ut ral.
Acti vate the fun ctio n Mirror down in the - C onvenience menu.
reverse gear.
Adjus t the passenge r outsid e mirror for a clear view of the curb, for example.
The adjusted mirror positio n is automatically
s to red and ass igned to the ve hicl e key used to lock the vehicle. The preselecte d po sit ion w ill recalled w hen the ke y ass igned to that mirror justment pos it io n is used again .
Recalling
passenger s id e mirror setting s
Turn the adjusting for the sid e mirrors to the R posit ion.
T he mirror m ove s back to the re g ul ar position wh en the ve hicl e m oves forward faster than about mph (16 km /h) or the adjusting knob is to th e or L po sition.
use of the foldin g outside mirrors can cause persona l injury.
Alway s make sure that nobody is in the way w hen f oldin g the mirrors in or out.
Make sure that you do not get yo ur finger caught between the mirror and the mirror base when moving the mirrors.