2012 VOLKSWAGEN GOLF PLUS fuse
[x] Cancel search: fusePage 133 of 541
The sensor cannot always recognize rain and activate the wipers.
Switch the wipers on manually when water on the windshield reduces visibility.
131, fig. 81 (arrow) regularl y and check the wipe r b lades fo r damage.
T o remove wax and coats of polish safely, we recommend usin g a n alcoho l-based s hi eld
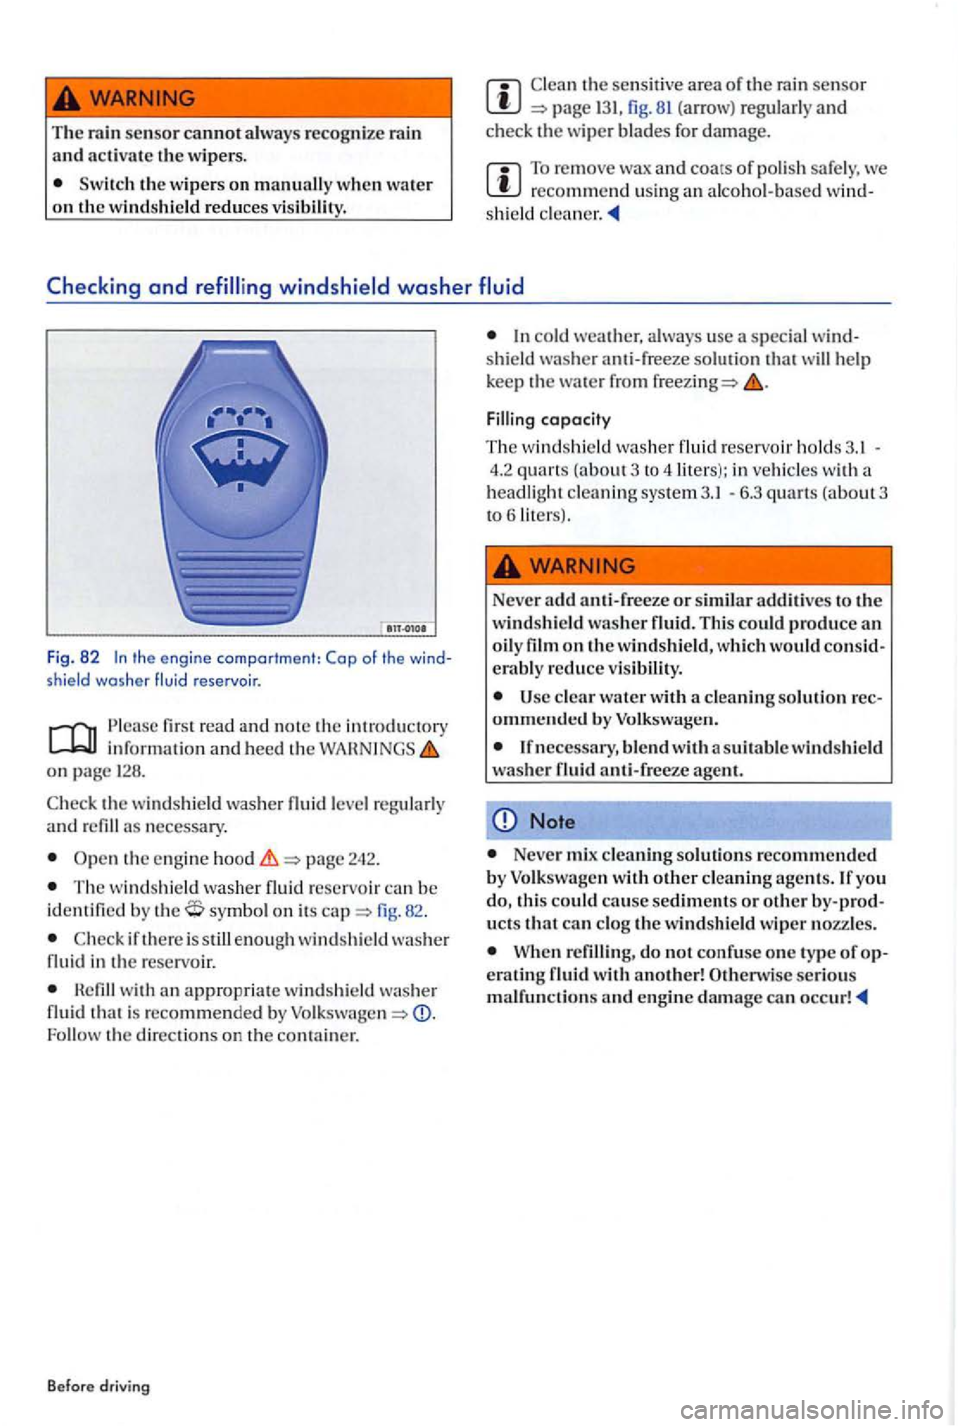
Fig. 82 the engine compartme nt: Cap of the shield washer fluid reservoir .
Ple ase first read and the int rod uctory information and heed th e on pa ge
the windshi eld was her necess ary.
page 242.
The wind shi eld washer fluid reservoi r can be identifi ed by symbol on its fig. 82.
H efill w ith an appropriat e windshie ld was he r
fluid i s recommended by Follow th e directio ns on the co ntainer.
Before driving
co ld weather. u sc a speci al
Filling capacity
The w indshi eld washer fluid reservoir holds 4.2 quarts (a bout 3 to 4 liters ): in vehicles with headlight cleaning sys te m - 6.3 quarts (about3 to 61it e rs).
Never add anti-freeze or simila r to the windshie ld was her fluid . This could produce
erabl y reduce v is ibility.
Note
Neve r mix cleaning solutions recommended by Volkswagen with other cl eaning agcnts.lfyo u
ucts that can clog the windshield wiper nozz les.
When refilling, do not confuse one type of
Page 228 of 541
Air conditioner operation
information and heed the WAHNINGS on page 226.
The cooling syste m for the passenger compart
ment o nl y functions when the engin e is running
and the fan is switched on.
The air conditioner is most efficient when the w indows an d the power sunroof are closed. However,
if th e vehicle is sta ti o nary and the passenger compartment becomes very hot due to sunlight, opening the w indows briefly may speed up the cooling proce ss.
Keep
the a ir intake slot in front of the windshield
free of i ce, snow and lea ves in order to maintain proper funct ioning of the heating and ventilation systems.
Settings for optimal driving safety
When yo u sw itch on the cooling system, both the temperature and humidity in the vehicle are reduced. Th is will help make passengers feel more comfo rtable and prevent windows from fogging
up.
For
Sw itch off a ir page 232.
fan to Ievell or 2.
T urn the temperature knob to t he center posi
tion.
all air vents in the in strument panel page232 .
Turn the air distribution knob to the des ired settin g.
butto n to turn on the air conditioner. The indicator light illumin ate s in the button.
For
th e button.
temperature to +72
pa ge232.
Sw itching between Fahrenheit and Celsius in Cli
matronic
The t empe ratu re disp lay is switched from to Fahrenheit and vice versa in the display of the factory- in stalled radio or naviga tion system via the in strument cluster page
control
H eating
Maximum heating output and fas t defrosting will
only be possib le a fte r the e ngin e has reached operating tempe rature.
T he e ng in e is not running.
T he fan is switc hed off.
The a ir conditi one r fuse has blown.
The ambien t a ir temperature is colder than (+3
T he air condition er compresso r has been tem
porarily switched off due to excess ive engin e coolant temperature.
The re is a nother malfunction in the ve hicle.
Ha ve the ai r conditioner checked by an authorize d
Volkswage n dealer or authorized Volkswage n Ser
v ice Facility.
Special considerations
Whe n it is very hot and humid outside, water con
d ensation can drip from the air condition er evaporator and form
The air condit ioner takes a few minutes to reach the selected temperature in the passenger compartment.
Due to residual m oisture in the air condi tione r, th e windshi eld may fog up after the
engi ne is s tarted.
23 1
Page 315 of 541
Do it yourself
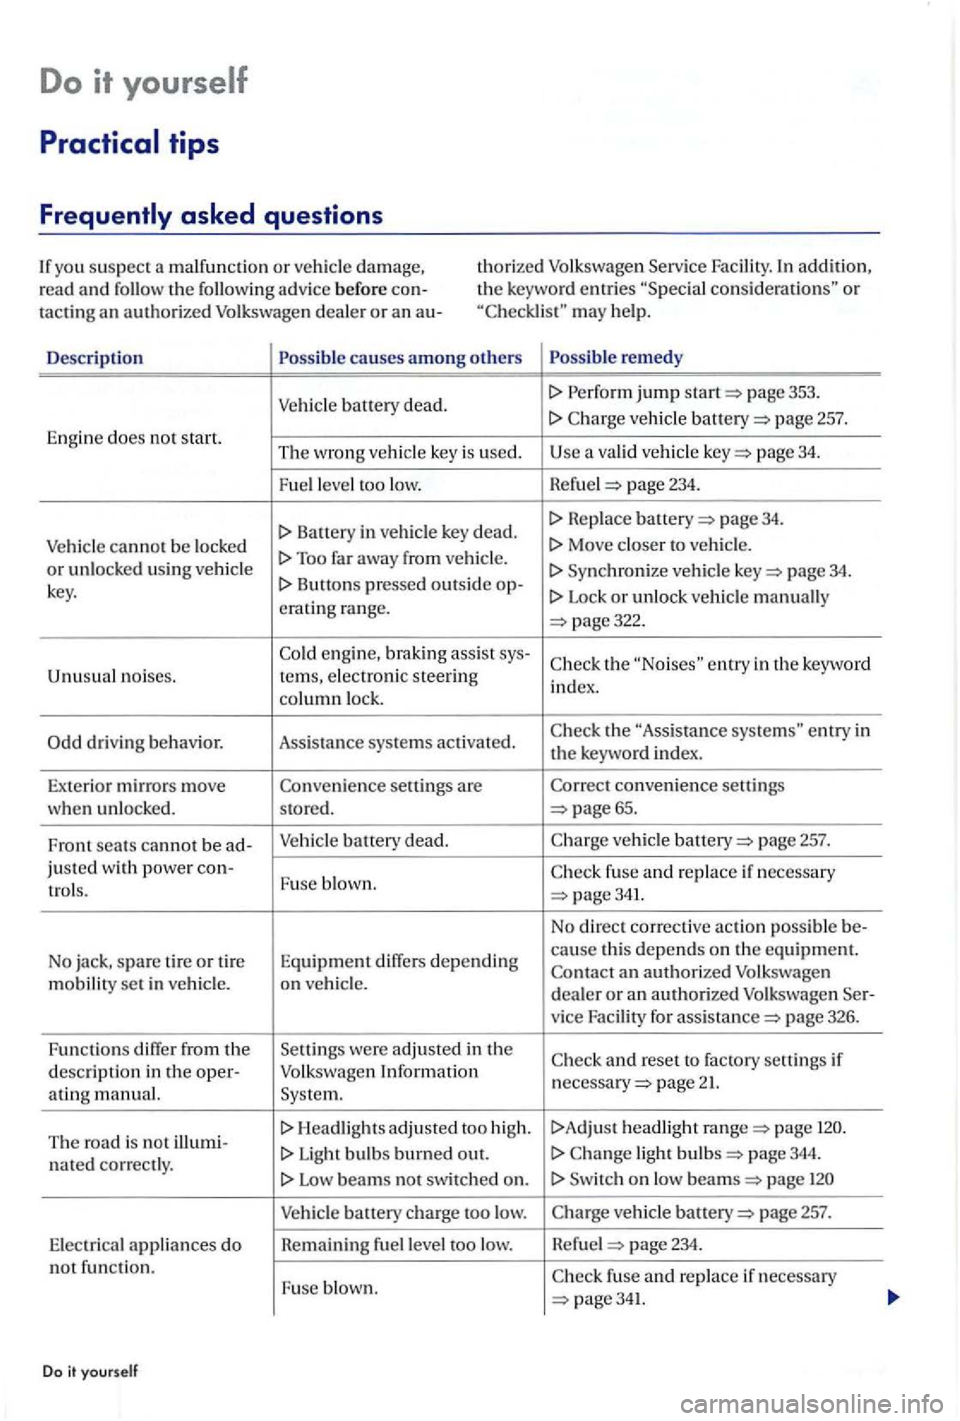
con sid era tions" or may help.
De
scription causes amon g oth ers remed y
Vehicl e ba tt ery dead. jump page 353.
page 257. Engine does no t start. The wrong ve hicle key is used. a valid ve hicl e page 34.
Fuel leve l too low. Hefue l 234.
Batt ery in ve hicl e key dead. page 34.
Vehicle cannot be locke d Too far away from vehicle . Sy nchroni ze veh icle page 34. key. Lock or unlo ck vehicl e manually
crat ing range. page322.
en gine, braking assis t sys-th e entry in the ke yword noises. te rns, e lectro nic steering index.
co lumn lock.
the "Assis tance e ntry in the keywo rd in dex .
Exterior mirro rs move convenience settings
w he n unl ocke d . stored. 65.
F ront seats can not be ad -Vehicle battery dead. veh icle page 257.
jus ted with power con-Fuse b lown.
a n authoriz e d Volkswage n
m obilit y se t in vehicle. on ve h icl e. dealer or an authori zed Volk swagen Ser-
v ice Facility for page 326.
Func tions diff
er from th e Settin gs were adju ste d in th e and reset to fac tory settings if
descript ion in the oper-Volkswagen Information page 2 ating manual. Syste m.
T he road
is not illumi-H ea dlights a djusted too hig h . !>A dju st headlig ht page
n a ted correctly. Light b ulb s burned out. ligh t page 344.
Low beams no t swi tched on . Switch on low page
Vehicle battery ch a rge too low. page 257.
E lect rica l a p plian ces do Remaining fuel le vel too low. Refu el page 234. not functi on.
page341.
Do it yourself
Page 338 of 541
Fuses
Introduction
thi s section yo u'll find information on the lowing:
342
343
Due to ongoing development of the ve hicl e, ment -d ependent allocation of fuse s an d th e bin ed fuse prote ction of multiple load s us ing one fuse, an up-to-date overview of th e fuse location per lo ad is no t pos sible at the time of printing. taile d info rma tion regarding fuse bo x layout is
availabl e from authori zed dea ler s Faciliti es.
In gen eral , one fuse ca n prot ect severa l l oad s. load can a ls o be protected by s evera l fuses.
R eplac e
fuses only if the ca use of th e malfuncti on
wa s corr ected. a newly re pla ced fuse blow s aga in
aft er a short time, th e ele ctri cal sys te m should be
c he cke d b y
an authorized deale r or an au thorize d Facility .
More information:
page 242
High voltage systems in the engine
Never touch ignition cables. Never touch other components of the hi gh voltag e elec tronic
ignition syste m.
Practi cal tips
Avoid short circuits in the electrical system.
tion in tJ1e circuit can cause fires and serious
Neve r replace a fuse with one that has a
higher amp ratin g. Replace a blown fuse only
with a fus e of the same amperage (same color and same imprint) and same overall size.
Never repair fuses.
Never
Note ---To help prevent damage to ele ctr ica l
system, swit ch off all lights and accessories,
switch off the ignition , and remove the key from the ign ition switch befo re replacing a fuse.
If a fuse is replaced with a fuse with higher
electrical system.
A sin gle load (a s ingle electr ical componen t) ma y be prot ected several fuses.
fuse m ay prote ct sev era l loads (several e le ctri ca l compone nts).
341
Page 339 of 541
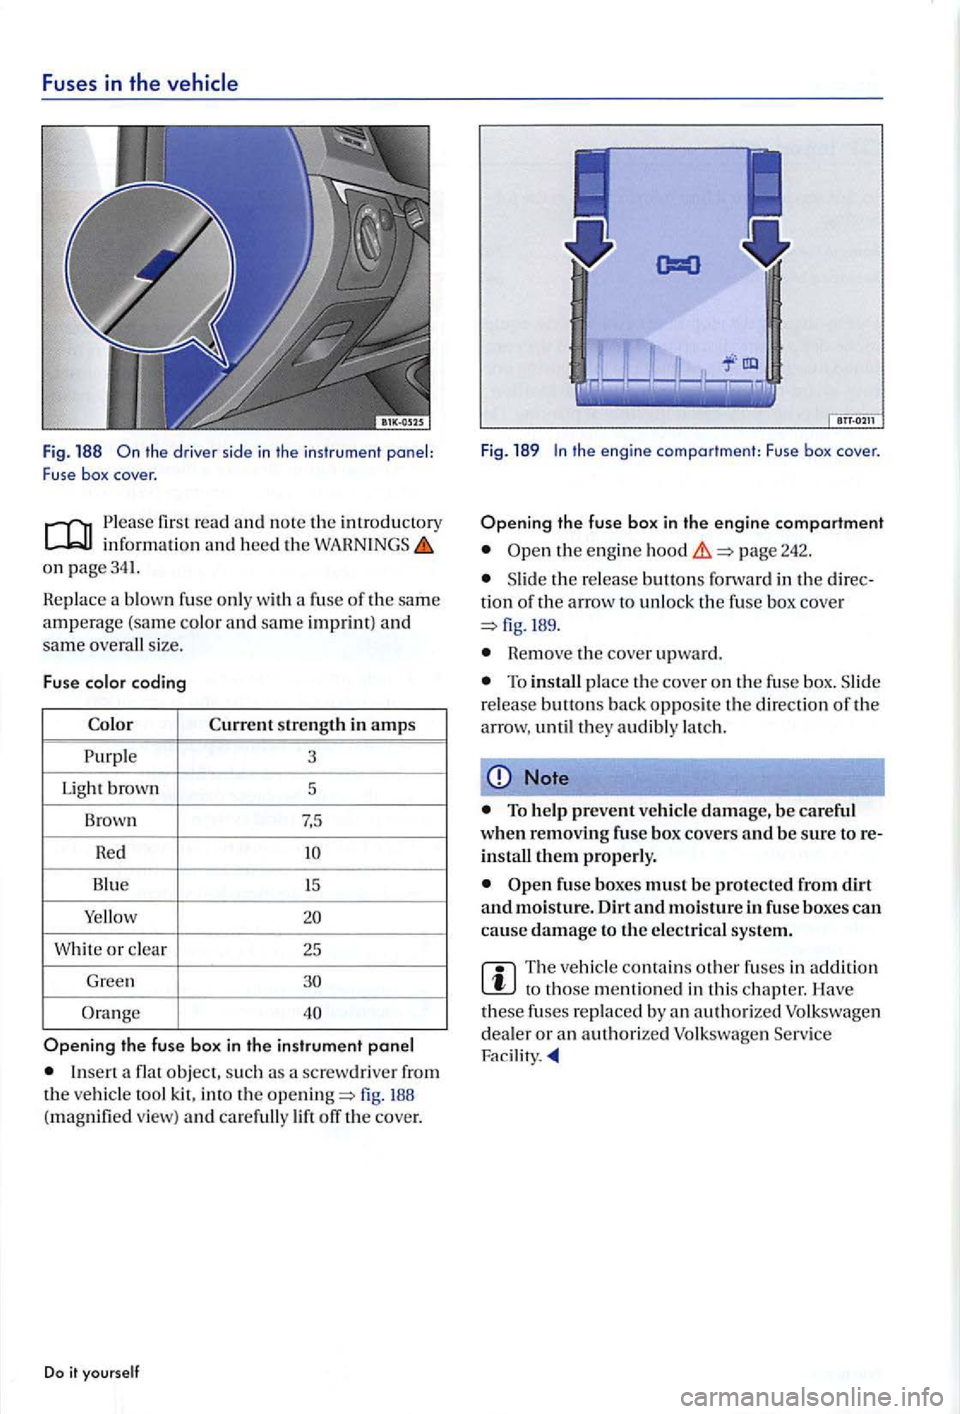
Fuses in the
the driver sid e i n the instr ument panel:
F use box cover .
first read and note the introductory info rma tion and heed th e on page341.
Replac e a blown fuse onl y with a fuse of th e same amperage (same color and same imprint) and same overall size .
Fuse color coding
Color Current strengt11 in amps
3
Ligh t brown
5
Brown 7,5
Red
or clea r
25
Gr een
Ins ert a flat object, su ch a scre wdri ver from the ve hicle tool kit, into th e
the engi ne comportment: Fuse box cover .
page 242.
Slide the rel ease butt ons fo rwa rd in th e dir ection of th e arrow to unlo ck th e fuse box cov er
Remove the cover upward.
To in stall p lace the cove r o n th e fuse box . S lid e
r e lease buttons back oppos ite the directio n of th e
arrow , unti l they audibly lat ch.
Note
To help prevent vehicl e damage, be careful when removing fuse box covers and be sure to reinstall them properly.
The vehicle contains other fuses in addition to th os e m en tioned in this chapter. ave
these fus e s rep laced by an authorized Volkswage n
dea ler or an authorized Volk sw agen Service Fac ilir y.
Page 340 of 541
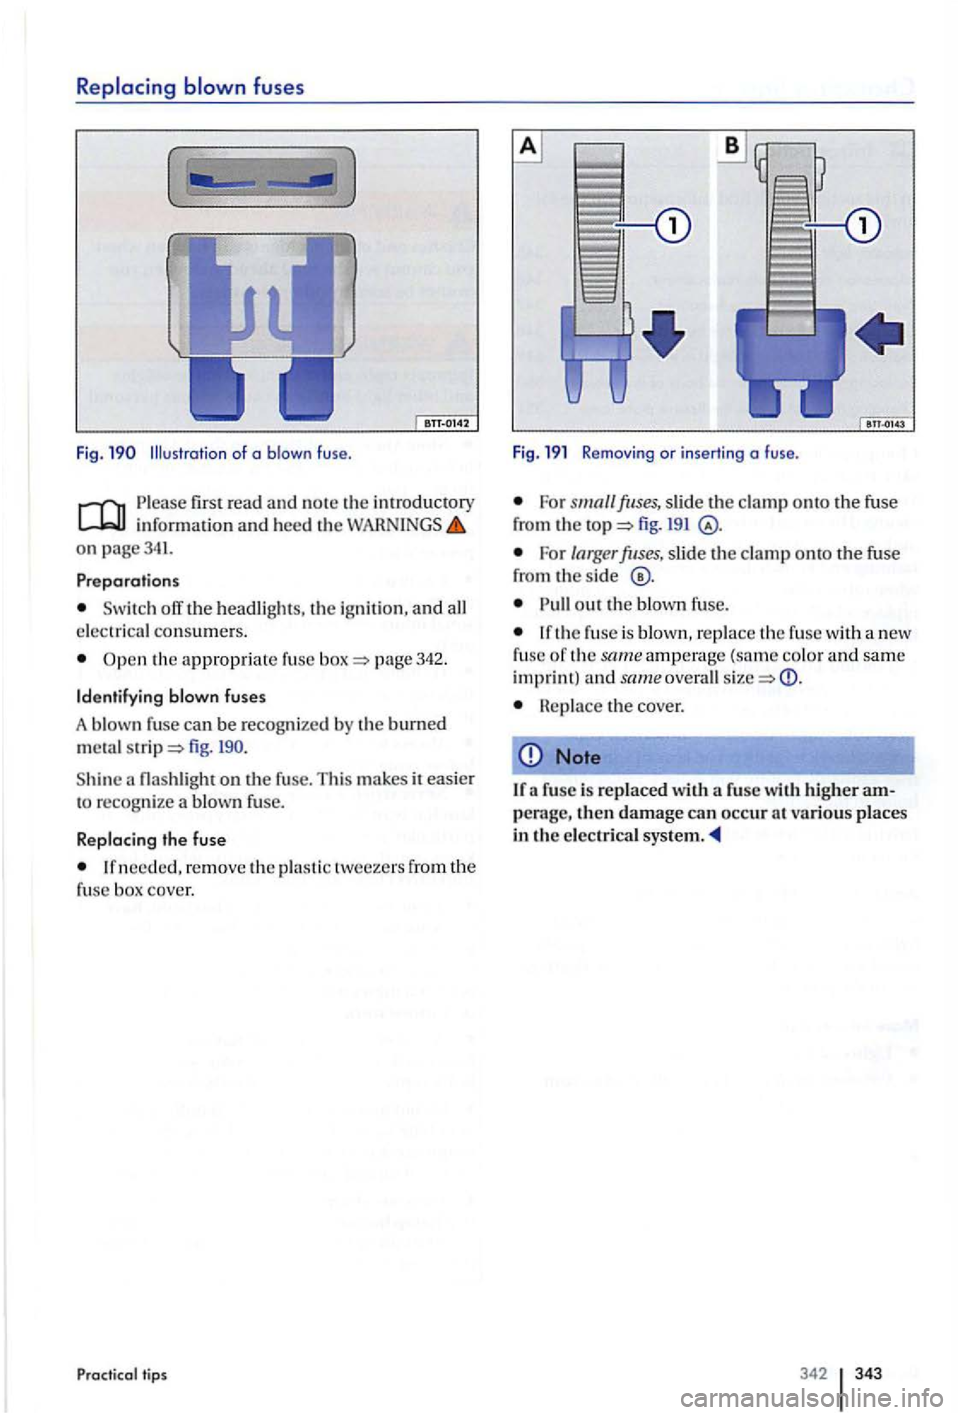
Replacing blown fuses
(
Fig . of a blown fuse.
Please first read and not e th e int roductory info rmatio n and h eed on page341.
Pr eparations
consum ers.
th e appro pr ia te f use page 342.
Identifying blown fuses
A blown fuse can be recogni ze d b y th e burned metal fig.
nas h light on th e fuse. Thi s make s it easie r
t o reco gnize a blown fuse.
Replacing the fu se
n eeded, re m ove th e plas tic tweezers from th e
f u se b ox cover.
Practi cal ti ps
F ig. 19 1 Removing or in sert ing a fuse .
For fuses, slide fig. 191
For larger fuses, slid e clamp onto th e fuse from the sid e
out the blown fuse.
th e fuse is blown, rep lace th e fuse w ith a new
f use o f th e same amperage (sam e co lor and sa me imprint) and same ove rall
H ep lace the cover.
Note
a fuse is rep laced with a fuse with higher amp erage, then d amage can occur at va rious places in th e electric al sys te m .
342 343
Page 343 of 541
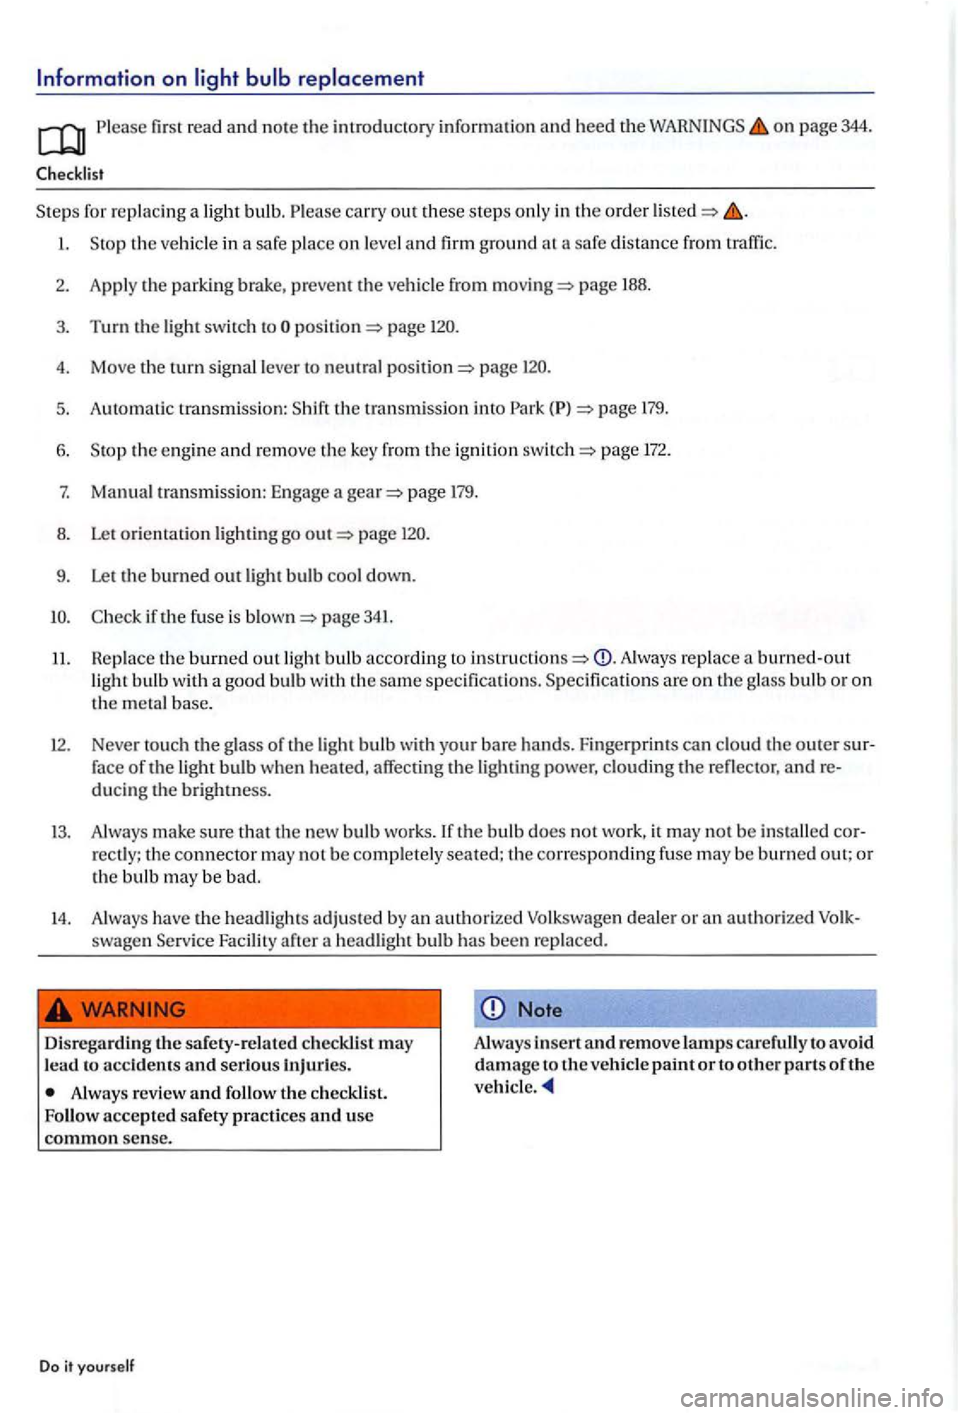
Please first read and note the introdu cto ry information and heed the on page 344.
for re pla cing a light bulb. Please carry out these ste p s only in the order
page 188.
3. Turn the light switch page
4. Move the tu rn signal lever to neutral page
5. Auto mati c transmission: 179.
6. the eng ine and re move the key from the ig ni tion page 172.
7. Manu al transmission: Engage a page 179.
8. Let orie nt ation lighting go page
9. Let the burned out light bulb cool down.
page 341.
11. R e place the burned out light bulb accordi ng Always replace a burned-out light bulb with a good bulb with the sa me s pecifications. Specifications are on the g lass bulb or on
the meta l base.
12. Neve r tou ch the glass of th e light bulb with your bare hands. Finge rprin ts can clo ud t he o uter sur
f ace of the light bulb when heated, affec ting the lighting power, clouding the reflector, andre
d u ci ng th e brightness.
13. Always make sure th at the new bulb works. the bulb does not work, it may not be installed cor
rectly; the connector may no t be co mplet ely seated; the correspondin g fuse may be burned out; or the bulb may be bad.
14. Always have th e headligh ts adj usted by an authorized Vol k swage n dealer or an a uth orized swagen Service Facility
to accidents and serious Injuries.
Always review and follow the
Note
Alway s insert and remove lamps car efully to avoid damage to the vehicle paint or to other parts of the
Page 364 of 541
Emerg ency lo ck in g and unlockin g
R ea r h atc h . . . . . . . . . . . . . . . . . . . . . . . . . . 324
Em er
gen cy sta rtin g . . . . . . . . . . . . . . . . . . . . 353
Jum
per cables ................ .. ..... 355
E
mission contro l sys te m . . . . . . . . . . . . . . . . 3 15
Ind icato r light.. . . . . . . . . . . . . . . . . . . . . . 315
E ng in e
Break-i n
perio d ..................... Noises................ ......... ..... 177
Engin e and ig nition . . . . . . . . . . . . . . . . . . . . 172
12-vo lt socke ts.. . . . . . . . . . . . . . . . . . . . . .
Ig niti on sw itch . . . . . . . . . . . . . . . . . . . . . . 174
Immobilizer . . . . . . . . . . . . . . . . . . . . . . . . 178
Preheating. . . . . . . . . . . . . . . . . . . . . . . . . . 176
S ta rtin g en g ine...................... 176
S ta rtin g en g ine
with KESSY.......... . 175
Sto pping the e ngin e . . . . . . . . . . . . . . . . . 177 Unauthorized vehi cle key . . . . . . . . . . . . 174
E
ngine cl ass ification co de
De terminin g . . . . . . . . . . . . . . . . . . . . . . . . . 31
E
ngine co mpartment. . . . . . . . . . . . . . . . . . . 242
C l
eanin g ... 269
C l
osing . . . . . . . . . . . . . . . . . . . . . . . . . . . . . 24 6
Eng ine
coolant ...................... 252
Eng ine oil. . . . . . . . . . . . . . . . . . . . . . . . . . . 247
P l
enum chamber .................... 269
P re para
tio ns . . . . . . . . . . . . . . . . . . . . . . . . 245
Vehicle battery . . . . . . . . . . . . . . . . . . . . . . 257
E
ngine control . . . . . . . . . . . . . . . . . . . . . . . . . 3 15
I
ndicator l ight. ...... ....... ......... 3 15
En gin e c oo la
nt.. . . . . . . . . . . . . . . . . . . . . . . . 252
C heck ing
coolant leve l .............. . 255
F
ille r op enin g . . . . . . . . . . . . . . . . . . . . . . . 255
G 12 p lu s-p lus
.................. .. 254
Ind icator light ....................... 252 Specifications .. ..................... 254
Temperatu re gauge... . . . . . . . . . . . . . . . 252 Topping off
249
C hange ............................. 251
C heck ing oil leve l. . . . . . . . . . . . . . . . . . . . 249
Co ns
umptio n .......................
D ips tick . . . . . . . . . . . . . . . . . . . . . . . . . . . . 249
Fille r openin g . . . . . . . . . . . . . . . . . . . . . . . 24 9 I
n d i
cato r light. ..........
b raking assistance systems . . . . . . . 194
F
FAQs .................................. 318
capacity
W
indshi e ld was her nuid reservo ir. . . . . 132
Fir e extingui sh er
T ra ile r tow
ing. . . . . . . . . . . . . . . . . . . . . . . 154
Floor mats............... .............. 18 1
Fo g lig
hts ..... 123
F requently ask ed ques tion s. . . . . . . . . . . . . 3 18
F
ront airba g s
321
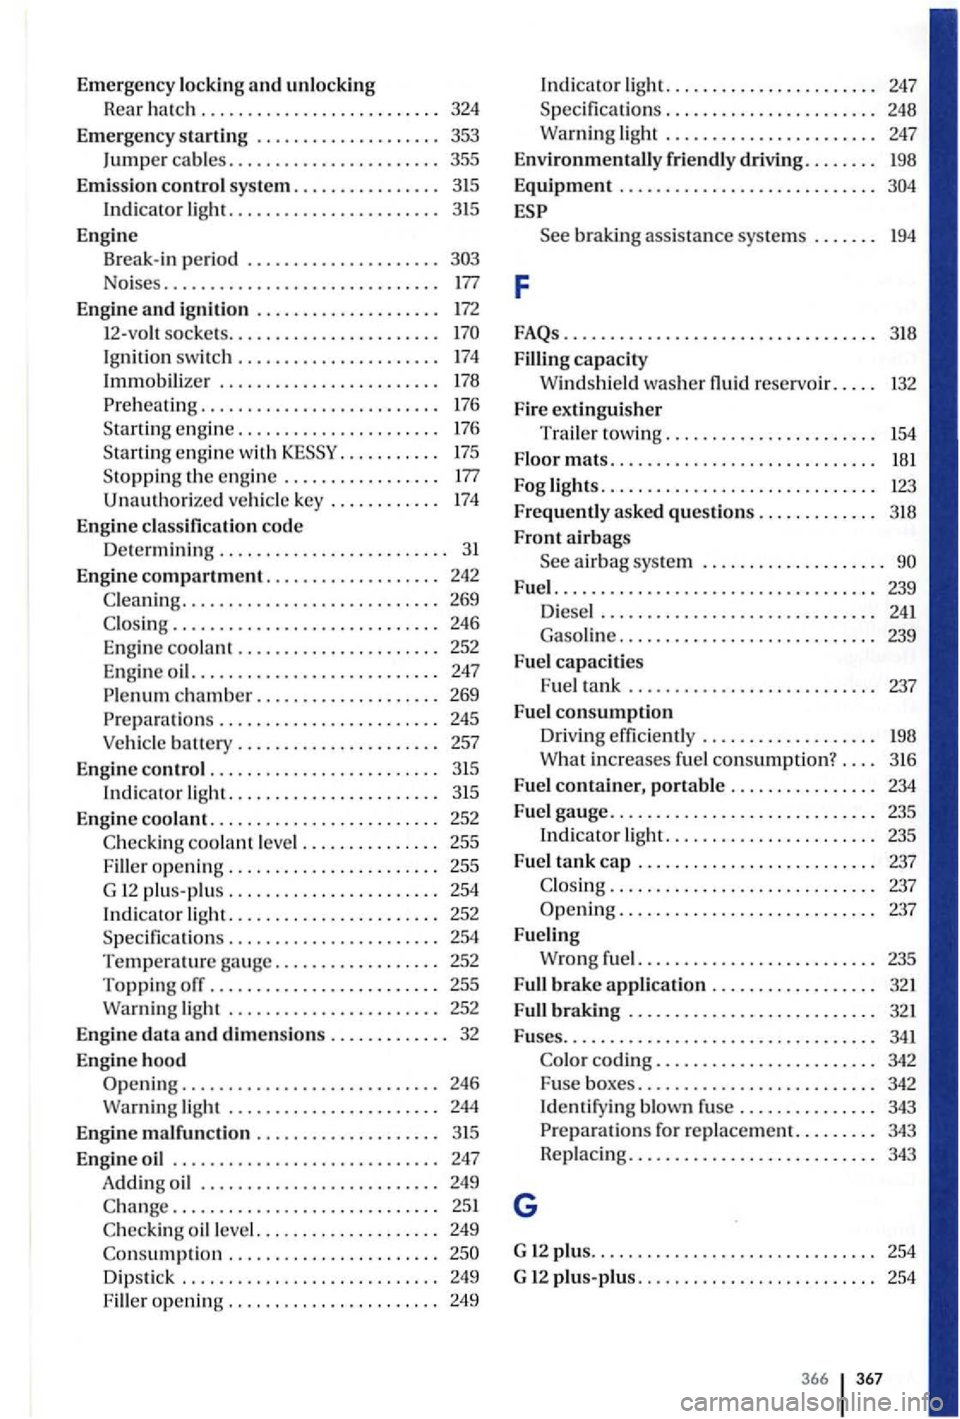
F u ses .................................. 341
G
Colo r codi ng.. . . . . . . . . . . . . . . . . . . . . . . 342
Fuse boxes. . . . . . . . . . . . . . . . . . . . . . . . . .
342 Ident ifying blown fuse . . . . . . . . . . . . . . . 343
P re para ti
ons for replace ment. . . . . . . . . 343
Heplaci ng. . . . . . . . . . . . . . . . . . . . . . . . . . . 343
G 12
plus. . . . . . . . . . . . . . . . . . . . . . . . . . . . . . . 254
G 12 plus- plus.
367