2012 VOLKSWAGEN GOLF MK6 check engine
[x] Cancel search: check enginePage 328 of 516
Engine
on page 227.
Engin es Engine
Checking the engine
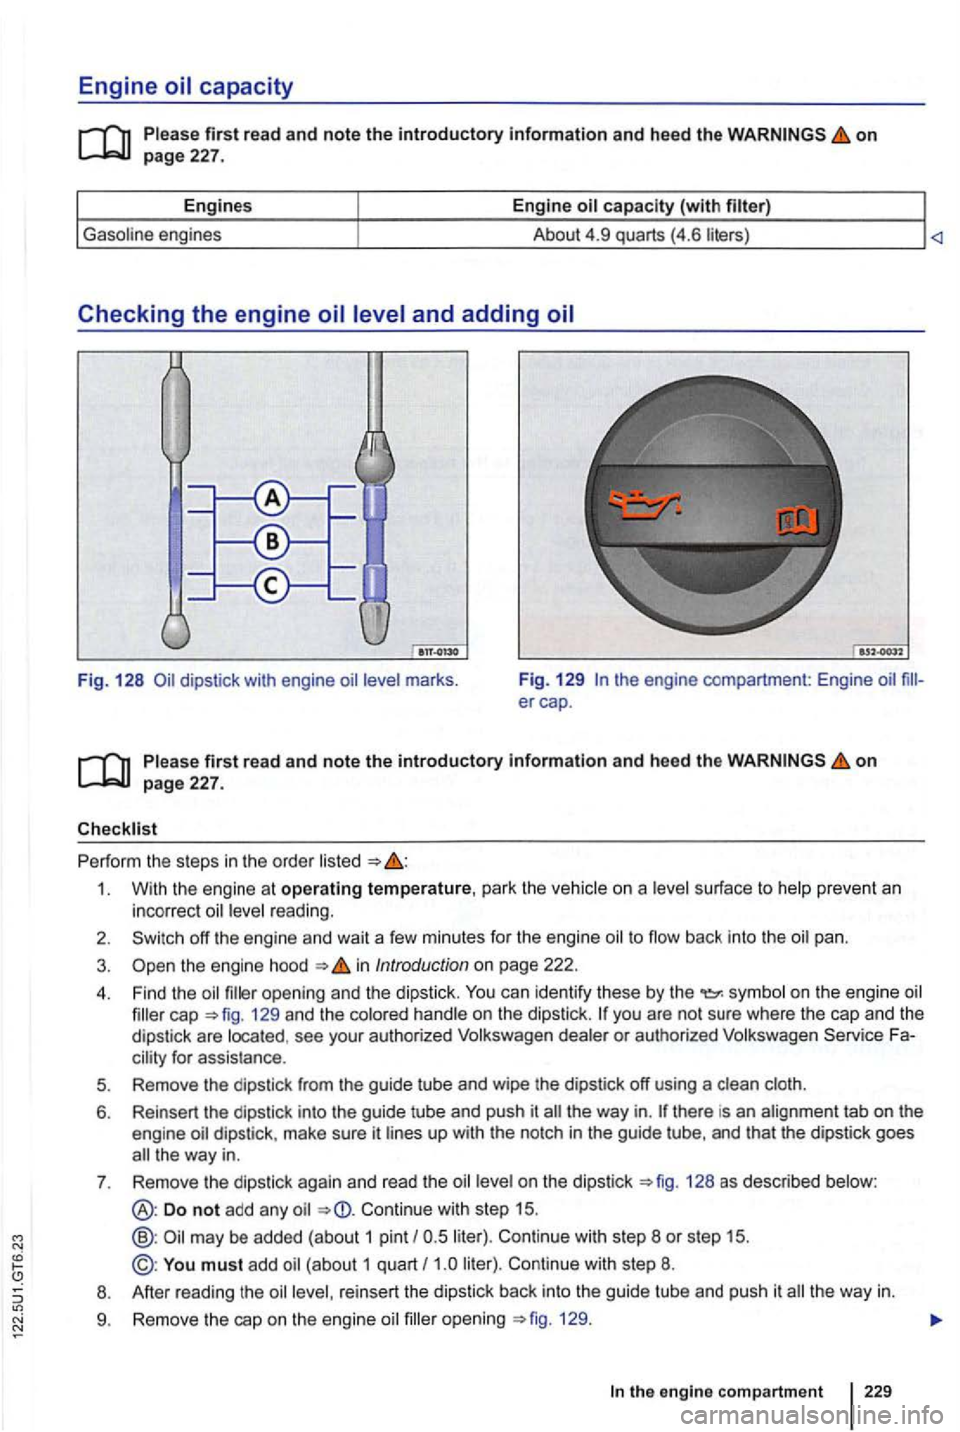
Fig. 128 marks . Fig
. 129 the engine compartment: Engine
first rea d and note the introductory information and heed the on page 227.
Perf orm the steps in the order
1. With the engine at operating temperature, park the ve hic le on a surface to prevent an
incorrect r eadi ng.
2. off the engine and wait a few minutes for the engine to flow back int o the pan .
3. the engi ne hood in Introduc tion on page 222.
4. Find the opening and the dipstic k. can identify these by the on the engi ne cap =>fig . 129 and the co lo red hand le on the dipstick . dealer or aut horized Fa
the way in. dipstick, make sure it lin es up with the notch in the guide tube, and that the dipstick goes the way in.
7 . Remove the dipstick again and
read the on the dipstick 128 as described below:
Do not add any Continue with step 15.
@ : may be added (about 1 pint liter). Continue with step 8 or step 15.
©: You must add Continue with step 8.
8 . After reading the oil level , reinsert the dipstick back into the guide tube
and push it the way in.
9. Remove the cap on the engine oil opening =>fig. 129 .
the engine compartment 229
Page 332 of 516
Engine
this section you'll find information about
Warning light and en gine coolant tempe rature
gaug e ................................. 233
En gine coolant spec ifica tions . . . . . . . . . . . . . . 235
Checking engine coolan t level and toppi ng
o ff 236
Ne ver do any work
on the coolant system unle ss
you
know exactly how to carry out the job,
have the correct technical inform ation and the
proper tools, supplie s, and operating fluids, and
are fa miliar with the necessary safety
you are uncertain in any way, have the work
done by an authori zed Volkswage n dea le r or an
a uth orized Volkswagen
in jury may
to wing =>page 149
Preparat ions for work ing in the engi ne page 222
Parts, accesso ries, repai rs and modifications =>page 283
Engine coolant is poisonous!
To reduce the risk of poisoning, never
store engine coolant in empty food or age containers or in any other containers that might mislead someone into drinking from them.
Always make sure there is enough of the correct coolant additive to provide proper tifreeze protection at the coldest tures that can be expe cted where the vehicle will be used .
At extremely cold temperatures, the ant could freeze, causing the vehicle to break down. The heater would also not work, and
vehi cle occupants could be without
Coolant and coolant additives can po llute the en vironme nt. leaking ope rati ng fluids
a nd dis pose of them properly in acco rdance with
applicab le environment al
Warning light and engine coolant temperature gauge
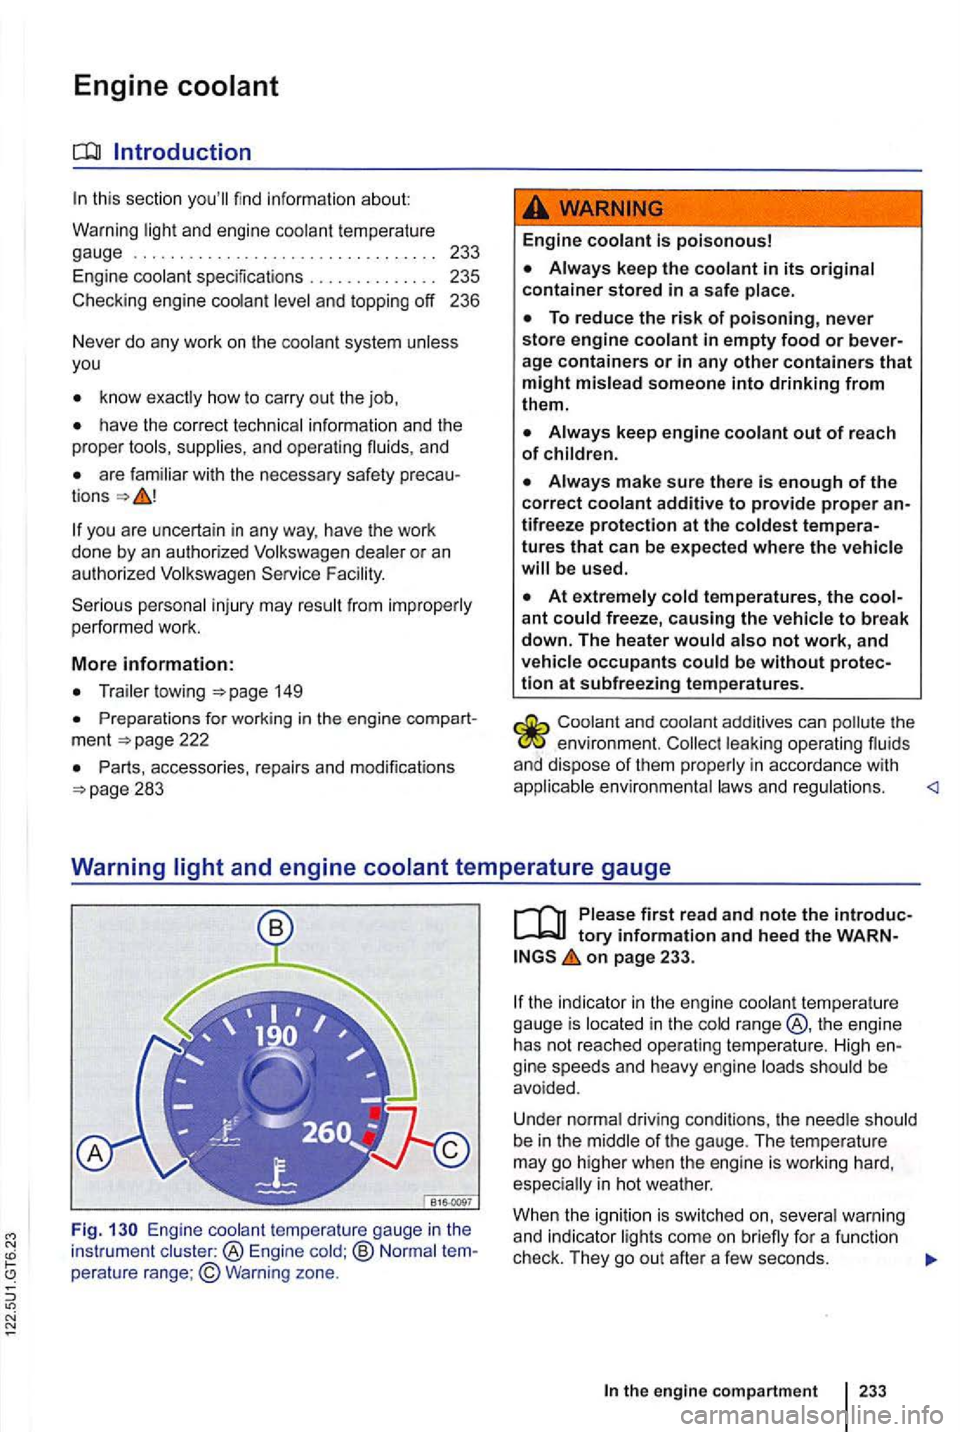
Fig.
perature range;© Warning zone.
first read and note the
on page 233.
the in dicator in the engine coolant tempera ture
gauge is located in the cold range @, the engine
h as not reached operating temperature . H igh
gi ne s peeds and heavy engine loads should be
avo ided .
Under normal driving con
ditions , the needle should
be in the middle of the gauge . The tempe ratu re
may go higher when the engine is working hard, espec ially i n h ot weather.
When
the ign ition is switched on, seve ra l warn ing and indicato r
the engine compartment 233
Page 335 of 516
Checking engine coolant level and topping off
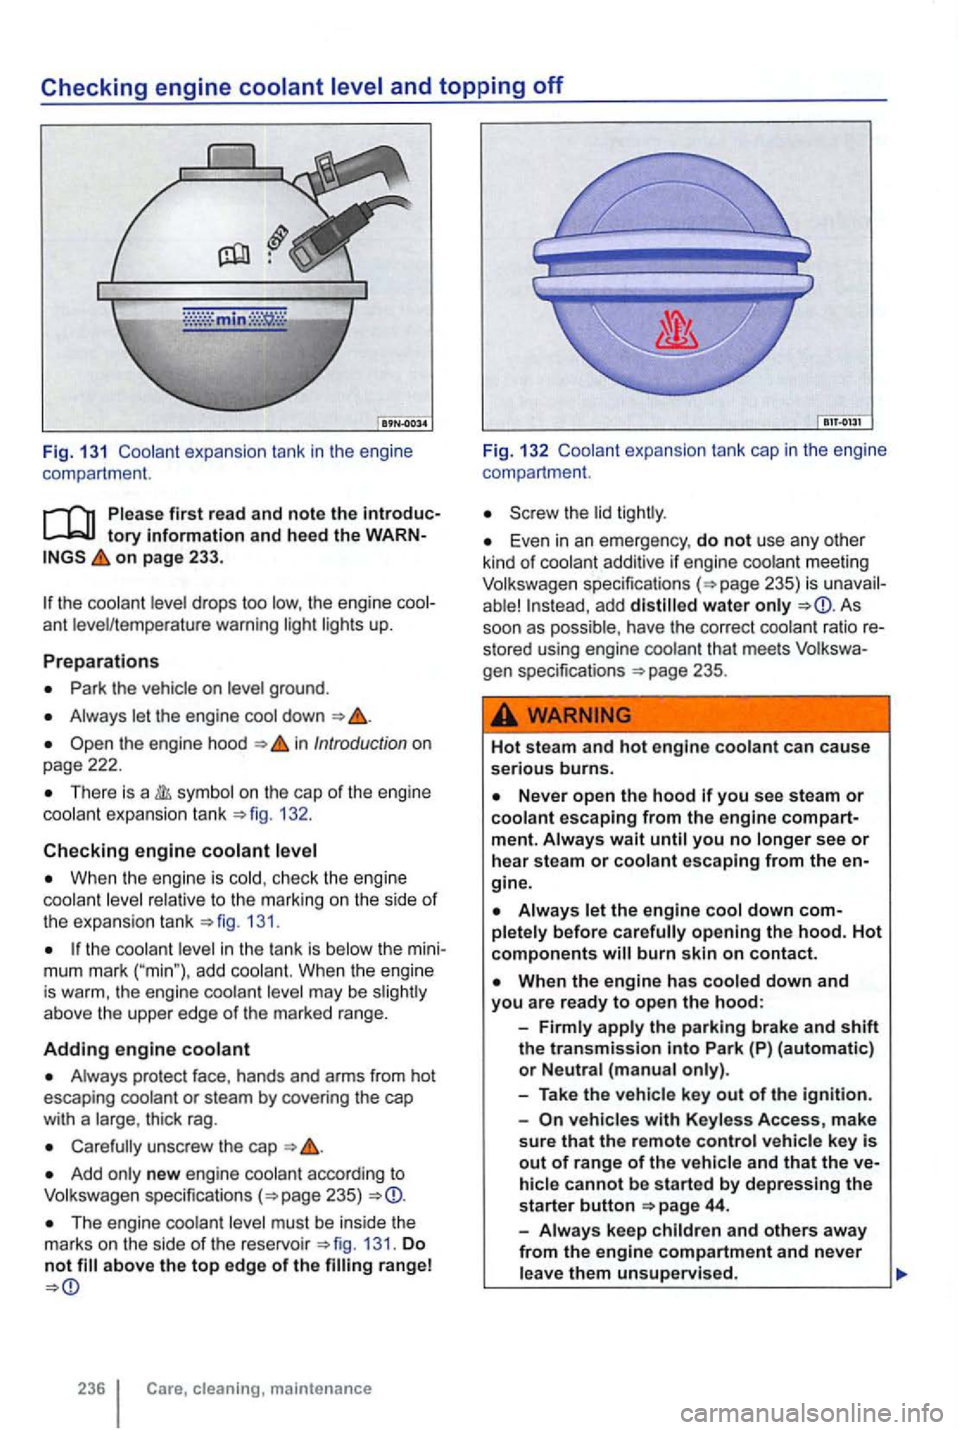
Fig. 13 1 Coolant expan sion tank in the engi ne
compartme nt.
Please first read and note the introductory Information and heed the WARN on page 233.
Park the vehicle on level ground .
Always let the engine down
the engine hood in Introduction on
page 222.
There is a sy mbol on the cap of the engine coolant expans ion tank 132 .
Checking engine coolant
When the engine is cold , check the engine
coolant level relative to the marking on the side of the expansion tank 13 1.
the coolant level in the tank is below the mini
mum mark ("min"), add coolant. When th e engi ne is warm, the engine coolant level may be slig htly
above the upper edge of the marked range.
Adding engine coolant
Always protect face, hands and arms from hot
escaping coolant or steam by covering the cap
with a large , thick rag.
Carefully unscrew the cap
Add only new engine coolant according to
The engine coolant level must be inside the
marks on the side of the reservoir 131. Do not
236 cleaning, maintenance Fig.
132 Coola nt expansion tank cap in the eng ine
compa rtment.
Screw the lid tightly .
Even in an emergency , do not use any other kind of coolant additive if engine coolant meeting
add distilled water only As
soon as possible , have the correct coolant ratio re
sto red using engine coolant that meet s
WARNING
Hot steam and hot engine coolant can cau se serious burns.
Neve r open the hood you see steam or coolant escaping from the engine compartment. Always w ai t until you no longer see or hea r steam or co olant escaping from the en
gine .
opening the hood. Hot components will burn skin on contact.
Park (P) (automatic) or Neutral (manua l only).
- Take the vehicle key
out of the ignition.
-
veh icles with Keyless Access, make
sure that the remote control vehicle key is out of range of the vehicle and that the vehicle cannot be sta rted by depressing the
starte r button 44.
-
Always keep children and others away
from the engine compartment and never
l eave them unsupervised.
Page 338 of 516
California Proposition 65 Warning
nect 2 vehicle batteries to each other when the ignition is switched on or the engine is
tem or electronic components.
violet rays may damage the battery housing.
dam-aged by freezing .
on
Alterna tor malfun ction .
W he n t he igni tion i s sw itched on, severa l wa rnin g
a n d i ndi cato r li g ht s
come on brie fly for a functio n
check . They go out after a few seconds.
Failure to heed warning
Faci lity . H av e the
e le c tric al sys tem checked. o ff unn ecessa ry electrica l loads . The ve-batt ery
to h ee d warning or text can result in vehicle damage.
Page 339 of 516
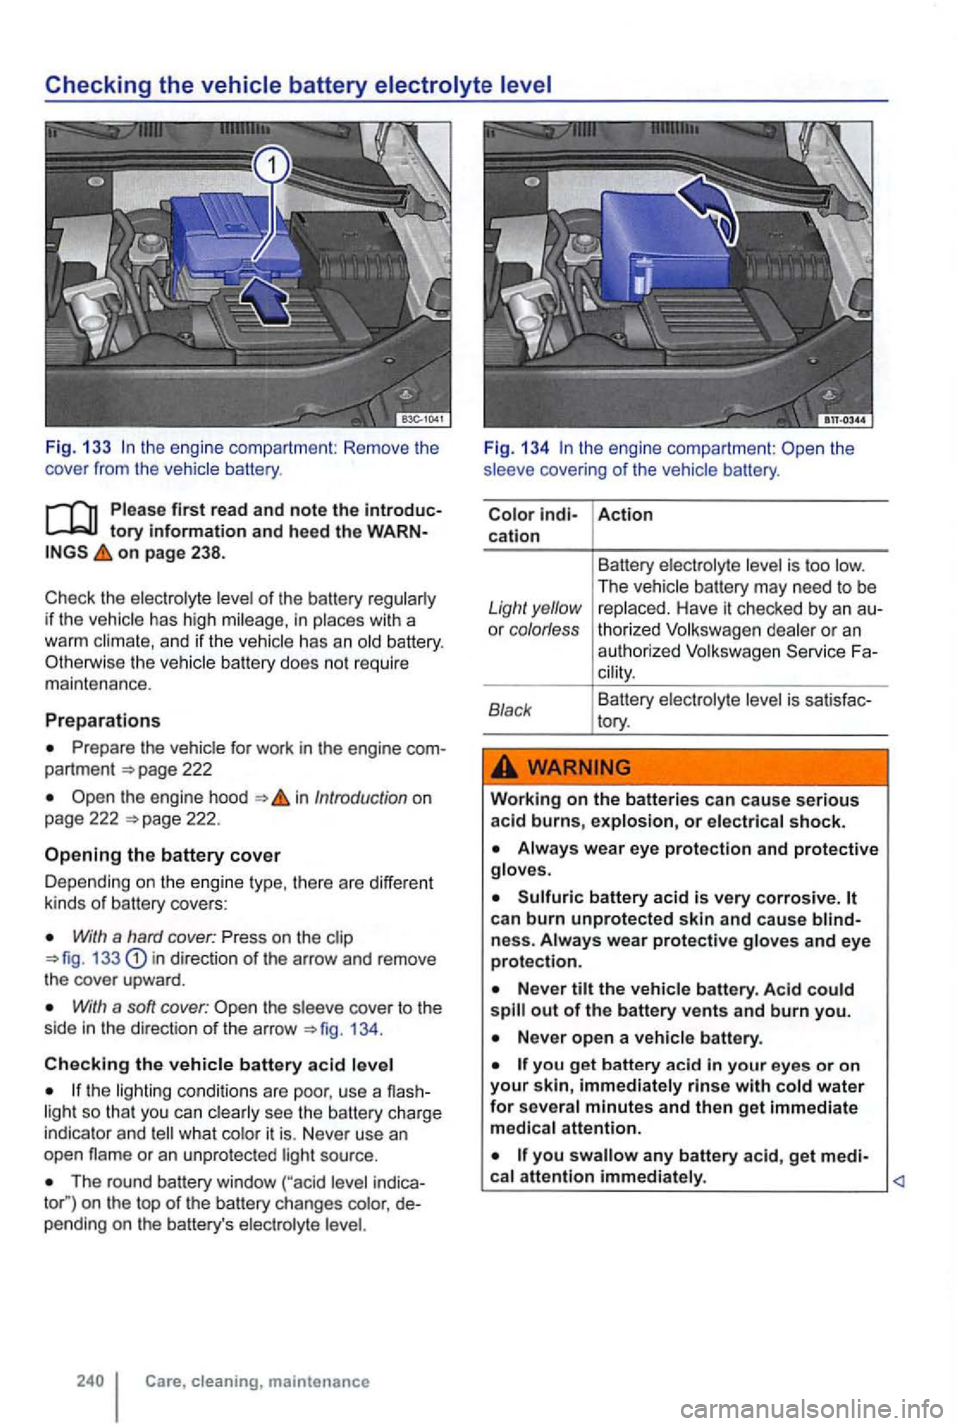
Fig. 133 the engi ne compartment: Remove the
cover from the vehicle battery.
first read and note the tory information and heed the on page 238.
of the battery if th e vehicle has high in with a
warm a nd if the vehicle has an
Prepare the for work in the engine pa rtm ent 222
the engine hood in Introduction on
page 222
With a hard cover: Press on the 133 in direct ion of t h e arrow and remove the cove r upwa rd.
W ith a son cover: the cove r to the
side in th e direction of the arrow 1 34 .
Checking the vehicle battery acid
the lighting co nd it ions are poo r, use a so tha t you can see the ba ttery charge
indica tor and
The rou nd batt ery window on th e top of the battery ch anges
Care, cleaning, maintenance Fi
g. 134
cove ring of the vehic le battery .
Action cation
Battery
is too The vehicle battery may need to be Light yellow replaced. Have it chec ked by an or colorless thorized Volkswagen or an a uthor ized Volksw ag en
is sa tisfac-
tory.
Working on the batteries can cause serious acid burns, explosion, or
can burn unprotec te d skin and cause ne ss. and eye protection.
Never out of th e battery vents a nd burn you.
Never open a vehi cle battery .
you get battery acid in your eyes or on your skin, immediately rinse with water for several minutes and t hen ge t immediate
medical attention.
you any battery acid, get medi-
Page 340 of 516
Charging,
on page 238.
Charging the vehicle battery
Vehicle batteries should be charged by an author
ized Volkswagen dealer or an authorized Volkswa
gen
because the factory -installed
battery requires a charger with overload protection
Replacing the vehicle battery
The battery in your vehicle is
batteries meet
ing standards TL 825
electrical system, note the following :
off
Unlock the vehicle before disconnecting the
battery; otherwise the alarm system
Fir st disconnect the negativ e cable(-) and then the positive
Connecting the vehicle battery
Pr ior to reconnecting the battery , switch off electrical sys tems and devices and the ignition .
Connect the posit ive cable(+) first and then the
negative cable (-)
After the battery is connected and the ignition is
sw itched on, different indicator light s may come on. They should go out after you drive a short distance
ice Facility and have the checked.
th e ign ition not start after reconnecting the vehicle battery , lock the vehic le from the outside
and unlock it again. Then try to start the ignition
again.
lhe ignition cannot be switched on, con
tact an authorized Volkswagen dealer, an author
ized Volkswagen
o r another quali
fied workshop for assistance.
Automatic electrical load deactivation
onboard electrical system management auto mati takes steps to help prevent battery drain.
The idle speed is increa sed so that the alterna
t o r provides more power.
Th e power to devices that consume a lot of electricity is cut back or switched off completely.
When the engine is started, the power supply to the 12
Long periods when the engine is not running,
especially when the ignition is on .
Using electr ical sys tems or devices when the
engine is swi tched off. Leaving the
The selecto r lever is left for a long period of time in any position other than P when the ignition
is swi tched off =>page 175.
Failure to use th e proper battery with proper mounting and connection s may cause short circu its, fires, and serious persona l injuries.
Always use only maintenance-free or cy-
cle-free, leak-proof batteries with the sa me
s p ec ifications and dimensions as the original
equipment b attery. Specifications are listed
on the battery housing.
Wh en the vehicle battery is ch arged, it produ-
ces highly explosive hydroge n gas.
th e engine compartment
Page 365 of 516
When the warns that the
pressure in at
one tire is too
check the tire pressure in
not be spotted by
true for
Tire Pres-4 tires with an accurate tire pressure
gauge. Low tire pressure
can-sure Monitoring System (TPMS).
on page 258.
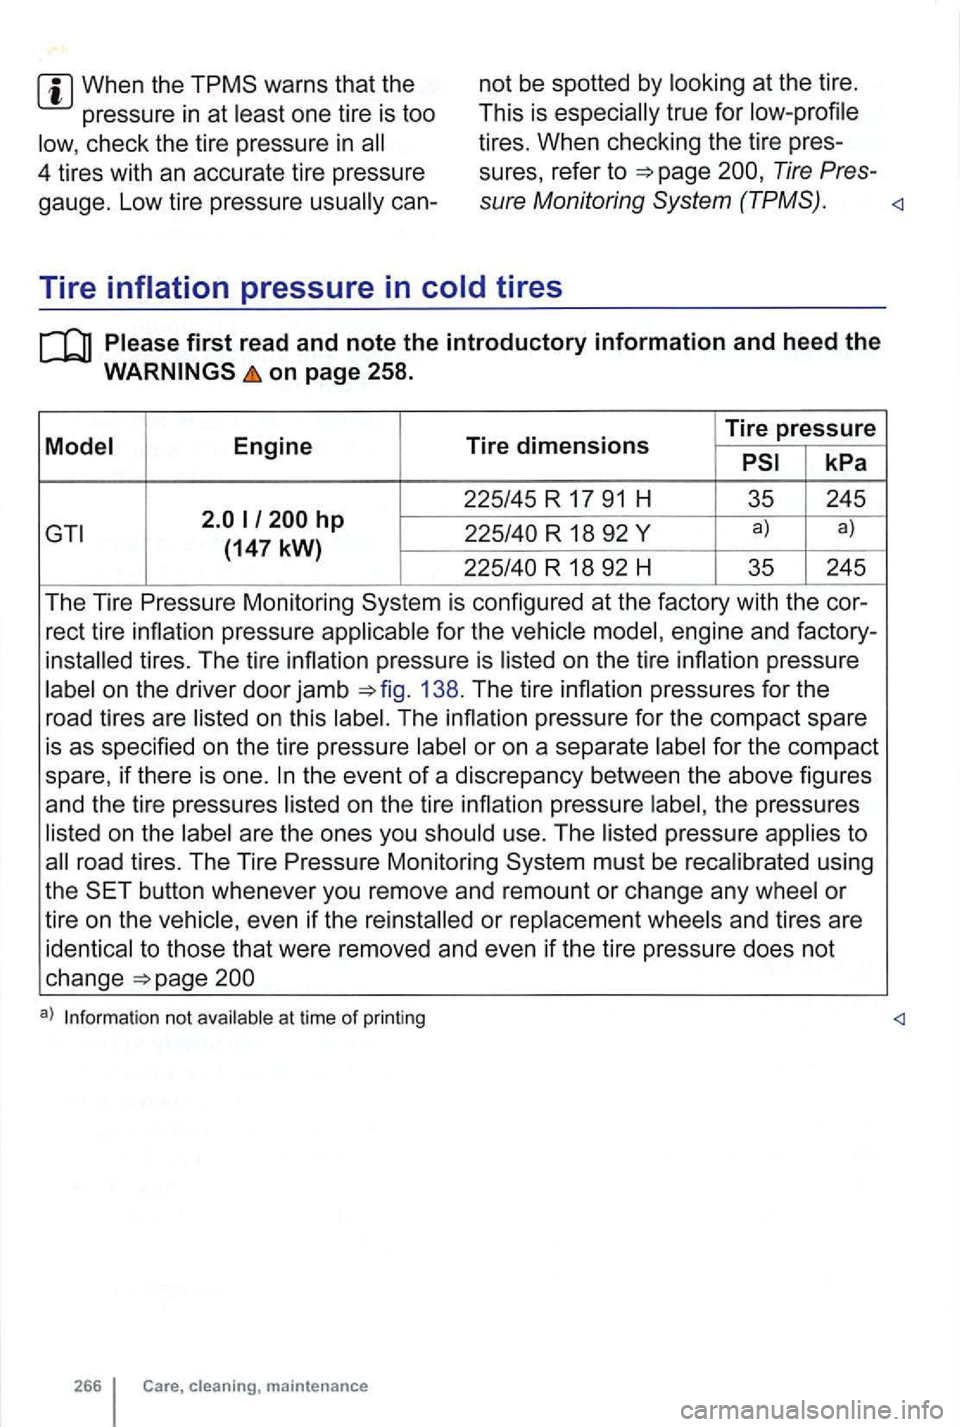
R 18 92
R 18 92 H 35 245
The Tire
Monitoring is configured at the factory with the cor-
rect tire inflation pressure
engine and factory-
tires. The tire
on the driver door jamb =>fig. 138 . The tire inflation pressures for the
road tires are
on this
or on a separate
on the tire
on the use. The to
road tires. The Tire Monitoring must be recalibrated using
the
button whenever you remove and remount or change any
or replacement
a) Inform ation not avail able at tim e of printing
266 Care, m aintenance
Page 394 of 516
Engine
In this sectio n yo u 'll find informatio n about
Indicato r lights ............... ........... 295
Cata lytic co nverter
..... 296
More information:
Sh ifting gears 171
Refueling 214
Fuel 219
Engine oil
Vehicle ba ttery
N otice about data recorded by vehic le co ntr ol
modu les
T owing 330
The vehicle exhaust system and the catalytic
converter get very hot. This can cause a fire
and serious personal injury.
Never apply additional undercoating or rust proofing on or near the exhaust mani-fold, exhaust pipes, catalytic converter , or heat shields .
Proposition 65 Warning
constituents,
and certain vehicle components contain or emit chemicals known to the
addition, certain fluids contained in vehicles and certain products of component wear contain or emit chemicals
known to the
on page 295.
L
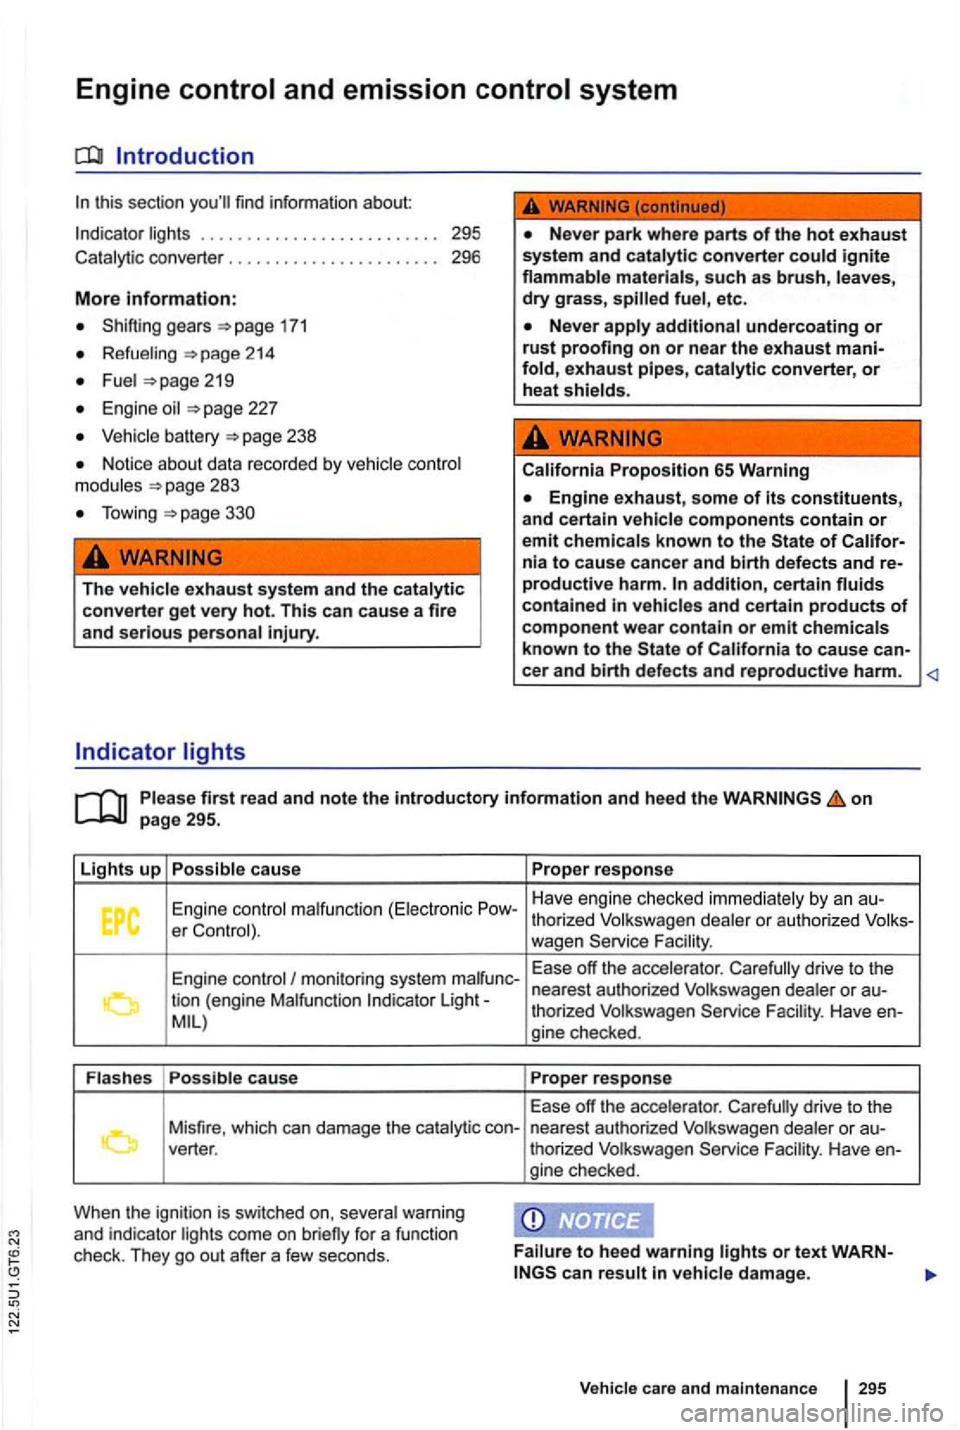
ights up Possibl e ca use Proper respon se
Engine contr
ol malfunctio n (Elec tron ic Pow -Have engi
ne checked immediat ely by an au-
er
Contr ol). thor
ized Volkswage n dea ler or aut hor ized Volks-
wagen Fa cility .
Engine contr ol/ monitoring system
malfunc- E
ase off the accelerator . Carefully drive to the
lion (engine Malfunction Indicator Light- n
ea rest auth orized Volkswagen dealer or au-MIL) thorized
Volkswagen Facility . Ha ve en-
gine checked .
Flashes Possible cause Proper response
Ease
off the accele rator. Caref ully drive to the Misfire , which can damage th e catalytic con-
nearest authorize d Volkswagen dealer or au-.
thorized Volkswagen Service Faci lity. Have en-
gine checked .
When
the ignition is switched severa l warning
and indicator ligh ts come on briefly for a func tion
check . The y
go out after a few seconds . Failure to h
eed warning lights or text WARN-
Vehi cle care and maint enance