Page 108 of 516
Passenger compartment
Driver door overview
Fig . 4 Overview o f
Door
Power switch for and the ...................... .
for anti- theft
for adjusting the outside mirror ..................••..........................
-Adjusting outside mirrors l -
® Buttons for operating the power windows ................•..........................
-Power windows
switch for rear power
the engine hood
.........................................••..................•.....
compartment
P as seng er co m partm ent
47
41
41
134
53
222
161
157
Page 124 of 516
Avg. Consu m.
Route
Avg . speed
Dig it. speed
warning
Back
Compass
Convenience
ATAconfirm
Dooropen
Manual
(All doors , door, Veh . si de,
Automa tic (Auto Lock, Auto Unlock)
Mirror adjust
Factory
Lights & Vision
Background lighting
Footwell ligh ting
L n. Chg.
F actory setting
Ti me
Units
Alternative speed display
Reset
Factory setting
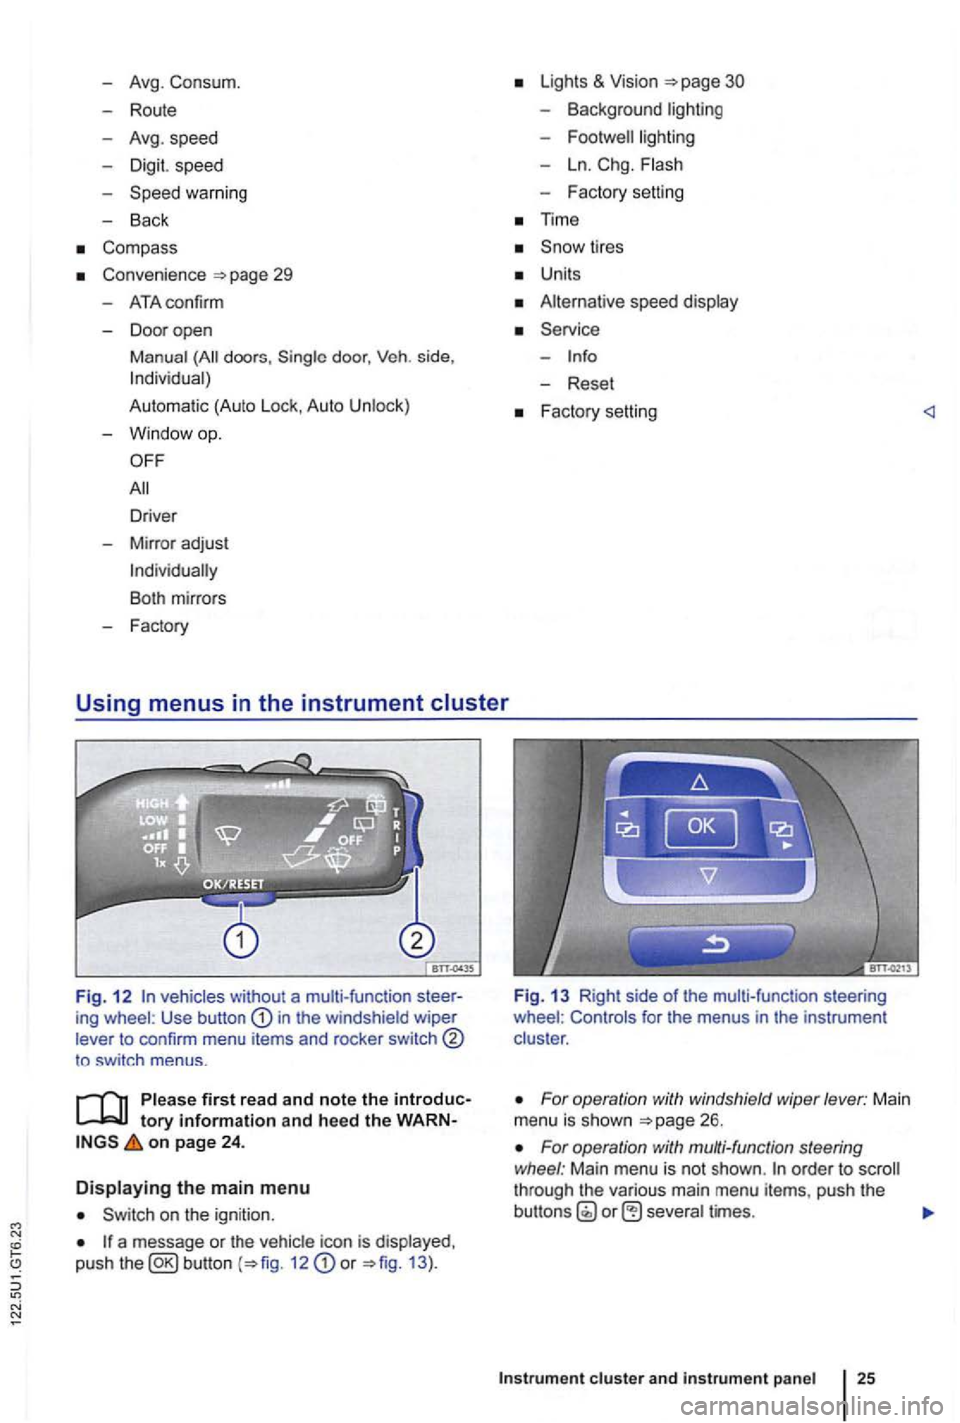
Using menus in the instrument cluster
Fig. 1 2 vehicles without a multi-function ing wheel : Use button in the windshield wiper
lever to confirm menu items and rocker switch
to sw itch menus .
tory information and heed the on page 24 .
Displaying the main menu
on the ignition .
a message or the vehi cle icon is displayed ,
push the 12 or 13 ).
Fig. 13 Right side of the mult i-func tion steering
wheel : Controls for the menus in the instrumen t
clus ter .
For operation with windshield wiper lever: Main
menu is shown
For operation with multi-function steering
wheel : Main menu is not shown . order to through the various main menu items, push the
cluster and instr um ent pan el
Page 128 of 516
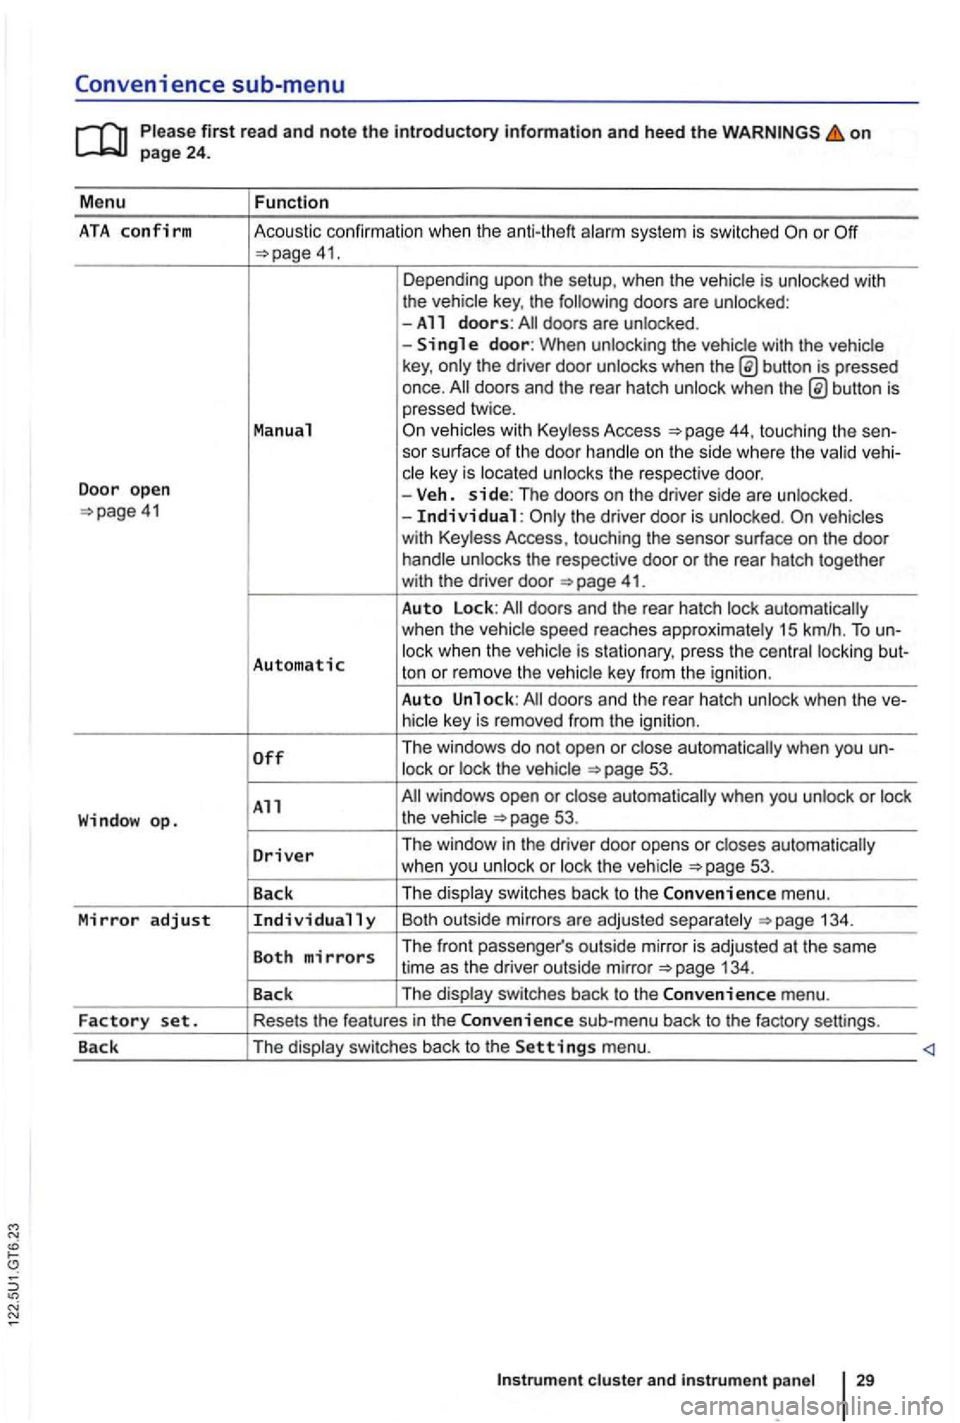
Convenience sub-menu
on
41. Depending upo n the setup, when the vehicle is unlocked with
the vehic le key , the following doors are unlocked :
-All doors: doors are un locked .
-
button is pressed
once.
44, touching the sen-
sor surface of the door handle on the s ide where the valid vehi-
c le key is located unlocks the respective doo r.
Door open -Veh. side: The doors on the dr iver side are unlo cked. the driver door is unloc ked.
41.
Auto Lock:
Automatic lock when the vehic le is s tationary, press the centra l locki ng but-
ton or rem ove the ve hic le key from the igni tion .
Auto Unlock:
53.
All 53.
D
river Th e window in the driver door opens or closes automatically
w hen you unlock or loc k th e ve hicle 53 .
Back The
displa y swi tc
hes back to the Convenience m enu.
Mirror adjust Individually Bo th outsi de mirrors a re ad juste d sepa ra te ly 134 .
Both mirrors The front passe nger's outs ide mirro r is adj usted at th e same
time as the driver out side mirror
Page 130 of 516
Before driving
this sectio n yo u'll find infor ma tion about
Gett ing ready and driving safely . . . . . . . . . . . 3 1
Driving in other countr ies . . . . . . . . . . . . . . . 32
Driving through
water on ro ads . . . . . . . . . . 33
More information:
S tarting , shift ing, pa rking 1 65
189
Consumer information
Driving under the influence of alcohol,
on
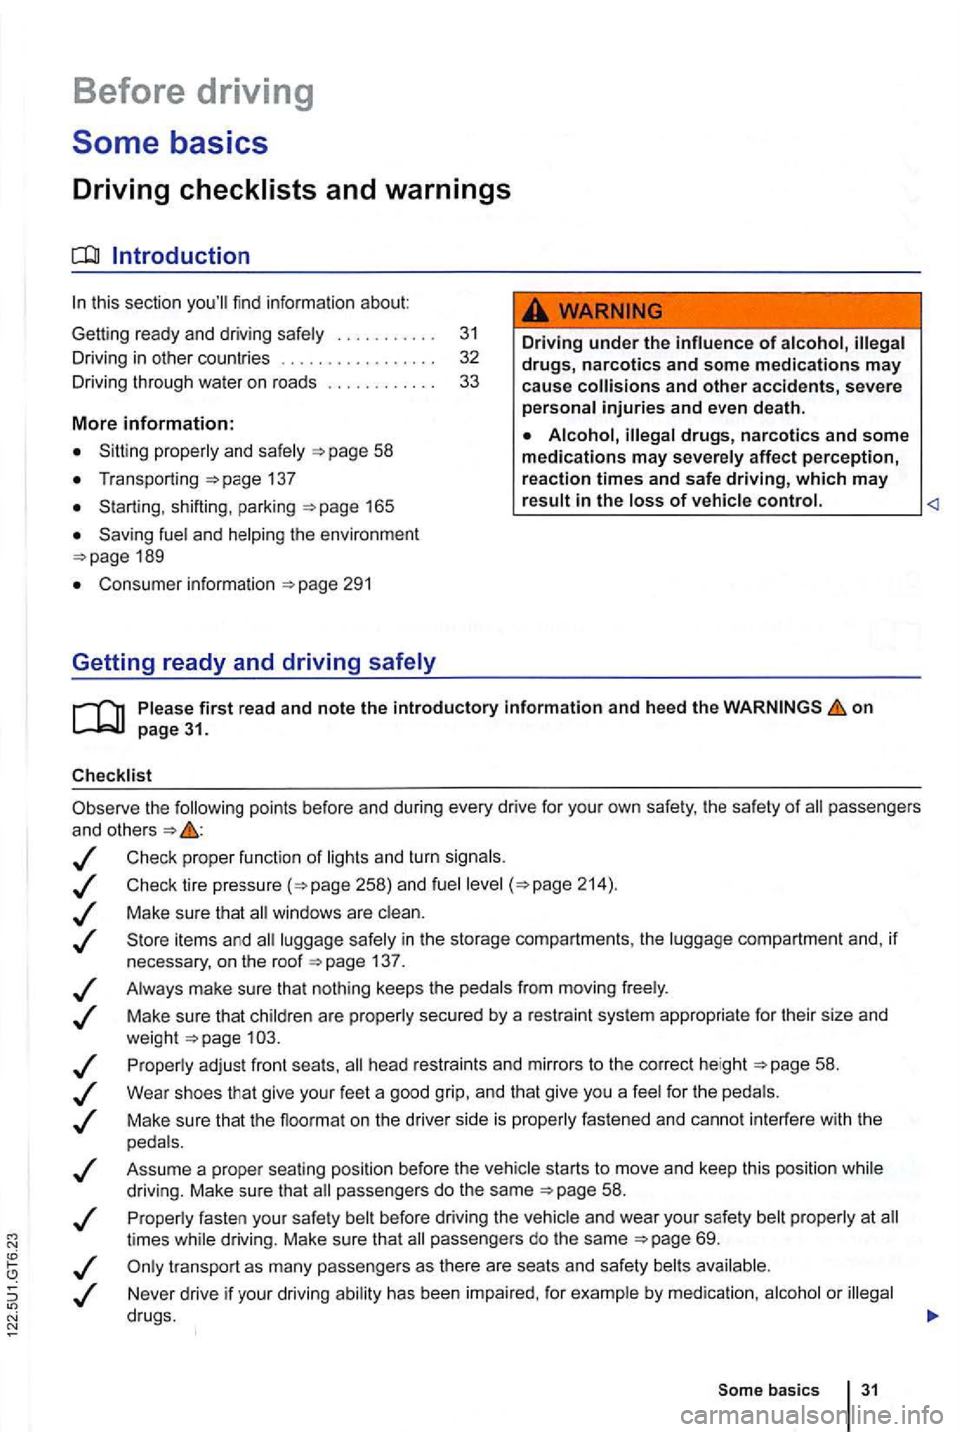
the following points be fore and during every drive for you r own safe ty, the safety of passengers
and other s
Check proper functio n of lights and turn signa ls .
Check tire pressu re
258) and fuel 214) .
Make su re that win dows are .
137 .
Always make sure tha t nothing keeps th e pedals from moving freely .
Make sure that children are properly sec
ured by a rest raint sys tem appropriate for their size and
weigh t .
Proper ly ad just front seats , head restraints and mirrors to the correct height
give your feet a good grip, and that give you a feel for the peda ls .
M ake sure that the floormat on the drive r side is properly fastened and canno t interfere with the
peda ls .
Assume a prope r sea ti
ng posi tion before the vehicle starts to move and keep this positio n whil e
driving. Make sure that passe ngers do the same 58 .
P roper ly fasten your safe ty bel t before
driving the vehic le and wear you r safety belt properly at times while driving. Make sure that passe ngers do the same
or
Som e basics 31
Page 160 of 516
N
N
Passenger-front seat adjustment:
P ush the passe nger seat as far back as possi
M ove the front seat backward or for-ward.
Fold backrest forward o r backwa rd
(only in 2-door vehicles)
Lumbar support contro l.
Adjust back rest angle .
Adjust seat height.
on page 58.
The contr o ls on the fr on t passenger seat mirror
those on the
driver seat.
There may be both manual and electrical con
in place after the leve r is released!
Folding forwar d: Pull the
the way back , p ull
t he lever , a nd fold the back res t back into the upright
p osit
ion . The backrest must in place after the le v-
er is released!
Adj ust the leve r position.
Lea n forward and tu
rn th e adjuster wheel.
Move the lever
times up o r down .
Sitting properly and
safely
Page 166 of 516
this section find information about:
. . . 67
More information:
Adjusting the seating position 58
69
Airbag system page 82
safety and restraints
Outside mirrors 134
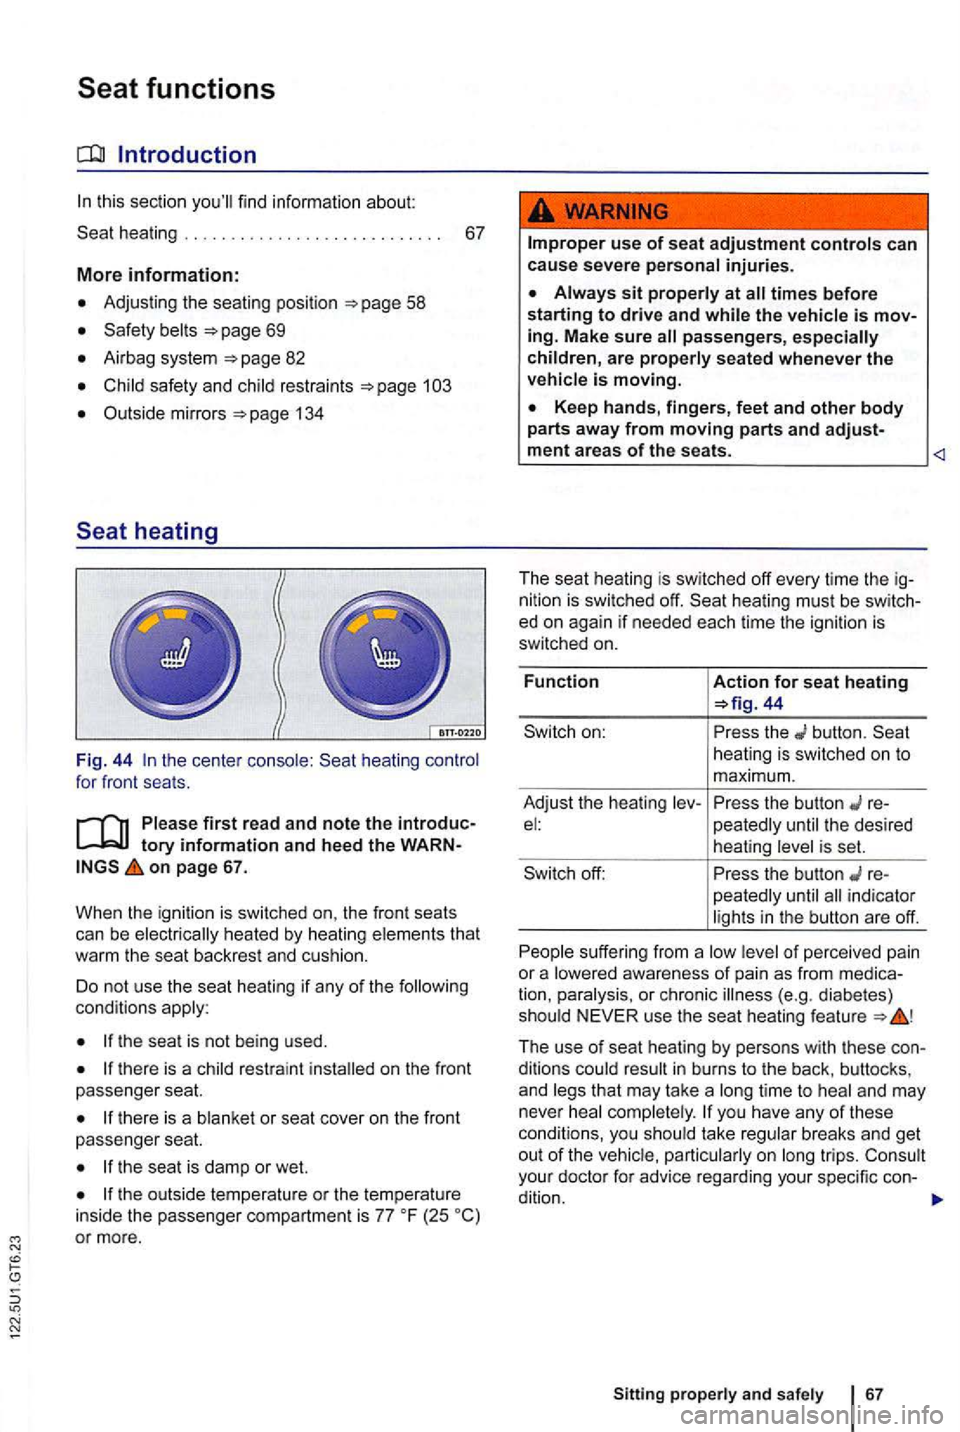
the cente r heating for front seats.
on page 67.
When the igni
tion is sw itched on, the front seats
can be that
wa rm the seat backrest and cush ion .
Do not use the seat heating
if any of the cond itions
the sea t is not being used.
on the front
passenger seat.
there is a or seat cover on the front
passenger seat.
the seat is damp or wet.
(25 or more .
use of seat adjustment controls can
cause severe personal injuries.
passengers, especially
children, are properly seated whenever the
44
button. heating is sw itched on to
m aximum.
Adjust the hea ting
re-the desired
heating
the button re
peatedly indicator
s uff ering from a of perce ived pain
or a
The use of seat heating by persons with these conditions time to and may
never
take breaks and get out of the trips. your docto r fo r advice rega rding your specific con-
dition.
Sitting a nd 67
Page 227 of 516
this section
visors 128
Windshie ld made of heat-insu
latin g glass . . . 128
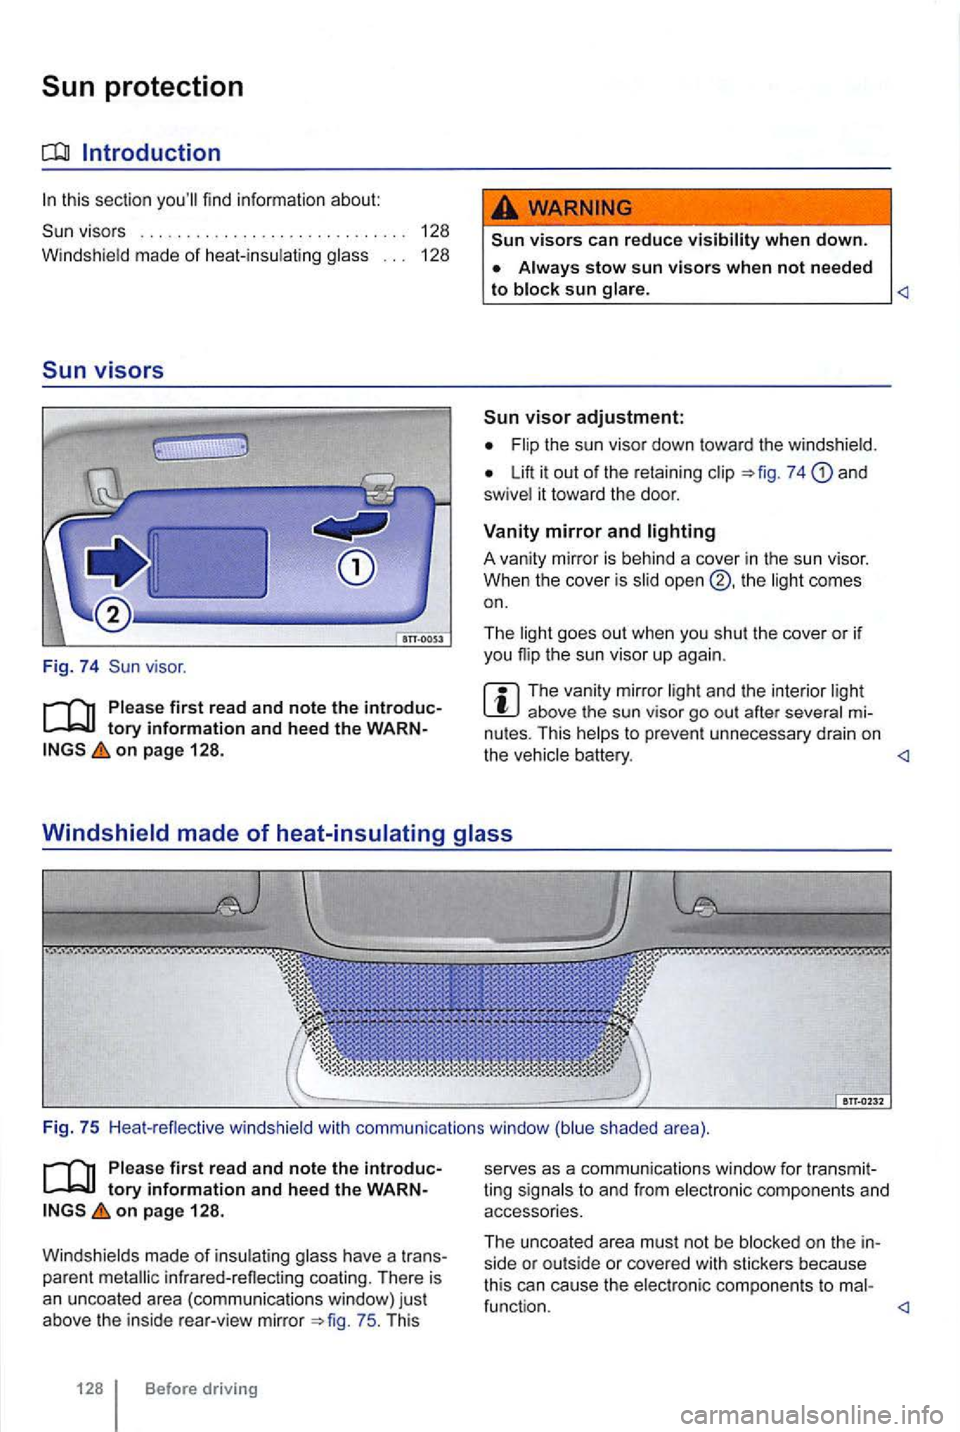
Sun visors
Fig. 74
on page 128.
visors can reduce visibility when down.
Always stow sun visors when not needed to block sun glare.
visor adjustment:
Flip the sun visor down toward the windshie ld.
Lift it out of the retain ing clip 7 4 and
swivel it toward the door.
Vanity mirror and lighting
A vanity mirror is behind a cove r in t he sun visor.
When the cover is
The vanity mirror light and the interior light above the sun visor go out after several
Windshield made of heat-insulating glass
Fig. 75 Hea t-reflective windsh ie ld w ith commun icat ions window (blue shaded area).
on page 128.
Windshields made
of insulating glass have a parent
75. This
128 Before driving serves
as a communications window
for ting signa ls to and from electroni c components and accessories.
The uncoated area must not be block ed on the
side or outside or covered with stickers because
this can cause the elec tronic componen ts to f u nct ion.
Page 233 of 516
Mirrors
this section find informa tio n about:
mirr ors . . . . . . . . . . . . . . . . . . . . . . . . 135
More information:
Exte rio r views page 6
Personal comfort settin g in the Volksw age n fo rmation
17 1
179
Auto-dimming mirrors conta in an electrolyte
ken . Electrolyte fluid can irritate the skin, eyes, and respiratory system.
trolyte can irritate the respiratory tem, especially among people with asthma or other respiratory conditions. Get fresh air
the
way .
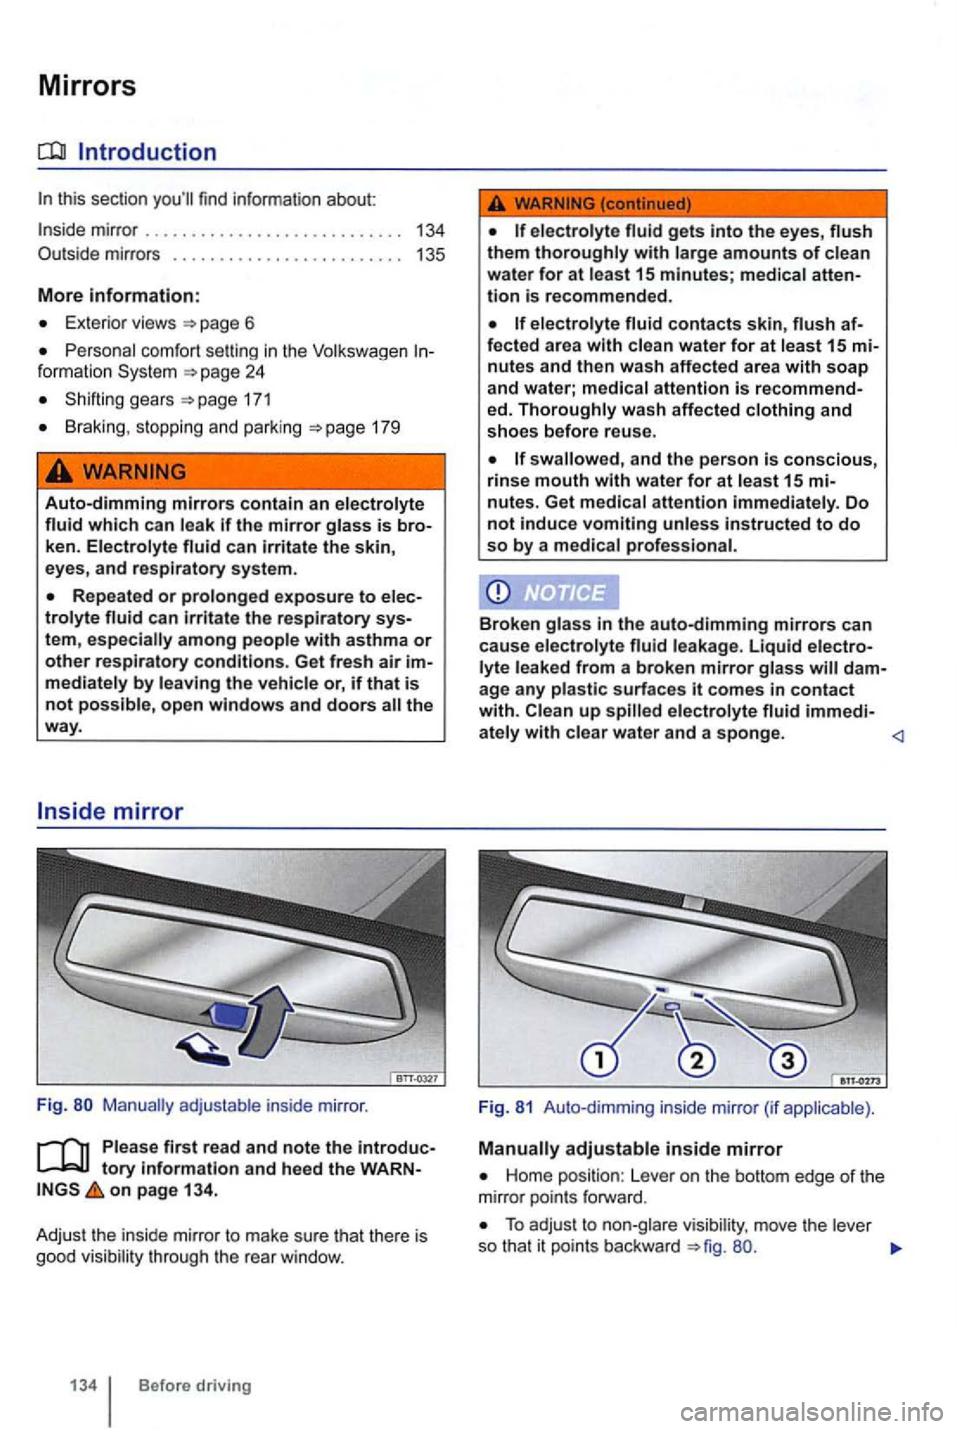
adjustab le ins ide m irro r.
tory information a nd heed the on page 134.
Adj ust
the i nside mirror to make sure that there is
good visibilit y thr ough the rea r window .
ele c trolyte fluid gets into the ey es, flush them thoroughly with large amounts of clean water for at least 15 minutes; med ical tion is recommended .
electrolyte fluid contacts skin, fected area with clean water for at least 15
ed. Thoroughly wash affecte d clothing and
shoes before reuse.
swallowed , and the person is conscious, rinse mouth with w ater for at leas t 15 nute s. Get medical attention immediately. Do not induce vomiting unless instructed to do so by a medical professional.
Broken glass in the auto-d imming mirrors can
cause electrolyte lyte leaked from a broken mirror g lass
Fi g. 81 Auto-dimming inside mirror (if appl icable) .
Manually adjustable inside mirror
Home position : Lever on th e bottom edge of the mirror poin ts forward .
To adjust to visibil ity , move the leve r
so that it points backward