Page 37 of 516
Media source Conditions for playback
Audio file playback via Bluetooth®a)_ - The device or vehicle must be equipped with a suitable mo
profile
connectable for audio output 1
MDI. External data media -
Compa tible with mul timedia interface
a) is a registered trademark of Bluetooth
Limitations and notes
Dirt , h igh temperatures and mechani cal damage
ca n render a data medium unusable. ob
serve dat a medium manufac turer information .
Quality differences between data media
of different
manufa cturers can cause prob lems during play
back.
Observe
requirements regarding copyrights!
Th e data med
ium configuration or the devices or
prog rams used for recording can cause individual
tr acks or data medium
to be unreadabl e. lnforma- lion
regarding best practices for
the creation of au
dio files and data media (compression rate,
tag, etc .) can be fo und on the
The r ead time can vary depending on the
size, usage status (copy and delete processes) ,
folder st
ructure and file type .
define a ce rtain playback se
quence. do not save any
on page 3 and note the introductory information on page
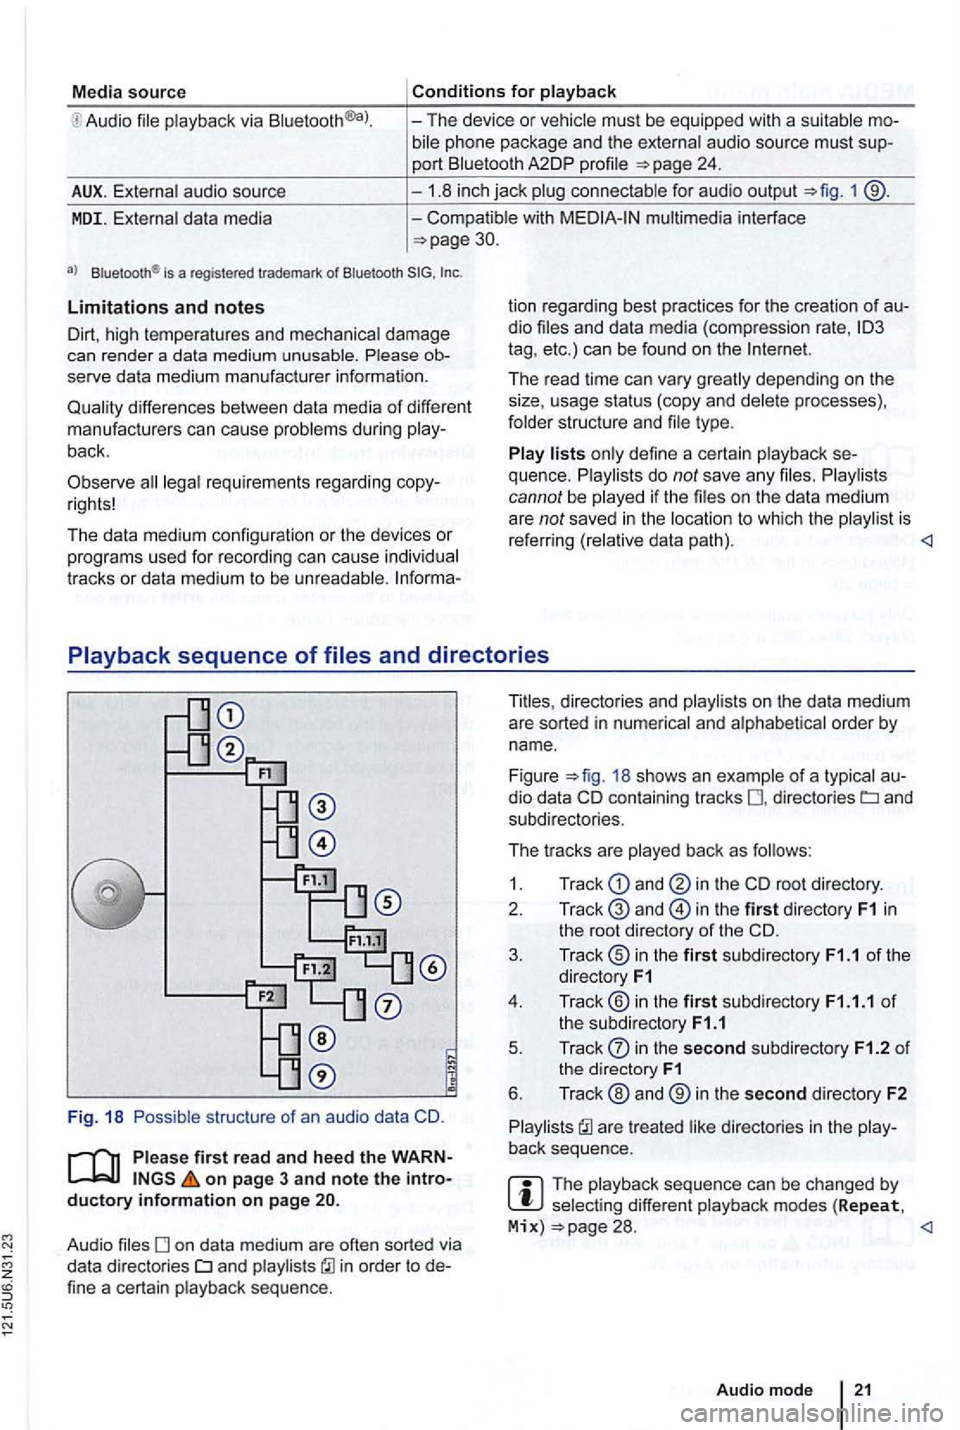
Audio files on data med ium are often sorted via
data directories CJ and in order to de
fine a certain playback sequence.
directories and on the data medium
are sorted in nume rical and alphabetical order by name .
Figure
18 shows an example of a typical au
dio data containing tracks directories and
subdi rectories .
The tr acks are played back
as
1. Track and in the root directory.
2.
in the first dir ectory F1 in the root directory of the CD.
3. Track® in the first subdirectory F1.1 of the
directory F1
4 . Track ® in the first subdirecto ry F1.1.1 of the subd irectory F1.1
5 . Track
in the second subdirectory F1.2 of the directory F1
6. Track ® and ® in the second directory F2
are treated
select ing different playback modes (Repeat, Mix) 28.
Audio mode
Page 38 of 516
on page 3 and note the introductory information on page
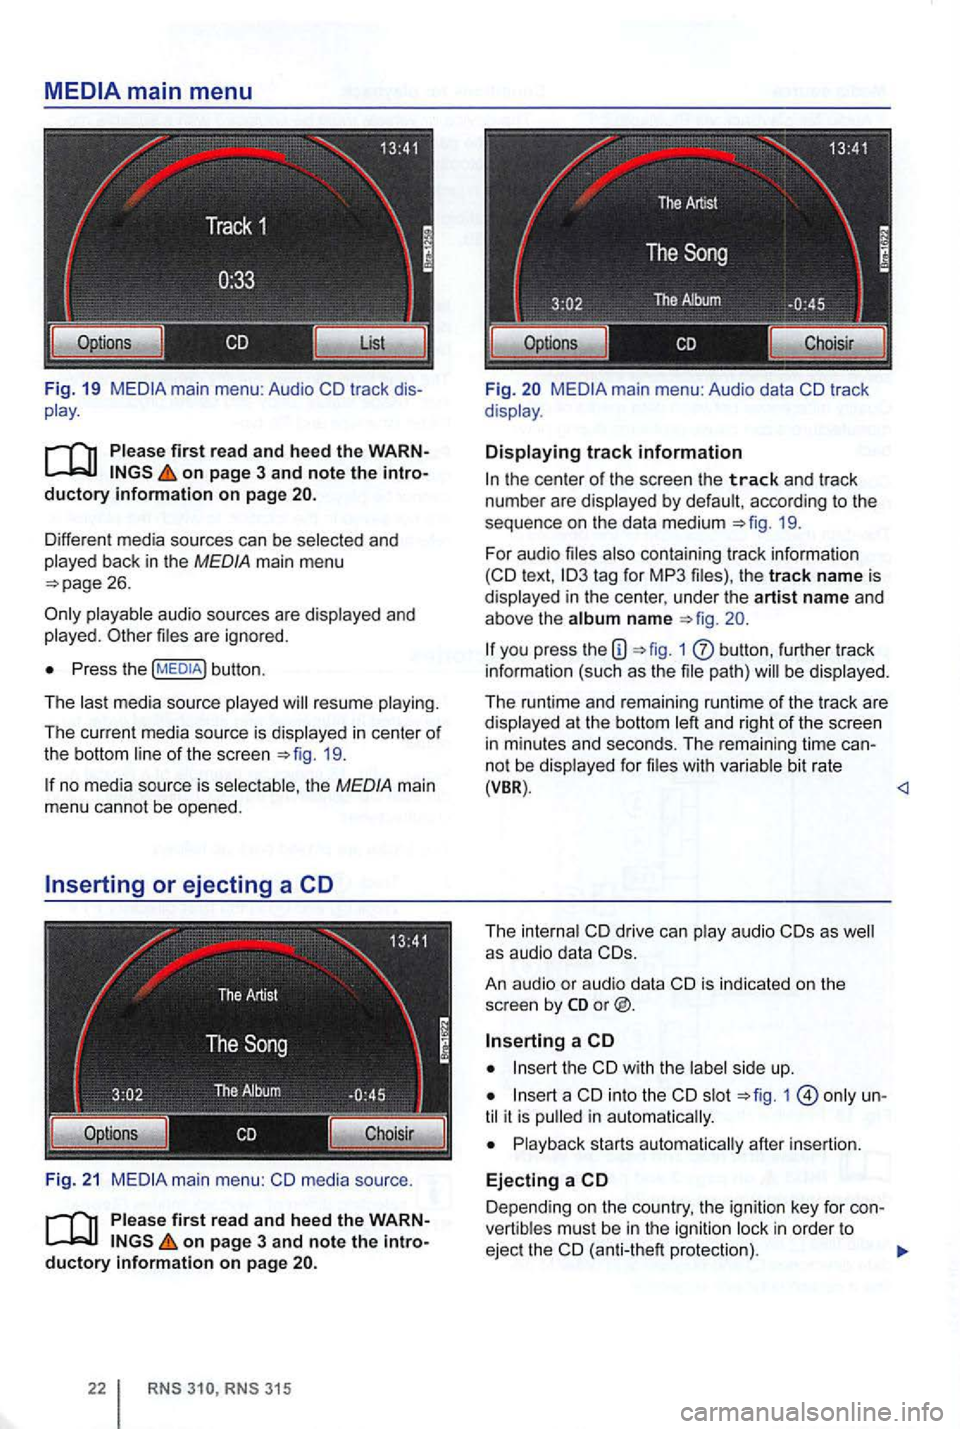
Different media sources can be selected and
played back in the MEDIA main menu
playable audio sources are d isplayed and
played . files are igno red.
Press the button .
The last med ia source played will resume playing .
The current med ia source is displayed
in center of
the bottom line of the screen 19.
no med ia sou rce is selec table, the MEDIA main
menu cannot be opened.
F
ig. 21 media source .
on page 3 and note the introductory information on page
315
Fi g. main menu: Audio data
the center of the screen the track and trac k
numbe r are d isplayed by defau lt , acc ording to the
sequence on
the da ta medium 19.
For audio files also conta in ing tr ack information text ,
you press the 1 butt on , furth er track
info rma tion (such as the file path) will be dis played .
The runtime and rema ining runtime of the track a
re displayed at t he bottom left and right of the screen in m inutes and seco nds. The rema ining tim e ca nnot be disp layed fo r file s w it h va riabl e bit rate (VBR) .
Th e internal drive can play audio as well as audio data CDs.
An au dio
or audio data
the
int o the slot 1 until it is pull ed in a utomatica lly.
Playback starts automatica lly after insertion.
Ejecting a
Depend ing on the country , the ign ition key for con
vert ib les mus t be in the igniti on l ock in order to
ejec t the (anti-the ft protectio n).
Page 39 of 516
Press
An inserted CD is moved to ejec t posi tion and
must be removed within sec
onds.
an inserted CD canno t be read , a pop-up window
with a message is
Depending on the device , an ejected and in agai n th ree
times to
Press
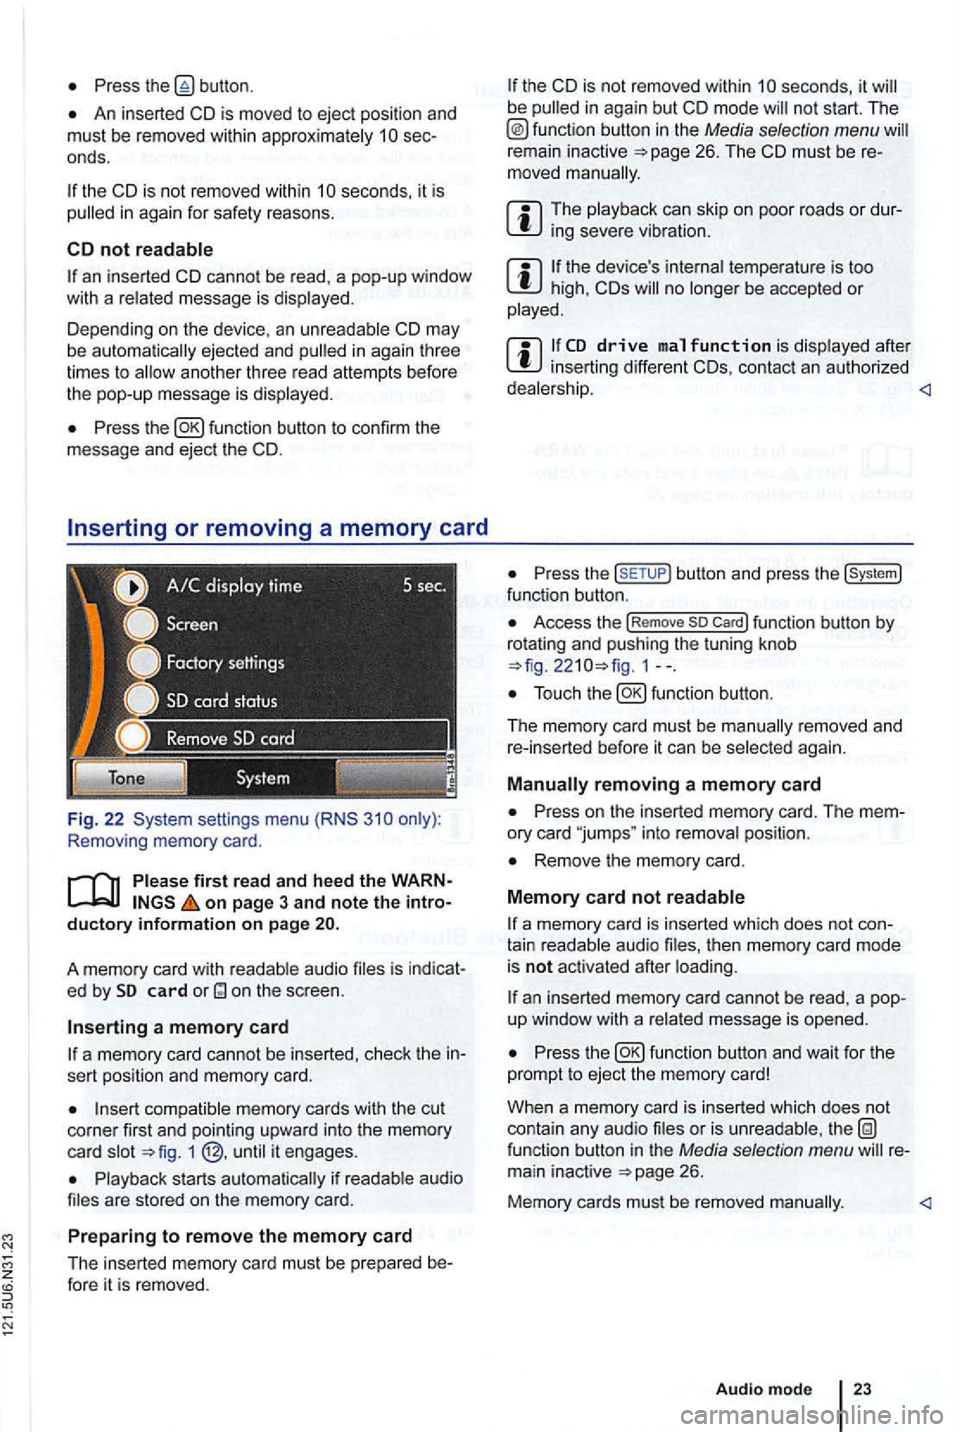
Removing memory card .
first read and hee d the WARN on page 3 and note the intro ductory informa tion o n page
audio is indicat
e d by card
a m em ory card
a memory card cannot be inserted , check the in
sert position and memory card.
memory cards with the cut
corner first and pointing upwa rd into the memory
c ard 1
s tarts if are stored on the mem ory ca rd.
Prep aring to remo ve the memory card
The inserted memory card must be prepared be-fore it is removed .
the CD is not removed within be
remain inactive
can skip o n poor roads or dursevere
the device 's temperature is too high, CDs no be accepted or
after inserting different CDs, contac t an authorized
Press the butto n and press the func tion button .
Access the !Rem ove so Car d! function button by
rotat ing and push ing the tuning knob 1--.
again .
Press on the inserted memory card. The mem
ory card "jumps " into position .
Remove the memory card.
M em o
ry card not
a memory card is inserted which does not con
tain aud io then memory card mode
is not acti vated after
an inserted memory card cannot be rea d, a pop
up window with a message is opened .
Press
or is function button in the Media selection menu 26.
Memory cards must be removed
Audio mode
Page 40 of 516
Fig. 23 audio source connec ted to the mult imedia socket.
on page 3 and note the introductory information on page
The 1 ®
The connected
via the radio navigation system.
A connec ted
a u dio source is indicated by AUX on the screen.
Connecting an
Reduce
Connec t an
audio source.
To change to
of the audio
source
socket
Operation Effect
socket.
the instruc tions for use of
menu with BT audio se
audio source continues in the backg round.
The radio navigat ion system remains
in the AUX menu .
The radio navigat ion system switches
to
the audio source is powered by the 12 interference is
Fig. 25 a udio mode .
Page 41 of 516
first read and heed the on page 3 and note the ductory information on page
through an ed via (for a phone)
can be through the speakers. via the radio-navigation system is
audio source must support the
A2DP or AVRCP
in equipped with a factory -installed phone age that supports this function . To
responding owner's Cell
Phone Package.
Pairing and connec ting is done via the radio
audio
the directions in the owner 's
Redu ce
To change to
Bl uetooth function
button 26.
Aud io mode is indicated on the screen
by Bl uetooth Audio 25 .
The
o f t he be adjusted to match the of the other audio sources
activating audio
some devices ,
After the audio
transmission , a pop-up window opens.
Request fo r confir mation of aud io
BT-Audio Audio mode must be
swi tched to
Audio transmission, as
audio source is
started or s topped automatically by switc hing to
addition , track dio navigation system 's arrow keys 1
25.
the connection is broken . the radio
navigation system switches to
media source.
th e that dio ed .
Radio mode, press the sETUP) button .
Press the
Press the
Tag the device connected and press
the connect) funct ion butt on.
Read and manufacturer of the
Because of the number of audio sources , it canno t be teed that
audio source, warning and service tones, suc h as touch
tones on a
Do not connect radio nav igation system at the same time for
music
interface , as this to on the
ing the use of can be obtained from the
Page 42 of 516
Fig . 26
Please first read and heed the on page 3 and note the
the MEDIA main menu the current media source
is indicated in the center of the bottom line on the
screen 26 . inserted or connected dia sources must be selected via the Media
the MEDIA main menu press the 1 butt on .
T he
Media selection menu is opened 27 .
Repeatedly press the
the tuning knob to tag
a va ila ble media sources one after the other , and
p ress
the tuning knob to access them .
Press the dow with out maki ng changes.
Fi g. 28
Track li st of a MP3 CD being played .
played as inactive, for examp le the function button
multimedia socket
CD Drive
memory card
1.8 inch multimedia jack plugged in to 1
Data media to
Bluetooth audio source (media play-er, page 24.
Fig . 29 High est le ve l of an MP3 CD being played.
Page 44 of 516
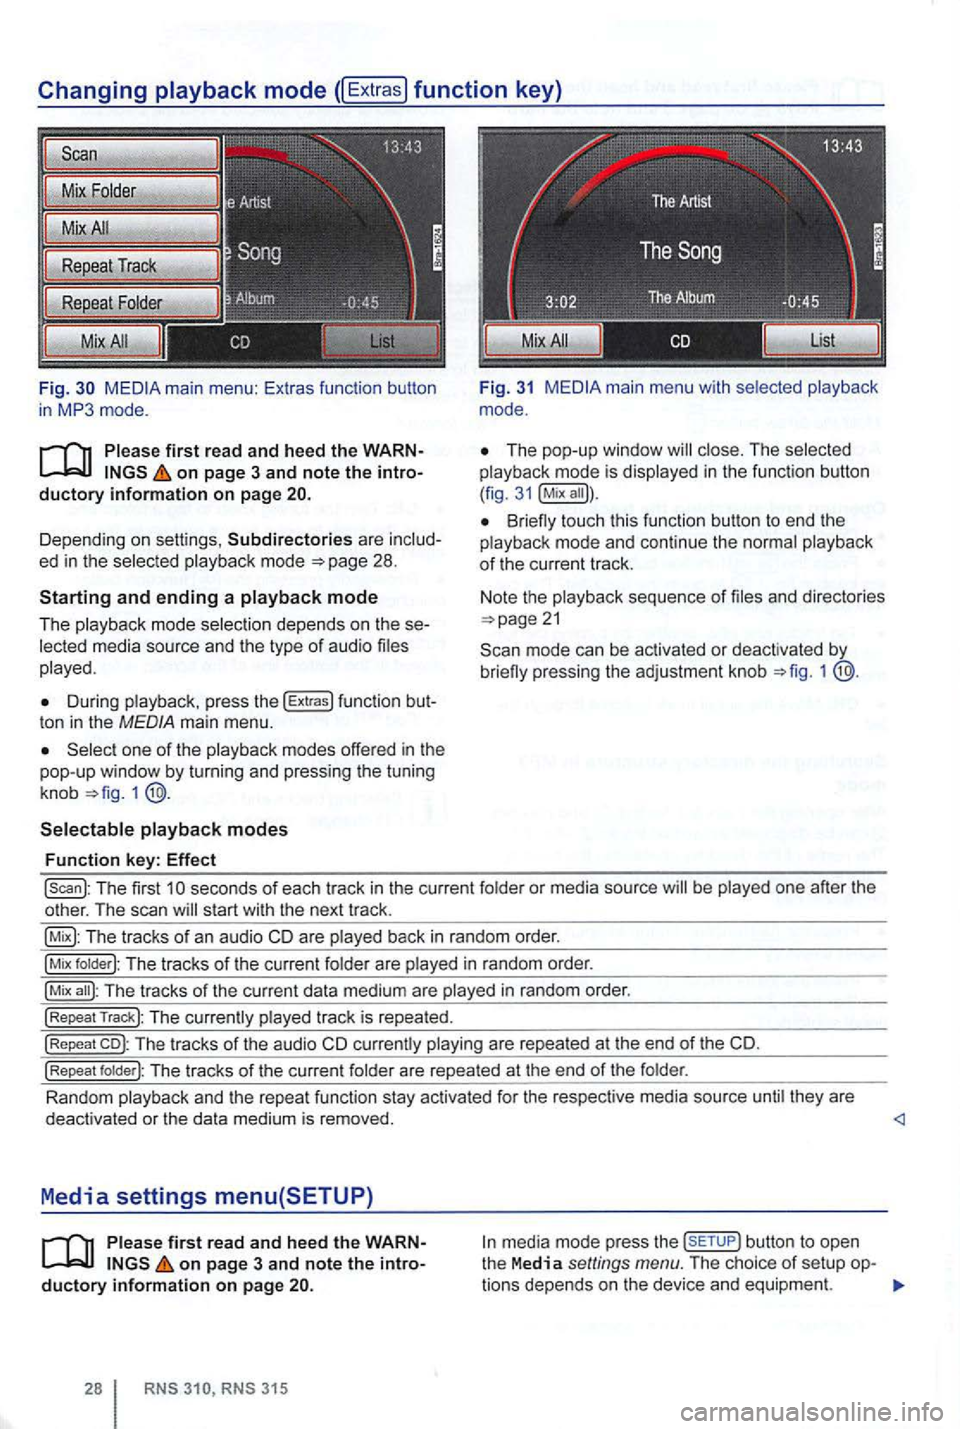
Fig. main m enu : Ex tras function butto n
i n mode.
on page 3 and note the
Depending on sett ings , Subdirectories are mode
During press the !Extras) func tion t on in the MED IA ma in menu.
one of the
1
main menu wit h
Th e pop-up windo w in the funct ion button
( fig .
Bri eny touch this function button to end the mode and continue the
sequence of
mode can be activated or deactivated by brieny pressing the adjustment knob 1
!scan): Th e first seconds of each tr ack in the curre nt or media source be one after the
o ther . The scan start with the next track .
The tracks of an aud io CD are back in random order.
!Mix T he tracks of the cur rent are in random order.
!Mix The tracks of the curr ent data medium are in random order.
!Repeat Track): The track is repea ted.
!Repeat co): The tracks of the audio CD are repea te d at t he end of the CD.
!Repeat The tracks of the curren t
Random they are
deact ivated or the data medium is removed. <1
Media settings menu(SETUP)
on page 3 and note the button to open
the Media settings menu. The choice of setup tions dep ends on the device and equipme nt.
Page 45 of 516
The menu item (Biue loo th se ttings} serves to or
connect
315
S can/MixiRepea t includi ng in the
A UX volume :Adjust the input of an socket 1 9 to of other audio sources
of an or an iP hone conn ected via the dia interface to of other audio sources
BT audio audio source which is connected to a factory -installed ca n be over the spea kers
of an it with the of the othe r aud io sou rces
Lower the on an audio source.
the of the audio source , if that is not sufficient , set
the input t o
back too or the sound is distorted, t h e au dio sourceoutput if to (Mid-ra nge or
or distorted speakers.
Audio mode