2012 TOYOTA DYNA 100/150 check engine light
[x] Cancel search: check engine lightPage 139 of 240

STARTING AND DRIVING133
Before starting the engine, be sure to fol-
low the instructions in “(a) Before crank-
ing”.
Normal starting procedure
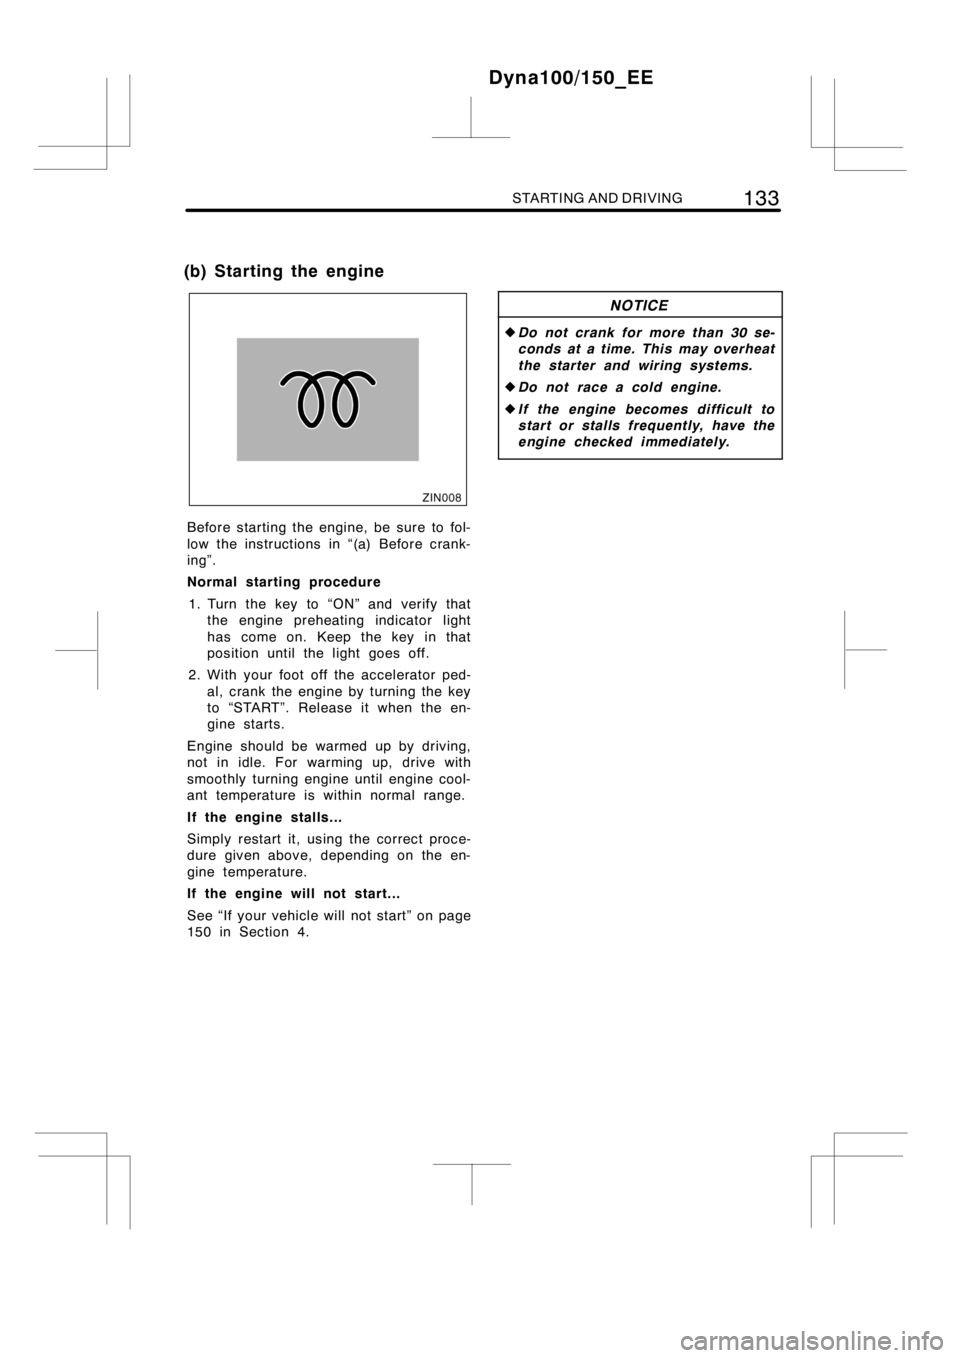
1. Turn the key to “ON” and verify that
the engine preheating indicator light
has come on. Keep the key in that
position until the light goes off.
2. With your foot off the accelerator ped-
al, crank the engine by turning the key
to “START”. Release it when the en-
gine starts.
Engine should be warmed up by driving,
not in idle. For warming up, drive with
smoothly turning engine until engine cool-
ant temperature is within normal range.
If the engine stalls...
Simply restart it, using the correct proce-
dure given above, depending on the en-
gine temperature.
If the engine will not start...
See “If your vehicle will not start” on page
150 in Section 4.
NOTICE
zDo not crank for more than 30 se-
conds at a time. This may overheat
the starter and wiring systems.
zDo not race a cold engine.
zIf the engine becomes difficult to
start or stalls frequently, have the
engine checked immediately.
Dyna100/150_EE
(b) Starting the engine
Page 140 of 240

134STARTING AND DRIVING
After high−speed or extended driving that
requires a heavy engine load, the engine
should be allowed to idle, as shown in the
chart before turning it off.
Driving condition and required idling
time
Normal city driving
Idling time—Not necessary
High−speed driving
About 80 km/h (50 mph)
Idling time—About 20 seconds
About 100 km/h (62 mph)
Idling time—About 1 minute
Steep mountain slopes or continued
driving above 100 km/h (62 mph)
Idling time—About 2 minute
NOTICE
Do not turn the engine off immediate-
ly after a heavy load has been placed
on the engine in order to prevent en-
gine damage.
It is a good idea to do a safety check
before starting out on a trip. A few min-
utes of checking can help ensure safe and
pleasant driving. Just a basic familiarity
with your vehicle is required and a careful
eye! Or, if you would like, any authorized
Toyota dealer or repairer, or another duly
qualified and equipped professional, will
be pleased to make this check for you at
a nominal cost.
CAUTION
If you make this check in an enclosed
garage, make sure there is adequate
ventilation. Engine exhaust is poison-
ous.
BEFORE STARTING THE ENGINE
Outside the vehicle
Tires (spare included).Check the pres-
sure with a gauge and look carefully for
cuts, damage, or excessive wear.
Wheel nuts.Make sure no nuts are mis-
sing or loose.
Fluid leaks.After the vehicle has been
parked for a while, check underneath for
leaking fuel, oil, water, or fluid.
Lights.Make sure the headlights, stop
lights, tail lights, turn signals and other
lights are all working. Check the headlight
aim.
Battery and cables.All the battery cells
should be filled to theproper level with
distilled water. Look for corroded or loose
terminals and a cracked case. Check the
cables for good condition and connections.
Inside the vehicle
Jack and wheel nut wrench.Make sure
you have your jack and wheel nut wrench.
Seat belts.Check that the buckles lock
securely. Make sure the belts are not
worn or frayed.
Dyna100/150_EE
Precautions for turning off
an engine with turbochargerPre−trip safety check
Page 141 of 240

STARTING AND DRIVING135
Instruments and controls.Especially
make sure the service reminder indicators,
instrument lights, and defroster are work-
ing.
Brakes.Make sure the pedal has enough
clearance.
Spare fuses.Make sure you have spare
fuses. They should cover all the amperage
ratings designated on the fuse box lid.
In the engine compartment
Coolant level.Make sure the coolant lev-
el is correct. (See page 198 in Section
7−2 for instructions.)
Wiring.Look for damaged, loose, or dis-
connected wires.
Fuel lines.Check the lines for leaks or
loose connections.
AFTER STARTING THE ENGINE
Exhaust system.If you notice any
change in the sound of the exhaust or
smell exhaust fumes, have the cause lo-
cated and corrected immediately. (See
“Engine exhaust cautions” on page 122 in
Section 2.)
Engine oil level.Stop the engine and
check the dipstick with the vehicle parked
on a level spot. (See page 196 in Section
7−2 for instructions.)
WHILE DRIVING
Instruments.Make sure the speedometer
and gauges are working.
Brakes.In a safe place, check that the
brakes do not pull to one side when ap-
plied.
Anything unusual?Look for loose parts
and leaks. Listen for abnormal noises.
If everything looks O.K., set your mind at
ease and enjoy your trip!DAlways slow down in gusty crosswinds.
This will allow you much better control.
DDrive slowly onto curbs and, if pos-
sible, at a right angle. Avoid driving
onto high, sharp−edged objects and
other road hazards. Failure to do so
can lead to severe tire damage such
as a tire burst.
Drive slowly when passing over bumps
or travelling on abumpy road. Other-
wise, the impact could cause severe
damage to the tires and/or wheels.
DWhen parking on a hill, turn the front
wheels until they touch the curb so
that the vehicle will not roll. Apply the
parking brake, and place the transmis-
sion in first or reverse. If necessary,
block the wheels.
DWashing your vehicle or driving through
deep water may get the brakes wet. To
see whether they are wet, check that
there is no traffic near you, and then
press the pedal lightly. If you do not
feel a normal braking force, the brakes
are probably wet. To dry them, drive
the vehicle cautiously while lightly
pressing the brake pedal with the park-
ing brake applied. If they still do not
work safely, pull to the side of the road
and call any authorized Toyota dealer
or repairer, or another duly qualified
and equipped professional, for assis-
tance.
CAUTION
DBefore driving off, make sure the
parking brake is fully released and
the parking brake reminder light is
off.
DDo not leave your vehicle unat-
tended while the engine is running.
DDo not rest your foot on the brake
pedal while driving. It can cause
dangerous overheating, needless
wear, and poor fuel economy.
Dyna100/150_EE
Tips for driving in various
conditions
Page 150 of 240

144STARTING AND DRIVING
TIRES
DEnsure that your vehicle’s tires are
properly inflated. See page 201 in Sec-
tion 7−2 and page 226 in Section 8 for
instructions.
DThe trailer tires should be inflated to
the pressure recommended by the trail-
er manufacturer in respect to the total
trailer weight.
TRAILER LIGHTS
DCheck for correct operation of the turn
signals and stop lights each time you
hitch up. Direct splicing may damage
your vehicle’s electrical system and
cause a malfunction of your lights.
BREAK−IN SCHEDULE
DToyota recommends that you do not
tow a trailer with a new vehicle or a
vehicle with any new power train com-
ponent (engine, transmission, differen-
tial, wheel bearing, etc.) for the first
800 km (500 miles) of driving.
MAINTENANCE
DIf you tow a trailer, your vehicle will
require more frequent maintenance due
to the additional load.
DRetighten all fixing bolts of the towing
ball and bracket after approximately
1000 km (600 miles) of trailer driving.
PRE−TOWING SAFETY CHECK
DBe sure not to exceed designated max-
imum load for the ball coupling of the
towing bracket. Please remember that
the ball coupling load will increase the
load on the vehicle. Maximum permissi-
ble rear axle capacity must not be ex-
ceeded.
DMake sure the trailer cargo is securely
loaded so that it cannot shift.
DIf the traffic behind the trailer cannot
be seen properly with the standard rear
view mirrors, additional outside mirrors
will be necessary. Both outside mirrors
must be fitted on folding arms and ad-
justed to give a good rear view at all
times.
TRAILER TOWING TIPS
Your vehicle will handle differently
when towing a trailer. In order to avoid
accident, death or serious injury, keep
the following in mind when towing:
DBefore starting out, check operation of
the lights and all vehicle−trailer connec-
tions. After driving a short distance,
stop and recheck the lights and con-
nections. Before actually towing a trail-
er, practice turning, stopping and back-
ing with a trailer in an area away from
traffic until you learn the feel.
DBecause stopping distance may be in-
creased, vehicle−to−vehicle distance
should be increased when towing a
trailer. For each 10 km/h (6 mph) of
speed, allow at least one vehicle and
trailer length between you and the ve-
hicle ahead. Avoid sudden braking as
you may skid, resulting in jackknifing
and loss of control. This is especially
true on wet or slippery surfaces.
DAvoid jerky starts or sudden accelera-
tion. Prevent excessive clutch slippage
by keeping engine rpm low and not
racing the engine. Always start out in
first gear.
DAvoid jerky steering and sharp turns.
The trailer could hit your vehicle in a
tight turn. Slow down before making a
turn to avoid the necessity of sudden
braking.
Dyna100/150_EE
Page 156 of 240

150IN CASE OF AN EMERGENCY
Before making these checks, make sure
you have followed the correct starting pro-
cedure given in “How to start the engine”
on page 132 in Section 3 and that you
have sufficient fuel.
If the engine is not turning over or is
turning over too slowly—
1. Check that the battery terminals are
tight and clean.
2. If the battery terminals are O.K., switch
on the interior light.
3. If the light is out, dim or goes out
when the starter is cranked, the battery
is discharged. You may try jump start-
ing. See “(c) Jump starting” on page
151 for further instructions.
If the light is O.K., but the engine still will
not start, it needs adjustment or repair.
Call any authorized Toyota dealer or re-
pairer, or another duly qualified and
equipped professional.
NOTICE
Do not pull−or push−start the ve-
hicle. It may damage the vehicle or
cause a collision when the engine
starts. Also, the catalytic converter
may overheat and become a fire haz-
ard.
If the engine turns over at its normal
speed but will not start—
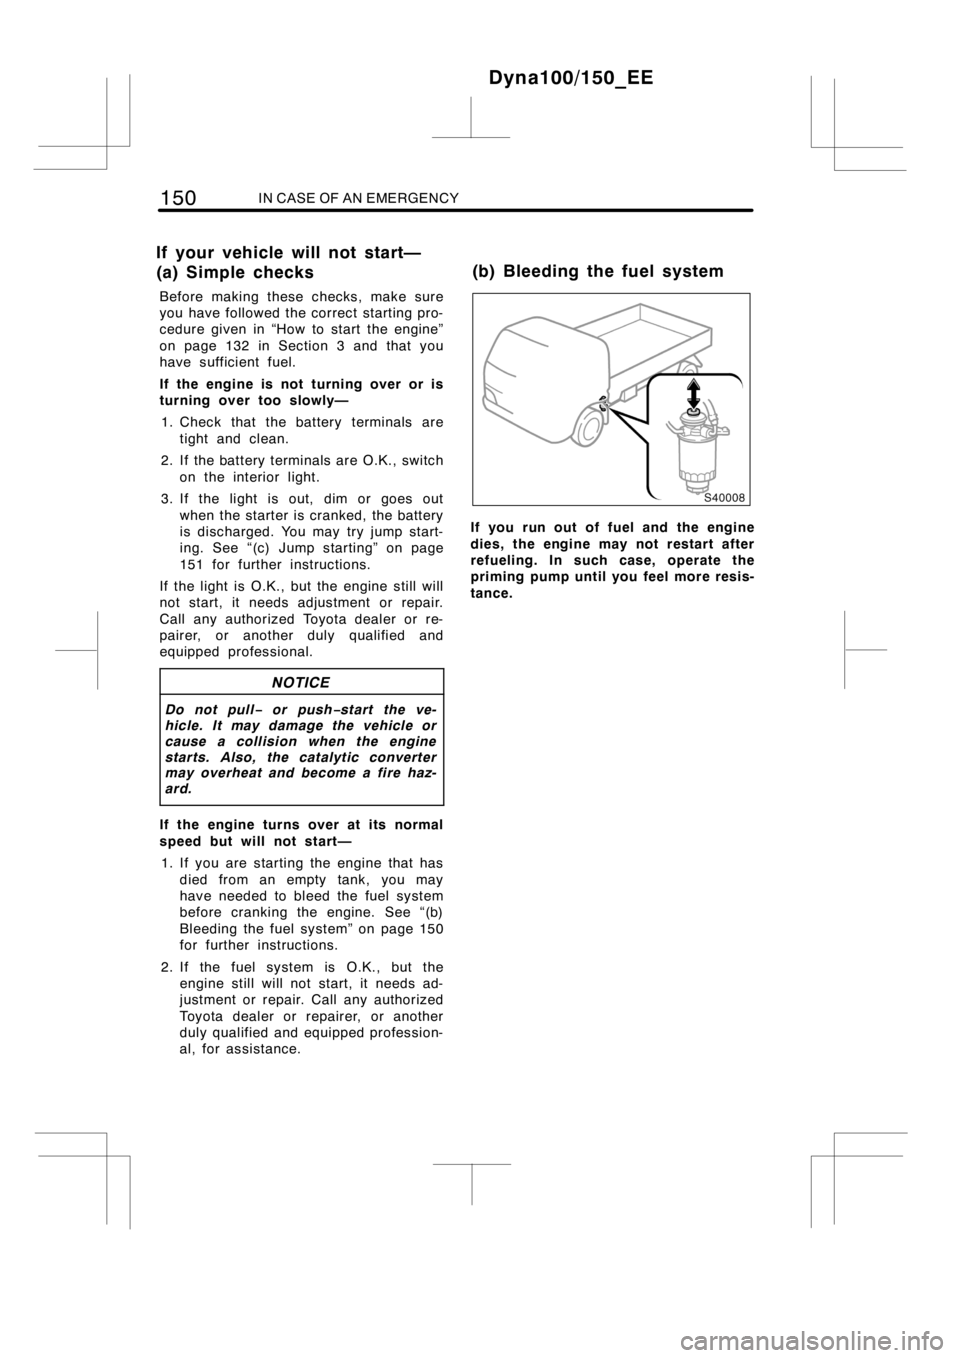
1. If you are starting the engine that has
died from an empty tank, you may
have needed to bleed the fuelsystem
before cranking the engine. See “(b)
Bleeding the fuelsystem” onpage 150
for further instructions.
2. If the fuel system is O.K., but the
engine still will not start, it needs ad-
justment or repair. Call any authorized
Toyota dealer or repairer, or another
duly qualified and equipped profession-
al, for assistance.
If you run out of fuel and the engine
dies, the engine may not restart after
refueling. In such case, operate the
priming pump until you feel more resis-
tance.
Dyna100/150_EE
If your vehicle will not start—
(a) Simple checks(b) Bleeding the fuel system
Page 160 of 240

154IN CASE OF AN EMERGENCY
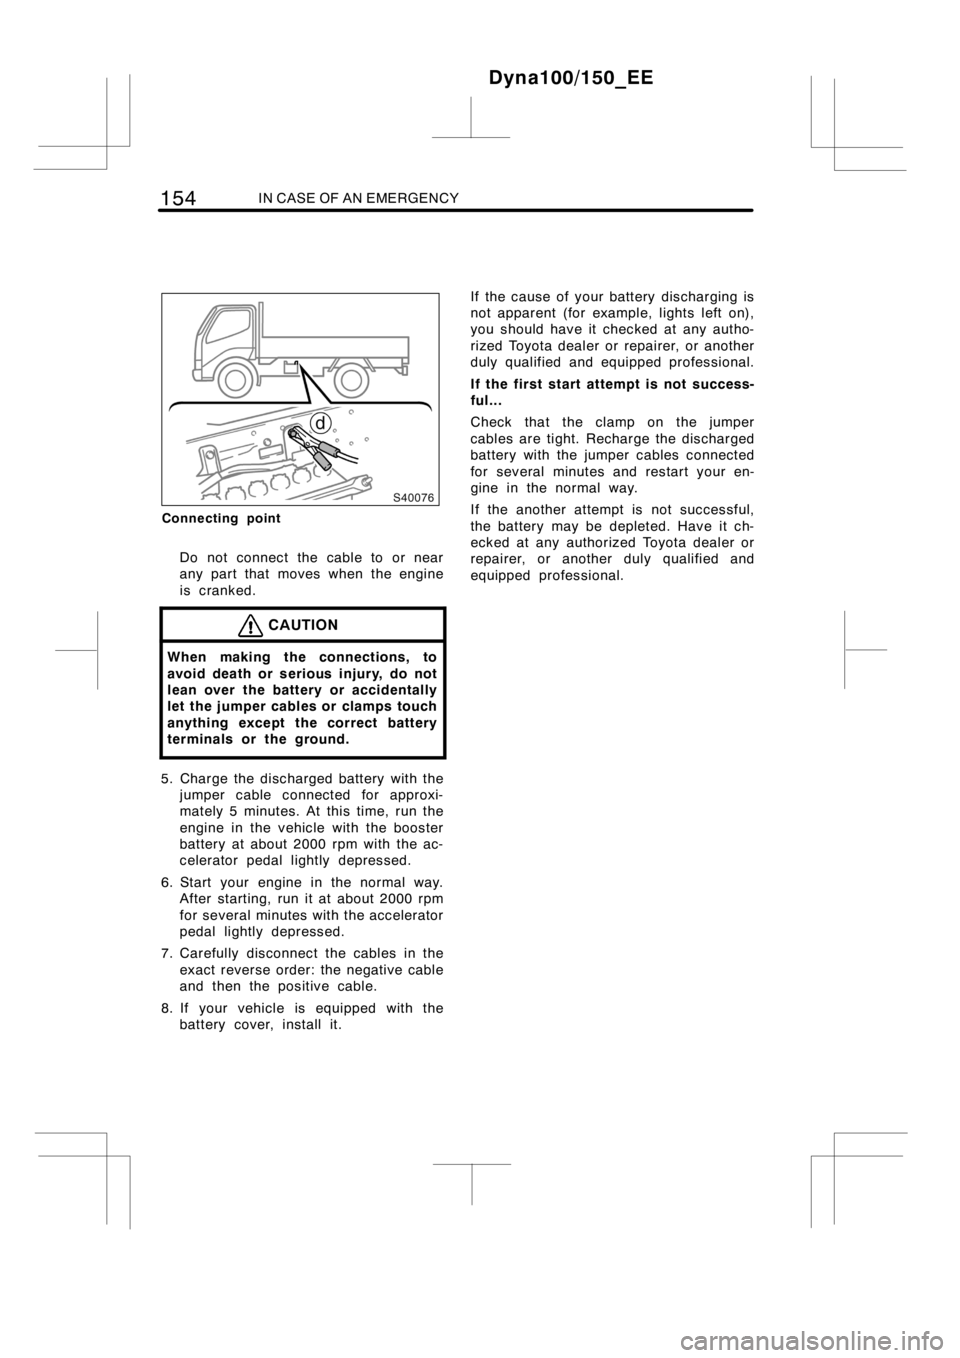
Connecting point
Do not connect the cable to or near
any part that moves when the engine
is cranked.
CAUTION
When making the connections, to
avoid death or serious injury, do not
lean over the battery or accidentally
let the jumper cables or clamps touch
anything except the correct battery
terminals or the ground.
5. Charge the discharged battery with the
jumper cable connected for approxi-
mately 5 minutes. At this time, run the
engine in the vehicle with the booster
battery at about 2000 rpm with the ac-
celerator pedal lightly depressed.
6. Start your engine in the normal way.
After starting, run it at about 2000 rpm
for several minutes with the accelerator
pedal lightly depressed.
7. Carefully disconnect the cables in the
exact reverse order: the negative cable
and then the positive cable.
8. If your vehicle is equipped with the
battery cover, install it.If the cause of your battery discharging is
not apparent (for example, lights left on),
you should have it checked at any autho-
rized Toyota dealer or repairer, or another
duly qualified and equipped professional.
If the first start attempt is not success-
ful...
Check that the clamp on the jumper
cables are tight. Recharge the discharged
battery with the jumper cables connected
for several minutes and restart your en-
gine in the normal way.
If the another attempt is not successful,
the battery may be depleted. Have it ch-
ecked at any authorized Toyota dealer or
repairer, or another duly qualified and
equipped professional.
Dyna100/150_EE
Page 162 of 240

156IN CASE OF AN EMERGENCY
If your engine coolant temperature
gauge indicates overheating, if you ex-
perience a loss of power, or if you hear
a loud knocking or pinging noise, the
engine has probably overheated. You
should follow this procedure...
1. Pull safely off the road, stop the ve-
hicle, and turn on your emergency
flashers. Put the transmission in neu-
tral and apply the parking brake. Turn
off the air conditioning if it is being
used.
2. If coolant or steam is boiling out of the
radiator or reservoir, stop the engine.
Wait until the steam subsides before
opening the engine access hole cover
or tilting the cab. If there is no coolant
or steam boiling over, leave the engine
running and make sure the electric
cooling fan is operating. If it is not,
turn the engine switch off.
CAUTION
To help avoid serious injury, keep the
engine access hole cover closed or
the cab lowered until there is no
steam. Escaping steam or coolant is
a sign of very high pressure.
3. Visually check to see if the engine
drive belt (fan belt) is broken or loose.
Look for obvious coolant leaks from the
radiator, hoses, and under the vehicle.
However, note that water draining from
the air conditioning is normal if it has
been used.
CAUTION
When the engine is running, keep
hands and clothing away from the
moving fan and engine drive belts.
4. If the engine drive belt is broken or the
coolant is leaking, stop the engine im-
mediately. Call any authorized Toyota
dealer or repairer, or another duly qual-
ified and equipped professional, for as-
sistance.
5. If the engine drive belt is O.K. and
there are no obvious leaks, you may
help the engine cool down more quickly
by running it at about 1500 rpm for a
few minutes with the accelerator pedal
lightly depressed.
6. Check the coolant reservoir. If it is dry,
add coolant to the reservoir while the
engine is running. Fill it about half full.
For the coolant type, see “Coolant type
selection” on page 199 in Section 7−2.
CAUTION
Do not attempt to remove the radiator
cap when the engine and radiator are
hot. Serious injury could result from
scalding hot fluid and steam blown
out under pressure.
7. After the engine coolant temperature
has cooled to normal, again check the
coolant level in the reservoir. If neces-
sary, bring it up to half full again.
Serious coolant loss indicates a leak in
the system. You should have it
checked as soon as possible at any
authorized Toyota dealer or repairer, or
another duly qualified and equipped
professional.
Dyna100/150_EE
If your vehicle overheats
Page 202 of 240

196DO−IT−YOURSELF MAINTENANCE: Engine and Chassis
Low level Full level
Add oil O.K. Too full
With the engine at operating tempera-
ture and turned off, check the oil level
on the dipstick.
1. To get a correct reading, the vehicle
should be on level ground. After warm-
ing up the engine and turning it off,
wait more than five minutes for the oil
to drain back into the bottom of the
engine.
2. Pull the dipstick out, hold a rag under
the end and wipe it clean.
3. Reinsert the dipstick—push it in as far
as it will go, or the reading will not be
correct.
4. Pull the dipstick out and look at the oil
level while holding a rag under the
end.
NOTICE
Be careful not to drop engine oil on
the vehicle components.
If the oil level is below or only slightly
above the low level, add engine oil of
the same type as already in the engine.
Remove the oil filler capand add engine
oil in small quantities at a time, checking
the dipstick. We recommend that you use
a funnel when adding oil.The approximate quantity of oil needed to
raise the level between low and full on the
dipstick is indicated as follows:
1.9L(2.0qt.,1.7Imp.qt.)
For the engine oil capacity, see “Service
specifications” on page 224 in Section 8.
When the level reaches within the correct
range, install the filler cap hand−tight.
NOTICE
zBe careful not to spill engine oil on
the vehicle components.
zAvoid overfilling, or the engine
could be damaged.
zCheck the oil level on the dipstick
once again after adding the oil.
Dyna100/150_EE
Checking the engine oil level