Page 4 of 532

TABLE OF CONTENTSIndex
4
3-4. Using the storage featuresList of storage features....... 289
• Glove box ......................... 290
• Console box ..................... 291
• Coin holder ....................... 292
• Bottle holders ................... 293
• Cup holders ...................... 294
• Auxiliary boxes ................. 296
3-5. Other interior features Sun visors .......................... 298
Vanity mirrors ..................... 299
Clock .................................. 300
Outside temperature display .............................. 301
Ashtray ............................... 303
Power outlets ..................... 304
Seat heaters ....................... 307
Armrest............................... 309
Coat hooks ......................... 310
Floor mat ............................ 311
Trunk features .................... 313
Garage door opener ........... 315
Compass ............................ 322
Safety Connect................... 326 4-1. Maintenance and care
Cleaning and protecting the vehicle exterior ........... 334
Cleaning and protecting the vehicle interior ............ 337
4-2. Maintenance Maintenance requirements .................... 340
General maintenance ......... 342
Emission inspection and maintenance (I/M)
programs .......................... 346
4-3. Do-it-yourself maintenance
Do-it-yourself service precautions ....................... 347
Hood ................................... 350
Positioning a floor jack........ 351
Engine compartment .......... 353
Tires.................................... 367
Tire inflation pressure ......... 375
Wheels................................ 379
Air conditioning filter ........... 382
Wireless remote control/ electronic key battery ....... 384
Checking and replacing fuses ................................. 389
Light bulbs .......................... 401
4Maintenance and care
Page 9 of 532
9
A
Vehicles without moon roof
Vanity mirrors P. 299
Sun visors P. 298
Auxiliary box P. 296
Personal lights P. 287
SRS curtain shield airbags P. 100
Interior light P. 286
Compass P. 322
Anti-glare inside rear view mirror P. 77
Garage door opener switches P. 315
Microphone , *1, *2
: If equipped
*1: For vehicles with a navigation system, refer to “Navigation System Owner’s Manual”.
*2: For vehicles with a Display Audio system, refer to “Display Audio System Owner’s Manual”.
Page 10 of 532
10
A
Moon roof switches P. 84
Garage door opener switches P. 315
“SOS” button P. 326
Sun visors P. 298
Vanity mirrors P. 299
SRS curtain shield airbags P. 100
Personal lights Interior lights P. 287
P. 286
Anti-glare inside rear view mirror P. 77
Compass P. 322
Vehicles with moon roof
Microphone
*1, *2P. 326
Pictorial indexInterior
Auxiliary box P. 296
Page 225 of 532

Interior features3
225
3-1. Using the air conditioning system and defogger
Manual air conditioning system ........................... 226
Automatic air conditioning system ....... 233
Rear window and outside rear view
mirror defoggers ............ 240
3-2. Using the audio system Audio system types .......... 242
Using the radio ................. 248
Using the CD player ......... 251
Playing back MP3 and WMA discs ..................... 257
Operating an iPod ............ 264
Operating a USB memory .......................... 272
Optimal use of the audio system ........................... 280
Using the AUX port .......... 283
3-3. Using the interior lights Interior lights list ............... 285
• Interior lights .................. 286
• Personal lights ............... 287 3-4. Using the storage
features
List of storage features .... 289
• Glove box....................... 290
• Console box ................... 291
• Coin holder .................... 292
• Bottle holders ................. 293
• Cup holders ................... 294
• Auxiliary boxes ............... 296
3-5. Other interior features Sun visors ........................ 298
Vanity mirrors ................... 299
Clock ................................ 300
Outside temperature display............................ 301
Ashtray ............................. 303
Power outlets ................... 304
Seat heaters..................... 307
Armrest ............................ 309
Coat hooks ....................... 310
Floor mat .......................... 311
Trunk features .................. 313
Garage door opener......... 315
Compass .......................... 322
Safety Connect ................ 326
Page 315 of 532
315
3-5. Other interior features
3
Interior features
Garage door opener
The garage door opener (HomeLink Universal Transceiver) is manufac-
tured under license from HomeLink.
Programming HomeLink (for U.S. owners)
The HomeLink
compatible transceiver in your vehicle has 3 buttons
which can be programmed to operate 3 different devices. Refer to the
programming method below appropriate for the device.
Buttons
Indicator
The garage door opener can be programmed to operate garage
doors, gates, entry doors, door locks, home lighting systems, secu-
rity systems, and other devices.
: If equipped
Page 317 of 532

317
3-5. Other interior features
3
Interior features
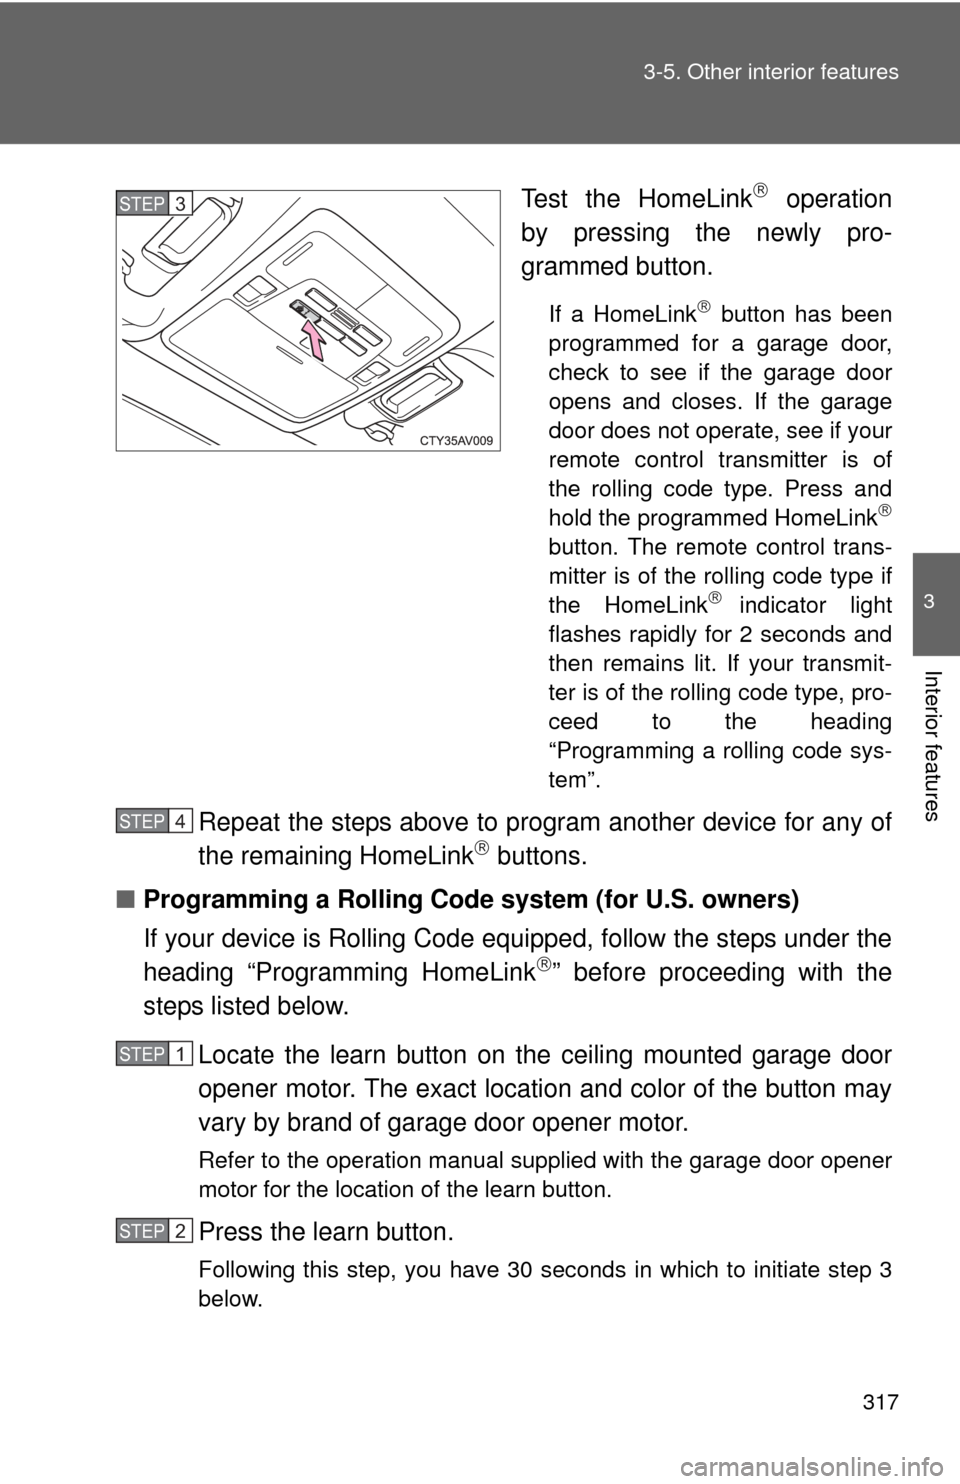
Test the HomeLink operation
by pressing the newly pro-
grammed button.
If a HomeLink button has been
programmed for a garage door,
check to see if the garage door
opens and closes. If the garage
door does not operate, see if your
remote control transmitter is of
the rolling code type. Press and
hold the programmed HomeLink
button. The remote control trans-
mitter is of the rolling code type if
the HomeLink
indicator light
flashes rapidly for 2 seconds and
then remains lit. If your transmit-
ter is of the rolling code type, pro-
ceed to the heading
“Programming a rolling code sys-
tem”.
Repeat the steps above to program another device for any of
the remaining HomeLink buttons.
■ Programming a Rolling Code system (for U.S. owners)
If your device is Rolling Code equipped, follow the steps under the
heading “Programming HomeLink
” before proceeding with the
steps listed below.
Locate the learn button on t he ceiling mounted garage door
opener motor. The exact location and color of the button may
vary by brand of garage door opener motor.
Refer to the operation manual supplied with the garage door opener
motor for the location of the learn button.
Press the learn button.
Following this step, you have 30 seconds in which to initiate step 3
below.
STEP3
STEP4
STEP1
STEP2
Page 318 of 532

318 3-5. Other interior features
Press and hold the vehicle’s programmed HomeLink button
for 2 seconds and then releas e it. Repeat this step once
again. The garage door may open.
If the garage door opens, the programming process is complete. If
the door does not open, press and release the button a third time.
This third press and release will complete the programming process
by opening the garage door.
The ceiling mounted garage door opener motor should now recog-
nize the HomeLink
signal and operate the garage door.
Repeat the steps above to prog ram another rolling code sys-
tem for any of the remaining HomeLink buttons.
■ Programming an entry gate (for U.S. owners)/Programming a
device in the Canadian market
Place the remote control transmitter 1 to 3 in. (25 to 75 mm)
away from the HomeLink
buttons.
Keep the HomeLink indicator light in view while programming.
Press and hold the selected HomeLink button.
Repeatedly press and release (cycle) the remote control
transmitter for 2 seconds each until step 4 is completed.
When the HomeLink
indicator light starts to flash rapidly,
release the buttons.
Test the HomeLink
operation by pressing the newly pro-
grammed button. Check to see if the gate/device operates
correctly.
Repeat the steps above to program another device for any of
the remaining HomeLink
buttons.
■ Programming other devices
To program other devices such as home security systems, home
door locks or lighting, contact y our Toyota dealer for assistance.
■ Reprogramming a button
The individual HomeLink
buttons cannot be erased but can be
reprogrammed. To reprogram a button, follow the “Reprogramming
a HomeLink
button” instructions.
STEP3
STEP4
STEP1
STEP2
STEP3
STEP4
STEP5
STEP6
Page 320 of 532

320 3-5. Other interior features
■Before programming
●Install a new battery in the remote control transmitter.
● The battery side of the remote control transmitter must be pointed away
from the HomeLink
button.
■ To prevent battery discharge
Vehicles without a smart key system:
HomeLink
will turn off if a door has not been opened and closed for 20 min-
utes or the engine switch is left turned off. (After which programming cannot
be completed.) Open and close a door or turn the engine switch to the
“ACC” position to turn HomeLink
on. We recommend programming while
the engine switch is in the “ACC” position.
Vehicles with a smart key system:
HomeLink
will turn off if a door has not been opened and closed for 20 min-
utes or the “ENGINE START STOP” switch is left turned off. (After which pro-
gramming cannot be completed.) Open and close a door or turn the
“ENGINE START STOP” switch to ACCESSORY mode to turn HomeLink
on. We recommend programming while the “ENGINE START STOP” switch
is in ACCESSORY mode.
■ Certification for the garage door opener
U.S.A.
FCC ID: CB2051AHL4/CB251AHL4NR
NOTE:
This device complies with Part 15 of the FCC Rules. Operation is subject to
the following two conditions: (1) this device may not cause harmful interfer-
ence, and (2) this device must accept any interference received, including
interference that may cause undesired operation.
FCC WARNING:
Changes or modifications not expressly approved by the party responsible
for compliance could void the user's authority to operate the equipment.
Canada
NOTE:
Operation is subject to the following two conditions: (1) this device may not
cause interference, and (2) this device must accept any interference, includ-
ing interference that may cause undesired operation of the device.