2012 SUBARU TRIBECA interior lights
[x] Cancel search: interior lightsPage 109 of 420
2-6Keys and doors
It also helps prevent passengers
from falling out if a door is acciden-
tally opened, and intruders from
unexpectedly opening doors and
entering your vehicle.
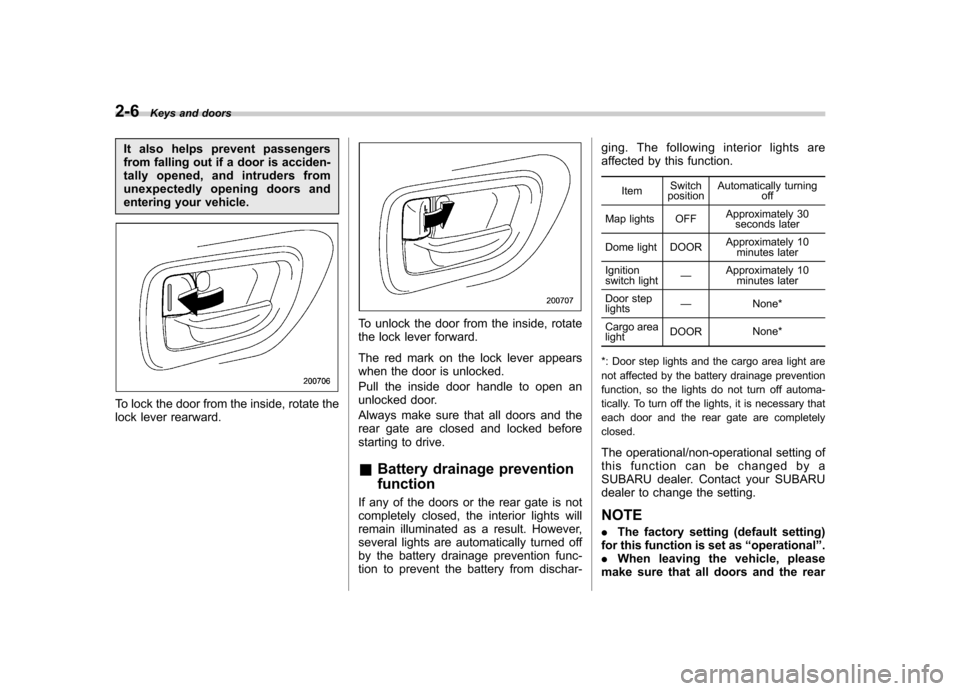
To lock the door from the inside, rotate the
lock lever rearward.
To unlock the door from the inside, rotate
the lock lever forward.
The red mark on the lock lever appears
when the door is unlocked.
Pull the inside door handle to open an
unlocked door.
Always make sure that all doors and the
rear gate are closed and locked before
starting to drive. &Battery drainage prevention function
If any of the doors or the rear gate is not
completely closed, the interior lights will
remain illuminated as a result. However,
several lights are automatically turned off
by the battery drainage prevention func-
tion to prevent the battery from dischar- ging. The following interior lights are
affected by this function.
Item Switch
position Automatically turning
off
Map lights OFF Approximately 30
seconds later
Dome light DOOR Approximately 10
minutes later
Ignition
switch light —
Approximately 10
minutes later
Door steplights —
None*
Cargo arealight DOOR
None*
*: Door step lights and the cargo area light are
not affected by the battery drainage prevention
function, so the lights do not turn off automa-
tically. To turn off the lights, it is necessary that
each door and the rear gate are completelyclosed.
The operational/non-operational setting of
this function can be changed by a
SUBARU dealer. Contact your SUBARU
dealer to change the setting. NOTE . The factory setting (default setting)
for this function is set as “operational ”.
. When leaving the vehicle, please
make sure that all doors and the rear
Page 113 of 420
2-10Keys and doors
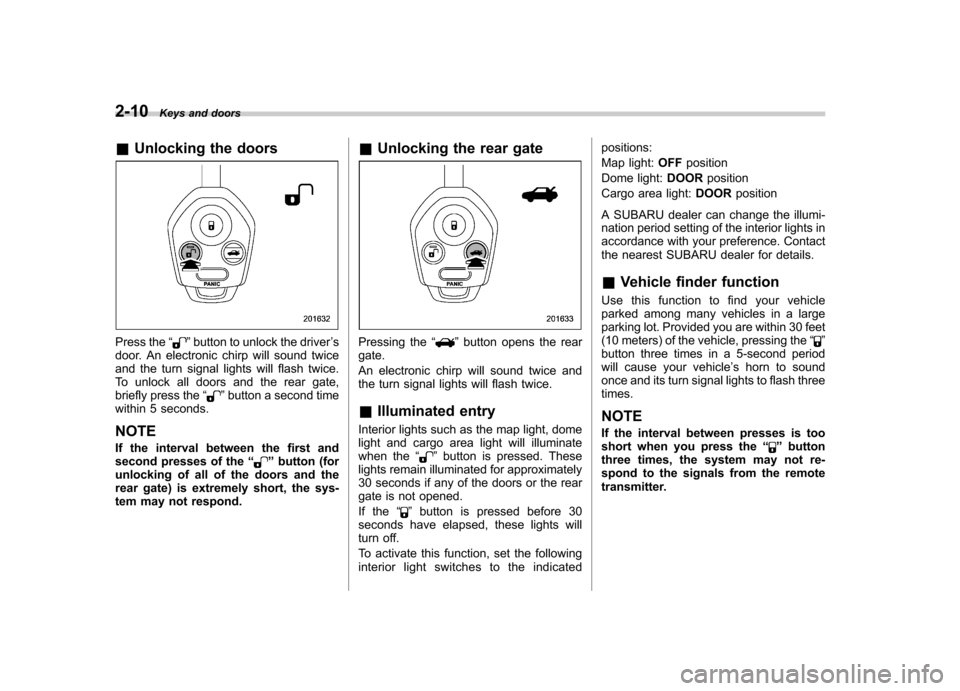
& Unlocking the doors
Press the “”button to unlock the driver ’s
door. An electronic chirp will sound twice
and the turn signal lights will flash twice.
To unlock all doors and the rear gate,
briefly press the “
”button a second time
within 5 seconds. NOTE
If the interval between the first and
second presses of the “
”button (for
unlocking of all of the doors and the
rear gate) is extremely short, the sys-
tem may not respond. &
Unlocking the rear gate
Pressing the “”button opens the rear
gate.
An electronic chirp will sound twice and
the turn signal lights will flash twice.
& Illuminated entry
Interior lights such as the map light, dome
light and cargo area light will illuminate
when the “
”button is pressed. These
lights remain illuminated for approximately
30 seconds if any of the doors or the rear
gate is not opened.
If the “
”button is pressed before 30
seconds have elapsed, these lights will
turn off.
To activate this function, set the following
interior light switches to the indicated positions:
Map light:
OFFposition
Dome light: DOORposition
Cargo area light: DOORposition
A SUBARU dealer can change the illumi-
nation period setting of the interior lights in
accordance with your preference. Contact
the nearest SUBARU dealer for details.
& Vehicle finder function
Use this function to find your vehicle
parked among many vehicles in a large
parking lot. Provided you are within 30 feet
(10 meters) of the vehicle, pressing the “
”
button three times in a 5-second period
will cause your vehicle ’s horn to sound
once and its turn signal lights to flash three times. NOTE
If the interval between presses is too
short when you press the “
”button
three times, the system may not re-
spond to the signals from the remote
transmitter.
Page 119 of 420
2-16Keys and doors
Alarm system
The alarm system helps to protect your
vehicle and valuables from theft. The horn
sounds and the turn signal lights flash if
someone attempts to break into yourvehicle.
The system can be armed and disarmed
with the remote transmitter.
The system does not operate when the
key is inserted into the ignition switch.
Your vehicle ’s alarm system has been set
for activation at the time of shipment from
the factory. You can set the system for
deactivation yourself or have it done by
your SUBARU dealer. & System operation
The alarm system will give the following
alarms when triggered. . The vehicle ’s horn will sound for 30
seconds.. The turn signal lights will flash for 30
seconds.
If any of the doors or the rear gate remains
open after the 30-second period, the horn
will continue to sound for a maximum of 3
minutes. If any of the doors or the rear
gate is closed while the horn is sounding,
the horn will stop sounding with a delay of up to 30 seconds.
The alarm is triggered by:.
Opening any of the doors or the rear
gate. Physical impact to the vehicle, such as
forced entry (only vehicles with shock
sensors (dealer option))
NOTE
The alarm system can be set to trigger
the illumination of the following interiorlights. . Dome light (illuminates only when
the dome light switch is in the “DOOR ”
position) . Map lights
The notifications regarding the dome
light and the map lights are deactivated
as the factory setting. A SUBARU
dealer can activate the system. Contact
your SUBARU dealer for details. & Activating and deactivating
the alarm system
To change the setting of your vehicle ’s
alarm system for activation or deactiva-
tion, do the following.
1. Disarm the alarm system. Refer to “ Disarming the system ”F 2-18.
2. Sit in the driver ’s seat and shut all doors and the rear gate.
3. Turn the ignition switch to the
“ON ”
position.
4. Hold down the UNLOCK side of the driver ’s power door locking switch, open
the driver ’s door within the following 1
second, and wait 10 seconds without
releasing the switch. The setting will then
be changed as follows.
If the system was previously activated:
The odometer/trip meter screen displays “ AL oF ”and the horn sounds twice,
indicating that the system is now deacti-vated.
If the system was previously deacti- vated:
The odometer/trip meter screen displays “ AL on ”and the horn sounds once,
indicating that the system is now acti-vated.
NOTE
You may have the above setting
change done by your SUBARU dealer.
Page 221 of 420

6-2Interior equipment
Interior light
When leaving your vehicle, make sure the
lights are turned off to avoid batterydischarge. &Dome light
Models with Rear Seat Entertainment
Models without Rear Seat Entertainment
1) ON
2) DOOR
3) OFF
The dome light switch has the following
three positions. ON: The light remains on continuously.
OFF: The light remains off.
DOOR: The dome light illuminates auto-
matically in the following cases. . Any of the doors or the rear gate is
opened.. The doors or the rear gate are un-
locked using the remote keyless entry
transmitter. . The ignition switch is turned from the
“ Acc ”position to the “LOCK ”position. The automatically illuminated dome light
remains on for several seconds and then
gradually turns off after all doors and the
rear gate are closed. While the light is
illuminated, if any of the following opera-
tions are performed, the dome light turns
off immediately. .
The ignition switch is turned from the
“ LOCK ”position to “Acc ”or “ON ”position.
. All doors and the rear gate are locked
using the remote keyless entry transmitter.
The setting of the period for which the light
remains on (OFF delay timer) can be
changed by a SUBARU dealer. Contact
the nearest SUBARU dealer for details.
Page 222 of 420
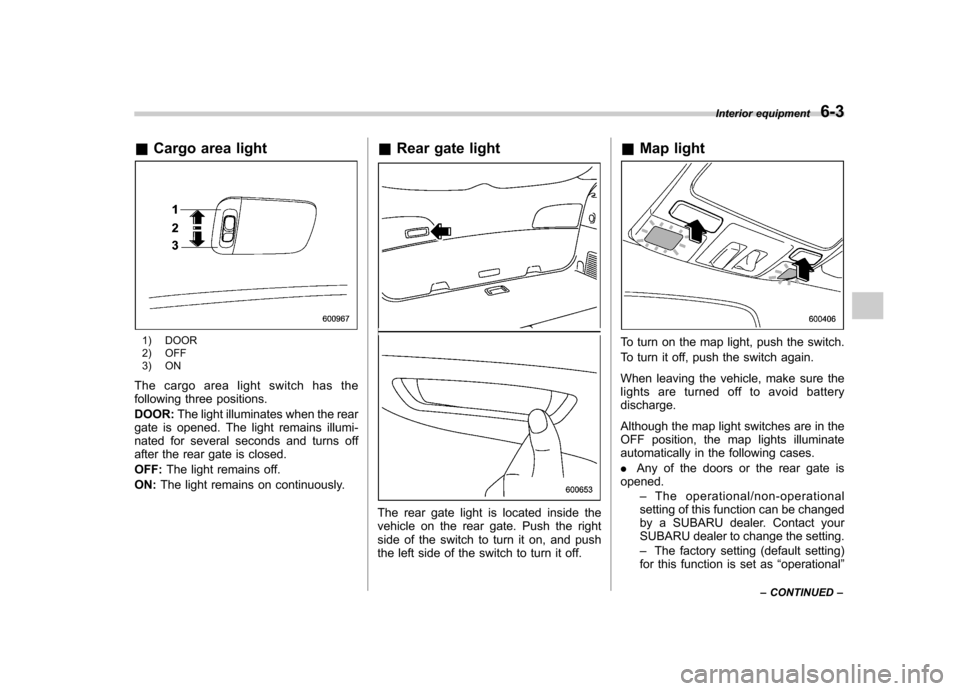
&Cargo area light
1) DOOR
2) OFF
3) ON
The cargo area light switch has the
following three positions. DOOR: The light illuminates when the rear
gate is opened. The light remains illumi-
nated for several seconds and turns off
after the rear gate is closed. OFF: The light remains off.
ON: The light remains on continuously. &
Rear gate light
The rear gate light is located inside the
vehicle on the rear gate. Push the right
side of the switch to turn it on, and push
the left side of the switch to turn it off. &
Map light
To turn on the map light, push the switch.
To turn it off, push the switch again.
When leaving the vehicle, make sure the
lights are turned off to avoid batterydischarge.
Although the map light switches are in the
OFF position, the map lights illuminate
automatically in the following cases. .Any of the doors or the rear gate is
opened.
–The operational/non-operational
setting of this function can be changed
by a SUBARU dealer. Contact your
SUBARU dealer to change the setting. – The factory setting (default setting)
for this function is set as “operational ”
Interior equipment
6-3
– CONTINUED –
Page 223 of 420
6-4Interior equipment
(automatic illumination - ON).
. The doors are unlocked using the
remote keyless entry transmitter. . The ignition switch is turned from the
“ Acc ”position to the “LOCK ”position.
The automatically illuminated map lights
remain illuminated for several seconds
and then gradually turn off after all doors
are closed.
While the lights are illuminated, if any of
the following operations are performed,
the map lights turn off immediately. . The ignition switch is turned from the
“ LOCK ”position to the “Acc ”or “ON ”
position.. All doors and the rear gate are locked
using the remote keyless entry transmitter.
The setting of the period for which the light
remains illuminated (OFF delay timer) can
be changed by a SUBARU dealer. Con-
tact your SUBARU dealer for details.
NOTE
If any of the doors or the rear gate is
not completely closed, the map lights
will remain illuminated as a result.
However, the map lights are automati-
cally turned off by the battery drainage
prevention functi on to prevent the
battery from discharging. For details, refer to
“Battery drainage prevention
function ”F 2-6.
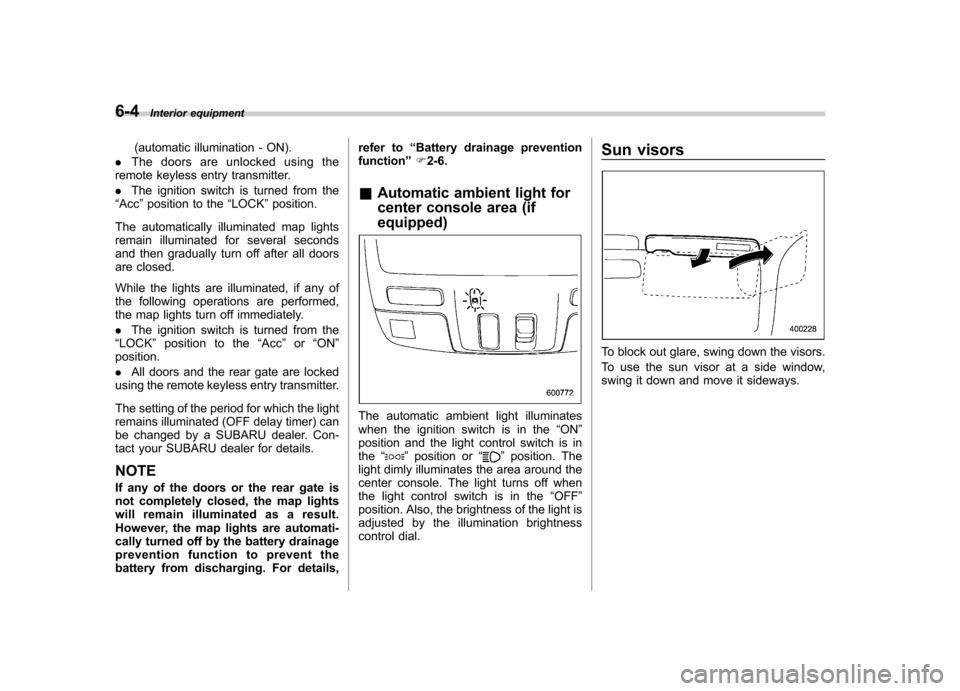
& Automatic ambient light for
center console area (if equipped)
The automatic ambient light illuminates
when the ignition switch is in the “ON ”
position and the light control switch is inthe “
”position or “”position. The
light dimly illuminates the area around the
center console. The light turns off when
the light control switch is in the “OFF ”
position. Also, the brightness of the light is
adjusted by the illumination brightness
control dial. Sun visors
To block out glare, swing down the visors.
To use the sun visor at a side window,
swing it down and move it sideways.
Page 255 of 420
7-10Starting and operating
transmitter within a few seconds immedi-
ately following remote engine start shut-down. & Pre-heating or pre-cooling
the interior of the vehicle
Before exiting the vehicle, set the tem-
perature controls to the desired setting
and operation. After the system starts the
vehicle, the heater or air-conditioning will
activate and heat or cool the interior to
your setting. & Service mode
In service mode, the remote start function
is temporarily disabled to prevent the
system from unexpectedly starting the
engine while being serviced. ! To engage the service mode
Turn the ignition switch to the “ON ”
position, depress and hold the brake pedal
then, press and release the “
”button on
the remote engine start transmitter three
times. The system will pause for 1 second
and then flash the parking lights and honk
the horn three times indicating that the
system is in service mode. When attempt-
ing to activate the remote start system
while in service mode, the parking lights
will flash and the horn will honk two times
and will not start. !
To disengage the service mode
Turn the ignition switch to the “ON ”
position, depress and hold the brake
pedal, then press and release the “
”
button on the remote engine start trans-
mitter three times. The system will pause
for 1 second and flash the parking lights
one time indicating that the system has
exited service mode. NOTE
When taking your vehicle in for service,
it is recommended that you inform the
service personnel that your vehicle is
equipped with a remote engine startsystem. & Remote engine start trans-
mitter programming and pro-
grammable feature option
New transmitters can be programmed to
the remote engine start system in the
event that remote engine start transmitters
are lost, stolen or damaged. The remote
engine start system also has one pro-
grammable feature that can be adjusted
for user preference.
The remote engine start system can be
programmed to either make an audible
horn chirp upon remote start activation or
not. Remote engine start transmitter pro-
gramming and feature programming can be adjusted using the following procedure.
1. Open the driver
’s door (the driver ’s
door must remain opened throughout the
entire process).
2. Insert the key into the vehicle ’s ignition
switch and turn to the “ON ”position.
3. Locate the small black programming
button behind the fuse box cover, on the
driver ’s side left under the dashboard
panel.
4. Press and hold the black programming
button for 10 to 15 seconds. The horn will
honk and the parking lights will flash three
times to indicate that the system has
entered programming mode. At this point
you can perform either action (step 5 or
step 6).
5. To program a remote transmitter:
press and release the “
”button on each
transmitter. The horn will honk and the
parking lights will flash one time to indicate
a successful transmitter learn each timethe “
”button is pressed. You can
program up to eight transmitters.
6. To toggle the Horn Confirmation chirps
ON/OFF: press and release the brake to
toggle the feature. The horn will chirp and
the parking lights will flash one time to
indicate Confirmation Horn Chirps are“ OFF ”. The horn will honk and the parking
lights will flash 2 times to indicate Con-
firmation Horn Chirps are “ON ”. Depres-
Page 413 of 420
14-6Index
High beam ............................................................ 3-22
Immobilizer. ........................................................... 3-21
Security .......................................................... 2-4, 3-21
Select lever/Gear position ....................................... 3-21
SPORT mode ........................................................ 3-21
Traction control system OFF .................................... 3-19
Turn signal ............................................................ 3-21
Vehicle Dynamics Control OFF ................................ 3-19
Vehicle Dynamics Control operation ................. 3-18, 3-19
Inside mirror .............................................................. 3-38
Interior lights ............................................................... 6-2
J
Jack and jack handle .................................................. 9-19
Jack-up point ............................................................... 9-6
Jump starting. ............................................................ 9-11
K
Key ............................................................................ 2-2 Number .................................................................. 2-2
Reminder chime. ...................................................... 3-4
Replacement ........................................................... 2-4
Keyless entry system ................................................... 2-8
L
Leather seat materials ................................................ 10-5
License plate light ..................................................... 11-41
Light Back-up ............................................................... 11-39
Back-up (Station wagon) ........................................ 11-40
Cargo area .................................................... 6-3, 11-44 Control switch
........................................................ 3-27
Dome ............................................................ 6-2, 11-42
Door step ............................................................ 11-43
Front fog ..................................................... 3-32, 11-39
Front side marker ................................................... 3-28
Ignition switch ......................................................... 3-4
License plate ....................................................... 11-41
Map .............................................................. 6-3, 11-43
Rear combination ................................................. 11-39
Rear gate ............................................................... 6-3
Turn signal .................................................. 3-29, 11-39
Vanity mirror .................................................. 6-5, 11-43
Loading your vehicle ................................................... 8-12
Low fuel warning light ................................................. 3-17
Low tire pressure warning light ..................................... 3-14
Lower and tether anchorage ........................................ 1-37
Lumbar support ........................................................... 1-7
M
Main fuse ................................................................ 11-35
Maintenance Precautions ........................................................... 11-3
Schedule ............................................................... 11-3
Seatbelt. ................................................................ 1-26
Tools ..................................................................... 9-19
Malfunction indicator light (check engine warning light) .... 3-12Manual Transmission oil ..................................................... 12-6
Map light ........................................................... 6-3, 11-43
Maximum load limits ................................................... 8-21
Meters and gauges ...................................................... 3-5