2012 SUBARU OUTBACK interior lights
[x] Cancel search: interior lightsPage 95 of 474
2-6Keys and doors
&Battery drainage prevention function
If a door or the rear gate (Outback) is not
completely closed, the interior lights will
remain illuminated as a result. However,
several lights are automatically turned off
by the battery drainage prevention func-
tion to prevent the battery from going
dead. The following interior lights are
affected by this function.
Item Switch
position Automatically turning
off
Map lights OFF
*1Approximately 20 minutes later
Dome lights DOORApproximately 20
minutes later
Ignition
switch light —
Approximately 20
minutes later
Door steplights —
None
*2
Cargo arealightDOORApproximately 20
minutes later
*1: The map lights can be controlled by the
battery drainage prevention function only when
the map light switches are in the OFF position
and the door interlock switch is in the DOOR
position. For the switch positions, refer to “Map
light ”F 6-2
.
*2: The door step lights are not affected by the
battery drainage prevention function, so the lights do not turn off automatically. To turn off
the lights, it is necessary that each door is
completely closed.
The operational/non-operational setting of
this function can be changed by a
SUBARU dealer. Contact the nearest
SUBARU dealer if you would like to
change the setting. NOTE .
The factory setting (default setting)
for this function is set as “operational ”.
. When leaving the vehicle, please
make sure that all doors and the rear
gate (Outback) are completely closed.. The battery drainage prevention
function does not operate while the
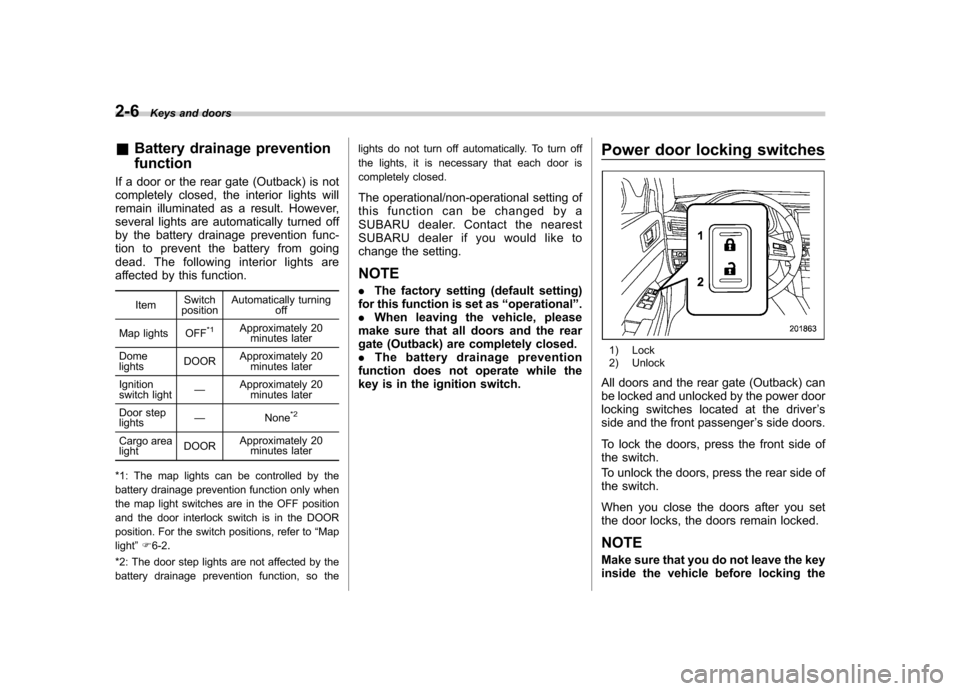
key is in the ignition switch. Power door locking switches
1) Lock
2) Unlock
All doors and the rear gate (Outback) can
be locked and unlocked by the power door
locking switches located at the driver ’s
side and the front passenger ’s side doors.
To lock the doors, press the front side of
the switch.
To unlock the doors, press the rear side of
the switch.
When you close the doors after you set
the door locks, the doors remain locked.
NOTE
Make sure that you do not leave the key
inside the vehicle before locking the
Page 255 of 474
6-2Interior equipment
Interior light
When leaving your vehicle, make sure the
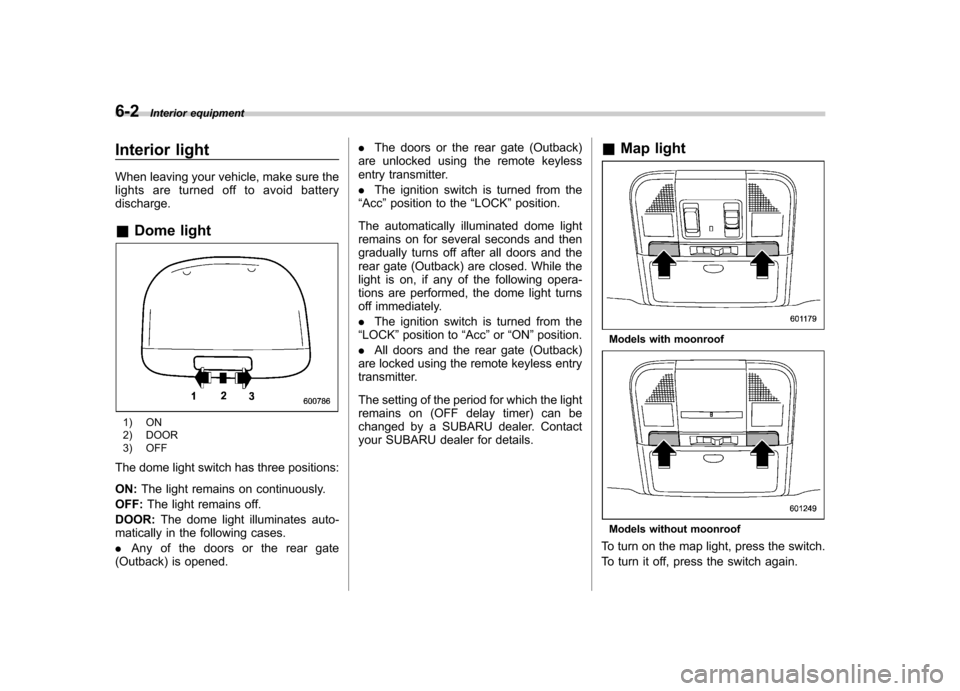
lights are turned off to avoid batterydischarge. &Dome light
1) ON
2) DOOR
3) OFF
The dome light switch has three positions: ON: The light remains on continuously.
OFF: The light remains off.
DOOR: The dome light illuminates auto-
matically in the following cases. . Any of the doors or the rear gate
(Outback) is opened. .
The doors or the rear gate (Outback)
are unlocked using the remote keyless
entry transmitter. . The ignition switch is turned from the
“ Acc ”position to the “LOCK ”position.
The automatically illuminated dome light
remains on for several seconds and then
gradually turns off after all doors and the
rear gate (Outback) are closed. While the
light is on, if any of the following opera-
tions are performed, the dome light turns
off immediately. . The ignition switch is turned from the
“ LOCK ”position to “Acc ”or “ON ”position.
. All doors and the rear gate (Outback)
are locked using the remote keyless entry
transmitter.
The setting of the period for which the light
remains on (OFF delay timer) can be
changed by a SUBARU dealer. Contact
your SUBARU dealer for details. &
Map light
Models with moonroof
Models without moonroof
To turn on the map light, press the switch.
To turn it off, press the switch again.
Page 256 of 474
When leaving the vehicle, make sure the
lights are turned off to avoid batterydischarge. !Door interlock switch
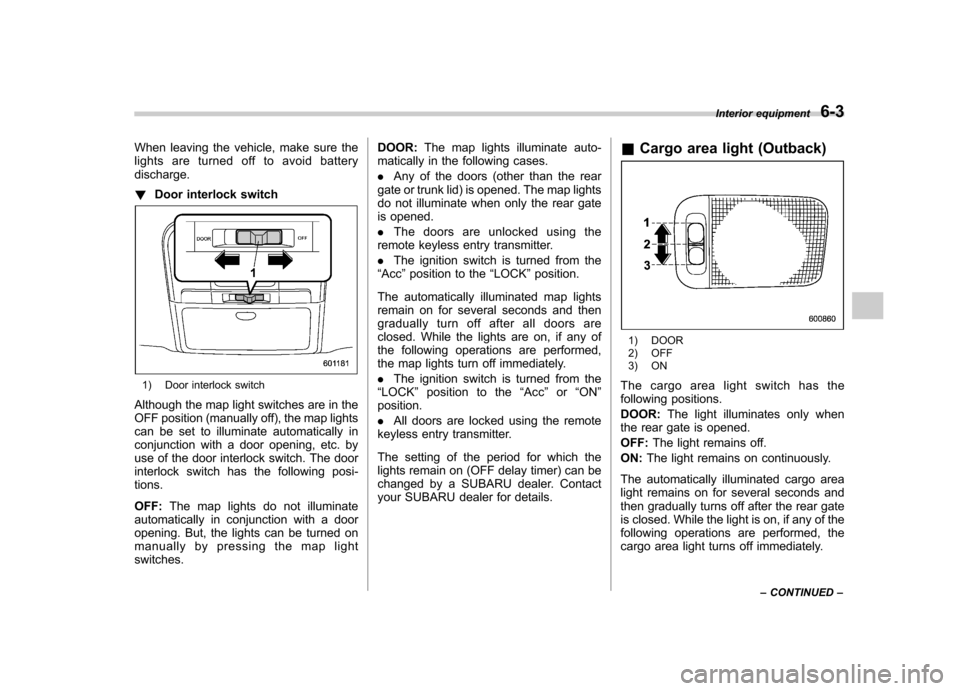
1) Door interlock switch
Although the map light switches are in the
OFF position (manually off), the map lights
can be set to illuminate automatically in
conjunction with a door opening, etc. by
use of the door interlock switch. The door
interlock switch has the following posi-tions. OFF: The map lights do not illuminate
automatically in conjunction with a door
opening. But, the lights can be turned on
manually by pressing the map lightswitches. DOOR:
The map lights illuminate auto-
matically in the following cases. . Any of the doors (other than the rear
gate or trunk lid) is opened. The map lights
do not illuminate when only the rear gate
is opened. . The doors are unlocked using the
remote keyless entry transmitter.. The ignition switch is turned from the
“ Acc ”position to the “LOCK ”position.
The automatically illuminated map lights
remain on for several seconds and then
gradually turn off after all doors are
closed. While the lights are on, if any of
the following operations are performed,
the map lights turn off immediately. . The ignition switch is turned from the
“ LOCK ”position to the “Acc ”or “ON ”
position. . All doors are locked using the remote
keyless entry transmitter.
The setting of the period for which the
lights remain on (OFF delay timer) can be
changed by a SUBARU dealer. Contact
your SUBARU dealer for details. &
Cargo area light (Outback)
1) DOOR
2) OFF
3) ON
The cargo area light switch has the
following positions. DOOR: The light illuminates only when
the rear gate is opened.OFF: The light remains off.
ON: The light remains on continuously.
The automatically illuminated cargo area
light remains on for several seconds and
then gradually turns off after the rear gate
is closed. While the light is on, if any of the
following operations are performed, the
cargo area light turns off immediately. Interior equipment
6-3
– CONTINUED –
Page 257 of 474
6-4Interior equipment
.The ignition switch is turned from the
“ LOCK ”position to the “Acc ”or “ON ”
position. . The rear gate is locked using the
remote keyless entry transmitter.
The setting of the period for which the
lights remain on (OFF delay timer) can be
changed by a SUBARU dealer. Contact
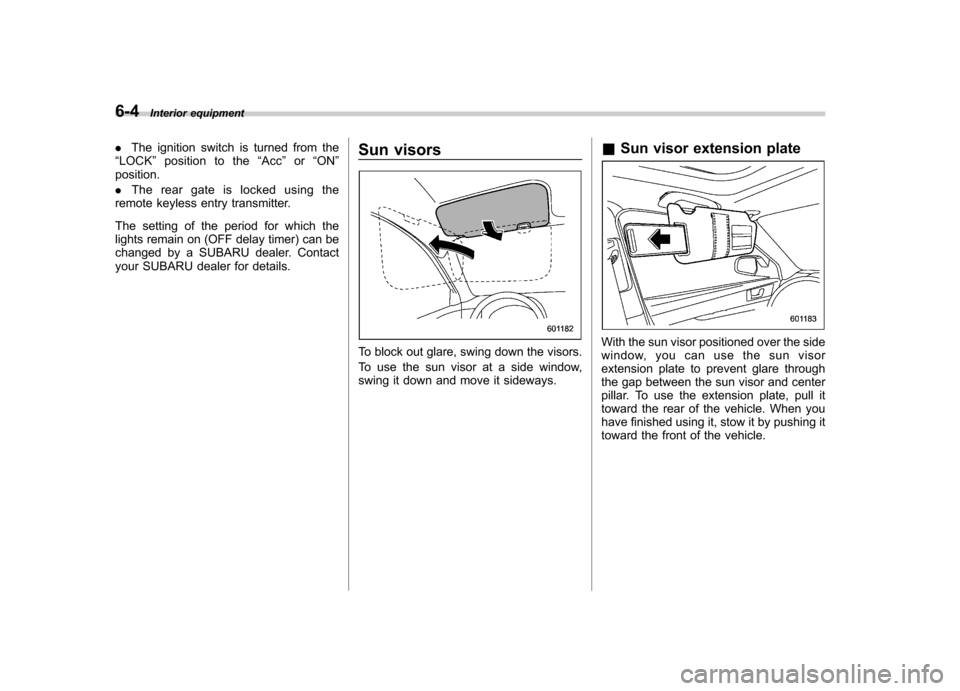
your SUBARU dealer for details. Sun visors
To block out glare, swing down the visors.
To use the sun visor at a side window,
swing it down and move it sideways.&
Sun visor extension plateWith the sun visor positioned over the side
window, you can use the sun visor
extension plate to prevent glare through
the gap between the sun visor and center
pillar. To use the extension plate, pull it
toward the rear of the vehicle. When you
have finished using it, stow it by pushing it
toward the front of the vehicle.
Page 258 of 474
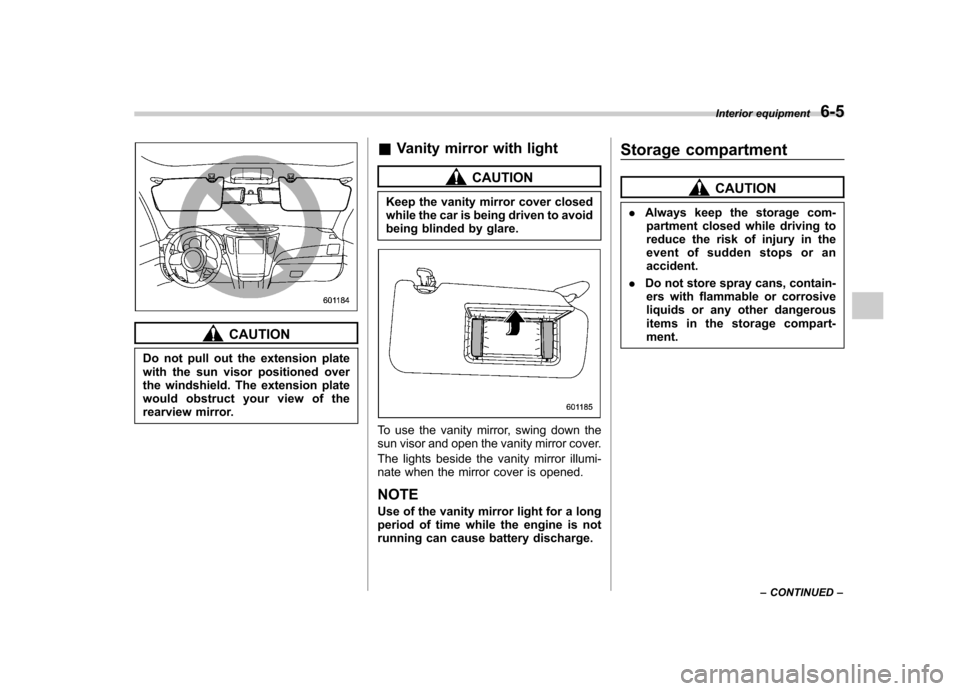
CAUTION
Do not pull out the extension plate
with the sun visor positioned over
the windshield. The extension plate
would obstruct your view of the
rearview mirror. &
Vanity mirror with light
CAUTION
Keep the vanity mirror cover closed
while the car is being driven to avoid
being blinded by glare.
To use the vanity mirror, swing down the
sun visor and open the vanity mirror cover.
The lights beside the vanity mirror illumi-
nate when the mirror cover is opened. NOTE
Use of the vanity mirror light for a long
period of time while the engine is not
running can cause battery discharge. Storage compartment
CAUTION
. Always keep the storage com-
partment closed while driving to
reduce the risk of injury in the
event of sudden stops or anaccident.
. Do not store spray cans, contain-
ers with flammable or corrosive
liquids or any other dangerous
items in the storage compart-ment. Interior equipment
6-5
– CONTINUED –
Page 290 of 474

&Entering the vehicle follow-
ing remote engine start shut- down
An alarm trigger may occur if the vehicle is
opened by the remote keyless entry
transmitter within a few seconds immedi-
ately following remote engine start shut-down. & Pre-heating or pre-cooling
the interior of the vehicle
Models with automatic climate control system:
After the system starts the engine, the
automatic climate control system will
activate the “FULL AUTO ”mode and heat
or cool the interior to the predetermined
median (room) temperature. No pre-
setting of controls is necessary.
Models without automatic climate con-
trol system:
Before exiting the vehicle, set the tem-
perature controls to the desired setting
and operation. After the system starts the
engine, the heater or air conditioning will
activate and heat or cool the interior to
your setting. &
Service mode
In service mode, the remote engine start
function is temporarily disabled to prevent
the system from unexpectedly starting the
engine while being serviced.
To engage or disengage service mode:
1. Enter the vehicle and close all vehicle
doors and the trunk/rear gate.
2. Verify that the select lever is in the “P ”
position (AT and CVT models)
3. Depress and hold the brake pedal
4. Turn the ignition switch to the “ON ”
position
5. Press and release the remote engine
start transmitter “
”button three times.
The system will honk the vehicle ’s horn
each time the button is pressed.
6. The system will pause for 1 second
then honk the vehicle ’s horn three times to
indicate that the service mode has been
engaged or honk one time to indicate that
the service mode has been disengaged.
NOTE
When taking your vehicle in for service,
it is recommended that you inform the
service personnel that your vehicle is
equipped with a remote engine startsystem. &
Remote transmitter program
New transmitters can be programmed to
the remote engine start system in the
event that a transmitter is lost, stolen,
damaged or additional transmitters are
desired (the system will accept up to eight
transmitters). New remote engine start
transmitters can be programmed accord-
ing to the following procedure.
1. Open the driver ’s door (the driver ’s
door must remain opened throughout the
entire process).
2. Depress and hold the brake pedal.
3. Turn the ignition switch to “ON ”then
“ LOCK ”, back to “ON ”then “LOCK ”, then
back to “ON ”again and leave the ignition
“ ON ”throughout the programming pro-
cess.
4. The system will flash the side marker
lights, tail lights and front position lights
and honk the horn three times, indicating
that the system has entered the transmit-
ter learn mode.
5. Press and release the “
”button on
the transmitter that you want to program.
6. The system will flash the side marker
lights, tail lights and front position lights
and honk the horn one time, indicating that
the system has learned the transmitter.
Upon successful programming, the re-
mote start confirmation transmitter button Starting and operating
7-13
– CONTINUED –
Page 467 of 474

14-6Index
Control switch ........................................................ 3-27
Flasher ................................................................. 3-28
Indicator light ......................................................... 3-23
High beam indicator light ............................................ 3-22
High/low beam change (dimmer) .................................. 3-28
Hill Holder ................................................................. 7-32
Indicator light ......................................................... 3-19
Switch .................................................................. 7-32
HomeLink
®........................................................ 3-36, 3-45
Hook Coat ..................................................................... 6-13
Convenient tie-down ............................................... 6-17
Shopping bag ........................................................ 6-13
Towing and tie-down ............................................... 9-14
Horn ......................................................................... 3-52
Hose and connections ............................................... 11-17
I
Ignition switch .............................................................. 3-3
Light ....................................................................... 3-4
Illumination brightness control ...................................... 3-29
Immobilizer. ................................................................. 2-3
Indicator light (security indicator light) ....................... 3-21
Indicator light
Coolant temperature low ......................................... 3-13
Cruise control ........................................................ 3-23
Cruise control set ................................................... 3-23
Door open ............................................................. 3-19
Front fog light ........................................................ 3-23
Headlight .............................................................. 3-23
High beam ............................................................ 3-22 Hill Holder
............................................................. 3-19
Immobilizer ............................................................ 3-21
Security ................................................................. 3-21
Select lever/Gear position ........................................ 3-22
Turn signal ............................................................ 3-22
Vehicle Dynamics Control OFF ................................. 3-21
Vehicle Dynamics Control operation .. ........................ 3-21
Inside mirror ..................................... 3-35, 3-36, 3-43, 3-45
Interior lights ............................................................... 6-2
Internal trunk lid release handle .................................... 2-24
iiPod
®operations ........................................................ 5-33
J
Jack-up point .............................................................. 9-6
Jump starting ............................................................. 9-10
K
Key............................................................................ 2-2 Number .................................................................. 2-2
Reminder chime ...................................................... 3-4
Replacement. .......................................................... 2-4
Keyless entry system ................................................... 2-7
L
Leather seat materials ................................................. 10-5
License plate light ..................................................... 11-52
Light
Back-up (Legacy) ................................................. 11-49