2012 SUBARU OUTBACK steering
[x] Cancel search: steeringPage 340 of 474
!Side mirrors
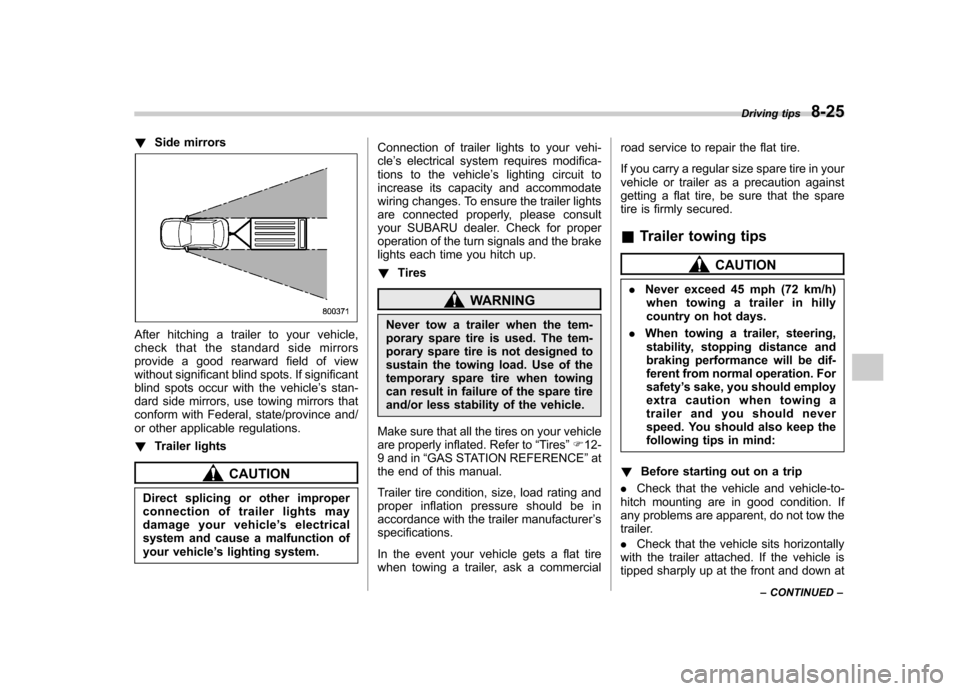
After hitching a trailer to your vehicle,
check that the standard side mirrors
provide a good rearward field of view
without significant blind spots. If significant
blind spots occur with the vehicle ’s stan-
dard side mirrors, use towing mirrors that
conform with Federal, state/province and/
or other applicable regulations. ! Trailer lights
CAUTION
Direct splicing or other improper
connection of trailer lights may
damage your vehicle ’s electrical
system and cause a malfunction of
your vehicle ’s lighting system. Connection of trailer lights to your vehi-cle
’s electrical system requires modifica-
tions to the vehicle ’s lighting circuit to
increase its capacity and accommodate
wiring changes. To ensure the trailer lights
are connected properly, please consult
your SUBARU dealer. Check for proper
operation of the turn signals and the brake
lights each time you hitch up. ! Tires
WARNING
Never tow a trailer when the tem-
porary spare tire is used. The tem-
porary spare tire is not designed to
sustain the towing load. Use of the
temporary spare tire when towing
can result in failure of the spare tire
and/or less stability of the vehicle.
Make sure that all the tires on your vehicle
are properly inflated. Refer to “Tires ”F 12-
9 and in “GAS STATION REFERENCE ”at
the end of this manual.
Trailer tire condition, size, load rating and
proper inflation pressure should be in
accordance with the trailer manufacturer ’s
specifications.
In the event your vehicle gets a flat tire
when towing a trailer, ask a commercial road service to repair the flat tire.
If you carry a regular size spare tire in your
vehicle or trailer as a precaution against
getting a flat tire, be sure that the spare
tire is firmly secured.
& Trailer towing tips
CAUTION
. Never exceed 45 mph (72 km/h)
when towing a trailer in hilly
country on hot days.
. When towing a trailer, steering,
stability, stopping distance and
braking performance will be dif-
ferent from normal operation. Forsafety ’s sake, you should employ
extra caution when towing a
trailer and you should never
speed. You should also keep the
following tips in mind:
! Before starting out on a trip
. Check that the vehicle and vehicle-to-
hitch mounting are in good condition. If
any problems are apparent, do not tow the
trailer. . Check that the vehicle sits horizontally
with the trailer attached. If the vehicle is
tipped sharply up at the front and down at Driving tips
8-25
– CONTINUED –
Page 341 of 474
8-26Driving tips
the rear, check the total trailer weight,
GVW, GAWs and tongue load again, then
confirm that the load and its distribution
are acceptable. . Check that the tire pressures are
correct.. Check that the vehicle and trailer are
connected properly. Confirm that
–the trailer tongue is connected
properly to the hitch ball. – the trailer lights connector is con-
nected properly and trailer ’s brake
lights illuminate when the vehicle ’s
brake pedal is pressed, and that the trailer ’s turn signal lights flash when
the vehicle ’s turn signal lever is oper-
ated. – the safety chains are connected
properly.– all cargo in the trailer is secured
safety in position.– the side mirrors provide a good
rearward field of view without a sig-
nificant blind spot.
. Sufficient time should be taken to learn
the “feel ”of the vehicle/trailer combination
before starting out on a trip. In an area free
of traffic, practice turning, stopping and
backing up. !
Driving with a trailer
. You should allow for considerably more
stopping distance when towing a trailer.
Avoid sudden braking because it may
result in skidding or jackknifing and loss ofcontrol. . Avoid abrupt starts and sudden accel-
erations. If your vehicle has a manual
transmission, always start out in first gear
and release the clutch at moderate enginerevolution. . Avoid uneven steering, sharp turns and
rapid lane changes.. Slow down before turning. Make a
longer than normal turning radius because
the trailer wheels will be closer than the
vehicle wheels to the inside of the turn. In
a tight turn, the trailer could hit yourvehicle. . Crosswinds will adversely affect the
handling of your vehicle and trailer, caus-
ing sway. Crosswinds can be due to
weather conditions or the passing of large
trucks or buses. If swaying occurs, firmly
grip the steering wheel and slow down
immediately but gradually. . When passing other vehicles, consid-
erable distance is required because of the
added weight and length caused by
attaching the trailer to your vehicle.
1) Left turn
2) Right turn
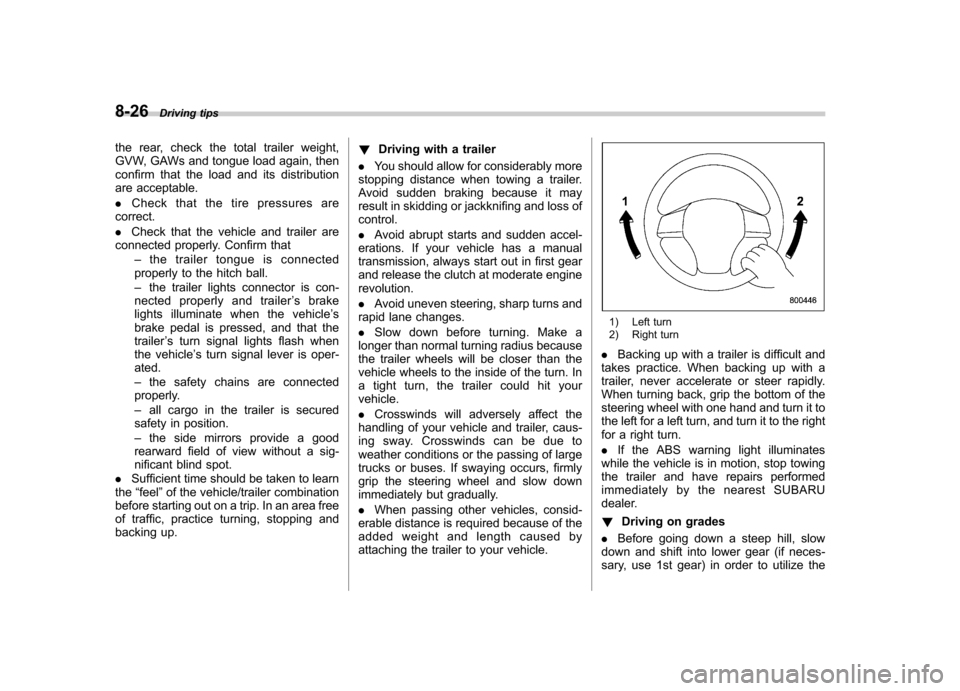
. Backing up with a trailer is difficult and
takes practice. When backing up with a
trailer, never accelerate or steer rapidly.
When turning back, grip the bottom of the
steering wheel with one hand and turn it to
the left for a left turn, and turn it to the right
for a right turn. . If the ABS warning light illuminates
while the vehicle is in motion, stop towing
the trailer and have repairs performed
immediately by the nearest SUBARU
dealer. ! Driving on grades
. Before going down a steep hill, slow
down and shift into lower gear (if neces-
sary, use 1st gear) in order to utilize the
Page 359 of 474
9-16In case of emergency
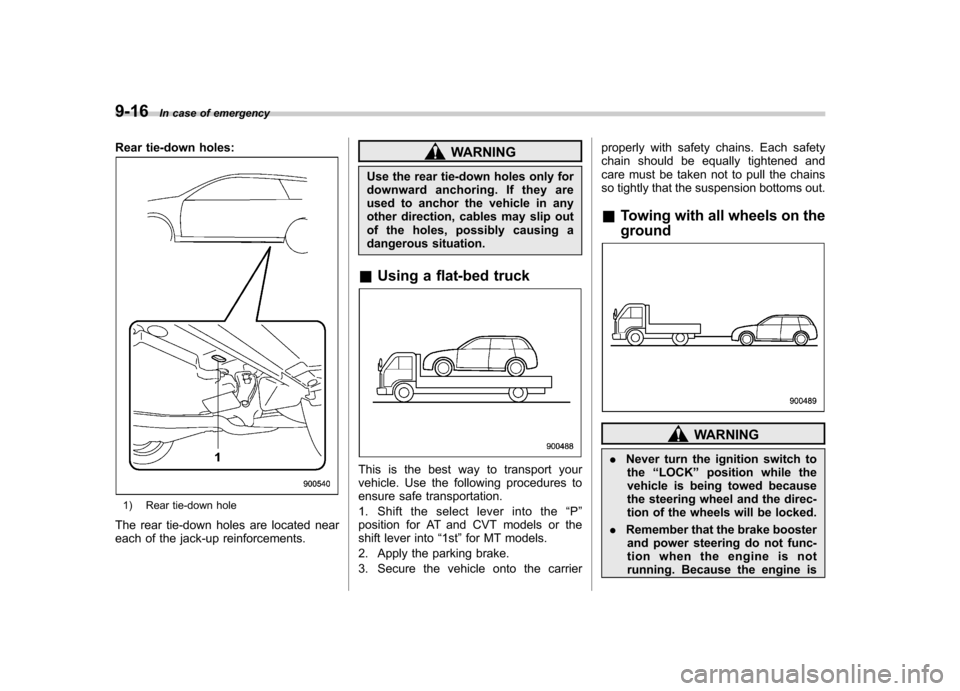
Rear tie-down holes:
1) Rear tie-down hole
The rear tie-down holes are located near
each of the jack-up reinforcements.
WARNING
Use the rear tie-down holes only for
downward anchoring. If they are
used to anchor the vehicle in any
other direction, cables may slip out
of the holes, possibly causing a
dangerous situation.
& Using a flat-bed truck
This is the best way to transport your
vehicle. Use the following procedures to
ensure safe transportation.
1. Shift the select lever into the “P ”
position for AT and CVT models or the
shift lever into “1st ”for MT models.
2. Apply the parking brake.
3. Secure the vehicle onto the carrier properly with safety chains. Each safety
chain should be equally tightened and
care must be taken not to pull the chains
so tightly that the suspension bottoms out. &
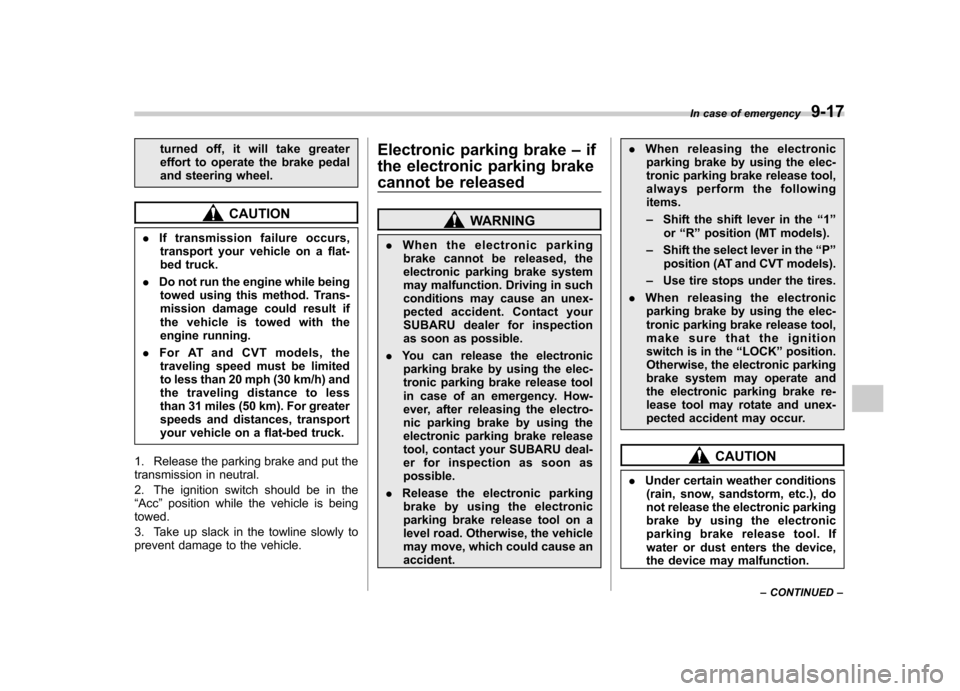
Towing with all wheels on the ground
WARNING
. Never turn the ignition switch to
the “LOCK ”position while the
vehicle is being towed because
the steering wheel and the direc-
tion of the wheels will be locked.
. Remember that the brake booster
and power steering do not func-
tion when the engine is not
running. Because the engine is
Page 360 of 474
turned off, it will take greater
effort to operate the brake pedal
and steering wheel.
CAUTION
. If transmission failure occurs,
transport your vehicle on a flat-
bed truck.
. Do not run the engine while being
towed using this method. Trans-
mission damage could result if
the vehicle is towed with the
engine running.
. For AT and CVT models, the
traveling speed must be limited
to less than 20 mph (30 km/h) and
the traveling distance to less
than 31 miles (50 km). For greater
speeds and distances, transport
your vehicle on a flat-bed truck.
1. Release the parking brake and put the
transmission in neutral.
2. The ignition switch should be in the “ Acc ”position while the vehicle is being
towed.
3. Take up slack in the towline slowly to
prevent damage to the vehicle. Electronic parking brake
–if
the electronic parking brake
cannot be releasedWARNING
. When the electronic parking
brake cannot be released, the
electronic parking brake system
may malfunction. Driving in such
conditions may cause an unex-
pected accident. Contact your
SUBARU dealer for inspection
as soon as possible.
. You can release the electronic
parking brake by using the elec-
tronic parking brake release tool
in case of an emergency. How-
ever, after releasing the electro-
nic parking brake by using the
electronic parking brake release
tool, contact your SUBARU deal-
er for inspection as soon aspossible.
. Release the electronic parking
brakebyusingtheelectronic
parking brake release tool on a
level road. Otherwise, the vehicle
may move, which could cause anaccident. .
When releasing th e electronic
parking brake by using the elec-
tronic parking brake release tool,
always perform the followingitems. – Shift the shift lever in the “1 ”
or “R ” position (MT models).
– Shift the select lever in the “P ”
position (AT and CVT models).
– Use tire stops under the tires.
. When releasing th e electronic
parking brake by using the elec-
tronic parking brake release tool,
make sure that the ignition
switch is in the “LOCK ”position.
Otherwise, the electronic parking
brake system may operate and
the electronic parking brake re-
lease tool may rotate and unex-
pected accident may occur.
CAUTION
. Under certain weather conditions
(rain, snow, sandstorm, etc.), do
not release the electronic parking
brakebyusingtheelectronic
parking brake release tool. If
water or dust enters the device,
the device may malfunction. In case of emergency
9-17
– CONTINUED –
Page 367 of 474

10-2Appearance care
Exterior care &Washing
CAUTION
. When washing the vehicle, the
brakes may get wet. As a result,
the brake stopping distance will
be longer. To dry the brakes,
drive the vehicle at a safe speed
while lightly pressing the brake
pedal to heat up the brakes.
. Do not wash the engine compart-
ment and areas adjacent to it. If
water enters the engine air in-
take, electrical parts or the power
steering fluid reservoir, it will
cause engine trouble or a mal-
function of the power steering.
. Do not use any organic solvents
when washing the surface of the
bulb assembly cover. However, if
a detergent with organic solvents
is used to wash the cover sur-
face, completely rinse off the
detergent with water. Otherwise,
the cover surface may be da-maged.
. Outback: Since your vehicle is
equipped with a rear wiper, auto-
matic car-wash brushes could become tangled around it, dama-
ging the wiper arm and other
components. Ask the automatic
car-wash operator not to let the
brushes touch the wiper arm or
to fix the wiper arm on the rear
window glass with adhesive tape
before operating the machine.
NOTE
When having your vehicle washed in
an automatic car wash, make sure
beforehand that the car wash is of
suitable type.
The best way to preserve your vehicle ’s
beauty is frequent washing. Wash the
vehicle at least once a month to avoid
contamination by road grime.
Wash dirt off with a wet sponge and plenty
of lukewarm or cold water. Do not wash
the vehicle with hot water and in directsunlight.
Salt, chemicals, insects, tar, soot, tree
sap, and bird droppings should be washed
off by using a light detergent, as required.
If you use a light detergent, make certain
that it is a neutral detergent. Do not use
strong soap or chemical detergents. All
cleaning agents should be promptly
flushed from the surface and not allowed to dry there. Rinse the vehicle thoroughly
with plenty of lukewarm water. Wipe the
remaining water off with a chamois or softcloth. !
Washing the underbody
Chemicals, salts and gravel used for
deicing road surfaces are extremely cor-
rosive, accelerating the corrosion of un-
derbody components, such as the exhaust
system, fuel and brake lines, brake
cables, floor pan and fenders, and sus-pension.
Thoroughly flush the underbody and in-
side of the fenders with lukewarm or cold
water at frequent intervals to reduce the
harmful effects of such agents.
Mud and sand adhering to the underbody
components may accelerate their corro-sion.
After driving off-road or on muddy or
sandy roads, wash the mud and sand off
the underbody.
Carefully flush the suspension and axle
parts, as they are particularly prone to
mud and sand buildup. Do not use a
sharp-edged tool to remove caked mud.
CAUTION
. Be careful not to damage brake
hoses, sensor harnesses, and
Page 369 of 474
10-4Appearance care
Corrosion protection
Your SUBARU has been designed and
built to resist corrosion. Special materials
and protective finishes have been used on
most parts of the vehicle to help maintain
fine appearance, strength, and reliableoperation. &Most common causes of corrosion
The most common causes of corrosion are:
1. The accumulation of moisture retain-
ing dirt and debris in body panel sections,
cavities, and other areas.
2. Damage to paint and other protective
coatings caused by gravel and stone
chips or minor accidents.
Corrosion is accelerated on the vehicle when:
1. It is exposed to road salt or dust
control chemicals, or used in coastal
areas where there is more salt in the air,
or in areas where there is considerable
industrial pollution.
2. It is driven in areas of high humidity,
especially when temperatures range just
above freezing.
3. Dampness in certain parts of the
vehicle remains for a long time, even though other parts of the vehicle may be
dry.
4. High temperatures will cause corro-
sion to parts of the vehicle which cannot
dry quickly due to lack of proper ventila-tion.
& To help prevent corrosion
Wash the vehicle regularly to prevent
corrosion of the body and suspension
components. Also, wash the vehicle
promptly after driving on any of the
following surfaces. . roads that have been salted to prevent
them from freezing in winter. mud, sand, or gravel
. coastal roads
After the winter has ended, it is recom-
mended that the underbody be given a
very thorough washing.
Before the beginning of winter, check the
condition of underbody components, such
as the exhaust system, fuel and brake
lines, brake cables, suspension, steering
system, floor pan, and fenders. If any of
them are found to be rusted, they should
be given an appropriate rust prevention
treatment or should be replaced. Contact
your SUBARU dealer to perform this kind
of maintenance and treatment if you need assistance.
Repair chips and scratches in the paint as
soon as you find them.
Check the interior of the vehicle for water
and dirt accumulation under the floor mats
because that could cause corrosion.
Occasionally check under the mats to
make sure the area is dry.
Keep your garage dry. Do not park your
vehicle in a damp, poorly ventilated
garage. In such a garage, corrosion can
be caused by dampness. If you wash the
vehicle in the garage or put the vehicle
into the garage when wet or covered with
snow, that can cause dampness.
If your vehicle is operated in cold weather
and/or in areas where road salts and other
corrosive materials are used, the door
hinges and locks, trunk lid lock, and hood
latch should be inspected and lubricated
periodically.
Page 372 of 474
Maintenance schedule....................................... 11-3
Maintenance precautions ................................... 11-3
Before checking or servicing in the engine compartment .................................................... 11-4
When checking or servicing in the engine compartment (2.5 L non-turbo models) .. ........... 11-4
When checking or servicing in the engine compartment while the engine is running .......... 11-5
Maintenance tips ................................................ 11-5
Removing and reinstalling clips .......................... 11-5
Removing air intake duct .................................... 11-7
Pulling off the fender lining ................................ 11-7
Engine hood ....................................................... 11-7
Engine compartment overview .......................... 11-9
2.5 L non-turbo models ...................................... 11-9
2.5 L turbo models ........................................... 11-10
3.6 L models .................................................... 11-11
Engine oil .......................................................... 11-12
Checking the oil level ....................................... 11-12
Changing the oil and oil filter ............................ 11-14
Recommended grade and viscosity .................. 11-16
Synthetic oil ..................................................... 11-16
Cooling system ................................................ 11-16
Cooling fan, hose and connections ................... 11-17
Engine coolant ................................................. 11-17
Air cleaner element .......................................... 11-18
Replacing the air cleaner element ..................... 11-18
Spark plugs ...................................................... 11-20
Recommended spark plugs .............................. 11-20
Drive belts ........................................................ 11-21 Manual transmission oil
.................................. 11-21
Recommended grade and viscosity .................. 11-21
Automatic transmission fluid .......................... 11-21
Checking the fluid level .................................... 11-21
Recommended fluid ......................................... 11-22
Continuously variable transmission fluid ...... 11-23
Front differential gear oil (AT and CVT models) .......................................................... 11-23
Checking the oil level ...................................... 11-23
Recommended grade and viscosity .................. 11-24
Rear differential gear oil .................................. 11-24
Recommended grade and viscosity .................. 11-24
Power steering fluid ........................................ 11-24
Checking the fluid level .................................... 11-24
Recommended fluid ......................................... 11-25
Brake fluid ........................................................ 11-25
Checking the fluid level .................................... 11-25
Recommended brake fluid ............................... 11-26
Clutch fluid (MT models) ................................. 11-26
Checking the fluid level .................................... 11-26
Recommended clutch fluid ............................... 11-27
Brake booster .................................................. 11-27
Brake pedal ...................................................... 11-28
Checking the brake pedal free play .................. 11-28
Checking the brake pedal reserve distance....... 11-28
Clutch pedal (MT models) ............................... 11-29
Checking the clutch function ............................ 11-29
Checking the clutch pedal free play .................. 11-29
Replacement of brake pad and lining ............ 11-29
Breaking-in of new brake pads and linings ....... 11-30 Maintenance and service
11
Page 378 of 474
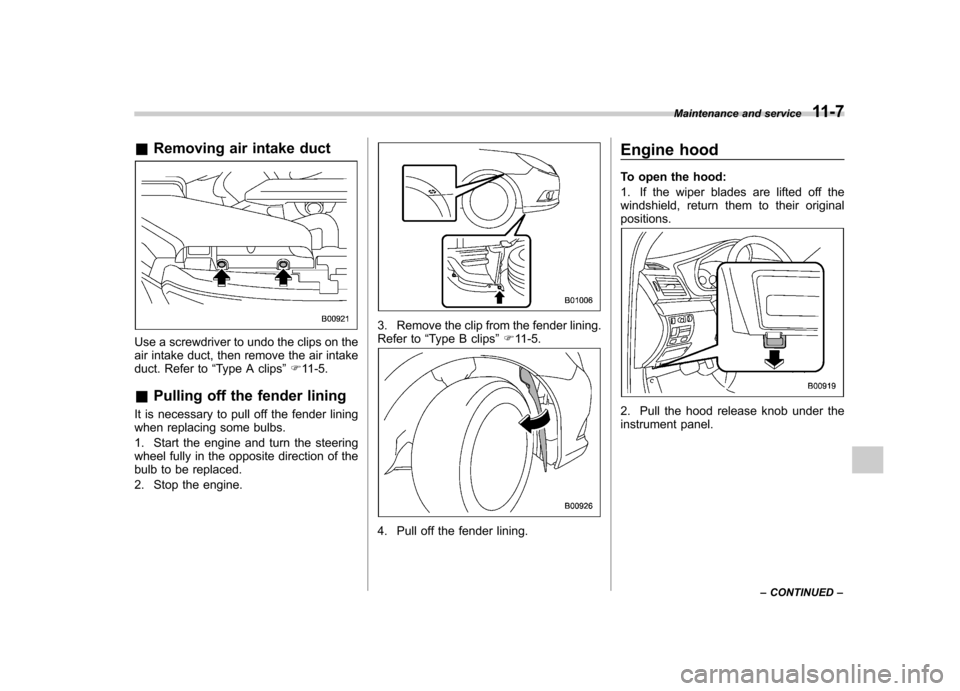
&Removing air intake duct
Use a screwdriver to undo the clips on the
air intake duct, then remove the air intake
duct. Refer to “Type A clips ”F 11-5.
& Pulling off the fender lining
It is necessary to pull off the fender lining
when replacing some bulbs.
1. Start the engine and turn the steering
wheel fully in the opposite direction of the
bulb to be replaced.
2. Stop the engine.
3. Remove the clip from the fender lining.
Refer to “Type B clips ”F 11-5.
4. Pull off the fender lining. Engine hood
To open the hood:
1. If the wiper blades are lifted off the
windshield, return them to their originalpositions.
2. Pull the hood release knob under the
instrument panel.
Maintenance and service
11-7
– CONTINUED –