Page 16 of 90
30 Navigation
Menu Screen Keys and Functions
Phone
Bluetooth Phone page 240
Redial List page 259
Received Calls page 259
Phone Book page 261
Memory Points page 250
Bluetooth Settings page 252
Version
Version page 96
VOL
Voice guidance volume page 25 Menu screen key Function Reference page
Page 23 of 90
Navigation 37
Setting Route
You can switch between screens by selecting (next page)
or (previous page).
NOTE
•If the set destination area is different from the one displayed under "Search
Area" in the right part of the screen, you must select the (change)
key and specify the desired area again.
•Depending on the category used or the status of the map displayed, the
point that is located may differ from the location where the facility you want
to visit actually exists.(Address) See Page 38
.
(Point of Interests) See Page 41
.
(Select from Map) See Page 43
.
(Emergency) See Page 44
.
(Memory Point) See Page 40
.
(Previous Destination) See Page 42
.
(Intersection) See Page 46
.
(Freeway Ent/Exit) See Page 43
.
(Phone number) See Page 48
.
(Coordinates) See Page 45
.
(Home) See Page 40
.
- (Preset1) - (Preset5)
Page 34 of 90
48 Navigation
Setting Route
■"Phone number" category
This function allows buildings and the like to be located using their
phone numbers.
1Press the button, select , and then select
(phone number).
2Enter the phone number starting with the area code.
: Use this key to delete the character last entered. Select it
repeatedly if you want to delete all of the characters
entered.
3Select .
4Select your destination.
NOTE
If a number of candidates exist as a result of, for example, different area codes,
these will be displayed in a list. The desired destination can then be selected
from the list.
5Select (destination) or (waypoint).
Page 36 of 90

50 Navigation
Setting Route
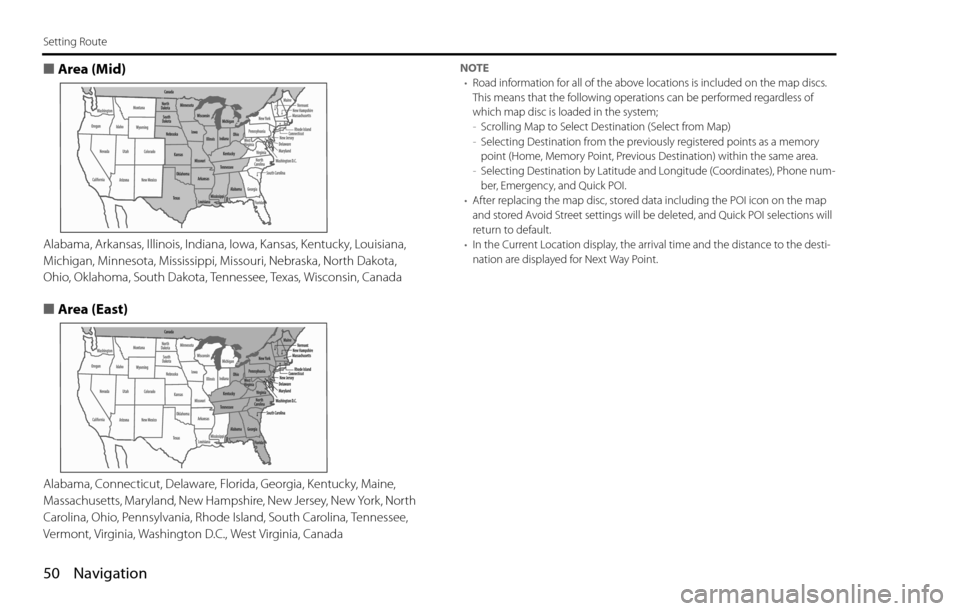
■Area (Mid)
Alabama, Arkansas, Illinois, Indiana, Iowa, Kansas, Kentucky, Louisiana,
Michigan, Minnesota, Mississippi, Missouri, Nebraska, North Dakota,
Ohio, Oklahoma, South Dakota, Tennessee, Texas, Wisconsin, Canada
■Area (East)
Alabama, Connecticut, Delaware, Florida, Georgia, Kentucky, Maine,
Massachusetts, Maryland, New Hampshire, New Jersey, New York, North
Carolina, Ohio, Pennsylvania, Rhode Island, South Carolina, Tennessee,
Vermont, Virginia, Washington D.C., West Virginia, Canada
NOTE
•Road information for all of the above locations is included on the map discs.
This means that the following operations can be performed regardless of
which map disc is loaded in the system;
-Scrolling Map to Select Destination (Select from Map)
-Selecting Destination from the previously registered points as a memory
point (Home, Memory Point, Previous Destination) within the same area.
-Selecting Destination by Latitude and Longitude (Coordinates), Phone num-
ber, Emergency, and Quick POI.
•After replacing the map disc, stored data including the POI icon on the map
and stored Avoid Street settings will be deleted, and Quick POI selections will
return to default.
•In the Current Location display, the arrival time and the distance to the desti-
nation are displayed for Next Way Point.
Page 53 of 90
Navigation 67
Route Options
POI keys:
When you select one of the six POI category keys, the system will
retrieve the selected POI from the Quick POI storage and display it on
the map. When selecting the (others) key,
POIs of other categories can be found. For more details, see Page
71.
If, for example, the (to next POI) category
key is selected and a simulation drive is started, the simulation
vehicle will then stop at a restaurant on the route.
If you then select (information), the system will display
information on the restaurant.
.
Selecting allows you to make a phone call to the phone
number displayed.
* The Bluetooth Phone is required to be set in advance.
NOTE
You must finish the simulation drive before you actually start to drive. Although
the simulation drive will automatically stop when you actually start to drive, not
finishing it properly can lead to an error in the display of the current position of
the vehicle.
Page 65 of 90
Navigation 79
Stored Locations
3Set the memory point using the preferred category avail-
able on the displayed screen.
4A confirmation message will be displayed.
NOTE
Up to 100 memory points can be stored. Once that number has been reached,
you must delete memory points that you no longer require (See Page 82
) before
you can store new memory points. The number of memory points you can store
is indicated on the screen.
■Editing memory points
Using this function, you can review the stored memory points in the
form of a list on the screen and modify names, icons, telephone num-
bers, and other memory point data.
1Press the button, then select (stored loca-
tions), and then select (memory points).
2Select (list).
Page 67 of 90

Navigation 81
Stored Locations
NOTE
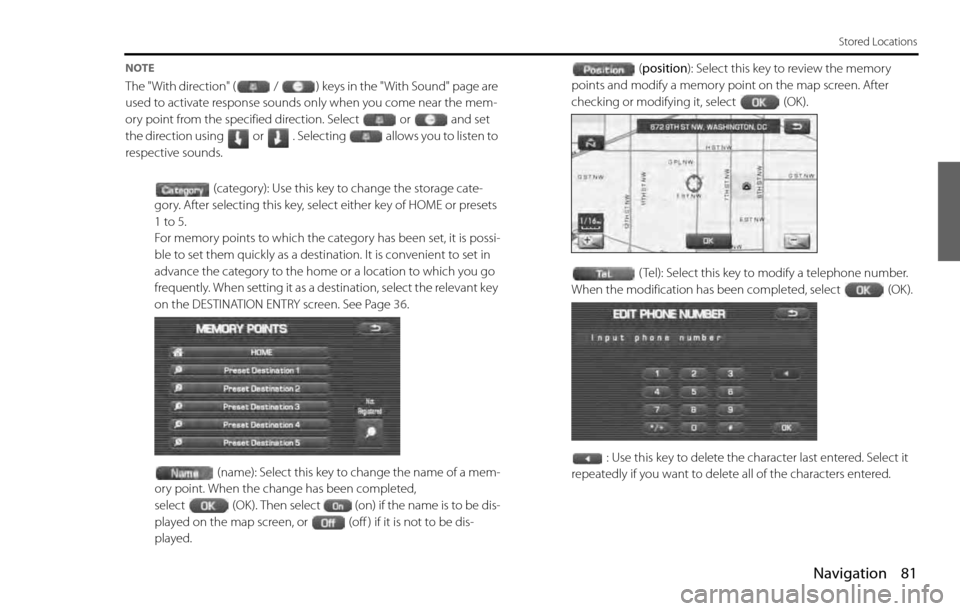
The "With direction" ( / ) keys in the "With Sound" page are
used to activate response sounds only when you come near the mem-
ory point from the specified direction. Select or and set
the direction using or . Selecting allows you to listen to
respective sounds.
(category): Use this key to change the storage cate-
gory. After selecting this key, select either key of HOME or presets
1 to 5.
For memory points to which the category has been set, it is possi-
ble to set them quickly as a destination. It is convenient to set in
advance the category to the home or a location to which you go
frequently. When setting it as a destination, select the relevant key
on the DESTINATION ENTRY screen. See Page 36.
(name): Select this key to change the name of a mem-
ory point. When the change has been completed,
select (OK). Then select (on) if the name is to be dis-
played on the map screen, or (off ) if it is not to be dis-
played.(position): Select this key to review the memory
points and modify a memory point on the map screen. After
checking or modifying it, select (OK).
( Tel): Select this key to modify a telephone number.
When the modification has been completed, select (OK).
: Use this key to delete the character last entered. Select it
repeatedly if you want to delete all of the characters entered.
Page 75 of 90

Navigation 89
Other Functions
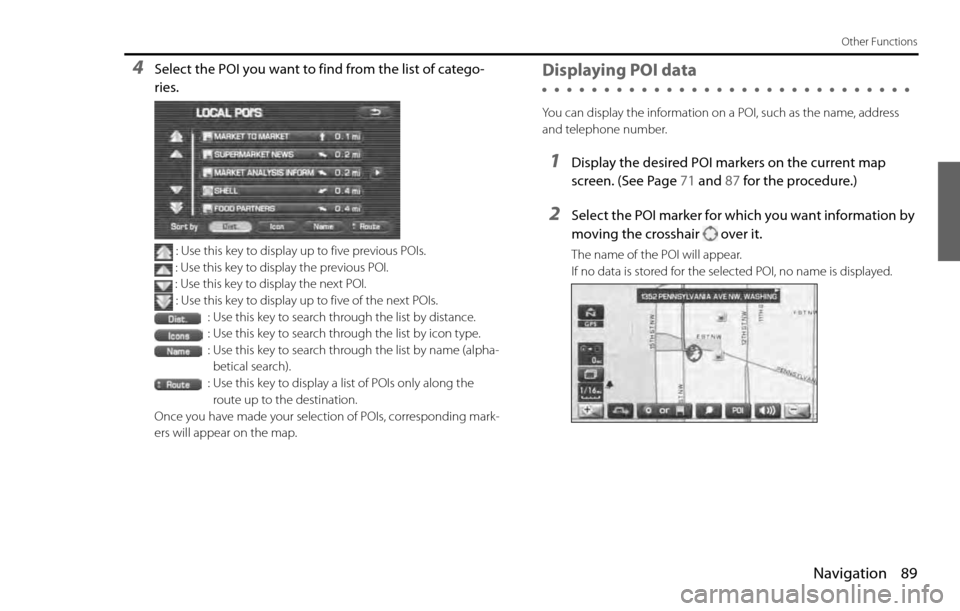
4Select the POI you want to find from the list of catego-
ries.
: Use this key to display up to five previous POIs.
: Use this key to display the previous POI.
: Use this key to display the next POI.
: Use this key to display up to five of the next POIs.
: Use this key to search through the list by distance.
: Use this key to search through the list by icon type.
: Use this key to search through the list by name (alpha-
betical search).
: Use this key to display a list of POIs only along the
route up to the destination.
Once you have made your selection of POIs, corresponding mark-
ers will appear on the map.
Displaying POI data
You can display the information on a POI, such as the name, address
and telephone number.
1Display the desired POI markers on the current map
screen. (See Page 71 and 87 for the procedure.)
2Select the POI marker for which you want information by
moving the crosshair over it.
The name of the POI will appear.
If no data is stored for the selected POI, no name is displayed.