Page 65 of 90
Navigation 79
Stored Locations
3Set the memory point using the preferred category avail-
able on the displayed screen.
4A confirmation message will be displayed.
NOTE
Up to 100 memory points can be stored. Once that number has been reached,
you must delete memory points that you no longer require (See Page 82
) before
you can store new memory points. The number of memory points you can store
is indicated on the screen.
■Editing memory points
Using this function, you can review the stored memory points in the
form of a list on the screen and modify names, icons, telephone num-
bers, and other memory point data.
1Press the button, then select (stored loca-
tions), and then select (memory points).
2Select (list).
Page 66 of 90
80 Navigation
Stored Locations
3Select the memory point to be edited.
You can sort the sequence in which memory points are listed by
selecting (Attribute), (icon), (na
me), or (date)
.
4Select the category key corresponding to the memory
point to be edited.
(icon): Selecting this key allows you to choose a dis-
play icon. (Page 1) and (Page 2) of
the CHANGE ICON screen contain standard icons, whereas the
(with sound) page contains icons that are accom-
panied by response sounds. Select (sound) to lis-
ten to these sounds.
Page 67 of 90

Navigation 81
Stored Locations
NOTE
The "With direction" ( / ) keys in the "With Sound" page are
used to activate response sounds only when you come near the mem-
ory point from the specified direction. Select or and set
the direction using or . Selecting allows you to listen to
respective sounds.
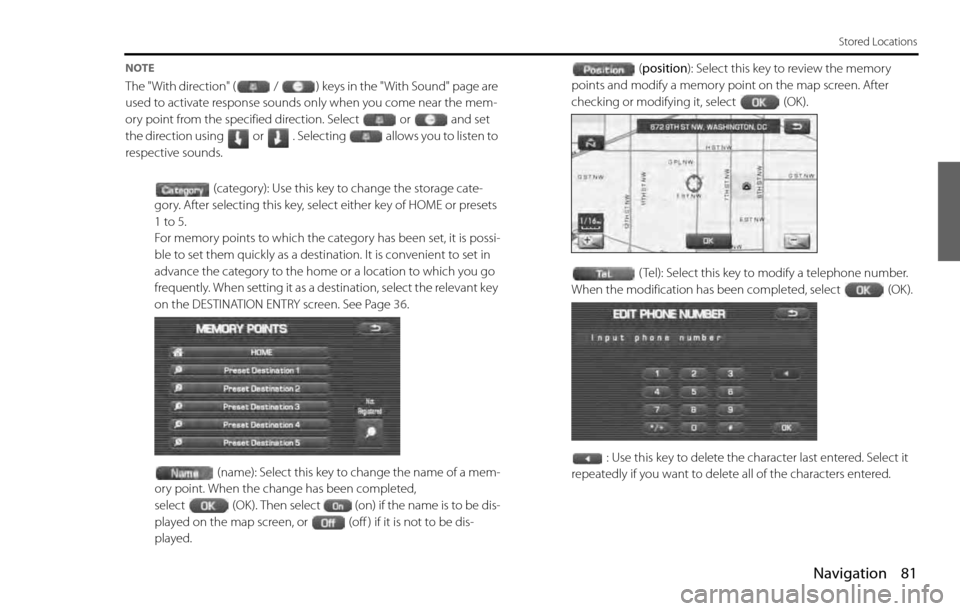
(category): Use this key to change the storage cate-
gory. After selecting this key, select either key of HOME or presets
1 to 5.
For memory points to which the category has been set, it is possi-
ble to set them quickly as a destination. It is convenient to set in
advance the category to the home or a location to which you go
frequently. When setting it as a destination, select the relevant key
on the DESTINATION ENTRY screen. See Page 36.
(name): Select this key to change the name of a mem-
ory point. When the change has been completed,
select (OK). Then select (on) if the name is to be dis-
played on the map screen, or (off ) if it is not to be dis-
played.(position): Select this key to review the memory
points and modify a memory point on the map screen. After
checking or modifying it, select (OK).
( Tel): Select this key to modify a telephone number.
When the modification has been completed, select (OK).
: Use this key to delete the character last entered. Select it
repeatedly if you want to delete all of the characters entered.
Page 68 of 90
82 Navigation
Stored Locations
■Deleting memory points
You can delete stored memory points by using this function.
1Press the button, then select (stored loca-
tions), and then select (memory points).
2Select the category of the memory point to be deleted.
3Select (delete).
4Select the memory point to be deleted.
5Confirmation message will be displayed. Select
(yes).
Select (no) to cancel the deletion.
■Deleting all memory points
Using this function, you can delete all memory points.
1Press the button, then select (stored loca-
tions), and then select (memory points).
2Select the category of the memory points to be deleted.
3Select (delete all).
Page 69 of 90
Navigation 83
Stored Locations
4Confirmation message will be displayed. Select
(yes).
Select (no) to cancel the deletion.
Avoid area
■Storing avoid areas
If you use this function to store into the system's memory the areas you
want to avoid, the system will avoid the areas when calculating routes.
1Press the button, then select (stored loca-
tions), and then select (avoid area).
2Select (add).
3Set an avoid area using preferred method.
A map including the specified avoid area will appear.
The method of setting avoid areas is identical to that of setting
destinations.
Page 70 of 90
84 Navigation
Stored Locations
4Select (reduce) or (enlarge).
(reduce): Reduces the size of the avoid area.
(enlarge): Increases the size of the avoid area.
5Select (OK).
NOTE
•Reduce the scale of the map to specify a larger area.
•Avoid areas can be set only when the scale of the map is 1/32-1/2 mile (50 m-
1 km) or less.
■Editing avoid areas
Using this function, you can review the stored avoid areas in the form of
a list and modify them if necessary.
1Press the button, then select (stored loca-
tions), and then select (avoid area).
2Select (list).
3Select the avoid area to be modified.
4Select the key corresponding to the item to be modified.
For details regarding the function of each key, refer to "Editing
memory points" on Page 79.
NOTE
The methods for deleting individual and all avoid areas are the same as those
described on Page 82 for memory points.
Page 71 of 90
Navigation 85
Stored Locations
Previous destination (deleting stored locations)
Use this function to delete previously set destinations.
1Press the button, then select (stored loca-
tions), and then select (previous destinations).
2Select (delete).
If (all delete) is selected, all previously set
destinations will be deleted.
3Select the destination to be deleted.
: Use this key to display up to five previous destinations.
: Use this key to display the previous destination.
: Use this key to display the next destination.
: Use this key to display up to five of the next destinations.
(name): Use this key to search through the list by name
(alphabetical search).
(date): Use this key to search through the list by date.
Page 72 of 90
86 Navigation
Stored Locations
4Confirmation message will be displayed. Select
(yes).
Select (no) to cancel the deletion.