2012 SUBARU IMPREZA WRX open hood
[x] Cancel search: open hoodPage 7 of 416
4
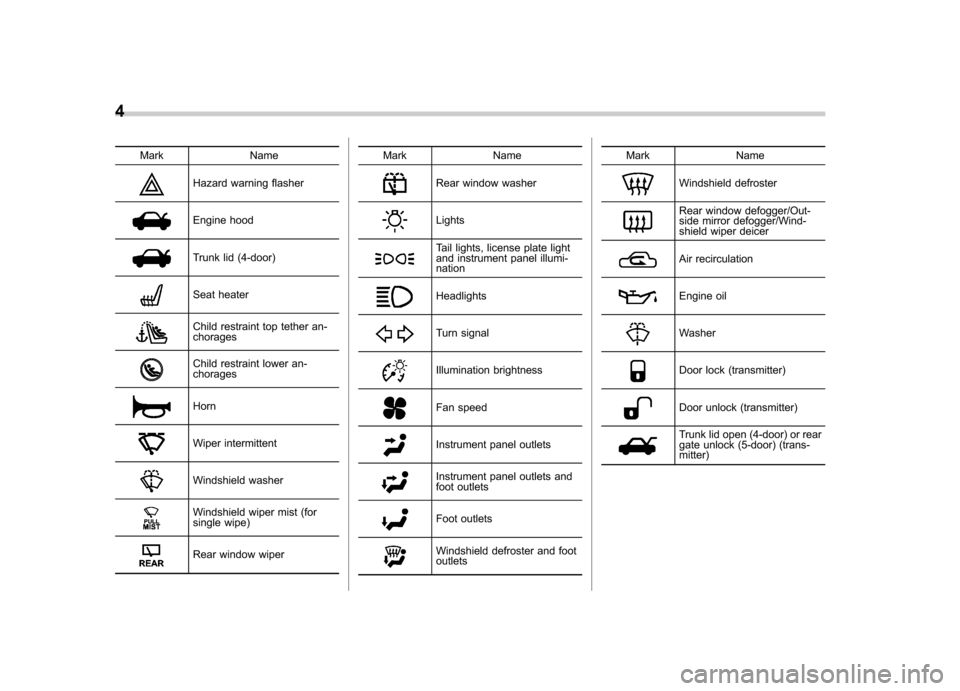
Mark Name
Hazard warning flasher
Engine hood
Trunk lid (4-door)
Seat heater
Child restraint top tether an- chorages
Child restraint lower an- chorages
Horn
Wiper intermittent
Windshield washer
Windshield wiper mist (for
single wipe)
Rear window wiperMark Name
Rear window washer
Lights
Tail lights, license plate light
and instrument panel illumi- nation
Headlights
Turn signal
Illumination brightness
Fan speed
Instrument panel outlets
Instrument panel outlets and
foot outlets
Foot outlets
Windshield defroster and foot outletsMark Name
Windshield defroster
Rear window defogger/Out-
side mirror defogger/Wind-
shield wiper deicer
Air recirculation
Engine oil
Washer
Door lock (transmitter)
Door unlock (transmitter)
Trunk lid open (4-door) or rear
gate unlock (5-door) (trans- mitter)
Page 103 of 416
2-16Keys and doors
& If you have accidentally trig-
gered the alarm system
! To stop the alarm
Do any of the following operations: . Press any button on the remote trans-
mitter.. Turn the ignition switch to the “ON ”
position. NOTE
Only registered keys will stop the
alarm. If the immobilizer transponder
is not registered, the alarm will notstop. & Arming the system
! To arm the system using remote transmitter
1. Close all windows.
2. Remove the key from the ignition switch.
3. Open the doors and get out of the vehicle.
4. Make sure that the engine hood (and
the trunk lid on the 4-door) are locked.
5. Close all doors (and the rear gate on
the 5-door).
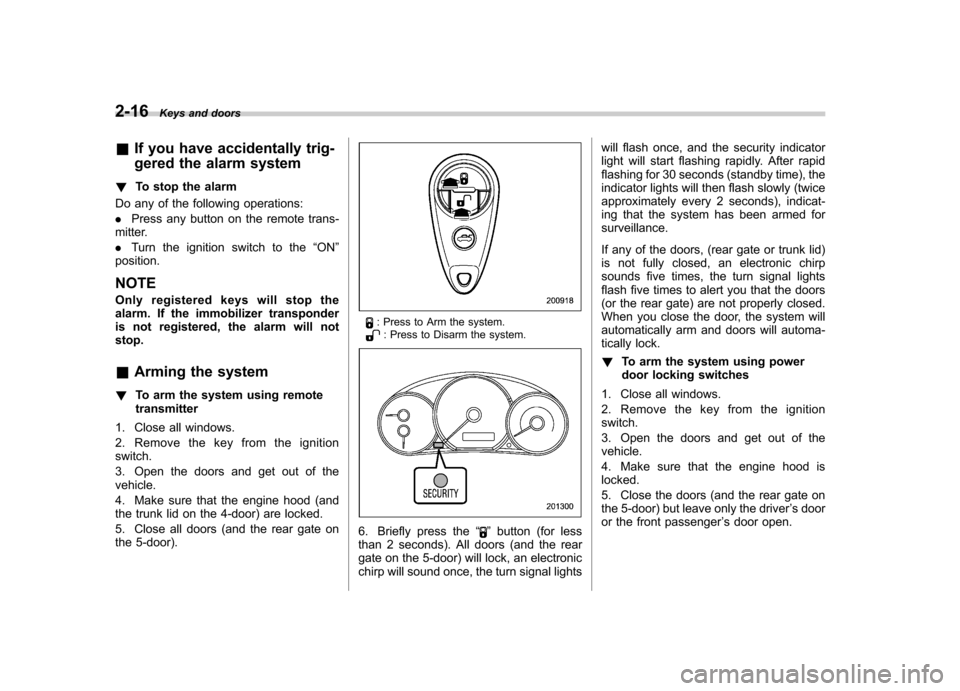
: Press to Arm the system.: Press to Disarm the system.
6. Briefly press the “”button (for less
than 2 seconds). All doors (and the rear
gate on the 5-door) will lock, an electronic
chirp will sound once, the turn signal lights will flash once, and the security indicator
light will start flashing rapidly. After rapid
flashing for 30 seconds (standby time), the
indicator lights will then flash slowly (twice
approximately every 2 seconds), indicat-
ing that the system has been armed forsurveillance.
If any of the doors, (rear gate or trunk lid)
is not fully closed, an electronic chirp
sounds five times, the turn signal lights
flash five times to alert you that the doors
(or the rear gate) are not properly closed.
When you close the door, the system will
automatically arm and doors will automa-
tically lock. !
To arm the system using power
door locking switches
1. Close all windows.
2. Remove the key from the ignition switch.
3. Open the doors and get out of the vehicle.
4. Make sure that the engine hood is locked.
5. Close the doors (and the rear gate on
the 5-door) but leave only the driver ’s door
or the front passenger ’s door open.
Page 104 of 416
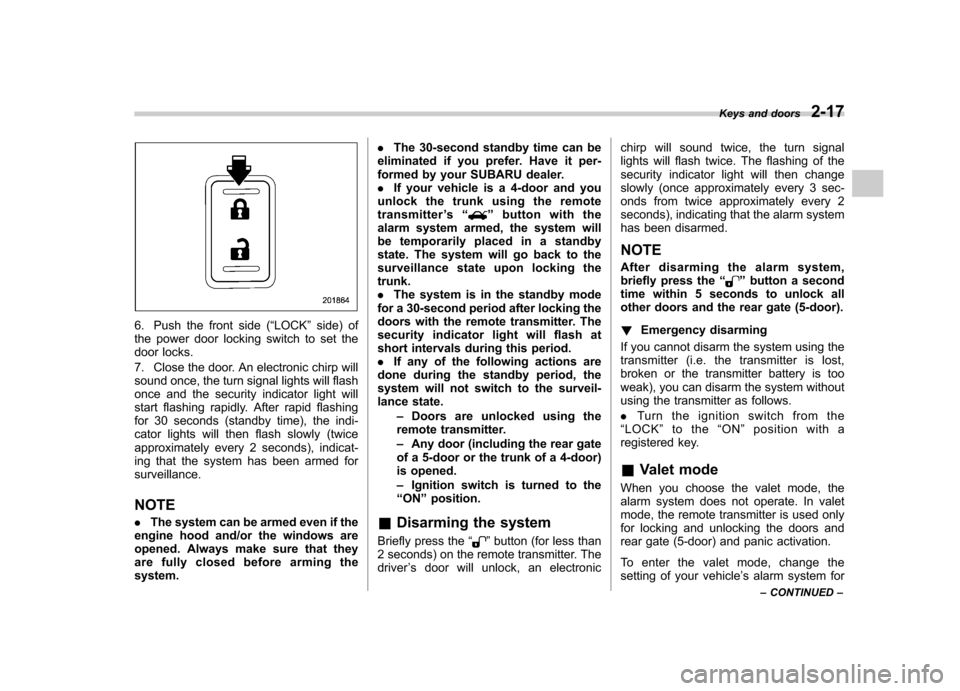
6. Push the front side (“LOCK ”side) of
the power door locking switch to set the
door locks.
7. Close the door. An electronic chirp will
sound once, the turn signal lights will flash
once and the security indicator light will
start flashing rapidly. After rapid flashing
for 30 seconds (standby time), the indi-
cator lights will then flash slowly (twice
approximately every 2 seconds), indicat-
ing that the system has been armed forsurveillance. NOTE . The system can be armed even if the
engine hood and/or the windows are
opened. Always make sure that they
are fully closed before arming thesystem. .
The 30-second standby time can be
eliminated if you prefer. Have it per-
formed by your SUBARU dealer.. If your vehicle is a 4-door and you
unlock the trunk using the remotetransmitter ’s “
”button with the
alarm system armed, the system will
be temporarily placed in a standby
state. The system will go back to the
surveillance state upon locking thetrunk.. The system is in the standby mode
for a 30-second period after locking the
doors with the remote transmitter. The
security indicator light will flash at
short intervals during this period. . If any of the following actions are
done during the standby period, the
system will not switch to the surveil-
lance state.
–Doors are unlocked using the
remote transmitter. – Any door (including the rear gate
of a 5-door or the trunk of a 4-door)
is opened. – Ignition switch is turned to the
“ ON ”position.
& Disarming the system
Briefly press the “
”button (for less than
2 seconds) on the remote transmitter. The driver ’s door will unlock, an electronic chirp will sound twice, the turn signal
lights will flash twice. The flashing of the
security indicator light will then change
slowly (once approximately every 3 sec-
onds from twice approximately every 2
seconds), indicating that the alarm system
has been disarmed. NOTE
After disarming the alarm system,
briefly press the
“
”button a second
time within 5 seconds to unlock all
other doors and the rear gate (5-door). ! Emergency disarming
If you cannot disarm the system using the
transmitter (i.e. the transmitter is lost,
broken or the transmitter battery is too
weak), you can disarm the system without
using the transmitter as follows. . Turntheignitionswitchfromthe
“ LOCK ”to the “ON ”position with a
registered key. & Valet mode
When you choose the valet mode, the
alarm system does not operate. In valet
mode, the remote transmitter is used only
for locking and unlocking the doors and
rear gate (5-door) and panic activation.
To enter the valet mode, change the
setting of your vehicle ’s alarm system for
Keys and doors
2-17
– CONTINUED –
Page 246 of 416
Fuel
CAUTION
Use of a fuel which is low in quality
or use of an inappropriate fuel
additive may cause engine damage.
& Fuel requirements
! Except STI
The engine is designed to operate usingpremium unleaded gasoline with an
octane rating of 91 AKI (95 RON) or
higher . If premium unleaded gasoline is
not available, regular unleaded gasoline
with an octane rating of 87 AKI (90 RON)
or higher may be temporarily used. For
optimum engine performance and drive-
ability, it is required that you use premium
grade unleaded gasoline. NOTE
Be sure to use premium unleaded
gasoline of 91 AKI (95 RON) or higher.
If other gasoline (lower than 91 AKI (95
RON)) is used, knocking, reduced out-
put and poor accelerator response willresult. !
STI
The engine is designed to operate at
maximum performance using unleaded
gasoline with an octane rating of 93 AKI
(98 RON) or higher . If 93 AKI (98 RON)
fuel is not readily available in your area,
unleaded gasoline with an octane rating of
91 AKI (95 RON) may be used with no
detriment to engine durability or driveabil-
ity. However, you may notice a slight
decrease in maximum engine perfor-
mance while using 91 AKI (95 RON) fuel.
Use of 91 AKI (95 RON) fuel will not affect
your warranty coverage. ! Fuel octane rating
This octane rating is the average of the
Research Octane and Motor Octane
numbers and is commonly referred to as
the Anti Knock Index (AKI).
Using a gasoline with a lower octane
rating can cause persistent and heavy
knocking, which can damage the engine.
Do not be concerned if your vehicle
sometimes knocks lightly when you drive
up a hill or when you accelerate. Contact
your SUBARU dealer if you use a fuel with
the specified octane rating and your
vehicle knocks heavily or persistently. ! Unleaded gasoline
The neck of the fuel filler pipe is designed
to accept only an unleaded gasoline filler nozzle. Under no circumstances should
leaded gasoline be used because it will
damage the emission control system and
may impair driveability and fuel economy. !
Gasoline for California-certified LEV
If your vehicle was certified to California ’s
low emission vehicle (LEV) standards as
indicated on the underhood tune-up label,
it is designed to optimize engine and
emission performance with gasoline that
meets the clean burning low-sulfur Cali-
fornia gasoline specifications. If you live in
any other state than California, your
vehicle will operate on gasoline meeting
Federal specifications. Gasoline sold out-
side California is permitted to have higher
sulfur levels, which may affect the perfor-
mance of your vehicle ’s catalytic converter
and may produce a sulfur exhaust odor or
smell. SUBARU recommends that you try
a different brand of unleaded gasoline
having lower sulfur to determine if the
problem is fuel related before returning
your vehicle to an authorized dealer forservice. ! MMT
Some gasoline contains an octane-en-
hancing additive called MMT (Methylcy-
clopentadienyl Manganese Tricarbonyl). If
you use such fuels, your emission control Starting and operating
7-3
– CONTINUED –
Page 254 of 416

an additional four times. If the vehicle fails
to start after the additional attempts, the
remote engine start system will abort and
return to a non-activated state. &Remote start safety features
For safety and security reasons, the
system will fail to start and beep the horn
twice or shut down the engine during
remote start operation if any of the
following conditions occur. . The brake pedal is depressed before
the vehicle ignition switch is turned “on ”.
. The key was already in the ignition
switch.. The engine hood is opened.
. The vehicle ’s engine idle speed has
reached a level over 3,000 rpm.. The alarm is triggered by opening a
door or the rear gate.
NOTE . The security indicator light on the
combination meter will stop flashing
while under remote engine start opera-
tion, but the vehicle is still protected.. If the vehicle is entered during
remote engine start operation, the
system will not record entry in the
alarm history. &
Entering the vehicle while it
is running via remote start
1. Unlock the vehicle doors using the
remote keyless entry system. If the vehi-cle ’s doors are unlocked manually using
the key, the vehicle ’s alarm system will
trigger and the remote engine start system
will turn off. Inserting the key into the
ignition switch and turning it to the “ON ”
position or pressing the unlock button “
”
on the remote keyless entry transmitter
will disarm the alarm system. Refer to“ Alarm system ”F 2-15.
2. Enter the vehicle. Do not depress the
brake pedal.
3. Insert the key into the ignition switch
and turn to the “ON ”position. If the ignition
switch is accidentally turned to the“ START ”position, the system ’s “starter
anti-grind ”feature will prevent the starter
from re-cranking.
4. Depress the brake pedal. The remote
starter disengages, the vehicle ’s power
window features are re-enabled and the
vehicle will operate normally.
& Entering the vehicle follow-
ing remote engine start shut-down
An alarm trigger may occur if the vehicle is
opened by the remote keyless entry transmitter within a few seconds immedi-
ately following remote engine start shut-down. &
Pre-heating or pre-cooling
the interior of the vehicle
Before exiting the vehicle, set the tem-
perature controls to the desired setting
and operation. After the system starts the
vehicle, the heater or air-conditioning will
activate and heat or cool the interior to
your setting. & Service mode
In service mode, the remote start function
is temporarily disabled to prevent the
system from unexpectedly starting the
engine while being serviced. ! To engage the service mode
Turntheignitionswitchtothe “ON ”
position, depress and hold the brake
pedal, then press and release the “
”
button on the remote engine start trans-
mitter three times. The system will pause
for 1 second and then flash the turn signal
lights and honk the horn three times
indicating that the system is in service
mode. When attempting to activate the
remote start system while in service
mode, the turn signal lights will flash and
the horn will honk two times and will not Starting and operating
7-11
– CONTINUED –
Page 309 of 416
9-12In case of emergency
Engine overheating
WARNING
Never attempt to remove the radia-
tor cap until the engine has been
shut off and has fully cooled down.
When the engine is hot, the coolant
is under pressure. Removing the
cap while the engine is still hot
could release a spray of boiling hot
coolant, which could burn you very
seriously.
If the engine overheats, safely pull off the
road and stop the vehicle in a safe place. & If steam is coming from the
engine compartment
Turn off the engine and get everyone
away from the vehicle until it cools down. & If no steam is coming from
the engine compartment
NOTE
For details about how to check the
coolant level or how to add coolant,
refer to “Engine coolant ”F 11-12.
1. Keep the engine running at idlingspeed. 2. Open the hood to ventilate the engine
compartment. Refer to
“Engine hood ”
F 11-5.
Confirm that the cooling fan is turning. If
the fan is not turning, immediately turn off
the engine and contact your authorized
dealer for repair.
3. After the engine coolant temperature
has dropped, turn off the engine.
If temperature gauge stays in the over-
heated zone, turn off the engine. Refer to“ Temperature gauge ”F 3-10.
4. After the engine has fully cooled down,
check the coolant level in the reservetank.
If the coolant level is below the “LOW ”
mark, add coolant up to the “FULL ”mark.
5. If there is no coolant in the reserve
tank, add coolant to the reserve tank.
Then remove the radiator cap and fill the
radiator with coolant.
If you remove the radiator cap from a hot
radiator, first wrap a thick cloth around the
radiator cap, then turn the cap counter-
clockwise slowly without pressing down
until it stops. Release the pressure from
the radiator. After the pressure has been
fully released, remove the cap by pressing
down and turning it. Towing
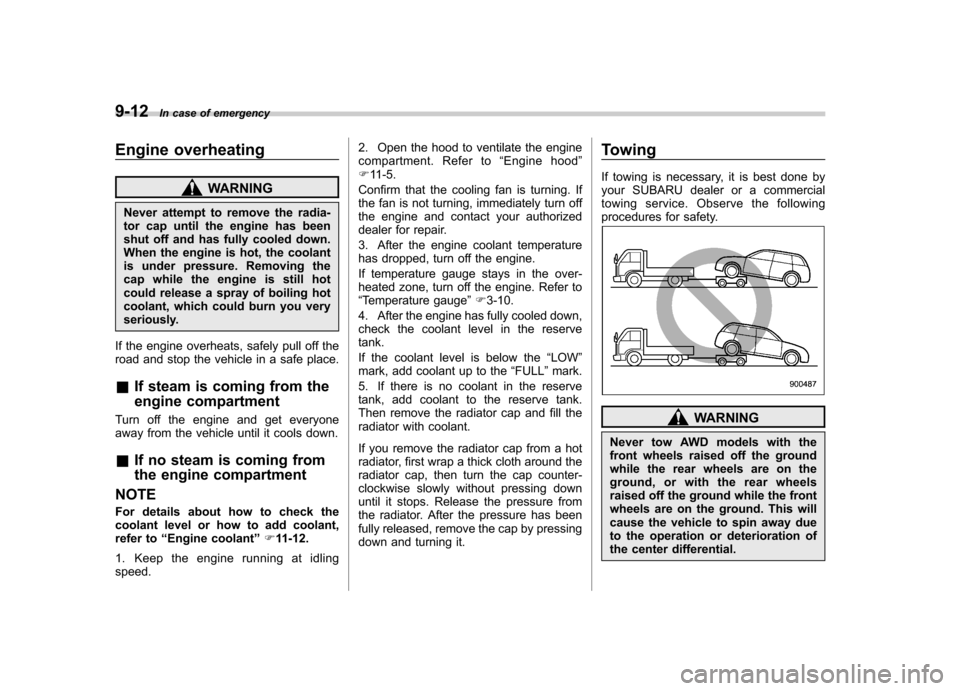
If towing is necessary, it is best done by
your SUBARU dealer or a commercial
towing service. Observe the following
procedures for safety.
WARNING
Never tow AWD models with the
front wheels raised off the ground
while the rear wheels are on the
ground, or with the rear wheels
raised off the ground while the front
wheels are on the ground. This will
cause the vehicle to spin away due
to the operation or deterioration of
the center differential.
Page 326 of 416
&When checking or servicing
in the engine compartment
while the engine is running
WARNING
A running engine can be dangerous.
Keep your fingers, hands, clothing,
hair and tools away from the cooling
fan, belts and any other moving
engine parts. Removing rings,
watches and ties is advisable. Engine hood
WARNING
Always check that the hood is
properly locked before you start
driving. If it is not, it might fly open
while the vehicle is moving and
block your view, which may cause
an accident and serious bodily in-
jury.
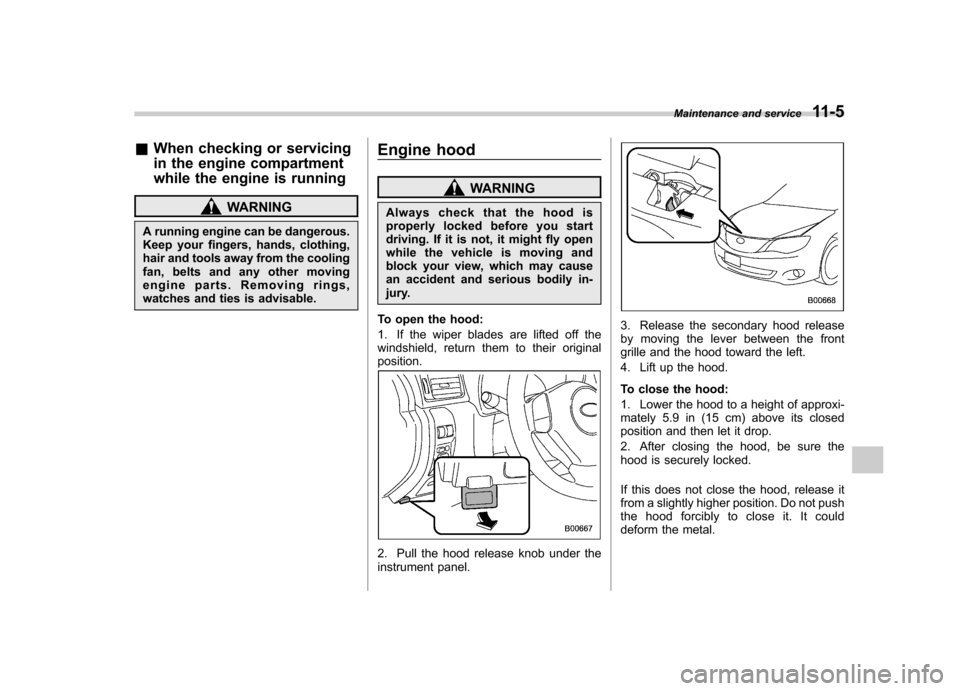
To open the hood:
1. If the wiper blades are lifted off the
windshield, return them to their originalposition.
2. Pull the hood release knob under the
instrument panel.
3. Release the secondary hood release
by moving the lever between the front
grille and the hood toward the left.
4. Lift up the hood.
To close the hood:
1. Lower the hood to a height of approxi-
mately 5.9 in (15 cm) above its closed
position and then let it drop.
2. After closing the hood, be sure the
hood is securely locked.
If this does not close the hood, release it
from a slightly higher position. Do not push
thehoodforciblytocloseit.Itcould
deform the metal. Maintenance and service
11-5
Page 407 of 416
14-4Index
Coolant ............................................................ 11-12, 12-8
Cooling system ......................................................... 11-11
Corrosion protection ................................................... 10-4
Cruise control ............................................................ 7-37
Indicator light ......................................................... 3-24
Set indicator light ................................................... 3-24
Cup holder .................................................................. 6-5
Front passenger ’s .................................................... 6-5
Rear passenger ’s..................................................... 6-7
D
Daytime running light system ....................................... 3-30
Defogger ................................................................... 3-45
Deicer ...................................................................... 3-45
Differential gear oil Front .................................................................... 12-6
Rear ............................................................ 11-16, 12-6
Dimensions ............................................................... 12-2
Disarming the alarm system ........................................ 2-17
Disc brake pad wear warning indicators ........................ 7-25
Dome light ........................................................ 6-2, 11-47
Door Locks ..................................................................... 2-4
Open warning light ................................................. 3-20
Drive belts. ............................................................... 11-15
Driver ’s Control Center Differential ............................... 7-18
Auto indicator light ................................................. 3-24
Indicator light ......................................................... 3-25
Driving AWD vehicles .......................................................... 8-4
Car phone/cell phone .................................................. 8 Drinking.
.................................................................... 7
Drugs ........................................................................ 7
Foreign countries ..................................................... 8-4
Pets .......................................................................... 8
Snowy and icy roads ............................................... 8-7
Tips ................................................. 7-16, 7-17, 8-2, 8-4
Tired or sleepy ........................................................... 8
Winter .................................................................... 8-6
E
Electrical system ........................................................ 12-3
Electronic Brake Force Distribution (EBD) system... 3-19, 7-26
Emergency Locking Retractor (ELR) ............................. 1-12
Engine Compartment overview ............................................ 11-6
Coolant ....................................................... 11-12, 12-8
Exhaust gas (carbon monoxide) ............................. 6, 8-2
Hood .................................................................... 11-5
Oil ................................................................ 11-8, 12-5Overheating ........................................................... 9-12
Starting .................................................................. 7-9
Stopping ................................................................ 7-10
Exterior care .............................................................. 10-2
F
Flat tires ..................................................................... 9-5
Floor mat ................................................................... 6-10
Fluid level
Brake .................................................................. 11-18
Clutch ................................................................. 11-19
Power steering ..................................................... 11-17