2012 Seat Ibiza 5D fuel flap
[x] Cancel search: fuel flapPage 74 of 280
72Cockpit
Tyre pressure adjustment
Following the modification to tyre pressure or changing one or more wheels,
the button ⇒ Fig. 40 must be kept pressed while the ignition is on until an
audible warning is heard.
If the wheels are under excessive load (for example, driving with a trailer or
heavy load), the tyre pressure must be increased to the recommended value
for a full load (see the sticker on the inside of the fuel flap). If the tyre moni-
tor system button is pressed down, the new tyre pressures are confirmed.
The tyre pressure control lamp lights up
If the tyre pressure of a wheel is much lower than the value set by the driver,
then the tyre pressure control lamp ⇒
will light up.
WARNING
● When the tyre pressure control lamp lights up, reduce speed immedi-
ately and avoid any sudden manoeuvre or braking. Stop when possible,
and check the tyre pressure and status.
● The driver is responsible for maintaining correct tyre pressures. For
this reason, tyre pressure must be regularly checked.
● Under certain circumstances (for example, when driving in a sports-
like manner, in winter conditions or on a dirt track) the tyre control lamp
may light up or function incorrectly.
Note
If the battery is disconnected, the yellow warning lamp lights up after
turning the ignition on. This should turn off after a brief journey. Speed selector lever lock*
The brake pedal must be depressed when this warning lamp lights up. This
is necessary when the automatic gearbox* selector lever is moved out of the
positions
P or N.
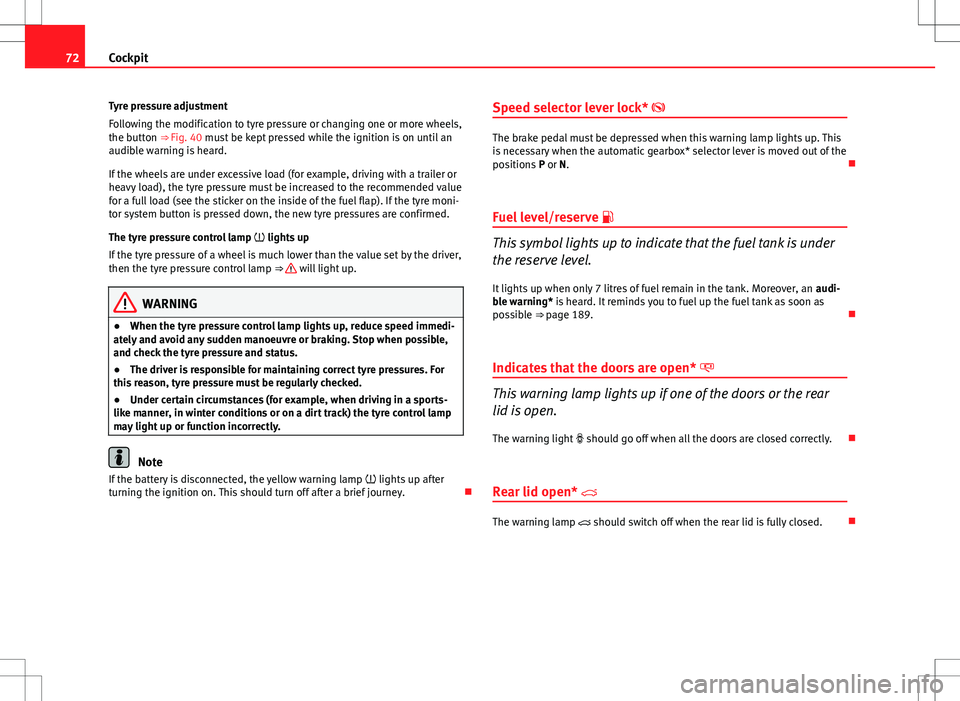
Fuel level/reserve
This symbol lights up to indicate that the fuel tank is under
the reserve level.
It lights up when only 7 litres of fuel remain in the tank. Moreover, an audi-
ble warning* is heard. It reminds you to fuel up the fuel tank as soon as
possible ⇒ page 189.
Indicates that the doors are open*
This warning lamp lights up if one of the doors or the rear
lid is open. The warning light should go off when all the doors are closed correctly.
Rear lid open*
The warning lamp should switch off when the rear lid is fully closed.
Page 176 of 280

174Driving and the environment
If the trailer has a 7-pin plug you will need to use an adapter cable. This is
available in any Technical Service.
Trailer weight/drawbar load
Never exceed the authorised trailer weight. If you do not load the trailer up
to the maximum permitted trailer weight, you can then climb correspond-
ingly steeper slopes.
The maximum trailer weights listed are only applicable for altitudes up to
1000 m above sea level. With increasing altitude the engine power and
therefore the vehicle climbing ability are impaired because of the reduced
air density. The maximum trailer weight has to be reduced accordingly. The
weight of the vehicle and trailer combination must be reduced by 10% for
every further 1000 m (or part thereof). The gross combination weight is the
actual weight of the laden vehicle plus the actual weight of the laden trailer.
When possible, operate the trailer with the maximum permitted drawbar
load on the ball joint of the towing bracket, but do not exceed the specified
limit.
The figures for trailer weights and drawbar loads that are given on the data
plate of the towing bracket are for certification purposes only. The correct
figures for your specific model, which may be lower than these figures for
the towing bracket, are given in the vehicle documentation or in ⇒ chap-
ter Technical Data.
Distributing the load
Distribute loads in the trailer so that heavy objects are as near to the axle as
possible. Loads carried in the trailer must be secured to prevent them mov-
ing.
Tyre pressure
Set tyre pressure to the maximum permissible pressure shown on the stick-
er on the inside of the fuel tank flap. Set the tyre pressure of the trailer tyres
in accordance with the trailer manufacturer's recommendations. Exterior mirrors
Check whether you can see enough of the road behind the trailer with the
standard rear vision mirrors. If this is not the case, you should have addi-
tional exterior mirrors fitted. Both exterior mirrors should be mounted on
hinged extension brackets. Adjust the mirrors to give sufficient vision to the
rear.
WARNING
Never transport people in a trailer. This could result in fatal accidents.
Note
● Towing a trailer places additional demands on the vehicle. We recom-
mend additional services between the normal inspection intervals if the ve-
hicle is used frequently for towing a trailer.
● Find out whether special regulations apply to towing a trailer in your
country.
Ball coupling of towing bracket*
The ball coupling is provided with instructions on fitting and removing the
ball coupling of the towing bracket.
WARNING
The towing bracket ball coupling must be stored securely in the luggage
compartment to prevent them being flung through the vehicle and caus-
ing injury.
Note
● By law, the ball coupling must be removed if a trailer is not being towed
if it obscures the number plate.
Page 191 of 280
189
Checking and refilling levels
Checking and refilling levels Refuelling
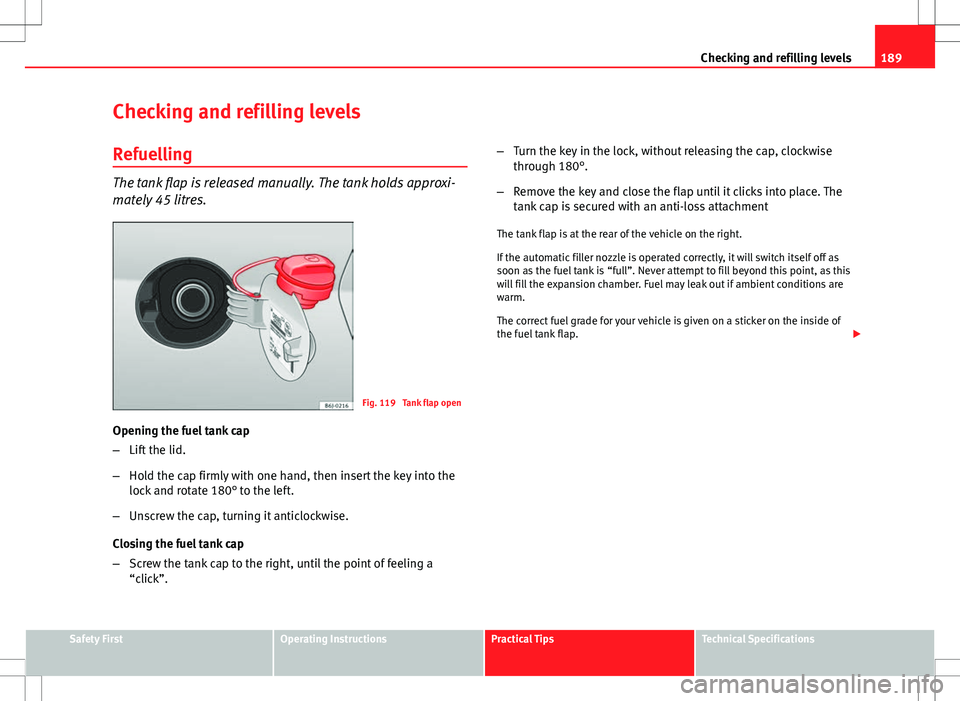
The tank flap is released manually. The tank holds approxi-
mately 45 litres.
Fig. 119 Tank flap open
Opening the fuel tank cap
– Lift the lid.
– Hold the cap firmly with one hand, then insert the key into the
lock and rotate 180° to the left.
– Unscrew the cap, turning it anticlockwise.
Closing the fuel tank cap
– Screw the tank cap to the right, until the point of feeling a
“click”. –
Turn the key in the lock, without releasing the cap, clockwise
through 180°.
– Remove the key and close the flap until it clicks into place. The
tank cap is secured with an anti-loss attachment
The tank flap is at the rear of the vehicle on the right.
If the automatic filler nozzle is operated correctly, it will switch itself off as
soon as the fuel tank is “full”. Never attempt to fill beyond this point, as this
will fill the expansion chamber. Fuel may leak out if ambient conditions are
warm.
The correct fuel grade for your vehicle is given on a sticker on the inside of
the fuel tank flap.
Safety FirstOperating InstructionsPractical TipsTechnical Specifications
Page 193 of 280

191
Checking and refilling levels
LPG system*
Refuelling with LPG
The LPG filler neck is behind the fuel cap, next to the petrol
filler neck.
Fig. 120 Fuel tank open with LPG filler neck and adapter.
Fig. 121 LPG tank in
spare wheel well
Refuelling with LPG
– Before refuelling, stop the engine and switch off the ignition.
– Open the tank flap.
– Before refuelling, please read the instructions on the pump.
– Unscrew the cap of the gas filler neck ⇒ Fig. 120 1
.
– Screw the required adapter ⇒ Fig. 120 2
on the gas filler neck
1.
– Refuel as indicated in the instructions on the pump.
– Unscrew the adapter ⇒ Fig. 120 2
.
– Screw on the cap of the gas filler neck ⇒ Fig. 120 1
.
– Close the tank flap.
When the hose is removed from the tank, a small amount of LPG may spill
out ⇒
.
Safety FirstOperating InstructionsPractical TipsTechnical Specifications
Page 196 of 280

194Checking and refilling levels
Petrol
Petrol types
The correct petrol types are listed on a sticker inside the fuel
tank flap.Only unleaded petrol conforming to standard DIN EN 228 may be used for
vehicles with catalytic converters (EN = “European Standard”).
Fuel types are differentiated by the octane rating, e.g: 91, 95, 98 RON (RON
= “Research Octane Number”, unit for determining the knock resistance of
petrol). You may use petrol with a higher octane number than the one rec-
ommended for your engine. However, this has no advantage in terms of fuel
consumption and engine power.
CAUTION
● Even one tankful of leaded fuel would permanently impair the efficiency
of the catalytic converter.
● High engine speed and full throttle can damage the engine when using
petrol with an octane rating lower than the correct grade for the engine.
For the sake of the environment
Just one full tank of leaded fuel would seriously impair the efficiency of the
catalytic converter.
Petrol additives
Petrol additives improve the quality of the petrol.
The quality of the petrol influences the performance, power and life of the
engine. For this reason, you should use good quality petrol containing addi- tives. These additives will help to prevent corrosion, keep the fuel system
clean and prevent deposits from building up in the engine.
If good quality petrol with additives is not available or engine problems oc-
cur, the required additives must be added during refuelling.
Diesel Diesel*
Diesel fuel must conform to DIN EN 590 (EN = “European Standard”). It
must have a cetane number (CN) of at least 51. The cetane number indi-
cates the ignition quality of the diesel fuel.
Notes on refuelling ⇒ page 189.
Biodiesel*
CAUTION
● Your vehicle is not designed to use biodiesel fuel. Never, under any cir-
cumstances refuel with biodiesel. The use of biodiesel fuel could damage
the engine and the fuel system. The addition of biodiesel to diesel fuel by
the diesel manufacturer in accordance with standard EN 590 or DIN 51628
is authorised and will not cause damage to the engine or the fuel system.
● The diesel engine has been designed to be used exclusively with diesel
fuel conforming to standard EN 590. Never refuel or use petrol, kerosene,
fuel oil or any other type of fuel. If you accidentally fill up the vehicle with
the wrong type of fuel, do not start the engine. Seek assistance from speci-
alised personnel. The composition of these fuels may severely damage the
fuel system and the engine.
Page 214 of 280
212Checking and refilling levels
–When removed, the wheels and/or tyres should be stored in a
cool, dry and preferably dark location.
– Store tyres in a vertical position if they are not fitted on wheel
rims.
New tyres
New tyres must be run in ⇒ page 168.
The tread depth of new tyres may vary, according to the type and make of
tyre and the tread pattern.
Concealed damage
Damage to tyres and rims is often not readily visible. If you notice unusual
vibrations or the vehicle pulling to one side, this may indicate that one of
the tyres is damaged. The tyres should be checked immediately by a Techni-
cal Service.
Tyres with directional tread pattern
An arrow on the tyre sidewall indicates the direction of rotation on tyres with
directional tread. Always observe the direction of rotation indicated when
fitting the wheel. This guarantees optimum grip and helps to avoid aqua-
planing, excessive noise and wear.
WARNING
● New tyres do not have maximum grip during the first 500 km (300
miles). Drive particularly carefully to avoid possible accidents.
● Never drive with damaged tyres. This may cause an accident.
● If you notice unusual vibrations or if the vehicle pulls to one side
when driving, stop the vehicle immediately and check the tyres for dam-
age.
Checking tyre pressure
The correct tyre pressure can be seen on the sticker on the
inside of the fuel tank flap.
1. Read the required tyre inflation pressure from the sticker. The values refer to Summer tyres.
2. The tyre pressures should only be checked when the tyres are cold. The slightly raised pressures of warm tyres must not be re-
duced.
3. Adjust the tyre pressure to the load you are carrying.
Tyre pressure
The correct tyre pressure is especially important at high speeds. The pres-
sure should therefore be checked at least once a month and before starting
a journey.
WARNING
A tyre can easily burst if the pressure is too low, causing an accident!
● At continuously high speeds, a tyre with insufficient pressure flexes
more. In this way it becomes too hot, and this can cause tread separation
and tyre blow-out. Always observe the recommended tyre pressures.
● If the tyre pressure is too low or too high, the tyres will wear prema-
turely and the vehicle will not handle well. Risk of accident!
For the sake of the environment
Under-inflated tyres will increase fuel consumption.
Page 218 of 280
216Checking and refilling levels
Winter tyres
Winter tyres will improve the vehicles handling on snow and
ice.
In winter conditions winter tyres will considerably improve the vehicle's han-
dling. The design of summer tyres (width, rubber compound, tread pattern)
gives less grip on ice and snow.
Winter tyres must be inflated to a pressure 0.2 bar higher than the pres-
sures specified for summer tyres (see sticker on fuel tank flap).
Winter tyres must be fitted on all four wheels.
Information on permitted winter tyre sizes can be found in the vehicle's reg-
istration documentation. Use only radial winter tyres. All tyre sizes listed in
the vehicle documentation also apply to winter tyres.
Winter tyres lose their effectiveness when the tread is worn down to a depth
of 4 mm.
The speed rating code ⇒ page 214, New tyres and wheels determines the
following speed limits for winter tyres: ⇒
max. 160 km/h (100 mph)
max. 180 km/h (110 mph)
max. 190 km/h (120 mph)
max. 210 km/h (130 mph)
In some countries, vehicles which can exceed the speed rating of the fitted
tyre must have an appropriate sticker in the driver's field of view. These
stickers are available from your Technical Service. The legal requirements of
each country must be followed.
Do not have winter tyres fitted for unnecessarily long periods. Vehicles with
summer tyres handle better when the roads are free of snow and ice. Q
S
T
H If you have a flat tyre, please refer to the notes on the spare wheel
⇒ page 214, New tyres and wheels.
WARNING
The maximum speed for the winter tyres must not be exceeded. Other-
wise, this could lead to tyre damage and risk of accident.
For the sake of the environment
Fit your summer tyres again as soon as possible. They are quieter, do not
wear so quickly and reduce fuel consumption.
Snow chains
Snow chains may be fitted only to the front wheels, and only for the follow-
ing tyres:
175/70R14
185/60R15Chains with links not exceeding 15 mm (including the chain
closure)
215/45R16Chains with links not exceeding 9 mm (including the chain
closure)
215/40R17Chains with links not exceeding 7 mm (including the chain
closure)
Remove wheel hub covers and trim rings before fitting snow chains. For
safety reasons cover caps, available in any Technical Service, must then be
fitted over the wheel bolts.
WARNING
Snow chains should be correctly tightened in accordance with the manu-
facturer's instructions. This will prevent the chains coming into contact
with the wheel housing.
Page 254 of 280
252Description of specifications
Drawbar loads
The maximum permitted drawbar load on the ball joint of the towing bracket
must not exceed 75 kg.
In the interest of road safety, we recommend that you always tow approach-
ing the maximum drawbar load. The response of the trailer on the road will
be poor if the drawbar load is too small.
If the maximum permissible drawbar load cannot be met (e.g. with small,
empty and light-weight single axle trailers or tandem axle trailers with a
wheelbase of less than 1 metre), a minimum of 4% of the actual trailer
weight is legally required for the drawbar load.
WARNING
● For safety reasons, do not exceed the 80 km/h (50 mph) limit. This is
also valid in countries where higher speeds are permitted.
● Never exceed the maximum trailer weights or the drawbar load. If the
permissible axle load or the permissible total weight is exceeded, the
driving characteristics of the vehicle may change, leading to accidents,
injuries and damage to the vehicle.
Wheels
Tyre pressure, snow chains, wheel bolts
Tyre pressures
The sticker with the tyre pressure values can be found on the inside of the
fuel tank flap. The tyre pressure values given there are for cold tyres. The
slightly raised pressures of warm tyres must not be reduced. ⇒
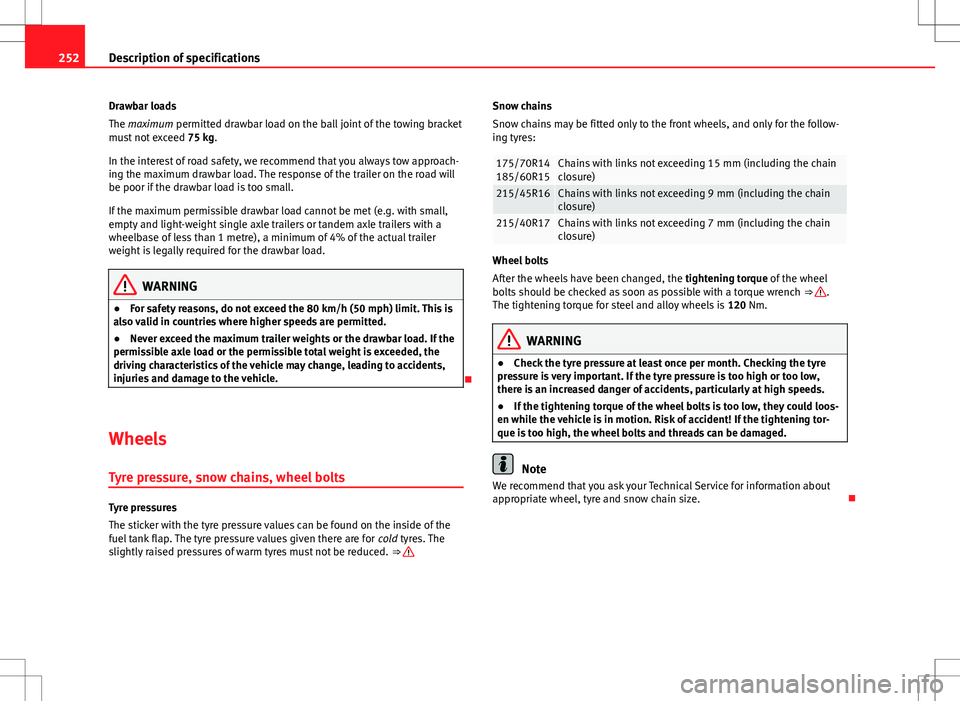
Snow chains
Snow chains may be fitted only to the front wheels, and only for the follow-
ing tyres:
175/70R14
185/60R15Chains with links not exceeding 15 mm (including the chain
closure)
215/45R16Chains with links not exceeding 9 mm (including the chain
closure)
215/40R17Chains with links not exceeding 7 mm (including the chain
closure)
Wheel bolts
After the wheels have been changed, the tightening torque of the wheel
bolts should be checked as soon as possible with a torque wrench ⇒
.
The tightening torque for steel and alloy wheels is 120 Nm.
WARNING
● Check the tyre pressure at least once per month. Checking the tyre
pressure is very important. If the tyre pressure is too high or too low,
there is an increased danger of accidents, particularly at high speeds.
● If the tightening torque of the wheel bolts is too low, they could loos-
en while the vehicle is in motion. Risk of accident! If the tightening tor-
que is too high, the wheel bolts and threads can be damaged.
Note
We recommend that you ask your Technical Service for information about
appropriate wheel, tyre and snow chain size.