2012 RENAULT WIND ROADSTER instrument panel
[x] Cancel search: instrument panelPage 48 of 185
1.42
ENG_UD25519_2
Ordinateur de bord : paramètres de voyage (E33 - X33 - Renault)
ENG_NU_865-6_E33_Renault_1
Jaune NoirNoir texte
TRIp COMpUTER: trip settings (2/4)
The display of information shown below DEpENDS ON THE VEHICLE EQUIpMENT AND COUNTRY.
Examples of selections Interpreting the display selected
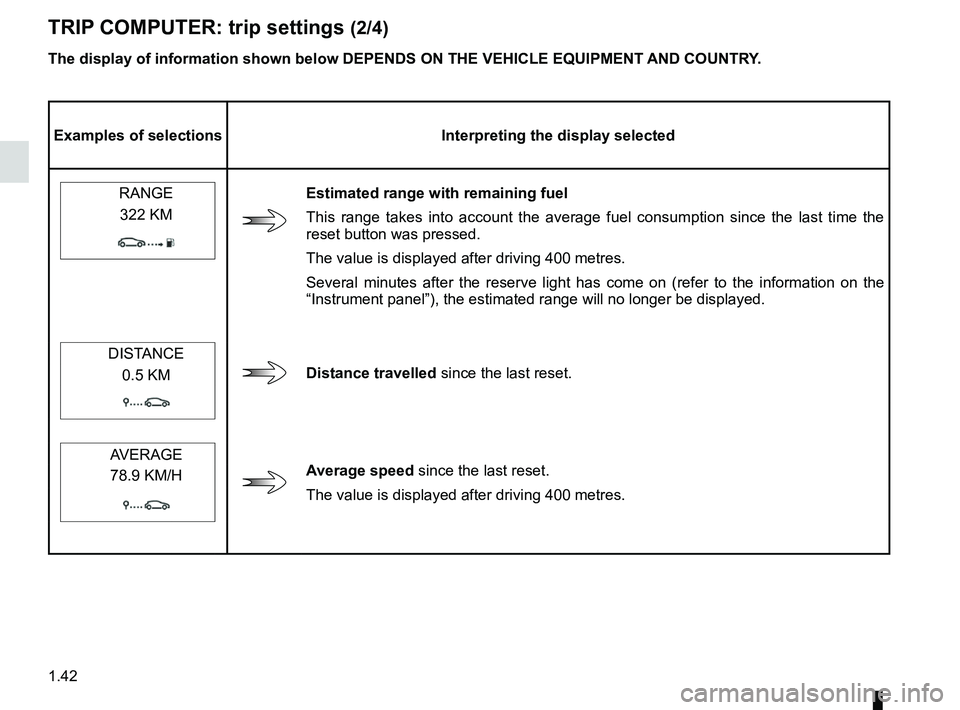
RANGE
Estimated range with remaining fuel
This range takes into account the average fuel consumption since the last time the
reset button was pressed.
The value is displayed after driving 400 metres.
Several minutes after the reserve light has come on (refer to the information on the
“Instrument panel”), the estimated range will no longer be displayed.
322 KM
DISTANCE
Distance travelled
since the last reset.
0.5 KM
AVERAGEAverage speed since the last reset.
The value is displayed after driving 400 metres.
78.9 KM/H
Page 50 of 185
1.44
ENG_UD25519_2
Ordinateur de bord : paramètres de voyage (E33 - X33 - Renault)
ENG_NU_865-6_E33_Renault_1
TRIp COMpUTER: trip settings (4/4)
Examples of
selections Interpreting the display selected
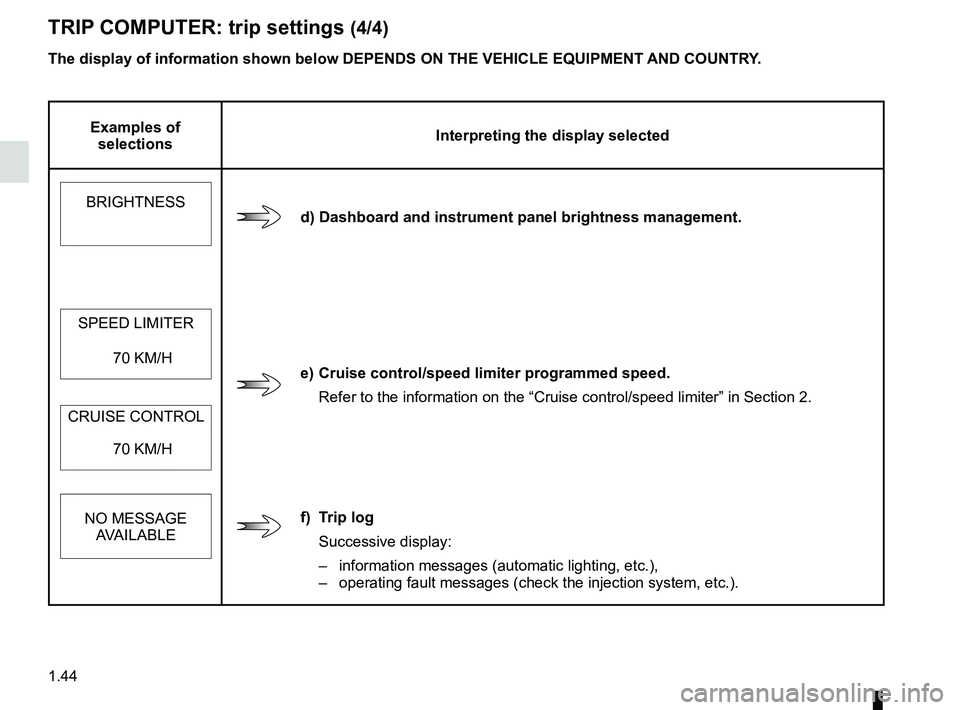
BRIGHTNESS
d) Dashboard and instrument panel brightness management.
SPEED LIMITER
e) Cruise control/speed limiter programmed speed.
Refer to the information on the “Cruise control/speed limiter” in Section 2.
70 KM/H
CRUISE CONTROL 70 KM/H
NO MESSAGE AVAILABLE
f) Trip log
Successive display:
– information messages (automatic lighting, etc.),
– operating fault messages (check the injection system, etc.).
The display of information shown below DEpENDS ON THE VEHICLE EQUIpMENT AND COUNTRY.
Page 58 of 185
lighting:exterior ............................................ (up to the end of the DU)
instrument panel .................................................... (current page)
lights: side lights ......................................................... (current page)
lights: dipped beam headlights ................................... (current page)
hazard warning lights signal .................................. (current page)
signals and lights .................................. (up to the end of the DU)
lighting: instrument panel .............................................. (current page)
daytime running lights ............................................ (current page)
1.52
ENG_UD21753_2
Éclairages et signalisations extérieurs (E33 - X33 - Renault)
ENG_NU_865-6_E33_Renault_1
Jaune NoirNoir texte
áMain beam headlightsWith the dipped headlights lit,
pull stalk A towards you. An indicator
light on the instrument panel will come
on.
To return to the dipped headlights posi-
tion, pull stalk A towards you again.
eSwitching off the lightsReturn the stalk to its original
position.
Lights-on warning buzzer
If the lights are on after the engine is
switched off, a warning beep sounds
when the driver ’s door is opened to
warn you that the lights are still on.
Exterior lighting and signals
EXTERIOR LIGHTING AND SIGNALS (1/2)
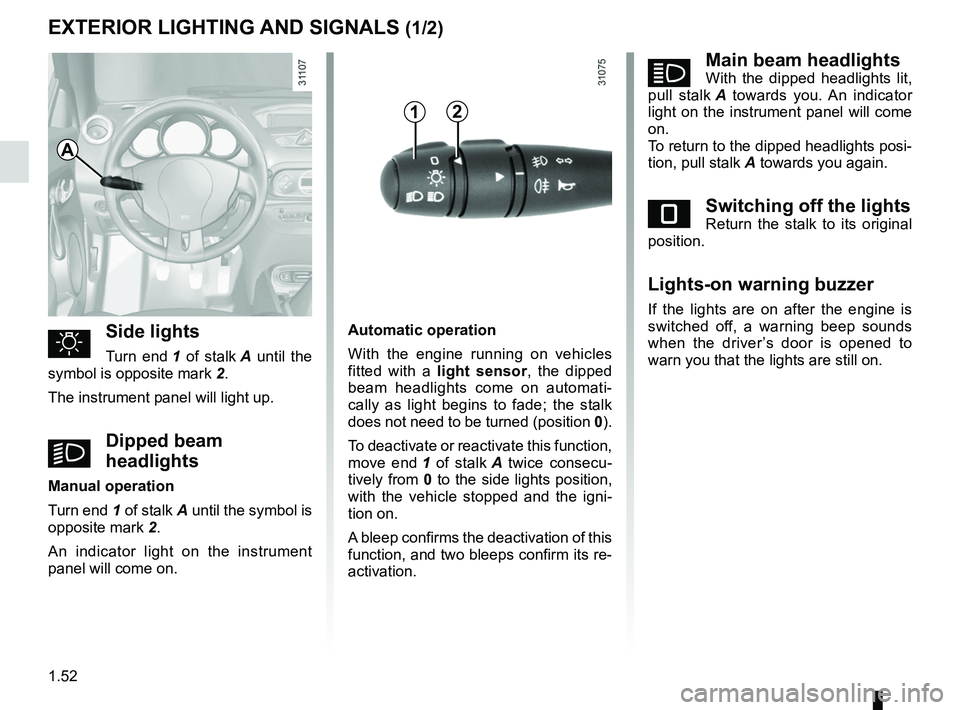
uSide lights
Turn end 1 of stalk A until the
symbol is opposite mark 2.
The instrument panel will light up.
kDipped beam
headlights
Manual operation
Turn end 1 of stalk A until the symbol is
opposite mark 2.
An indicator light on the instrument
panel will come on.
A
Automatic operation
With the engine running on vehicles
fitted with a light sensor , the dipped
beam headlights come on automati -
cally as light begins to fade; the stalk
does not need to be turned (position 0).
To deactivate or reactivate this function,
move end 1 of stalk A twice consecu -
tively from 0 to the side lights position,
with the vehicle stopped and the igni -
tion on.
A bleep confirms the deactivation of this
function, and two bleeps confirm its re-
activation.
21
Page 59 of 185

lights:main beam headlights ...................................... (current page)
warning buzzer ...................................................... (current page)
see-me-home lighting ............................................ (current page)
lights mobile directional ............................................. (current page)
JauneNoirNoir texte
1.53
ENG_UD21753_2
Éclairages et signalisations extérieurs (E33 - X33 - Renault)
ENG_NU_865-6_E33_Renault_1
Turning off the fog lights
Turn ring 3 again until mark 4 is oppo -
site the symbol for the fog light that you
wish to switch off. The corresponding
indicator light on the instrument panel
goes out.
The front and rear fog lights switch off
when the exterior lights are switched
off.
Special case
The front and rear fog lights do not op-
erate in automatic mode.
They only come on when the end of
ring 4 is in position
u or k.
EXTERIOR LIGHTING AND SIGNALS (2/2)
gFront fog lights
Turn centre ring 3 on stalk A
until the symbol faces mark 4, then re-
lease it.
Operation of the fog lights depends on
the exterior lighting position selected,
and an indicator light will light up on the
instrument panel.
Before driving at night:
check that the electrical
equipment is in good con -
dition. As a general precau -
tion, check that the lights are not
obscured (by dirt, mud, snow or ob-
jects which could cover them).
1A3
4
fRear fog lights
Turn centre ring 3 on stalk A
until the symbol faces mark 4, then re-
lease it.
Operation of the fog lights depends on
the exterior lighting selected, and an in-
dicator light will light up on the instru -
ment panel.
To avoid inconveniencing other road
users, remember to switch off the rear
fog light when it is no longer needed.
When driving in fog or snow, or
when transporting objects which are
higher than the roof, the headlights
do not come on automatically.
Switching on the fog lights remains
the responsibility of the driver: the
indicator lights on the instrument
panel inform you whether the fog
lights are lit (indicator light on) or not
(indicator light not on).
Page 74 of 185
ABS ...................................................... (up to the end of the DU)
anti-lock braking system: ABS ..............(up to the end of the DU)
ESP: Electronic Stability Program ........ (up to the end of the DU)
ASR (traction control) ........................... (up to the end of the DU)
traction control: ASR .............................(up to the end of the DU)
Electronic Stability Program: ESP ........ (up to the end of the DU)
emergency brake assist ........................(up to the end of the DU)
emergency braking ............................... (up to the end of the DU)
traction control: ASR .............................................. (current page)
driving ................................................... (up to the end of the DU)
2.10
ENG_UD11192_1
Dispositifs de correction de conduite (E33 - X33 - Renault)
ENG_NU_865-6_E33_Renault_2
Jaune NoirNoir texte
Driver correction devices/aids
DRIVER coRREctIoN DEVIcES/AIDS (1/3)
In an emergency, apply firm and
continuous pressure to the brake
pedal. There is no need to pump
it repeatedly. The ABS will modu -
late the force applied in the braking
system.
These functions are an ad-
ditional aid in the event of
critical driving conditions,
enabling the vehicle behav -
iour to be adapted to suit the driving
conditions.
However, the functions do not take
the place of the driver. they do
not increase the vehicle’s limits
and should not encourage you
to drive more quickly. Therefore,
they can under no circumstances
replace the vigilance or responsibil -
ity of the driver when manoeuvring
the vehicle (the driver must always
be ready for sudden incidents which
may occur when driving).
Yo u r b r a k i n g s y s t e m s
are partially operational.
However, it is dangerous
to brake suddenly and
it is essential to stop immediately,
as soon as traffic conditions allow.
Contact an approved dealer.
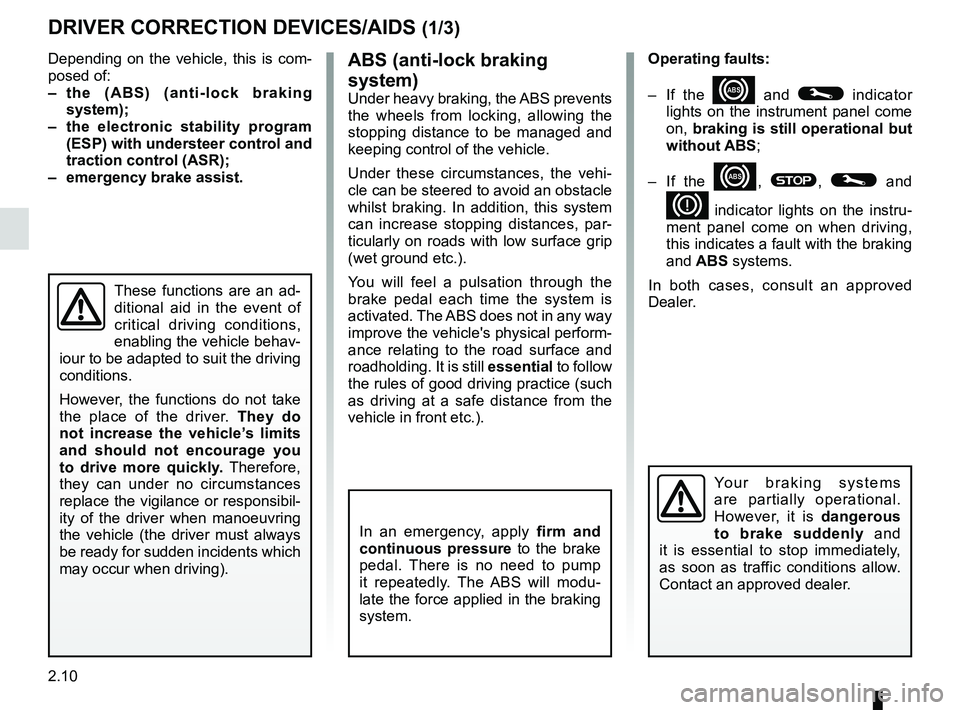
Depending on the vehicle, this is com-
posed of:
– the (A bS) (anti-lock braking
system);
– the electronic stability program
(ESP) with understeer control and
traction control (ASR);
– emergency brake assist. operating faults:
–
If the
x and © indicator
lights on the instrument panel come
on, braking is still operational but
without AbS;
– If the
x, ®, © and
D indicator lights on the instru -
ment panel come on when driving,
this indicates a fault with the braking
and AbS systems.
In both cases, consult an approved
Dealer.
AbS (anti-lock braking
system)
Under heavy braking, the ABS prevents
the wheels from locking, allowing the
stopping distance to be managed and
keeping control of the vehicle.
Under these circumstances, the vehi -
cle can be steered to avoid an obstacle
whilst braking. In addition, this system
can increase stopping distances, par -
ticularly on roads with low surface grip
(wet ground etc.).
You will feel a pulsation through the
brake pedal each time the system is
activated. The ABS does not in any way
improve the vehicle's physical perform-
ance relating to the road surface and
roadholding. It is still essential to follow
the rules of good driving practice (such
as driving at a safe distance from the
vehicle in front etc.).
Page 76 of 185

2.12
ENG_UD11192_1
Dispositifs de correction de conduite (E33 - X33 - Renault)
ENG_NU_865-6_E33_Renault_2
DRIVER coRREctIoN DEVIcES/AIDS (3/3)
Disabling the function
The function is deactivated by press -
ing switch 2 and indicator light 1
ù
lights up on the instrument panel. This
action also deactivates the traction con-
trol.
The E.S.P. offers additional safety, it
is recommended that you do not drive
with the function disabled. Correct this
by pressing switch 2 again.
The E.S.P. is automatically reactivated
when the ignition is switched on.
operating faults
When the system detects an operating
fault, the
© and ù warning
lights on the instrument panel come on.
Consult an approved dealer.
Emergency brake assist
This is an additional system to ABS
which helps reduce vehicle stopping
distances.
operating principle
The system detects an emergency
braking situation. In this case, the brak-
ing assistance immediately develops
maximum power and may trigger ABS
regulation.
ABS braking is maintained as long as
the brake pedal is not released.
hazard warning lights switching on
Depending on the vehicle, these may
light up in the event of sudden decel -
eration.
2
1
Page 77 of 185

speed limiter ......................................... (up to the end of the DU)
cruise control-speed limiter................... (up to the end of the DU)
cruise control ........................................ (up to the end of the DU)
driving ................................................... (up to the end of the DU)
2.13
ENG_UD11193_1
Régulateur-limiteur de vitesse : fonction limiteur (E33 - X33 - Rena\
ult)
ENG_NU_865-6_E33_Renault_2
Speed limiter
cRUISE coNtRoL - SPEED LIMItER: limiter function (1/3)
The speed limiter function helps you
stay within the driving speed limit that
you choose, known as the limit speed.controls
1 Main “On/Off” switch.
2 Limit speed activation, storage and
increase switch (+).
3 Limit speed activation, storage and
decrease switch (-).
4 Switch the function to standby, with
limit speed stored (O).
5 Stored limit speed activation, stor -
age and recall (R).
1
Switching on
Press switch 1 on the side showing .
Indicator light 6 comes on, lit orange,
and the message “ SPEED LIMITER”
appears on the instrument panel, ac -
companied by dashes to indicate that
the speed limiter function is activated
and waiting to memorise a limit speed.
To memorise the current speed, press
switch 2 (+): the minimum speed which
can be memorised is 20 mph (30 km/h).
2453
6
Page 78 of 185
2.14
ENG_UD11193_1
Régulateur-limiteur de vitesse : fonction limiteur (E33 - X33 - Rena\
ult)
ENG_NU_865-6_E33_Renault_2
Jaune NoirNoir texte
Exceeding the limit speed
It is possible to exceed the limit speed
at any moment. To do this: press the
accelerator pedal firmly and fully
(beyond the kickdown point).
Whilst the speed is being exceeded,
the limit speed displayed on the instru-
ment panel flashes.
Then, as far as is possible, release
the accelerator pedal: the speed lim -
iter function will return as soon as you
reach a speed lower than the memo -
rised speed.
Limited speed cannot be maintained
When driving down a steep gradient,
the system is unable to maintain the
limit speed: the memorised speed will
flash on the instrument panel informa -
tion display to inform you of this situ -
ation.
cRUISE coNtRoL - SPEED LIMItER: limiter function (2/3)
Driving
When a limited speed has been stored
and this speed is not reached, driving is
similar to driving a vehicle without the
speed limiter function.
Once you have reached the stored
speed, no effort on the accelera -
tor pedal will allow you to exceed
the programmed speed except in an
emergency (refer to information on
“Exceeding the limit speed”).
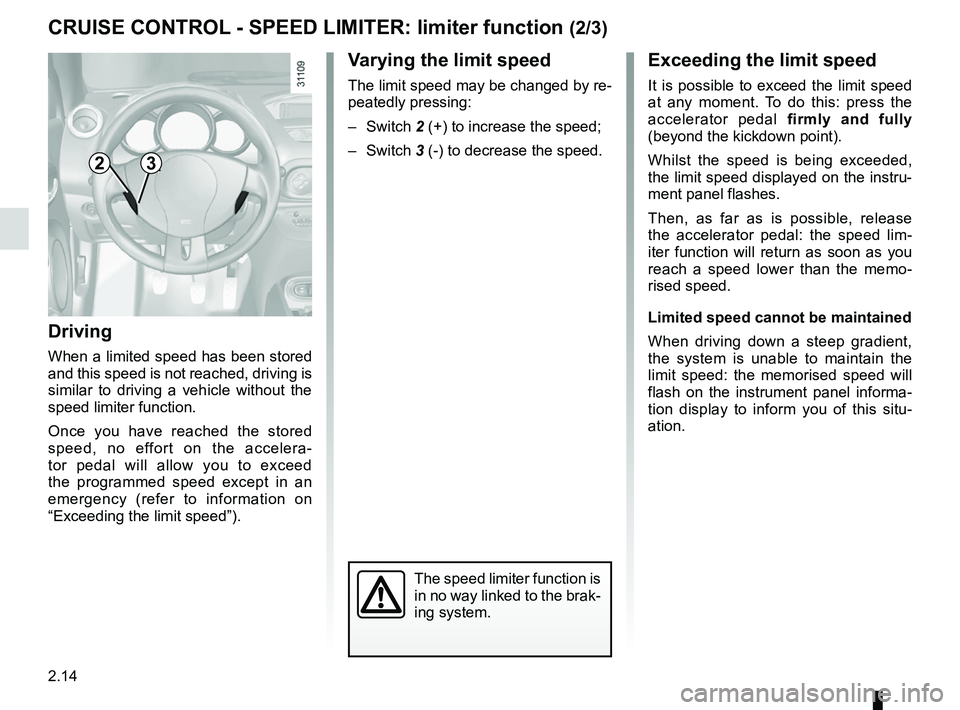
Varying the limit speed
The limit speed may be changed by re-
peatedly pressing:
– Switch 2 (+) to increase the speed;
– Switch 3 (-) to decrease the speed.
The speed limiter function is
in no way linked to the brak-
ing system.
23