2012 RENAULT MEGANE RS page 8
[x] Cancel search: page 8Page 174 of 239

emergency spare wheel ....................... (up to the end of the DU)
puncture ................................................ (up to the end of the DU)
5.2
ENG_UD18913_3
Roue de secours (X95 - B95 - D95 - Renault)
ENG_NU_837-6_BDK95_Renault_5
Puncture
Emergency spare wheel
Puncture, emergency sP are wheel
special note:
The Tyre Pressure Monitor function
does not check the emergency spare
wheel (the wheel replaced by the emer-
gency spare wheel disappears from the
instrument panel display).
Refer to the information on the “Tyre
pressure monitor” in Section 2.In the event of a puncture,
depending on the vehicle,
you will have:
An emergency spare wheel or tyre in -
flation kit (refer to the information on the
following pages).
emergency spare wheel
This is located in the luggage compart-
ment. To access it:
– open the tailgate;
– depending on the vehicle, unscrew
the anchorage points;
– fold back the luggage compartment
carpet using tab 1;
– unscrew the central mounting;
– remove the emergency spare wheel.
If the emergency spare wheel has been stored for several years, have it checked by your Dealer to ensure that it is
safe to use.
Vehicles fitted with an emergency spare wheel smaller than the four other\
wheels:
– Never fit more than one emergency spare wheel to the same vehicle.
– Replace the emergency spare wheel as soon as possible with a wheel with the same dimensions as the original.
– When this is fitted to the vehicle, which must only be a temporary measure, the driving speed must not exceed the speed
indicated on the label on the wheel.
– Fitting an emergency spare wheel may alter the way the vehicle usually runs. Avoid sudden acceleration or deceleration and
reduce your speed when cornering.
– If you need to use snow chains, fit the emergency spare wheel to the rear axle and check the tyre pressure.
1
Page 178 of 239
tool kit ................................................... (up to the end of the DU)
hubcap tool ........................................... (up to the end of the DU)
jack ....................................................... (up to the end of the DU)
puncture ................................................ (up to the end of the DU)
wheelbrace ........................................... (up to the end of the DU)
trims ...................................................... (up to the end of the DU)
emergency spare wheel ....................... (up to the end of the DU)
wheelbrace ............................................................ (current page)
5.6
ENG_UD18915_3
Bloc-outils (X95 - B95 - D95 - Renault)
ENG_NU_837-6_BDK95_Renault_5
Tool kit (jack, wheelbrace, etc.)
Hubcap
t OOl KIt/wheel trIm – wheel
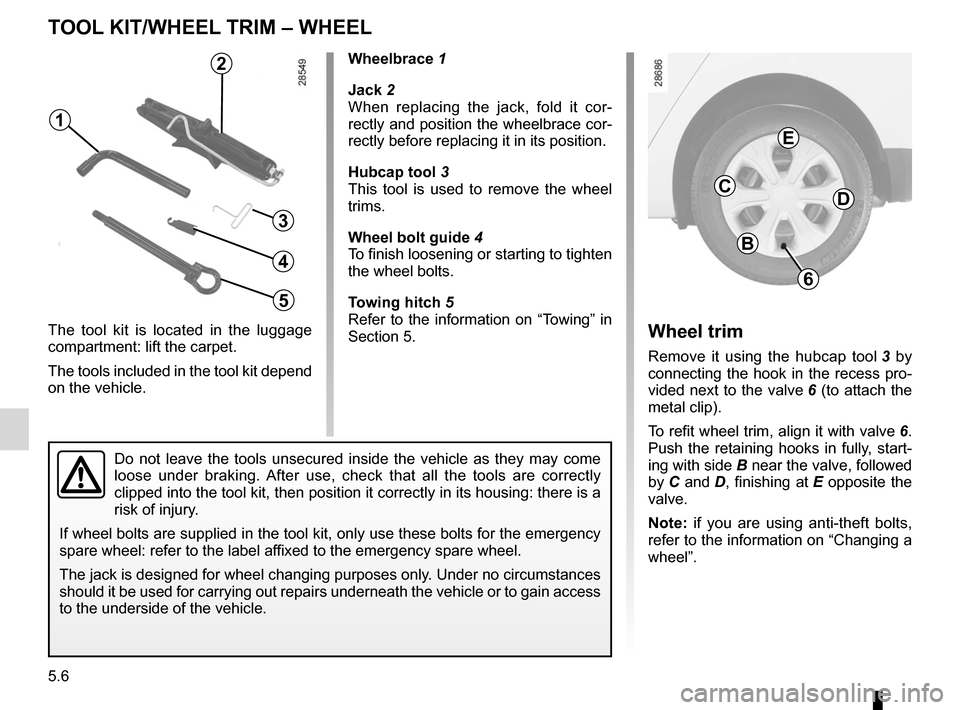
The tool kit is located in the luggage
compartment: lift the carpet.
The tools included in the tool kit depend
on the vehicle.
wheelbrace 1
Jack 2
When replacing the jack, fold it cor -
rectly and position the wheelbrace cor-
rectly before replacing it in its position.
hubcap tool 3
This tool is used to remove the wheel
trims.
wheel bolt guide 4
To finish loosening or starting to tighten
the wheel bolts.
t owing hitch 5
Refer to the information on “Towing” in
Section 5.
Do not leave the tools unsecured inside the vehicle as they may come
loose under braking. After use, check that all the tools are correctly
clipped into the tool kit, then position it correctly in its housing: there is a
risk of injury.
If wheel bolts are supplied in the tool kit, only use these bolts for the emergency
spare wheel: refer to the label affixed to the emergency spare wheel.
The jack is designed for wheel changing purposes only. Under no circumstances
should it be used for carrying out repairs underneath the vehicle or to gain access
to the underside of the vehicle.
2
1
3
5
wheel trim
Remove it using the hubcap tool 3 by
connecting the hook in the recess pro-
vided next to the valve 6 (to attach the
metal clip).
To refit wheel trim, align it with valve 6.
Push the retaining hooks in fully, start-
ing with side B near the valve, followed
by C and D, finishing at E opposite the
valve.
n ote: if you are using anti-theft bolts,
refer to the information on “Changing a
wheel”.
6
B
cD
e
4
Page 182 of 239

tyre pressure.......................................................... (current page)
5.10
ENG_UD10474_2
Pneumatiques (X95 - B95 - D95 - Renault)
ENG_NU_837-6_BDK95_Renault_5
Jaune NoirNoir texte
tyre pressuresAdhere to the tyre pressures (including
the emergency spare wheel). The tyre
pressures should be checked at least
once a month and additionally before
any long journey (refer to the label af -
fixed to the edge of the driver’s door). Pressures should be checked when the
tyres are cold; ignore higher pressures
which may be reached in hot weather
or following a fast journey.
If tyre pressures cannot be checked
when the tyres are
cold, the normal
pressures must be increased by 0.2 to
0.3 bar (or 3 PsI).
never deflate a hot tyre.
special note
Depending on the vehicle, there may
be an adapter which needs to be posi-
tioned on the valve before air is added.Fitting new tyres
emergency spare wheel
Refer to the information on the
“Emergency spare wheel” and in -
structions on “Changing a wheel” in
Section 5.
tyres (2/3)
Incorrect tyre pressures
lead to abnormal tyre wear
and unusually hot running.
These are factors which
may seriously affect safety and lead
to:
– poor road holding,
– risk of bursting or tread separa -
tion.
The pressure depends on the load
and the speed of use. Adjust the
pressure according to the condi -
tions of use (refer to the label affixed
to the edge of the driver’s door).
Please be aware that a
poorly tightened or miss -
ing valve cap can make the
tyres less airtight and lead
to pressure loss.
Always use valve caps identical to
those fitted originally and tighten
them fully.
For safety reasons, this op-
eration must be carried out
by a specialist.
Fitting different tyres may
change your vehicle as follows:
– It may mean that your vehicle no
longer conforms to current regu-
lations;
– It may change the way it handles
when cornering;
– It may cause the steering to be
heavy;
– It may affect the use of snow
chains.
Page 187 of 239

bulbschanging ......................................... (up to the end of the DU)
changing a bulb .................................... (up to the end of the DU)
lights: direction indicators ........................................... (current page)
lights: side lights ......................................................... (current page)
lights: brake lights ...................................................... (current page)
lights: reversing lights ................................................. (current page)
lights: fog lights .......................................................... (current page)
indicators: direction indicators ........................................... (current page)
bulbs changing ......................................... (up to the end of the DU)
5.15
ENG_UD18877_3
Feux arrière et latéraux : remplacement des lampes (X95 - B95 - D\
95 - Renault)
ENG_NU_837-6_BDK95_Renault_5
Rear lights (changing bulbs)
rear lIghts anD InDIcatOr lIghts: changing bulbs (1/6)
5
– loosen nut 1 , press down on it to
release the front of the light (move -
ment A) then remove the nut;
– from the outside, pull the light to -
wards you (movement B);
– remove the bulb holder 3 by releas-
ing the clips 4. Direction indicator lights
5
Bulb type: Py21w .
side light and brake light 6
Bulb type: P21/5w .
refitting
To refit, proceed in the reverse order,
taking care not to damage the wiring.Five-door versions
Direction indicator lights/brake and
side lights
– Unclip the cover to access nuts 1
and 2;
– unscrew nut 2 without removing it
completely;
The bulbs are under pres -
sure and can break when
replaced.
Risk of injury.
4
6
a
B
1
2
3
Page 192 of 239
side indicator lightschanging bulbs ................................................. (current page)
lights: number plate lights .......................................... (current page)
5.20
ENG_UD18877_3
Feux arrière et latéraux : remplacement des lampes (X95 - B95 - D\
95 - Renault)
ENG_NU_837-6_BDK95_Renault_5
Rear lights (changing bulbs)
rear lIghts anD InDIcatOr lIghts: changing bulbs (6/6)
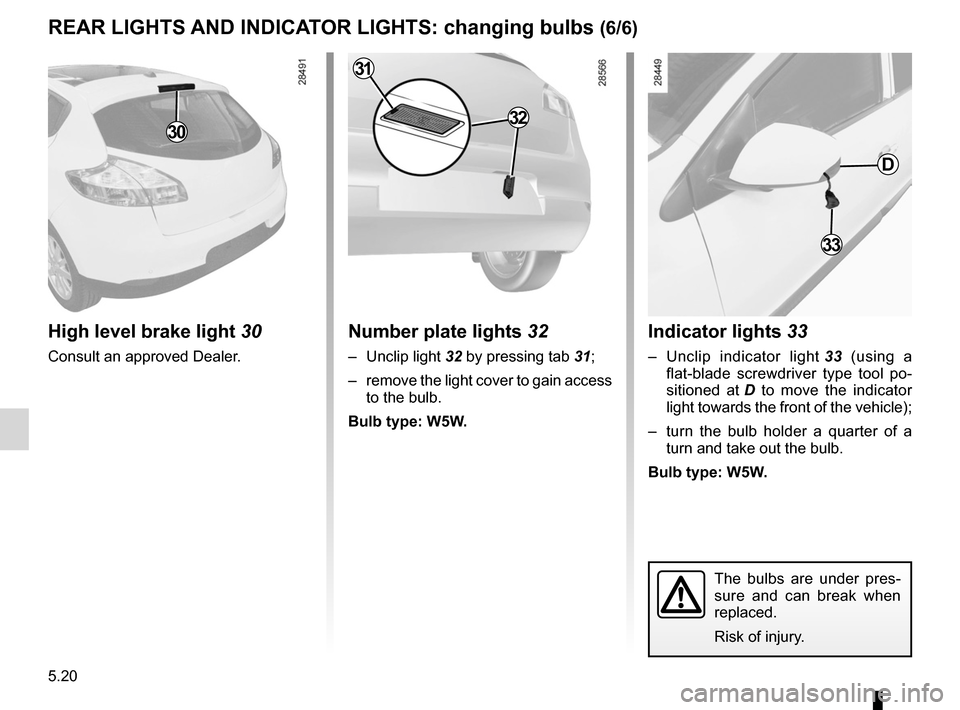
Indicator lights 33
– Unclip indicator light 33 (using a
flat-blade screwdriver type tool po -
sitioned at D to move the indicator
light towards the front of the vehicle);
– turn the bulb holder a quarter of a
turn and take out the bulb.
Bulb type: w5w .
number plate lights 32
– Unclip light 32 by pressing tab 31;
– remove the light cover to gain access
to the bulb.
Bulb type: w5w .
high level brake light 30
Consult an approved Dealer.
30
22
2333
D
32
31
The bulbs are under pres -
sure and can break when
replaced.
Risk of injury.
Page 221 of 239
service sheets....................................... (up to the end of the DU)
maintenance: mechanical ...................................... (up to the end of the DU)
maintenance: mileage before service .................... (up to the end of the DU)
6.11
ENG_UD10910_1
Justificatif d’entretien (X06 - X35 - X44 - X45 - X65 - X73 - X81 - \
X84 - X85 - X90 - X70 - X76 - X83 - X61 - X24 - X77 ph2 - L38 - L43 - L4\
7 - X61 BUp - X33 - Renault)
ENG_NU_837-6_BDK95_Renault_6
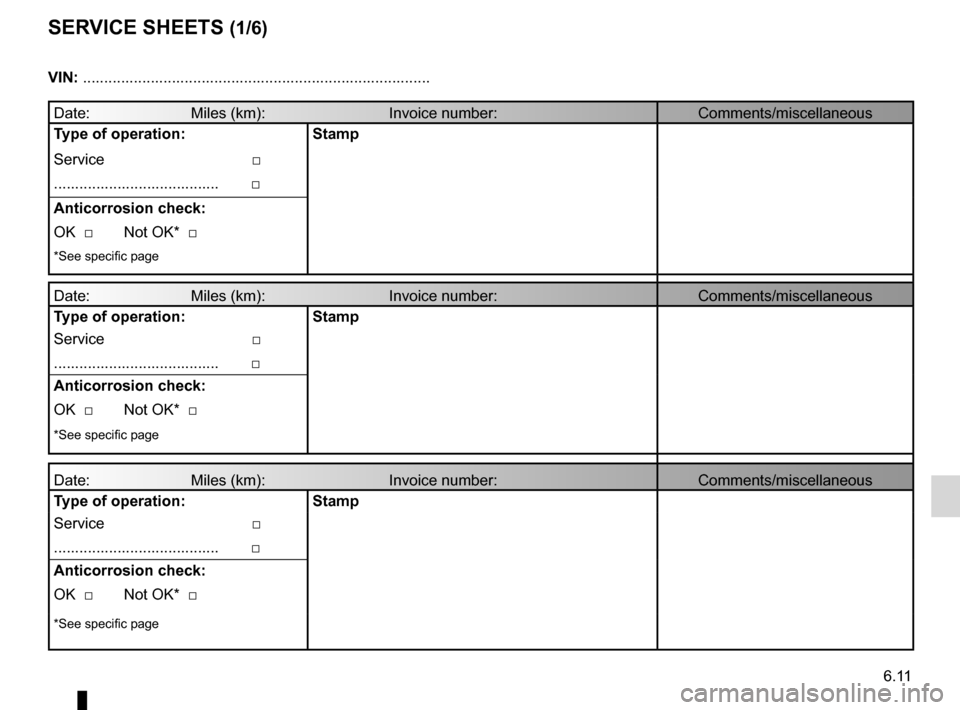
Service sheets
seRVice sheets (1/6)
Date: Miles (km): Invoice number: Comments/miscellaneous
t ype of operation: stamp
Service □
....................................... □
anticorrosion check:
OK □ Not OK* □
*See specific page
Date: Miles (km): Invoice number: Comments/miscellaneous
t ype of operation: stamp
Service □
....................................... □
anticorrosion check:
OK □ Not OK* □
*See specific page
Date: Miles (km): Invoice number: Comments/miscellaneous
t ype of operation: stamp
Service □
....................................... □
anticorrosion check:
OK □ Not OK* □
*See specific page
Vin: .......................................................................\
...........
Page 222 of 239
6.12
ENG_UD10910_1
Justificatif d’entretien (X06 - X35 - X44 - X45 - X65 - X73 - X81 - \
X84 - X85 - X90 - X70 - X76 - X83 - X61 - X24 - X77 ph2 - L38 - L43 - L4\
7 - X61 BUp - X33 - Renault)
ENG_NU_837-6_BDK95_Renault_6
Jaune NoirNoir texte
seRVice sheets (2/6)
Vin: .......................................................................\
...........
Date: Miles (km): Invoice number: Comments/miscellaneous
t ype of operation: stamp
Service □
....................................... □
anticorrosion check:
OK □ Not OK* □
*See specific page
Date: Miles (km): Invoice number: Comments/miscellaneous
t ype of operation: stamp
Service □
....................................... □
anticorrosion check:
OK □ Not OK* □
*See specific page
Date: Miles (km): Invoice number: Comments/miscellaneous
t ype of operation: stamp
Service □
....................................... □
anticorrosion check:
OK □ Not OK* □
*See specific page
Page 223 of 239
JauneNoirNoir texte
6.13
ENG_UD10910_1
Justificatif d’entretien (X06 - X35 - X44 - X45 - X65 - X73 - X81 - \
X84 - X85 - X90 - X70 - X76 - X83 - X61 - X24 - X77 ph2 - L38 - L43 - L4\
7 - X61 BUp - X33 - Renault)
ENG_NU_837-6_BDK95_Renault_6
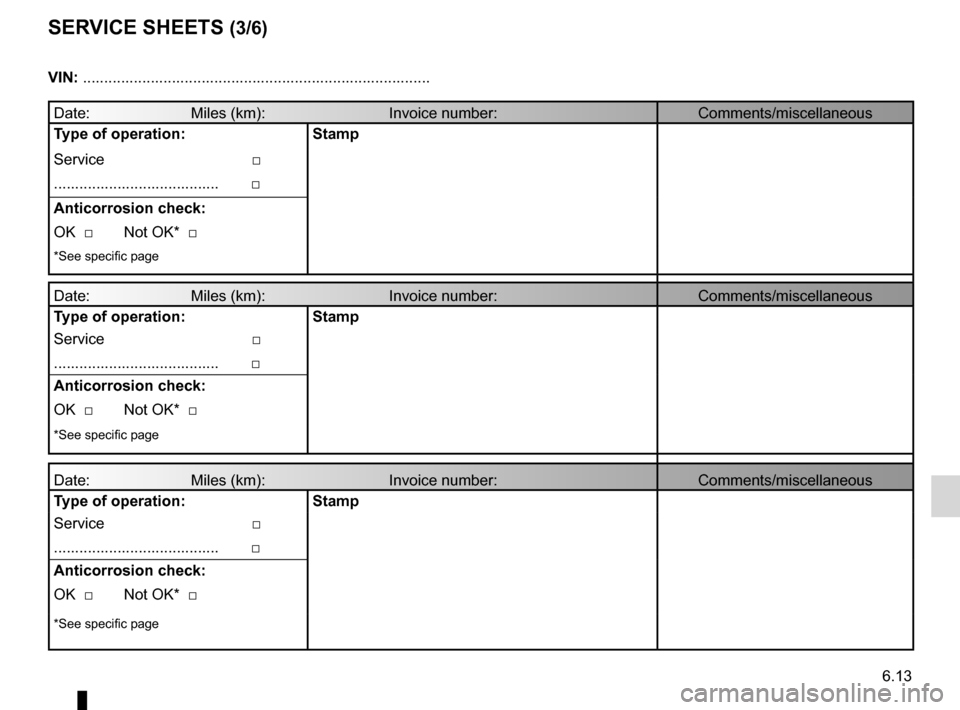
seRVice sheets (3/6)
Vin: .......................................................................\
...........
Date: Miles (km): Invoice number: Comments/miscellaneous
t ype of operation: stamp
Service □
....................................... □
anticorrosion check:
OK □ Not OK* □
*See specific page
Date: Miles (km): Invoice number: Comments/miscellaneous
t ype of operation: stamp
Service □
....................................... □
anticorrosion check:
OK □ Not OK* □
*See specific page
Date: Miles (km): Invoice number: Comments/miscellaneous
t ype of operation: stamp
Service □
....................................... □
anticorrosion check:
OK □ Not OK* □
*See specific page