Page 177 of 406

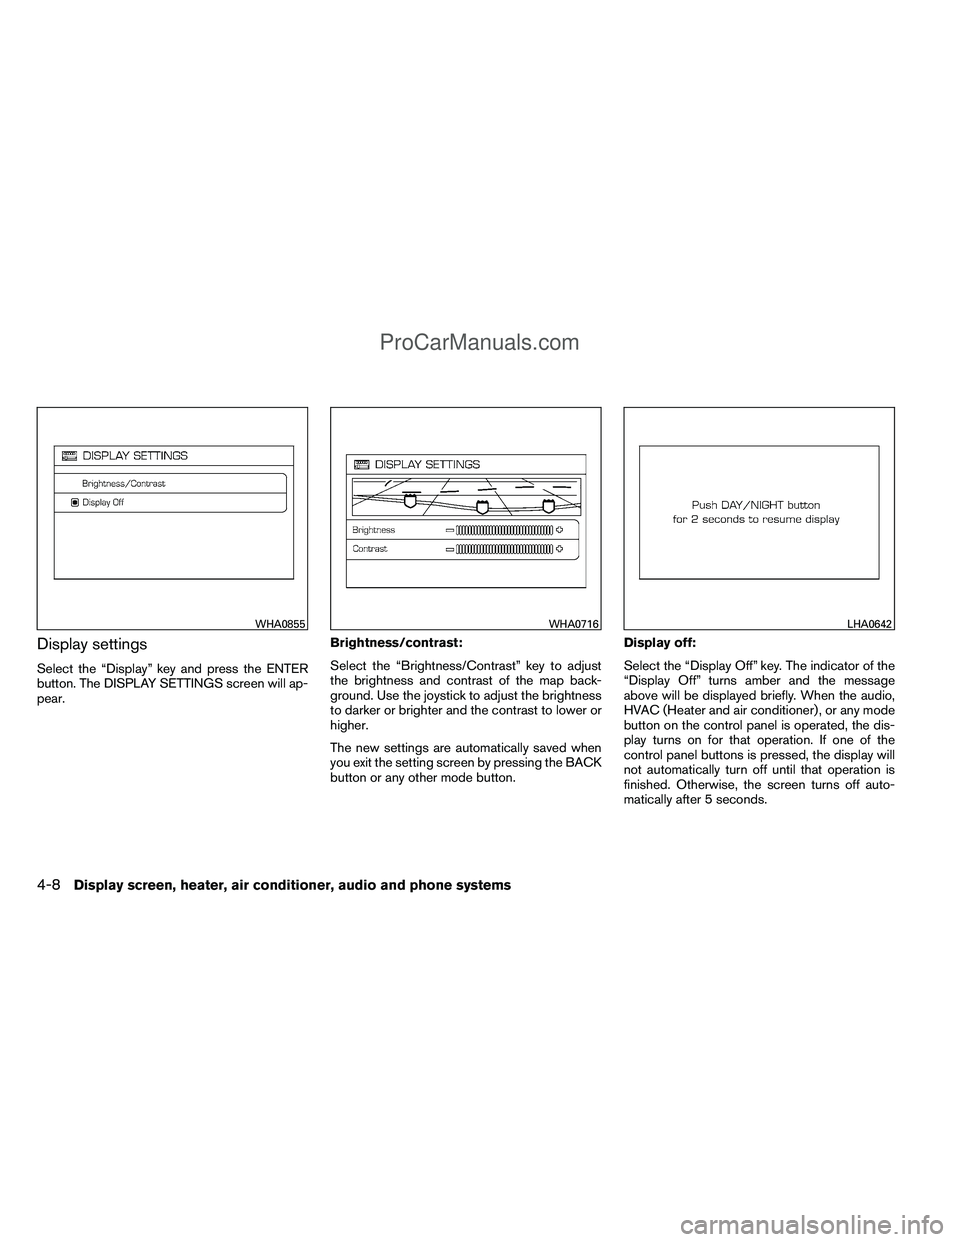
Display settings
Select the “Display” key and press the ENTER
button. The DISPLAY SETTINGS screen will ap-
pear.Brightness/contrast:
Select the “Brightness/Contrast” key to adjust
the brightness and contrast of the map back-
ground. Use the joystick to adjust the brightness
to darker or brighter and the contrast to lower or
higher.
The new settings are automatically saved when
you exit the setting screen by pressing the BACK
button or any other mode button.Display off:
Select the “Display Off” key. The indicator of the
“Display Off” turns amber and the message
above will be displayed briefly. When the audio,
HVAC (Heater and air conditioner) , or any mode
button on the control panel is operated, the dis-
play turns on for that operation. If one of the
control panel buttons is pressed, the display will
not automatically turn off until that operation is
finished. Otherwise, the screen turns off auto-
matically after 5 seconds.
WHA0855WHA0716LHA0642
4-8Display screen, heater, air conditioner, audio and phone systems
ProCarManuals.com
Page 178 of 406

To turn the screen on,● Press the SETTING button and select the
“Display” key and then select the “Display
Off” key. Then set the screen to on by press-
ing the ENTER button, or
● Hold the
button for approximately 2
seconds and the message “resuming dis-
play” will appear and the “Display Off” key
will be automatically turned on (no amber
indicator) .
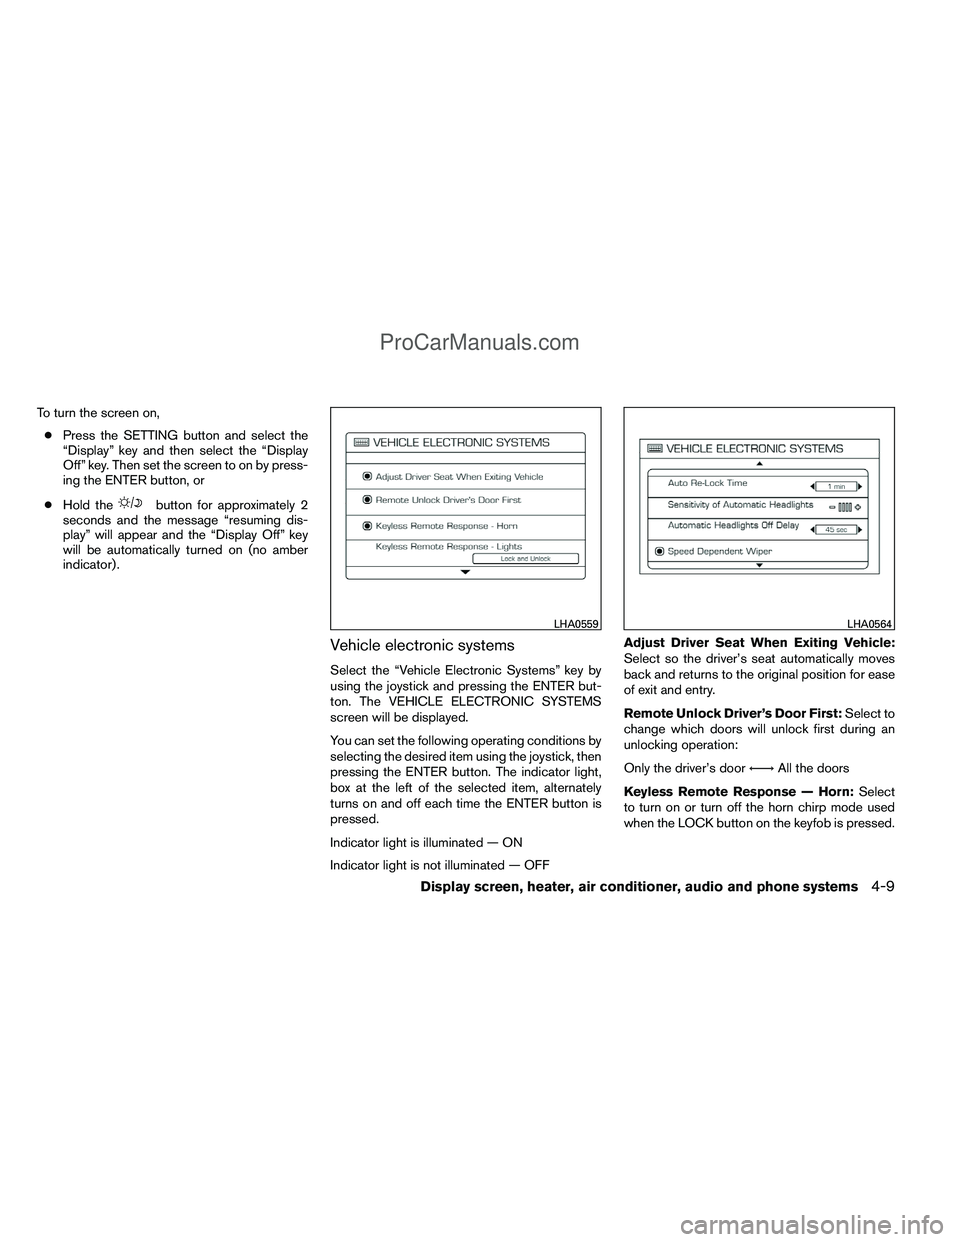
Vehicle electronic systems
Select the “Vehicle Electronic Systems” key by
using the joystick and pressing the ENTER but-
ton. The VEHICLE ELECTRONIC SYSTEMS
screen will be displayed.
You can set the following operating conditions by
selecting the desired item using the joystick, then
pressing the ENTER button. The indicator light,
box at the left of the selected item, alternately
turns on and off each time the ENTER button is
pressed.
Indicator light is illuminated — ON
Indicator light is not illuminated — OFF Adjust Driver Seat When Exiting Vehicle:
Select so the driver’s seat automatically moves
back and returns to the original position for ease
of exit and entry.
Remote Unlock Driver’s Door First:
Select to
change which doors will unlock first during an
unlocking operation:
Only the driver’s door ←→All the doors
Keyless Remote Response — Horn: Select
to turn on or turn off the horn chirp mode used
when the LOCK button on the keyfob is pressed.
LHA0559LHA0564
Display screen, heater, air conditioner, audio and phone systems4-9
ProCarManuals.com
Page 179 of 406

NOTE:
If you change the horn beep or the lamp
flash feature with the keyfob, the display
screen will not show the current mode. Use
the keyfob to return to the previous mode
and re-enable the display screen control.
Keyless Remote Response — Lights:Select
to turn on or turn off the hazard indicator flash
mode used when the LOCK or UNLOCK button
on the keyfob is pressed. NOTE:
If you change the horn beep or the lamp
flash feature with the keyfob, the mode will
not be changed with the display. Use the
keyfob to return to the previous mode and
re-enable the display control.
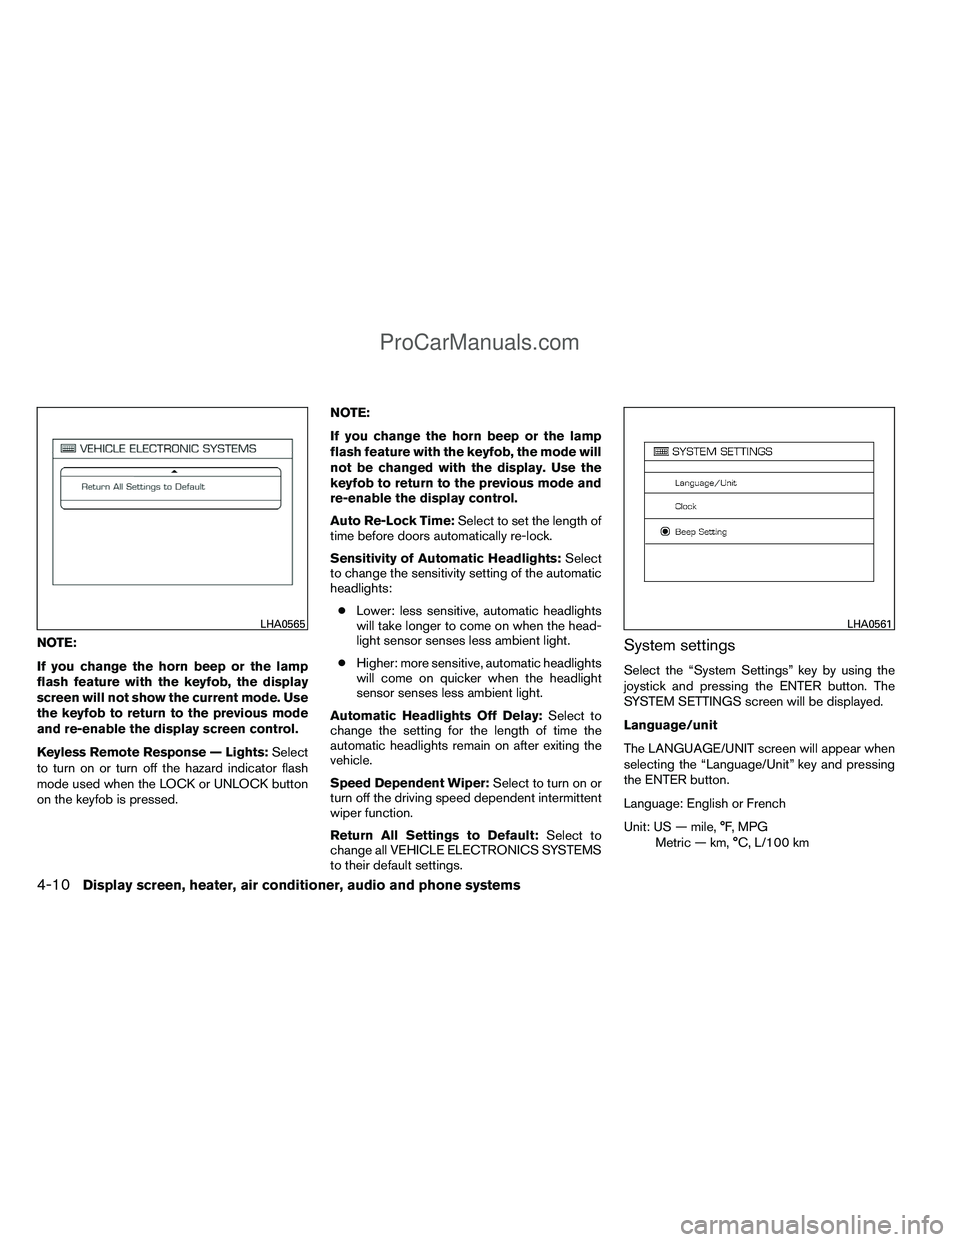
Auto Re-Lock Time:
Select to set the length of
time before doors automatically re-lock.
Sensitivity of Automatic Headlights: Select
to change the sensitivity setting of the automatic
headlights:
● Lower: less sensitive, automatic headlights
will take longer to come on when the head-
light sensor senses less ambient light.
● Higher: more sensitive, automatic headlights
will come on quicker when the headlight
sensor senses less ambient light.
Automatic Headlights Off Delay: Select to
change the setting for the length of time the
automatic headlights remain on after exiting the
vehicle.
Speed Dependent Wiper: Select to turn on or
turn off the driving speed dependent intermittent
wiper function.
Return All Settings to Default: Select to
change all VEHICLE ELECTRONICS SYSTEMS
to their default settings.System settings
Select the “System Settings” key by using the
joystick and pressing the ENTER button. The
SYSTEM SETTINGS screen will be displayed.
Language/unit
The LANGUAGE/UNIT screen will appear when
selecting the “Language/Unit” key and pressing
the ENTER button.
Language: English or French
Unit: US — mile, °F, MPG
Metric — km, °C, L/100 km
LHA0565LHA0561
4-10Display screen, heater, air conditioner, audio and phone systems
ProCarManuals.com
Page 180 of 406
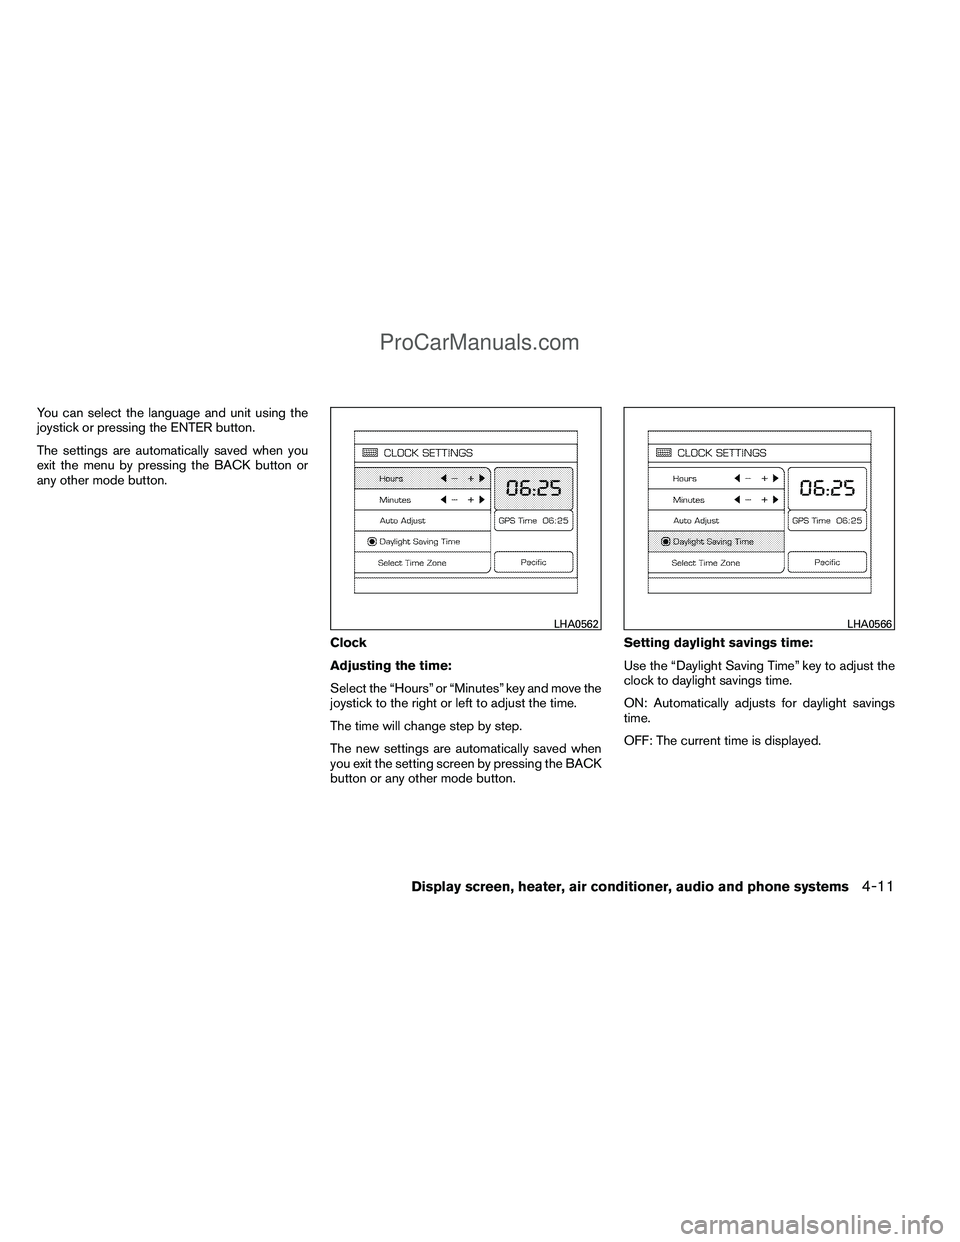
You can select the language and unit using the
joystick or pressing the ENTER button.
The settings are automatically saved when you
exit the menu by pressing the BACK button or
any other mode button.Clock
Adjusting the time:
Select the “Hours” or “Minutes” key and move the
joystick to the right or left to adjust the time.
The time will change step by step.
The new settings are automatically saved when
you exit the setting screen by pressing the BACK
button or any other mode button.Setting daylight savings time:
Use the “Daylight Saving Time” key to adjust the
clock to daylight savings time.
ON: Automatically adjusts for daylight savings
time.
OFF: The current time is displayed.
LHA0562LHA0566
Display screen, heater, air conditioner, audio and phone systems4-11
ProCarManuals.com
Page 181 of 406
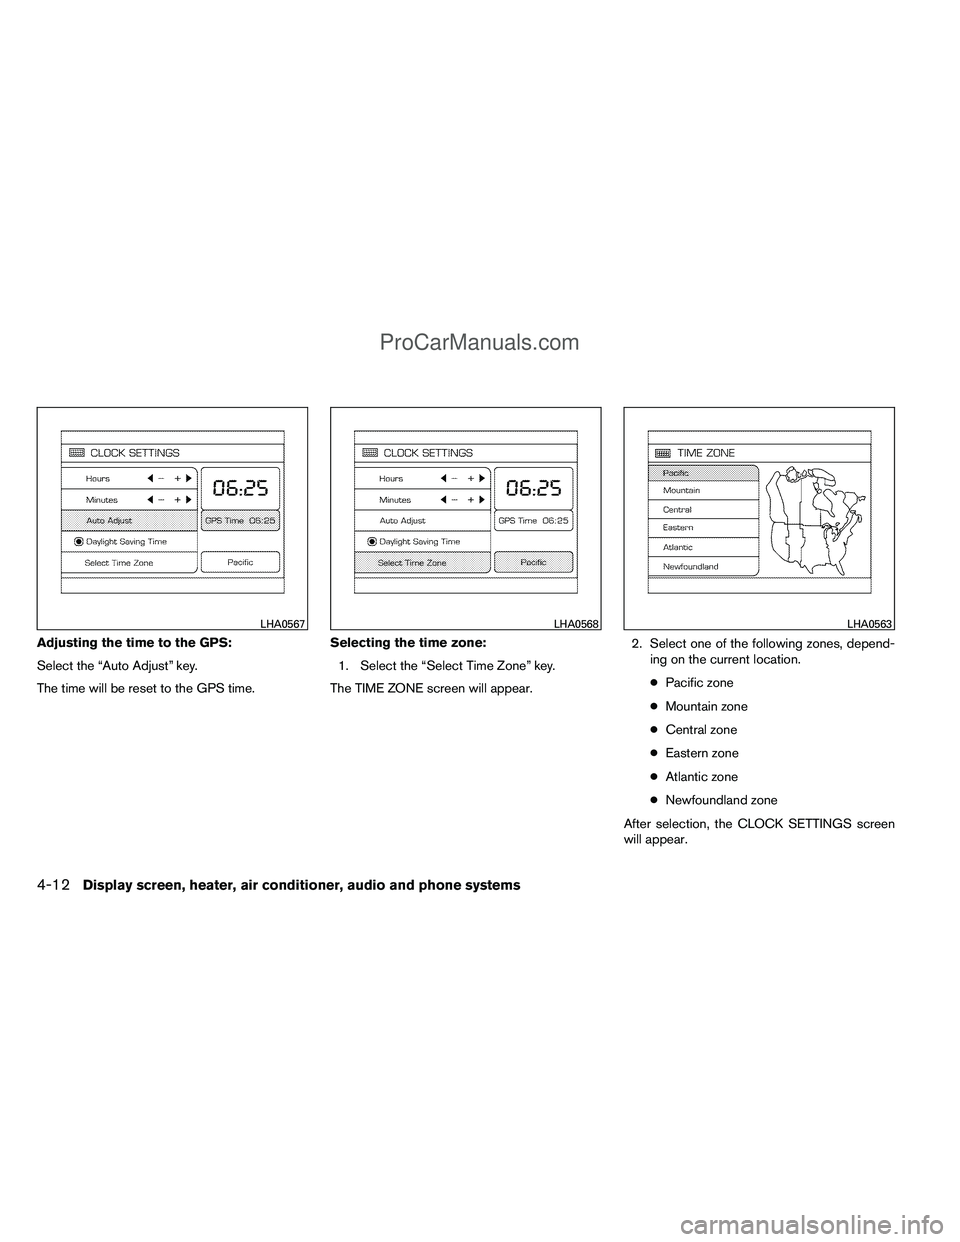
Adjusting the time to the GPS:
Select the “Auto Adjust” key.
The time will be reset to the GPS time.Selecting the time zone:
1. Select the “Select Time Zone” key.
The TIME ZONE screen will appear. 2. Select one of the following zones, depend-
ing on the current location.
● Pacific zone
● Mountain zone
● Central zone
● Eastern zone
● Atlantic zone
● Newfoundland zone
After selection, the CLOCK SETTINGS screen
will appear.
LHA0567LHA0568LHA0563
4-12Display screen, heater, air conditioner, audio and phone systems
ProCarManuals.com
Page 182 of 406

The GPS time (manual time) corresponding to
the selected zone will be displayed. Pacific zone
has been set as the initial (default) setting.
Beep setting
With this option ON, a beep will sound if any
audio button is pressed.
Navigation settings
Refer to the separate Navigation System Own-
er’s Manual for information regarding these set-
tings.
Guidance voice settings
Refer to the separate Navigation System Own-
er’s Manual for information regarding these set-
tings.
BUTTON
To change the display brightness, press
the
button. Pressing the button again will
change the display to “DAY” or “NIGHT” display.
Then, adjust the brightness by moving the joy-
stick right or left.
If no operation is done within 10 seconds, or if the
BACK button is pressed, the display will return to
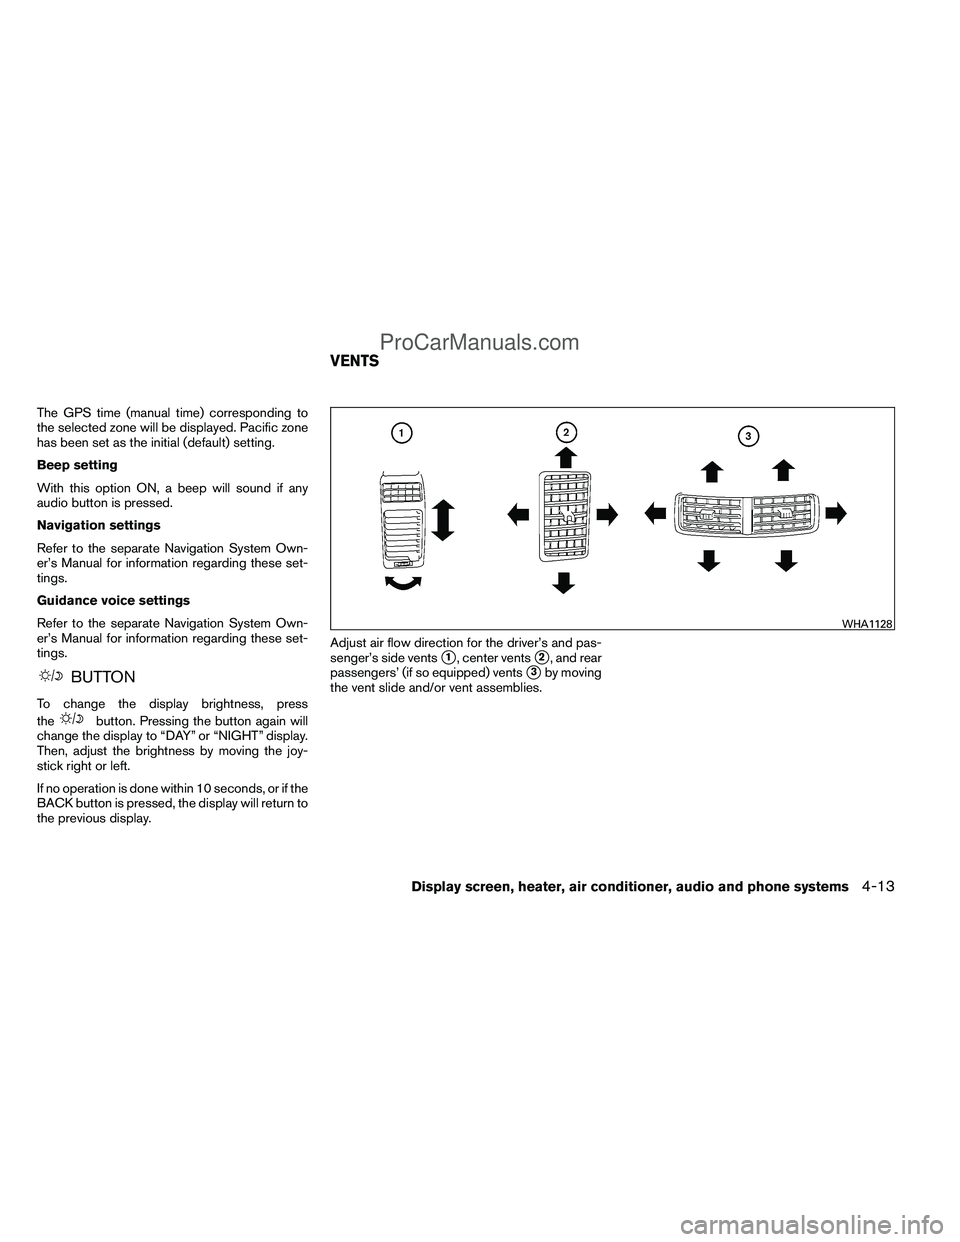
the previous display. Adjust air flow direction for the driver’s and pas-
senger’s side vents
1, center vents2, and rear
passengers’ (if so equipped) vents
3by moving
the vent slide and/or vent assemblies.
WHA1128
VENTS
Display screen, heater, air conditioner, audio and phone systems4-13
ProCarManuals.com
Page 183 of 406

WARNING
●The air conditioner cooling function op-
erates only when the engine is running.
● Do not leave children or adults who
would normally require the assistance
of others alone in your vehicle. Pets
should also not be left alone. They
could accidentally injure themselves or
others through inadvertent operation of
the vehicle. Also, on hot, sunny days,
temperatures in a closed vehicle could
quickly become high enough to cause
severe or possibly fatal injuries to
people or animals.
● Do not use the recirculation mode for
long periods as it may cause the interior
air to become stale and the windows to
fog up.
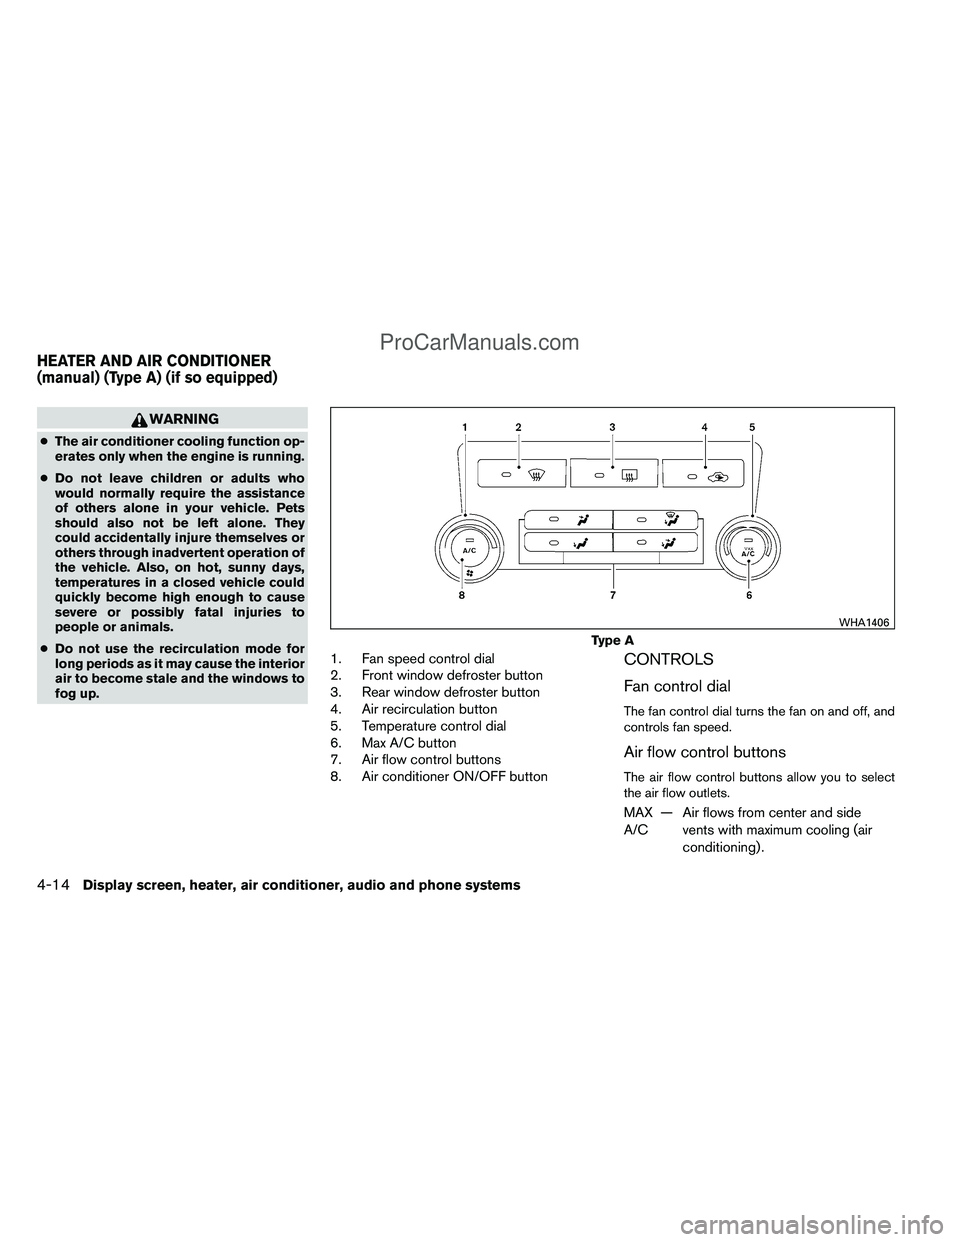
1. Fan speed control dial
2. Front window defroster button
3. Rear window defroster button
4. Air recirculation button
5. Temperature control dial
6. Max A/C button
7. Air flow control buttons
8. Air conditioner ON/OFF buttonCONTROLS
Fan control dial
The fan control dial turns the fan on and off, and
controls fan speed.
Air flow control buttons
The air flow control buttons allow you to select
the air flow outlets.
MAX
A/C — Air flows from center and side
vents with maximum cooling (air
conditioning) .
Type A
WHA1406
HEATER AND AIR CONDITIONER
(manual) (Type A) (if so equipped)
4-14Display screen, heater, air conditioner, audio and phone systems
ProCarManuals.com
Page 184 of 406

— Air flows from center and sidevents.
— Air flows from center and sidevents and the front and rear floor
outlets.
— Air flows mainly from the front andrear floor outlets.
— Air flows from defroster outlets andthe front and rear floor outlets.
Temperature control dial
The temperature control dial allows you to adjust
the temperature of the outlet air. To lower the
temperature, turn the dial to the left. To increase
the temperature, turn the dial to the right.
Air recirculation button
ON position:
Push the
button to recirculate air inside
the vehicle.
Push the
button to the on position when:
● driving on a dusty road.
● to prevent traffic fumes from entering pas-
senger compartment.
● for maximum cooling when using the air con-
ditioner. The air recirculation mode is only functional when
the air flow control mode is in the following
positions:
or.
OFF position:
Push the
button again to turn air recircula-
tion off. Outside air is drawn into the passenger
compartment and distributed through the se-
lected outlet.
Use the off position for normal heater or air con-
ditioner operation.
Air conditioner button
Start the engine, turn the fan control dial to the
desired position and push the
button to
turn on the air conditioner. The indicator light
comes on when the air conditioner is operating.
To turn off the air conditioner, push the
button again.
The air conditioner cooling function oper-
ates only when the engine is running.
HEATER OPERATION
Heating
This mode is used to direct heated air to the foot
outlets. Some air also flows from the defrost
outlets. 1. Press the
button to the OFF position
for normal heating. The indicator light on
the
button will go off.
2. Press the
air flow control button.
3. Turn the fan control dial to the desired posi- tion.
4. Turn the temperature control dial to the de- sired position between the middle and the
hot position.
Ventilation
This mode directs outside air to the side and
center ventilators.
1. Press the
button to the OFF position.
The indicator light on the
button will
go off.
2. Press the
air flow control button.
3. Turn the fan control dial to the desired posi- tion.
4. Turn the temperature control dial to the de- sired position.
Defrosting or defogging
This mode directs the air to the defrost outlets to
defrost/defog the windows.
Display screen, heater, air conditioner, audio and phone systems4-15
ProCarManuals.com