2012 NISSAN QASHQAI doors
[x] Cancel search: doorsPage 8 of 297

Downloaded from www.Manualslib.com manuals search engine j1Towing eye (P. 6-15)
j2Bonnet (P. 3-14)
j3Headlights, front side lights, turn signal lights
(Switch P. 2-24, Location and bulb replace-
ment P. 8-25)
j4Windscreen (Wiper and washer switch P. 2-21, Wiper replacement P. 8-22, Washer
fluid P. 8-16)
j5
Side turn signal light (P. 2-24, Location and
bulb replacement P. 8-27)
j6C-View® (Glass roof)* (P. 2-36)
j7Power windows (P. 2-34)
j8Roof rail* (P. 2-32)
j9Tyres (Tyres and wheels P. 8-31, P. 9-7, Flat
tyre P. 6-2)
j10Front view camera* (Around view monitor,
P. 4-4)
j11Back door (Door locks P. 3-12, Remote key-
less entry system P. 3-3)
j12Rear view camera* (Rear-view monitor, P. 4-2,
around view monitor, P. 4-4)
j13Rear window (Defogger switch P. 2-23, Wiper
and washer switch P. 2-21, Wiper replace-
ment P. 8-23, Washer fluid P. 8-16)
j14Rear combination light (Switch P. 2-24, Loca-
tion and bulb replacement P. 8-25)
j15Fuel filler lid (P. 3-15)
j16Doors (Keys P. 3-2, Door locks P. 3-9,
Remote keyless entry system P. 3-3)
j17Outside rear-view mirrors (P. 3-17)
Side view camera* (Around view monitor,
P. 4-4)
* where fitted
NPA1091
EXTERIOR FRONT AND REAR
Illustrated table of contents0-3
Page 27 of 297

Downloaded from www.Manualslib.com manuals search engine Belts should not be worn with straps twisted.
Each belt assembly must only be used by one
occupant; it is dangerous to put a belt around
a child being carried on the occupant’s lap.
Every occupant in this vehicle should wear a
seat belt at all times.
Never carry more people in the vehicle than
there are seat belts.
All seat belt assemblies, including retractors
and attaching hardware, should be inspected
by a NISSAN dealer or qualified workshop af-
ter any collision. NISSAN recommends that
all seat belt assemblies in use during a colli-
sion should be replaced unless the collision
was minor and the belts show no damage and
continue to operate properly. Seat belt assem-
blies not in use during a collision should also
be inspected and replaced if either damage
or improper operation is noted.
Once the pre-tensioner seat belt has been ac-
tivated, it cannot be re-used. It must be re-
placed together with the retractor. See a
NISSAN dealer or qualified workshop.
Removal and installation of the pre-tensioner
seat belt system components should be done
by a NISSAN dealer or qualified workshop
ONLY.
If the seat belt warning light glows continu-
ously while the ignition switch is in the ON
position, all doors are closed and occupied
seat belts are fastened, it may indicate a mal-function in the system. Have the system
checked by a NISSAN dealer or qualified
workshop.
Always route the shoulder belt over your
shoulder and across your chest. Never run
the belt under your arm. Serious injury can
occur if the seat belt is not worn properly.
Position the lap belt as low as possible
AROUND THE HIPS, NOT THE WAIST.
CHILD SAFETY
Infants or small children
NISSAN recommends that infants or small children
should be seated in a child restraint on the rear
seats if available. According to accident statistics,
children are safer when properly restrained in the
rear seat than in the front seat. See “Child restraints”
later in this section. You should choose a child re-
straint system which fits your vehicle and always fol-
low the manufacturer’s instructions for installation
and use.
Children
Children who are too large for child restraints should
be seated and restrained by the seat belts that are
provided.
The use of a booster seat (commercially available)
may help to avoid the shoulder belt coming across
the face or neck area of a child’s seating position.
The booster seat should raise the child so that the
shoulder belt is properly positioned across the top,
middle portion of the shoulder and the lap belt is low
on the hips. The booster seat should fit the vehicle’s
seat. Once the child has grown so the shoulder belt
is no longer on or near the face and neck, use the
shoulder belt without the booster seat.
WARNING
Never let a child stand or kneel on any seat and
do not allow a child in the cargo areas while the
vehicle is moving.
PREGNANT WOMEN
NISSAN recommends that pregnant women use
seat belts. Contact your doctor for specific recom-
mendations. The seat belt should be worn snug,
always position the lap belt as low as possible
around the hips, place the shoulder belt over your
shoulder and across your chest. Never run the lap/
shoulder belt over your abdominal area.
SSS0099Z
1-8Safety — seats, seat belts and supplemental restraint system
Page 52 of 297

Downloaded from www.Manualslib.com manuals search engine Anti-lock Braking System (ABS) warning
light (orange)Seat belt (driver and front passenger) warn-
ing light (red)Low fuel indicator light (orange)
Brake warning light (red)Supplemental Restraint System (SRS) air
bag warning light (red)Slip indicator light (orange)
Charge warning light (red)Water in fuel filter warning light (orange)Front fog light indicator light (green)
Diesel Particulate Filter (DPF) warning light
(orange)4WD warning light (orange)Rear fog light indicator light (orange)
Electronic Power Assisted Steering (EPAS)
warning light (red)Automatic Transmission check indicator light
(AT models) (orange)High beam indicator light (blue)
Engine oil pressure/level warning light (red)Continuously Variable Transmission (CVT)
indicator light (orange)Dipped beam indicator light (green)
Front passenger air bag deactivated (OFF)
warning light (red)Electronic Stability Programme (ESP) OFF
indicator light (orange)Side light and headlight indicator light
(green)
Malfunction warning light (red)
Malfunction Indicator light (orange)4WD mode indicator light (AUTO) (green)SPORT mode indicator light
Master warning light (orange)4WD mode indicator light (LOCK) (orange)Trailer direction indicator light (green)
NATS security warning light (red)Glow plug indicator light (Diesel engine)
(orange)Turn signal/hazard indicator lights (green)
CHECKING BULBS
With all doors closed, apply the handbrake, fasten
the seat belts and turn the ignition switch to the ON
position without starting the engine. The following
lights (where fitted) will come on:
,,,,,
The following lights (where fitted) come on briefly
and then go off:
,,,,,,,
,,,,(M9R engine
only)
If any light fails to come on, it may indicate a burned-
out bulb or an open circuit in the electrical system.
Have the system checked, and repaired promptly by
a NISSAN dealer or qualified workshop.
WARNING LIGHTS
Also see “Vehicle information display” later in this
section.
Anti-lock Braking System (ABS)
warning light
After turning the ignition switch to the ON position,
the light will illuminate. The anti-lock braking system
warning light will turn off after approximately 2 sec-
onds if the system is operational.
WARNING/INDICATOR LIGHTS AND AUDIBLE REMINDERS
Instruments and controls2-3
Page 61 of 297

Downloaded from www.Manualslib.com manuals search engine WARNINGS AND ALERTS
The design of the warnings and alerts may differ
depending on the model.
j1 Door open warning
This warning appears if any of the doors are open or
not closed securely. The vehicle icon indicates
which door is open on the display.
j2 Back door open warning
This warning appears if the back door is open or not
closed securely. When the door is to be left open,
e.g. when you transport a long load, push the
switch or the steering wheel switchji (where fit-
ted) to confirm.
j3 Seat belt warning (Rear seat or 2nd
row)
The seat belt warning indicates the seating position
when the ignition switch is turned to the ON position
and disappears when:
All related seat belts have been securely fas-
tened.
Theswitch or the steering wheel switchji
(where fitted) is pushed.
Approximately 35 seconds after engine start.
WARNING
Seat belts for 3rd row seats (where fitted) are not
part of the seat belt warning light monitoring sys-
tem.
NIC1644
2-12Instruments and controls
Page 81 of 297
Downloaded from www.Manualslib.com manuals search engine Sunglasses holder
WARNING
The sunglasses holder should not be used
while driving so that full attention may be given
to vehicle operation.
Do not leave sunglasses in the sunglasses
holder while parking in direct sunlight. The
heat may damage the sunglasses.
The glove box contains a sunglasses storage area,
which is accessible when the glove box is open.
CONSOLE BOX
WARNING
The centre console box should not be used while
driving so that full attention may be given to ve-
hicle operation.
Pull the lid up to open the console box.
CUP HOLDERS
WARNING
Cup holders should not be used while driving so
that full attention may be given to vehicle opera-
tion.
To access the rear cup holders (where fitted), lower
the centre armrest. CAUTION
Avoid abrupt starting and braking when the
cup holder is being used to prevent spillage.
If the liquid is hot, it can scald you or your pas-
senger.
Use only soft cups in the cup holder. Hard
objects can injure you in an accident.
BOTTLE HOLDER
CAUTION
Do not use the bottle holder for any other
objects that could be thrown about in the ve-
hicle and possibly injure people during sud-
den braking or an accident.
Do not use the bottle holder for open liquid
containers.
MAP POCKET (where fitted)
Map pockets are located in the doors.
SEAT POCKET (where fitted)
A seat pocket (where fitted) is located on the back
or side of the driver and/or passenger seat.
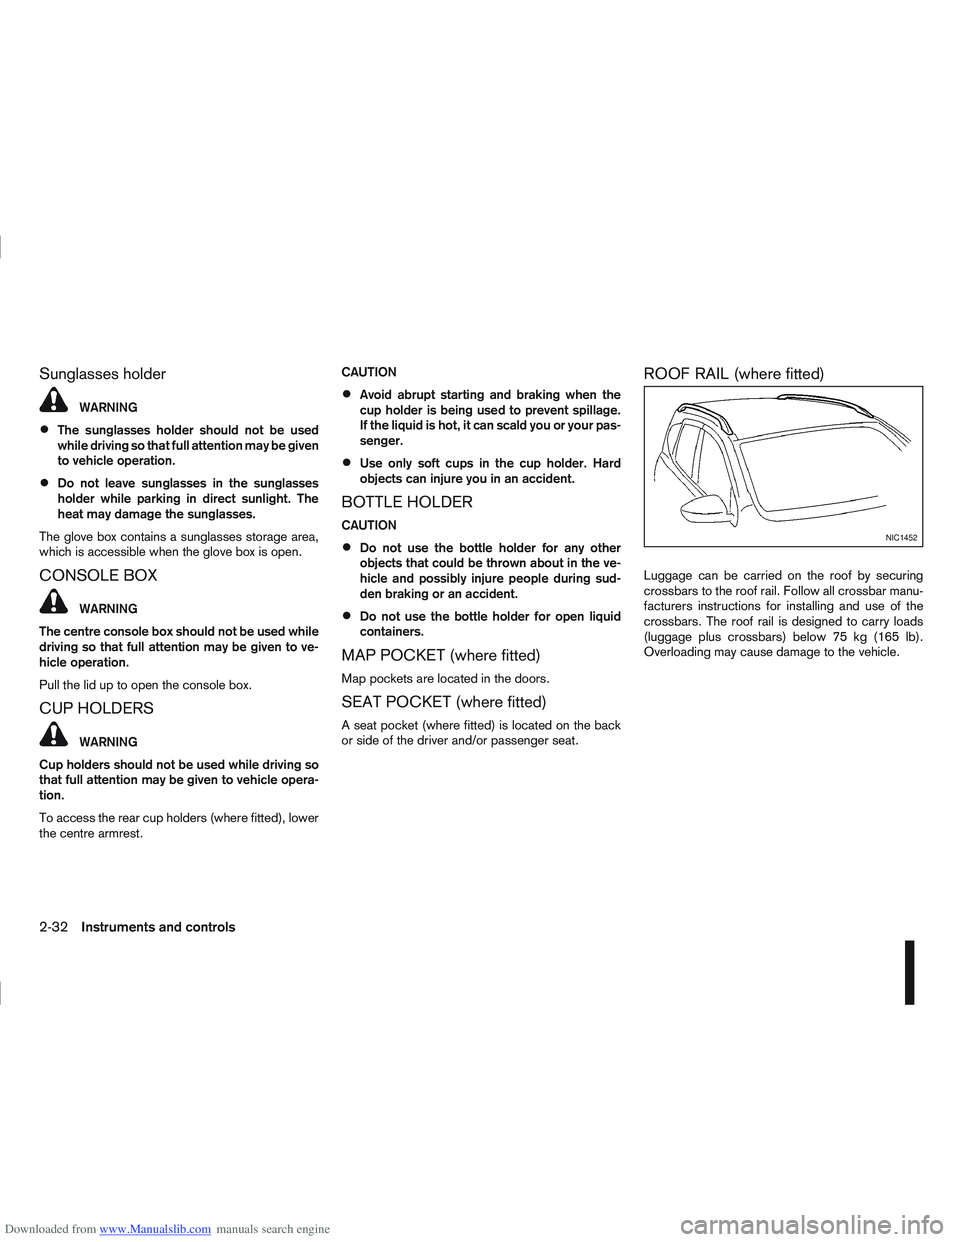
ROOF RAIL (where fitted)
Luggage can be carried on the roof by securing
crossbars to the roof rail. Follow all crossbar manu-
facturers instructions for installing and use of the
crossbars. The roof rail is designed to carry loads
(luggage plus crossbars) below 75 kg (165 lb).
Overloading may cause damage to the vehicle.
NIC1452
2-32Instruments and controls
Page 87 of 297

Downloaded from www.Manualslib.com manuals search engine Room light timer (where fitted)
The room light will stay on for approximately 30 sec-
onds when:
The ignition is switched off.
The doors are unlocked.
Any door is opened and then closed.
The timer is cancelled, and the interior light will turn
off when:
The doors are locked.
The ignition switch is turned to the ON position.
MAP LIGHTS (where fitted)
To switch on the map light, press eitherorof
the switchesj2.
To turn the map light off, press 0
REAR ROOM/READING LIGHT
The light can be switched on or off by pressing the
switchj3.
LUGGAGE COMPARTMENT LIGHT
The light comes on automatically when the back
door is opened.
VANITY MIRROR LIGHT (where fitted)
The light on the vanity mirror will turn on when the
cover is opened.
NIC1258Z
Room light (where fitted)
NIC1256Z
Reading light (where fitted)
NIC1257Z
2-38Instruments and controls
Page 88 of 297

Downloaded from www.Manualslib.com manuals search engine 3Pre-driving checks and adjustments
Pre-driving checks and adjustments
Keys ........................................................................\
3-2
NISSAN Anti-Theft System (NATS)* key ............. 3-2
Intelligent Key (where fitted)................................ 3-2
Key number ........................................................ 3-3
New keys ........................................................... 3-3
Emergency/mechanical key (Intelligent Key
models) .............................................................. 3-3
Integrated keyfob/remote control system .................. 3-3 Switching from Convenience mode to
Anti-hijack mode ................................................. 3-4
Using the remote keyless entry system ................ 3-5
Locking the doors ............................................... 3-5
Unlocking the doors ............................................ 3-5
Keyfob operation failure ...................................... 3-6
Intelligent Key system (where fitted) ......................... 3-6 Intelligent Key operating range ............................ 3-6
Using Intelligent Key system................................ 3-7
Locking/unlocking .............................................. 3-7
Starting the engine with the Intelligent Key .......... 3-8
Door locks ............................................................... 3-9 Super Lock system (RHD models) ...................... 3-9
Locking/unlocking with the key (vehicle dead
battery) ............................................................... 3-9 Inside door handle .............................................. 3-10
Power door lock switch ...................................... 3-10
Child safety lock — rear doors............................ 3-11
Back door lock ................................................... 3-12
Security system ....................................................... 3-13 Alarm system (where fitted) ................................ 3-13
NISSAN Anti-Theft System (NATS)..................... 3-13
Bonnet release ........................................................ 3-14
Fuel filler lid ............................................................. 3-15 Fuel filler lid opener lever .................................... 3-15
Fuel filler cap ...................................................... 3-15
Handbrake lever ...................................................... 3-16
Steering wheel......................................................... 3-16
Sun visors ............................................................... 3-17
Mirrors..................................................................... 3-17 Inside rear-view mirror ........................................ 3-17
Automatic anti-dazzling inside mirror (where
fitted).................................................................. 3-17
Outside rear-view mirrors.................................... 3-17
Vanity mirror ....................................................... 3-19
Page 90 of 297

Downloaded from www.Manualslib.com manuals search engine KEY NUMBER
A key number platej3 is supplied with your key
Record the key number on the “Security Informa-
tion” page at the end of this manual and keep it in a
safe place, but not in the vehicle . The key can only
be duplicated using an original key or the original
key number. The key number is required when you
have lost all of the keys and do not have the original
key to duplicate from. If the key is lost, or you need
extra keys, provide an original key or the key number
to a NISSAN dealer or qualified workshop.
NISSAN does not record key numbers, so it is very
important that you keep a record of your key num-
ber.
NEW KEYS
As many as four NATS keys can be registered to
one vehicle at any one time. New keys must be reg-
istered to the NATS components of your vehicle by
a NISSAN dealer.
When registering a new key at a NISSAN dealer,
you are requested to bring all of your NATS keys
with you. This is necessary because the registration
process will erase and reprogram the memory of
your vehicle’s NATS components.
NOTE
A key number is only required if you have lost all
of your keys and do not have one to duplicate
from. If you still have a key, this key can be dupli-
cated by a NISSAN dealer.
EMERGENCY/MECHANICAL KEY
(Intelligent Key models)
The emergency key can be used to unlock the driv-
er’s door and start the engine in emergency situa-
tions (e.g. Intelligent Key dead battery).
To use the mechanical key, release the lock knob
located on the side of the Intelligent Key then slide
and remove the cap. Unfold the mechanical key from
its housing until it locks in place.
Use the mechanical key to lock or unlock the doors.
(See “Door locks” later in this section.)
For further details on accessing and using the emer-
gency key, see “Ignition knob (where fitted)” in the
“5. Starting and driving” section.
NOTE
For the driver side door, it is normal for the key
not to go all the way into the key cylinder. The remote keyless entry system can operate all
door locks (including the back door) using the inte-
grated keyfob. The integrated keyfob can operate at
a distance of approximately 5 m (15 ft) from the
vehicle (the effective distance depends upon the
conditions around the vehicle and the state of the
keyfob battery).
As many as 5 remote controllers can be used with
one vehicle. For information about the purchase and
NPA1050
NPA1082
Integrated keyfob
NPA1083
Intelligent key
INTEGRATED KEYFOB/REMOTE
CONTROL SYSTEM
Pre-driving checks and adjustments3-3