2012 NISSAN 370Z COUPE fuel
[x] Cancel search: fuelPage 299 of 427
4M(4th) , 3M(3rd) and 2M(2nd):
Use these positions for hill climbing or engine
braking on downhill grades.
1
M(1st):
Use this position when climbing steep hills
slowly or driving slowly through deep snow, or
for maximum engine braking on steep downhill
grades.
. Remember not to drive at high speeds for
extended periods of time in lower than 7th
gear. This reduces fuel economy.
. Moving the selector lever rapidly to the same
side twice will shift the ranges in succes-
sion.
. In the manual shift mode, the transmis-
sion may not shift to the selected gear.
This helps maintain driving perfor-
mance and reduces the chance of
vehicle damage or loss of control.
When this situation occurs, the Automatic
Transmission (AT) position indicator light (on
the vehicle information display) will blink and
the buzzer will sound.
. In the manual shift mode, the transmis-
sion automatically shifts down to 1st
gear before the vehicle comes to a
stop. When accelerating again, it is
necessary to shift up to the desired
range.
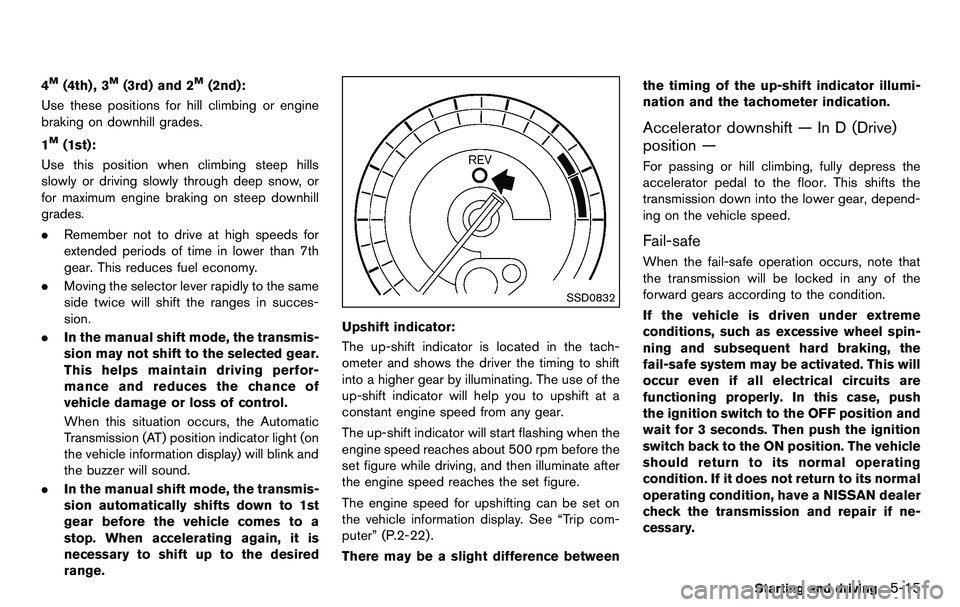
SSD0832
Upshift indicator:
The up-shift indicator is located in the tach-
ometer and shows the driver the timing to shift
into a higher gear by illuminating. The use of the
up-shift indicator will help you to upshift at a
constant engine speed from any gear.
The up-shift indicator will start flashing when the
engine speed reaches about 500 rpm before the
set figure while driving, and then illuminate after
the engine speed reaches the set figure.
The engine speed for upshifting can be set on
the vehicle information display. See “Trip com-
puter” (P.2-22) .
There may be a slight difference between the timing of the up-shift indicator illumi-
nation and the tachometer indication.
Accelerator downshift — In D (Drive)
position —
For passing or hill climbing, fully depress the
accelerator pedal to the floor. This shifts the
transmission down into the lower gear, depend-
ing on the vehicle speed.
Fail-safe
When the fail-safe operation occurs, note that
the transmission will be locked in any of the
forward gears according to the condition.
If the vehicle is driven under extreme
conditions, such as excessive wheel spin-
ning and subsequent hard braking, the
fail-safe system may be activated. This will
occur even if all electrical circuits are
functioning properly. In this case, push
the ignition switch to the OFF position and
wait for 3 seconds. Then push the ignition
switch back to the ON position. The vehicle
should return to its normal operating
condition. If it does not return to its normal
operating condition, have a NISSAN dealer
check the transmission and repair if ne-
cessary.
Starting and driving5-15
Page 303 of 427
the engine speed lowers to the target
engine speed.
Rapid clutch engagement before the engine
speed lowers to the target engine speed
may cause shift shock.
. When depressing the clutch pedal with
the gear engaged:
The engine speed is automatically kept at
the proper engine speed for the engaged
gear.
This function will not operate when low (1st)
gear is selected.
There is a delay between the clutch pedal
operation and the S-MODE operation. Make
sure the engine speed is adjusted before
engaging the clutch again.
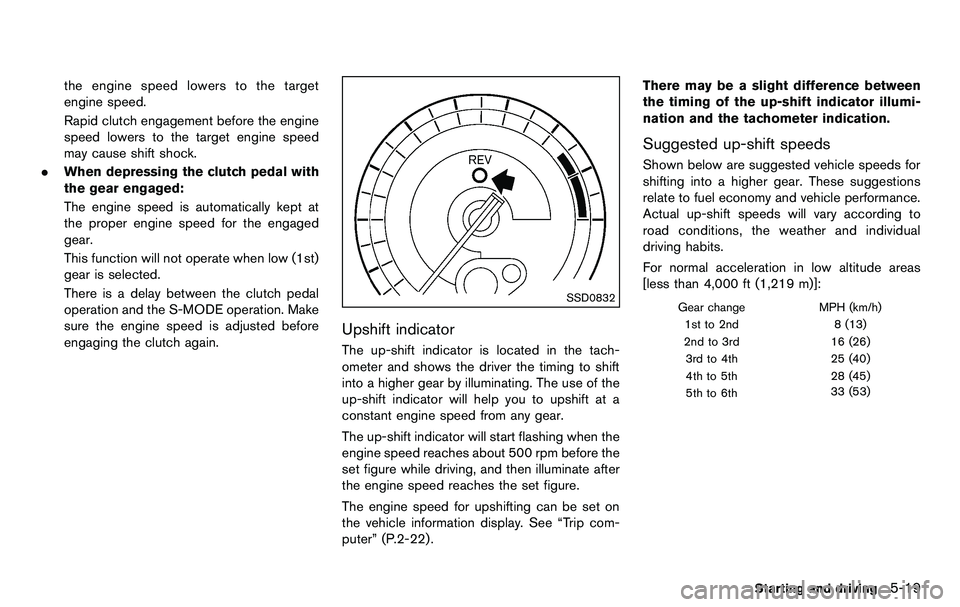
SSD0832
Upshift indicator
The up-shift indicator is located in the tach-
ometer and shows the driver the timing to shift
into a higher gear by illuminating. The use of the
up-shift indicator will help you to upshift at a
constant engine speed from any gear.
The up-shift indicator will start flashing when the
engine speed reaches about 500 rpm before the
set figure while driving, and then illuminate after
the engine speed reaches the set figure.
The engine speed for upshifting can be set on
the vehicle information display. See “Trip com-
puter” (P.2-22) . There may be a slight difference between
the timing of the up-shift indicator illumi-
nation and the tachometer indication.
Suggested up-shift speeds
Shown below are suggested vehicle speeds for
shifting into a higher gear. These suggestions
relate to fuel economy and vehicle performance.
Actual up-shift speeds will vary according to
road conditions, the weather and individual
driving habits.
For normal acceleration in low altitude areas
[less than 4,000 ft (1,219 m)]:
Gear change
MPH (km/h)
1st to 2nd 8 (13)
2nd to 3rd 16 (26)
3rd to 4th 25 (40)
4th to 5th 28 (45)
5th to 6th 33 (53)
Starting and driving5-19
Page 307 of 427
CAUTION
During the first 1,200 miles (2,000 km) ,
follow these recommendations to ob-
tain maximum engine performance and
ensure the future reliability and econo-
my of your new vehicle.
Failure to follow these recommenda-
tions may result in shortened engine
life and reduced engine performance.
. Avoid driving for long periods at constant
speed, either fast or slow. Do not run the
engine over 4,000 rpm.
. Do not accelerate at full throttle in any gear.
. Avoid quick starts.
. Avoid hard braking as much as possible. .
Accelerate slowly and smoothly. Maintain
cruising speeds with a constant accelerator
position.
. Drive at moderate speeds on the highway.
. Avoid unnecessary stopping and braking.
Keep a safe distance behind other vehicles.
. Select a gear range suitable to road condi-
tions.
. Avoid unnecessary prolonged engine idling.
. Keep your engine tuned up.
. Follow the recommended periodic mainte-
nance schedule.
. Keep the tires inflated at the correct
pressure. Improper tire pressure will in-
crease wear and waste fuel.
. Make sure the front wheels are properly
aligned. Improper alignment will cause pre-
mature tire wear and lower fuel economy.
. Air conditioner operation lowers fuel econ-
omy. Use the air conditioner only when
necessary.
. When cruising at highway speeds, it is more
economical to use the air conditioner and
leave the windows closed to reduce drag.
Starting and driving5-23
BREAK-IN SCHEDULE INCREASING FUEL ECONOMY
Page 350 of 427
7-8Appearance and care
MOST COMMON FACTORS CONTRI-
BUTING TO VEHICLE CORROSION
.The accumulation of moisture-retaining dirt
and debris in body panel sections, cavities,
and other areas.
. Damage to paint and other protective coat-
ings caused by gravel and stone chips or
minor traffic accidents.
ENVIRONMENTAL FACTORS INFLU-
ENCE THE RATE OF CORROSION
Moisture
Accumulation of sand, dirt and water on the
vehicle body underside can accelerate corro-
sion. Wet floor coverings will not dry completely
inside the vehicle, and should be removed for
drying to avoid floor panel corrosion.
Relative humidity
Corrosion will be accelerated in areas of high
relative humidity, especially those areas where
the temperatures stay above freezing where
atmospheric pollution exists, or where road salt
is used.
Temperature
A temperature increase will accelerate the rate
of corrosion to those parts which are not well
ventilated.
Air pollution
Industrial pollution, the presence of salt in the air
in coastal areas, or heavy road salt use will
accelerate the corrosion process. Road salt will
also accelerate the disintegration of paint
surfaces.
TO PROTECT YOUR VEHICLE FROM
CORROSION
.Wash and wax your vehicle often to keep the
vehicle clean.
. Always check for minor damage to the paint
and repair it as soon as possible.
. Keep drain holes at the bottom of the doors
open to avoid water accumulation.
. Check the underbody for accumulation of
sand, dirt or salt. If present, wash with water
as soon as possible.
CAUTION
.NEVER remove dirt, sand or other
debris from the passenger compart-
ment by washing it out with a hose. Remove dirt with a vacuum cleaner.
. Never allow water or other liquids to
come in contact with electronic
components inside the vehicle as
this may damage them.
Chemicals used for road surface deicing are
extremely corrosive. They accelerate corrosion
and deterioration of underbody components
such as the exhaust system, fuel and brake
lines, brake cables, floor pan and fenders.
In winter, the underbody must be cleaned
periodically.
For additional protection against rust and
corrosion, which may be required in some areas,
consult a NISSAN dealer.
CORROSION PROTECTION
Page 357 of 427
Windshield defroster:Check that the air
comes out of the defroster outlets properly and
in sufficient quantity when operating the heater
or air conditioner.
Windshield wiper and washer*: Check that
the wipers and washer operate properly and that
the wipers do not streak.
Under the hood and vehicle
The maintenance items listed here should be
checked periodically (for example, each time you
check the engine oil or refuel) .
Battery*: Check the fluid level in each cell. It
should be between the MAX and MIN lines.
Vehicles operated in high temperatures or under
severe condition require frequent checks of the
battery fluid level.
Brake and clutch fluid levels*: Make sure
that the brake and clutch fluid levels are
between the MAX and MIN lines on the
reservoirs.
Engine coolant level*: Check the coolant level
when the engine is cold.
Engine drive belts*: Make sure that no belt is
frayed, worn, cracked or oily.
Engine oil level*: Check the level after parking
the vehicle on a level spot and turning off the
engine. Wait more than 15 minutes for the oil to
drain back into the oil pan. Exhaust system:
Make sure there are no loose
supports, cracks or holes. If the sound of the
exhaust seems unusual or there is a smell of
exhaust fumes, immediately have the exhaust
system inspected by a NISSAN dealer. (See
“Precautions when starting and driving” (P.5-2)
for exhaust gas (carbon monoxide) .)
Fluid leaks: Check under the vehicle for fuel,
oil, water or other fluid leaks after the vehicle has
been parked for a while. Water dripping from the
air conditioner after use is normal. If you should
notice any leaks or if gasoline fumes are evident,
check for the cause and have it corrected
immediately.
Power steering fluid level* and lines: Check
the level with the engine off. Check the lines for
proper attachment, leaks, cracks, etc.
Radiator and hoses: Check the front of the
radiator and clean off any dirt, insects, leaves,
etc., that may have accumulated. Make sure the
hoses have no cracks, deformation, rot or loose
connections.
Underbody: The underbody is frequently ex-
posed to corrosive substances such as those
used on icy roads or to control dust. It is very
important to remove these substances, other-
wise rust will form on the floor pan, frame, fuel
lines and around the exhaust system. At the end
of winter, the underbody should be thoroughly flushed with plain water, being careful to clean
those areas where mud and dirt may accumu-
late. For additional information, see “Cleaning
exterior” (P.7-2).
Windshield washer fluid*:
Check that there is
adequate fluid in the reservoir.
Maintenance and do-it-yourself8-5
Page 358 of 427
8-6Maintenance and do-it-yourself
When performing any inspection or mainte-
nance work on your vehicle, always take care
to prevent serious accidental injury to yourself or
damage to the vehicle. The following are general
precautions which should be closely observed.
WARNING
.Park the vehicle on a level surface,
apply the parking brake securely
and block the wheels to prevent
the vehicle from moving. For man-
ual transmission models, move the
shift lever to N (Neutral) . For auto-
matic transmission models, move
the selector lever to P (Park) .
. Be sure the ignition switch is in the
OFF or LOCK position when per-
forming any parts replacement or
repairs.
. Never connect or disconnect the
battery or any transistorized com-
ponent while the ignition switch is
in the ON position.
. Never leave the engine or automatic
transmission related component
harnesses disconnected while the
ignition switch is in the ON position. .
If you must work with the engine
running, keep your hands, clothing,
hair and tools away from moving
fans, belts and any other moving
parts.
. It is advisable to secure or remove
any loose clothing and remove any
jewelry, such as rings, watches, etc.
before working on your vehicle.
. Always wear eye protection when-
ever you work on your vehicle.
. If you must run the engine in an
enclosed space such as a garage, be
sure there is proper ventilation for
exhaust gases to escape.
. Never get under the vehicle while it
is supported only by a jack. If it is
necessary to work under the vehicle,
support it with safety stands.
. Keep smoking materials, flame and
sparks away from fuel tank and the
battery.
. Your vehicle is equipped with an
automatic engine cooling fan. It may
come on at any time without warn-
ing, even if the ignition key is in the
OFF position and the engine is not
running. To avoid injury, always disconnect the negative battery
cable before working near the fan.
. The fuel filter or fuel lines should be
serviced by a NISSAN dealer be-
cause the fuel lines are under high
pressure even when the engine is
off.
CAUTION
.Do not work under the hood while
the engine is hot. Turn the engine
off and wait until it cools down.
. Avoid direct contact with used en-
gine oil and coolant. Improperly
disposed engine oil, coolant, and/
or other vehicle fluids can damage
the environment. Always conform to
local regulations for disposal of
vehicle fluid.
This “8. Maintenance and do-it-yourself” section
gives instructions regarding only those items
which are relatively easy for an owner to perform.
A genuine NISSAN Service Manual is also
available. (See “Owner’s Manual/Service Man-
ual order information” (P.9-24).)
MAINTENANCE PRECAUTIONS
Page 364 of 427
8-12Maintenance and do-it-yourself
SDI2335
Engine oil and filter
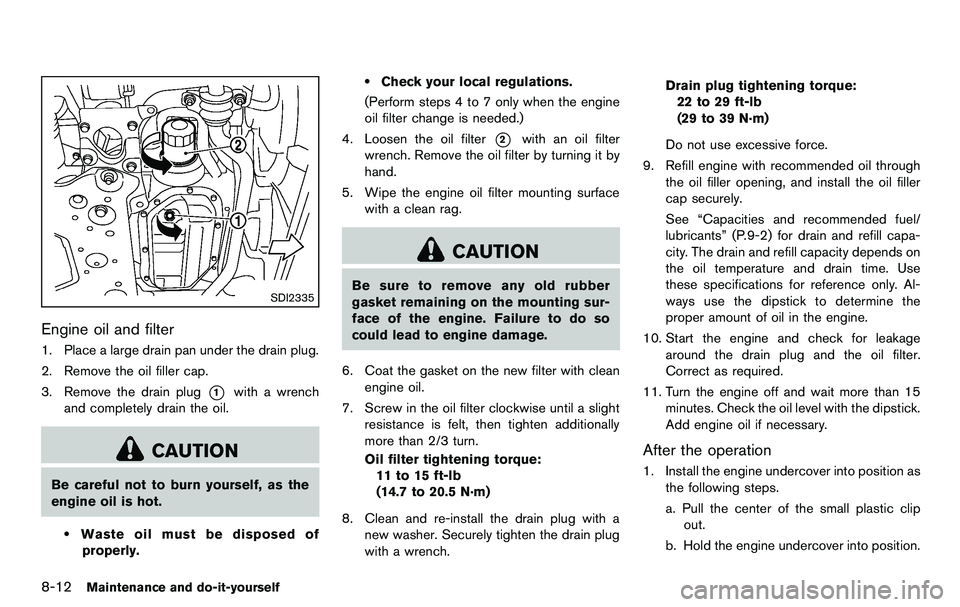
1. Place a large drain pan under the drain plug.
2. Remove the oil filler cap.
3. Remove the drain plug
*1with a wrench
and completely drain the oil.
CAUTION
Be careful not to burn yourself, as the
engine oil is hot.
.Waste oil must be disposed of
properly.
.Check your local regulations.
(Perform steps 4 to 7 only when the engine
oil filter change is needed.)
4. Loosen the oil filter
*2with an oil filter
wrench. Remove the oil filter by turning it by
hand.
5. Wipe the engine oil filter mounting surface with a clean rag.
CAUTION
Be sure to remove any old rubber
gasket remaining on the mounting sur-
face of the engine. Failure to do so
could lead to engine damage.
6. Coat the gasket on the new filter with clean engine oil.
7. Screw in the oil filter clockwise until a slight resistance is felt, then tighten additionally
more than 2/3 turn.
Oil filter tightening torque:11 to 15 ft-lb
(14.7 to 20.5 N·m)
8. Clean and re-install the drain plug with a new washer. Securely tighten the drain plug
with a wrench. Drain plug tightening torque:
22 to 29 ft-lb
(29 to 39 N·m)
Do not use excessive force.
9. Refill engine with recommended oil through the oil filler opening, and install the oil filler
cap securely.
See “Capacities and recommended fuel/
lubricants” (P.9-2) for drain and refill capa-
city. The drain and refill capacity depends on
the oil temperature and drain time. Use
these specifications for reference only. Al-
ways use the dipstick to determine the
proper amount of oil in the engine.
10. Start the engine and check for leakage around the drain plug and the oil filter.
Correct as required.
11. Turn the engine off and wait more than 15 minutes. Check the oil level with the dipstick.
Add engine oil if necessary.
After the operation
1. Install the engine undercover into position asthe following steps.
a. Pull the center of the small plastic clipout.
b. Hold the engine undercover into position.
Page 366 of 427
8-14Maintenance and do-it-yourself
CAUTION
.Do not overfill.
. Use Genuine NISSAN PSF or
equivalent. For further brake and clutch fluid information,
see “Capacities and recommended fuel/lubri-
cants” (P.9-2) of this manual.
WARNING
.
Use only new fluid from a sealed
container. Old, inferior or contami-
nated fluid may damage the brake
and clutch system.
. Be sure to clean the filler cap before
removing.
CAUTION
Do not spill the fluid on painted sur-
faces. This will damage the paint. If
fluid is spilled, wash the surface with
water.
SDI2025A
BRAKE FLUID
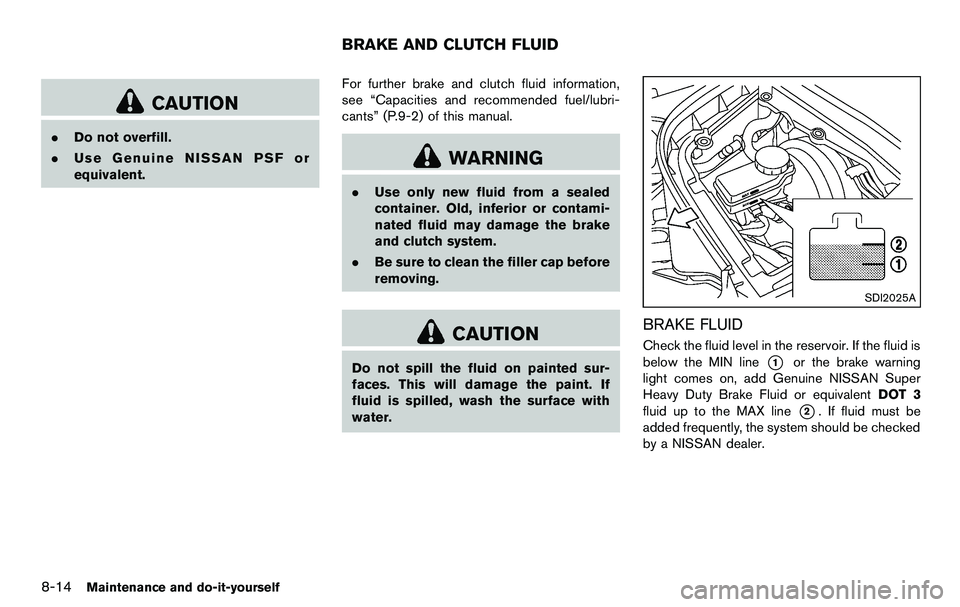
Check the fluid level in the reservoir. If the fluid is
below the MIN line
*1or the brake warning
light comes on, add Genuine NISSAN Super
Heavy Duty Brake Fluid or equivalent DOT 3
fluid up to the MAX line
*2. If fluid must be
added frequently, the system should be checked
by a NISSAN dealer.
BRAKE AND CLUTCH FLUID