2012 NISSAN 370Z COUPE air condition
[x] Cancel search: air conditionPage 63 of 427
SPA1097
SUPPLEMENTAL AIR BAG WARNING
LIGHT
The supplemental air bag warning light, display-
ing
in the instrument panel, monitors the
circuits of the supplemental front-impact air bag,
front seat-mounted side-impact supplemental
air bag, roof-mounted (Coupe models) or door-
mounted (Roadster models) curtain side-impact
supplemental air bag, and seat belt pretensioner
systems. The monitored circuits include the air
bag systems, pretensioners and all related
wiring.
When the ignition switch is in the ON position,
the supplemental air bag warning light illumi-
nates for about 7 seconds and then turns off. This means the system is operational.
If any of the following conditions occur, the front
air bag, side air bag, curtain air bag and
pretensioner systems need servicing:
.
The supplemental air bag warning light
remains on approximately 7 seconds after
the ignition switch is pushed to the ON
position.
. The supplemental air bag warning light
flashes intermittently.
. The supplemental air bag warning light does
not come on at all.
Under these conditions, the front air bag, side air
bag, curtain air bag or pretensioner systems may
not operate properly. They must be checked and
repaired. Take your vehicle to the nearest
NISSAN dealer.
WARNING
If the supplemental air bag warning
light is on, it could mean that the front
air bag, side air bag, curtain air bag
and/or pretensioner systems will not
operate in an accident. To help avoid
injury to yourself or others, have your
vehicle checked by a NISSAN dealer as
soon as possible.
REPAIR AND REPLACEMENT PRO-
CEDURE
The front air bags, side air bags, curtain air bags
and pretensioners are designed to activate on a
one-time-only basis. As a reminder, unless it is
damaged, the supplemental air bag warning light
will remain illuminated after inflation has oc-
curred. Repair and replacement of these sys-
tems should be done only by a NISSAN dealer.
When maintenance work is required on the
vehicle, the front air bags, side air bags, curtain
air bags, pretensioners and related parts should
be pointed out to the person conducting the
maintenance. The ignition switch should always
be in the LOCK position when working under
the hood or inside the vehicle.
WARNING
. Once a front air bag, side air bag, or
curtain air bag has inflated, the air
bag module will not function again
and must be replaced. Additionally,
the activated pretensioner must
also be replaced. The air bag mod-
ule and pretensioner system should
be replaced by a NISSAN dealer.
The air bag module and preten-
sioner system cannot be repaired.
Safety — Seats, seat belts and supplemental restraint system1-41
Page 68 of 427
2-4Instruments and controls
SSI0653
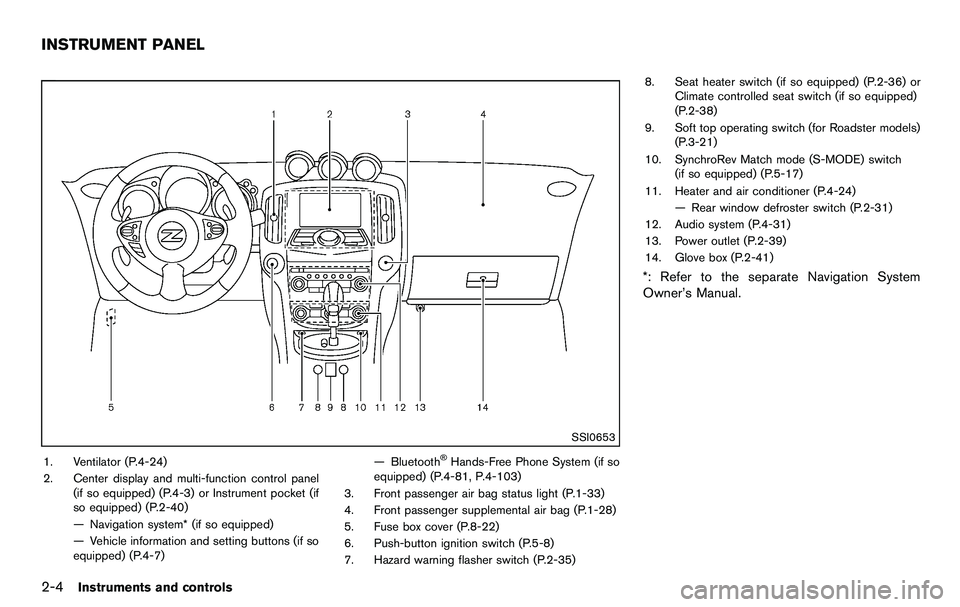
1. Ventilator (P.4-24)
2. Center display and multi-function control panel(if so equipped) (P.4-3) or Instrument pocket (if
so equipped) (P.2-40)
— Navigation system* (if so equipped)
— Vehicle information and setting buttons (if so
equipped) (P.4-7) — Bluetooth®Hands-Free Phone System (if so
equipped) (P.4-81, P.4-103)
3. Front passenger air bag status light (P.1-33)
4. Front passenger supplemental air bag (P.1-28)
5. Fuse box cover (P.8-22)
6. Push-button ignition switch (P.5-8)
7. Hazard warning flasher switch (P.2-35) 8. Seat heater switch (if so equipped) (P.2-36) or
Climate controlled seat switch (if so equipped)
(P.2-38)
9. Soft top operating switch (for Roadster models) (P.3-21)
10. SynchroRev Match mode (S-MODE) switch (if so equipped) (P.5-17)
11. Heater and air conditioner (P.4-24) — Rear window defroster switch (P.2-31)
12. Audio system (P.4-31)
13. Power outlet (P.2-39)
14. Glove box (P.2-41)
*: Refer to the separate Navigation System
Owner’s Manual.
INSTRUMENT PANEL
Page 71 of 427
SIC3975
ENGINE COOLANT TEMPERATURE
GAUGE
The gauge indicates the engine coolant tem-
perature.
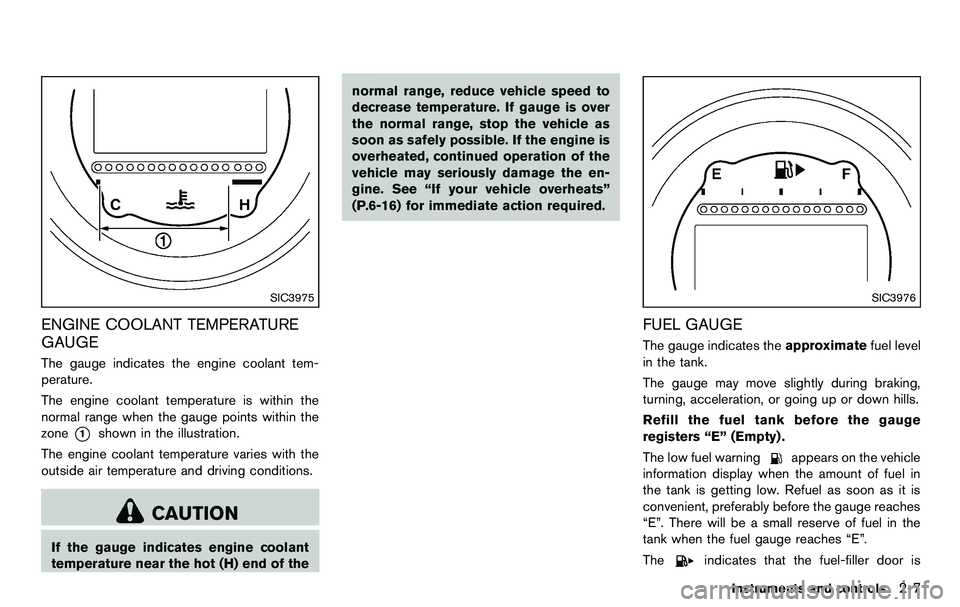
The engine coolant temperature is within the
normal range when the gauge points within the
zone
*1shown in the illustration.
The engine coolant temperature varies with the
outside air temperature and driving conditions.
CAUTION
If the gauge indicates engine coolant
temperature near the hot (H) end of the normal range, reduce vehicle speed to
decrease temperature. If gauge is over
the normal range, stop the vehicle as
soon as safely possible. If the engine is
overheated, continued operation of the
vehicle may seriously damage the en-
gine. See “If your vehicle overheats”
(P.6-16) for immediate action required.
SIC3976
FUEL GAUGE
The gauge indicates the
approximatefuel level
in the tank.
The gauge may move slightly during braking,
turning, acceleration, or going up or down hills.
Refill the fuel tank before the gauge
registers “E” (Empty) .
The low fuel warning
appears on the vehicle
information display when the amount of fuel in
the tank is getting low. Refuel as soon as it is
convenient, preferably before the gauge reaches
“E”. There will be a small reserve of fuel in the
tank when the fuel gauge reaches “E”.
The
indicates that the fuel-filler door is
Instruments and controls2-7
Page 77 of 427
CAUTION
.The TPMS is not a substitute for the
regular tire pressure check. Be sure
to check the tire pressure regularly.
. If the vehicle is being driven at
speeds of less than 16 MPH (25
km/h) , the TPMS may not operate
correctly.
. Be sure to install the specified size
of tires to the four wheels correctly.
Master warning light
When the ignition switch is in the ON position,
the master warning light illuminates if any of the
following are displayed on the vehicle informa-
tion display:
.No key warning
. Low fuel warning
. Low washer fluid warning
. Parking brake release warning
. Door/rear hatch open warning
. Loose fuel cap warning
See “Vehicle information display” (P.2-17) .
Seat belt warning light and chime
The light and chime remind you to fasten seat
belts. The light illuminates whenever the ignition
switch is pushed to the ON position, and will
remain illuminated until the driver’s seat belt is
fastened. At the same time, the chime will sound
for about 6 seconds unless the driver’s seat belt
is securely fastened.
The seat belt warning light for the front
passenger will illuminate if the seat belt is not
fastened when the front passenger’s seat is
occupied. For 5 seconds after the ignition
switch is in the ON position, the system does
not activate the warning light for the front
passenger.
See “Seat belts” (P.1-9) for precautions on seat
belt usage.
Supplemental air bag warning light
After pushing the ignition switch to the ON
position, the supplemental air bag warning light
will illuminate. The air bag warning light will turn
off after about 7 seconds if the front air bag, side
air bag and curtain air bag systems and/or
pretensioner system are operational.
If any of the following conditions occur, the front
air bag, side air bag and curtain air bag systems
and/or pretensioner system need servicing, and
your vehicle must be taken to your nearest NISSAN dealer.
.
The supplemental air bag warning light
remains on after approximately 7 seconds.
. The supplemental air bag warning light
flashes intermittently.
. The supplemental air bag warning light does
not come on at all.
Unless checked and repaired, the Supplemental
Restraint Systems and/or the pretensioner seat
belt may not function properly.
For additional information, see “Supplemental
restraint system” (P.1-28) .
WARNING
If the supplemental air bag warning
light is on, it could mean that the front
air bag, side air bag and curtain air bag
systems and/or pretensioner system
will not operate in an accident. To help
avoid injury to yourself or others, have
your vehicle checked by a dealer as
soon as possible.
Instruments and controls2-13
Page 79 of 427
Operation:
The malfunction indicator light will come on in
one of two ways:
.Malfunction indicator light on steady — An
emission control system malfunction has
been detected. Check the fuel-filler cap if
the LOOSE FUEL CAP warning appears in
the vehicle information display. If the fuel-
filler cap is loose or missing, tighten or install
the cap and continue to drive the vehicle.
The
light should turn off after a few
driving trips. If the
light does not turn off
after a few driving trips, have the vehicle
inspected by a NISSAN dealer. You do not
need to have your vehicle towed to the
dealer.
. Malfunction indicator light blinking — An
engine misfire has been detected which may
damage the emission control system.
To reduce or avoid emission control system
damage:
— Do not drive at speeds above 45 MPH
(72 km/h).
— Avoid hard acceleration or deceleration.
— Avoid steep uphill grades.
— If possible, reduce the amount of cargo being hauled or towed.
The malfunction indicator light may stop
blinking and remain on. Have the vehicle inspected by a NISSAN
dealer. You do not need to have your vehicle
towed to the dealer.
CAUTION
Continued vehicle operation without
having the emission control system
checked and repaired as necessary
could lead to poor driveability, reduced
fuel economy, and possible damage to
the emission control system.
Rear fog light indicator light (if so
equipped)
The rear fog light indicator light illuminates when
the rear fog light is on. (See “Fog light switch”
(P.2-35) .)
Security indicator light
The light blinks when the ignition switch is in the
ACC, OFF or LOCK position. This function
indicates the security system equipped on the
vehicle is operational.
If the security system is malfunctioning, this light
will remain on while the ignition switch is in the
ON position. For additional information, see
“Security systems” (P.2-27) .
Soft top indicator light (Roadster
models)
This light illuminates when the soft top is being
operated or it is stopped before reaching a full
open/close state. When the top is fully opened
or closed, the light will turn off.
The light blinks while the soft top is not fully
opened or closed under the following condi-
tions:
. When the vehicle is driven.
. When the selector lever or shift lever is in
the R (Reverse) position.
Be sure to fully open or close the soft top when
driving the vehicle.
The soft top can be moved with the soft top
operating switch only under all of the following
conditions:
. When the vehicle is stopped.
. When the ignition switch is ON.
. When the trunk is closed.
. When the selector lever or shift lever is in a
position other than the R (Reverse) position.
CAUTION
Operate the soft top with the engine
running to prevent a discharged battery.
Instruments and controls2-15
Page 88 of 427
2-24Instruments and controls
SIC3676
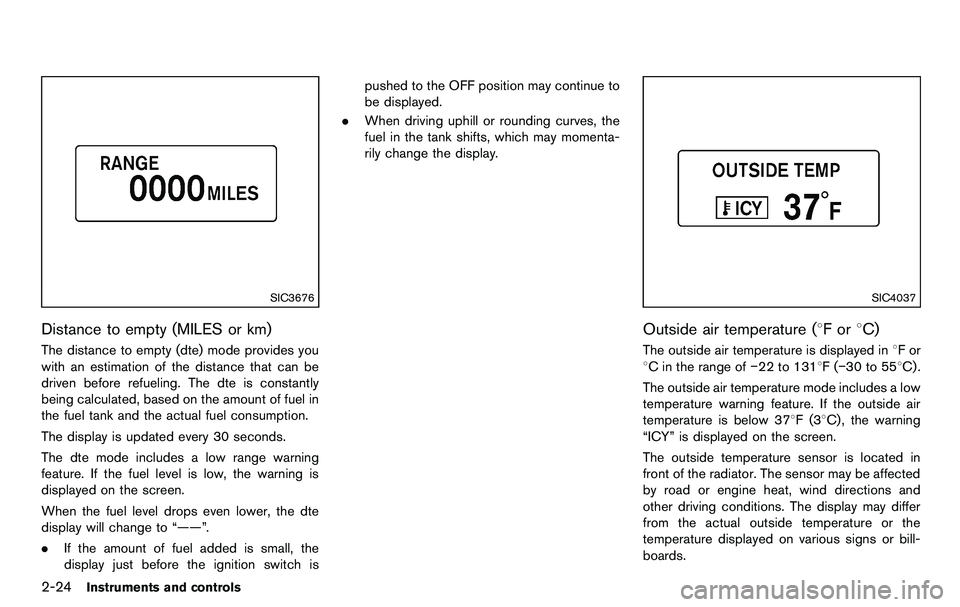
Distance to empty (MILES or km)
The distance to empty (dte) mode provides you
with an estimation of the distance that can be
driven before refueling. The dte is constantly
being calculated, based on the amount of fuel in
the fuel tank and the actual fuel consumption.
The display is updated every 30 seconds.
The dte mode includes a low range warning
feature. If the fuel level is low, the warning is
displayed on the screen.
When the fuel level drops even lower, the dte
display will change to “——”.
.If the amount of fuel added is small, the
display just before the ignition switch is pushed to the OFF position may continue to
be displayed.
. When driving uphill or rounding curves, the
fuel in the tank shifts, which may momenta-
rily change the display.
SIC4037
Outside air temperature (8For 8C)
The outside air temperature is displayed in 8For
8C in the range of −22 to 1318F(−30 to 558C) .
The outside air temperature mode includes a low
temperature warning feature. If the outside air
temperature is below 378F(3 8C) , the warning
“ICY” is displayed on the screen.
The outside temperature sensor is located in
front of the radiator. The sensor may be affected
by road or engine heat, wind directions and
other driving conditions. The display may differ
from the actual outside temperature or the
temperature displayed on various signs or bill-
boards.
Page 103 of 427
SSD1161
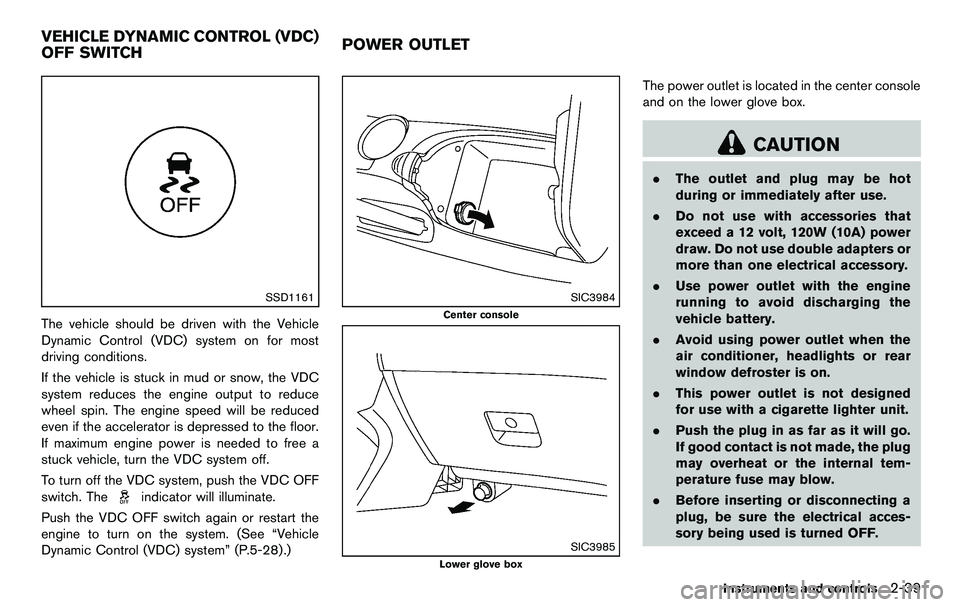
The vehicle should be driven with the Vehicle
Dynamic Control (VDC) system on for most
driving conditions.
If the vehicle is stuck in mud or snow, the VDC
system reduces the engine output to reduce
wheel spin. The engine speed will be reduced
even if the accelerator is depressed to the floor.
If maximum engine power is needed to free a
stuck vehicle, turn the VDC system off.
To turn off the VDC system, push the VDC OFF
switch. The
indicator will illuminate.
Push the VDC OFF switch again or restart the
engine to turn on the system. (See “Vehicle
Dynamic Control (VDC) system” (P.5-28) .)
SIC3984
Center console
SIC3985
Lower glove box
The power outlet is located in the center console
and on the lower glove box.
CAUTION
. The outlet and plug may be hot
during or immediately after use.
. Do not use with accessories that
exceed a 12 volt, 120W (10A) power
draw. Do not use double adapters or
more than one electrical accessory.
. Use power outlet with the engine
running to avoid discharging the
vehicle battery.
. Avoid using power outlet when the
air conditioner, headlights or rear
window defroster is on.
. This power outlet is not designed
for use with a cigarette lighter unit.
. Push the plug in as far as it will go.
If good contact is not made, the plug
may overheat or the internal tem-
perature fuse may blow.
. Before inserting or disconnecting a
plug, be sure the electrical acces-
sory being used is turned OFF.
Instruments and controls2-39
VEHICLE DYNAMIC CONTROL (VDC)
OFF SWITCH POWER OUTLET
Page 116 of 427
2-52Instruments and controls
surface. Hold the transmitter in that position
for up to 15 seconds. If HomeLink®is not
programmed within that time, try holding the
transmitter in another position - keeping the
indicator light in view at all times.
If you continue to have programming difficulties,
please contact the NISSAN Consumer Affairs
Department. The phone numbers are located in
the Foreword of this Owner’s Manual.
CLEARING THE PROGRAMMED IN-
FORMATION
Individual buttons cannot be cleared, however to
clear all programming, push and hold the two
outside buttons and release when the indicator
light begins to flash (in approximately 20
seconds) .
REPROGRAMMING A SINGLE
HomeLink®BUTTON
To reprogram a HomeLink®Universal Transcei-
ver button, complete the following.
1. Push and hold the desired HomeLink
®
button. Do not release the button until step
4 has been completed.
2. When the indicator light begins to flash slowly (after 20 seconds) , position the
hand-held transmitter 2 to 5 in (50 to 127
mm) away from the HomeLink
®surface. 3. Push and hold the hand-held transmitter
button.
4. The HomeLink
®indicator light will flash, first
slowly and then rapidly. When the indicator
light begins to flash rapidly, release both
buttons.
The HomeLink
®Universal Transceiver button
has now been reprogrammed. The new device
can be activated by pushing the HomeLink
®
button that was just programmed. This proce-
dure will not affect any other programmed
HomeLink
®buttons.
IF YOUR VEHICLE IS STOLEN
If your vehicle is stolen, you should change the
codes of any non-rolling code device that has
been programmed into HomeLink
®. Consult the
Owner’s Manual of each device or call the
manufacturer or dealer of those devices for
additional information.
When your vehicle is recovered, you will
need to reprogram the HomeLink
®Univer-
sal Transceiver with your new transmitter
information. FCC Notice:
For USA:
This device complies with Part 15 of the
FCC Rules. Operation is subject to the
following two conditions:
(1) This device may not cause harmful
interference, and (2) this device must
accept any interference received, including
interference that may cause undesired
operation.
Note: Changes or modifications not ex-
pressly approved by the party responsible
for compliance could void the user’s
authority to operate the equipment.
For Canada:
This device complies with RSS-210 of
Industry Canada. Operation is subject to
the following two conditions:
(1) this device may not cause interference,
and (2) this device must accept any inter-
ference, including interference that may
cause undesired operation of the device.