2012 MITSUBISHI ASX check oil
[x] Cancel search: check oilPage 308 of 378

CAUTION
• When washing around the door glass,
hold the nozzle at a distance of more
than 70 cm and at right angles to the
glass surface.
l After washing the vehicle, drive the vehi-
cle slowly while lightly depressing the
brake pedal several times in order to dry
out the brakes.
Leaving the brakes wet could result in re-
duced braking performance. Also, there
is a possibility that they could freeze up
or become inoperative due to rust, render-
ing the vehicle unable to move.
l When using an automatic car wash, pay
attention to the following items, referring
to the operation manual or consulting a
car wash operator. If the following proce-
dure is not followed, it could result in dam-
age to your vehicle.
• The outside mirrors are retracted.
• The antenna is removed.
• The wiper arms are secured in placewith tape.
• If your vehicle is equipped with a rear spoiler or roof rails, consult a car
wash operator before using the car
wash.
• If your vehicle has rain sensor wipers, place the wiper switch lever in the
“OFF” position to deactivate the rain
sensor. During cold weather
Salt
and other chemicals spread on the roads in
some areas in winter can have a harmful effect on
the vehicle body. You should therefore wash the ve-
hicle as often as possible in accordance with our
care-instructions. It is recommended to have a pres-
ervative applied and the underfloor protection
checked before and after the cold weather season.
After washing your vehicle, wipe off all water-
drops from the rubber parts around the doors to pre-
vent the doors from freezing.
NOTE
l To prevent freezing of the weatherstripping
on the doors, bonnet, etc., they should be trea-
ted with silicone spray.
Waxing E00901000863
Waxing the vehicle will help prevent the adherence
of
dust and road chemicals to the paintwork. Apply
a wax solution after washing the vehicle, or at least
once every three months to assist displacing of water.
Do not wax your vehicle in direct sunlight. You
should wax after the surfaces have cooled. CAUTION
l
Waxes
containing high abrasive com-
pounds should not be used. Such waxes re-
move rust and stains effectively from the
paintwork but they are harmful to the lus-
tre on the painted surface and the plated
surface.
Further, they are harmful to glossy surfa-
ces such as grille, garnish, mouldings, etc. CAUTION
l
Do
not use petrol or paint thinners to re-
move road tar or other contamination to
the painted surface.
l Do not apply wax to sections that have a
black mat paint coating, as doing so
could cause uneven discolouration, spots
or stains. If wax gets on such areas, wipe
it off using lukewarm water and a soft
cloth.
Polishing E00901100066
The vehicle should only be polished if the paint-
work
has become stained or lost its lustre. Do not
polish parts with a mat coating and the plastic bump-
ers. Doing so could cause stains or damage the finish.
Damaged paint E00901200054
Small cracks and scratches in the paint coat should
be
touched up as soon as possible with
MITSUBISHI touch-up paint to prevent corrosion.
Check body areas facing the road or the tyres care-
fully for damage to the paint caused by gravels,
etc. The paint code number for your vehicle can be
found on the vehicle information code plate in the
engine compartment.
Cleaning plastic parts E00901300707
Use a sponge or chamois leather.
If
a car wax adheres on a grey or black rough sur-
face of the bumper, moulding or lamps, the surface
becomes white. In such a case, wipe it off using
lukewarm water and soft cloth or chamois leather. Vehicle care
7-04
7
OGWE12E1
Page 314 of 378

NOTE
l If
this does not close the bonnet, release it
from a slightly higher position.
l Do not press down the bonnet hard with a
hand as it may damage the bonnet.
l For vehicles equipped with the security
alarm system, if you drive with the bonnet
left open, warning display is displayed on the
information screen in the multi-information
display.
Type 1 Type 2 Engine oil
E01000402817
To check and refill engine oil
Petrol-powered vehicles
1600 models
MAX. MIN.
1800, 2000 models
MAX. MIN. Diesel-powered vehicles
MAX. MIN.
The engine oil used has a significant effect on the
engine’s
performance, service life and startability.
Be sure to use oil of the recommended quality and
appropriate viscosity.
All engines consume a certain amount of oil during
normal operation. Therefore, it is important to
check the oil level at regular intervals or before start-
ing a long trip. 1. Park the car on a horizontal surface.
2. Switch off the engine.
3. Wait a few minutes.
4. Remove the dipstick and wipe it with a cleancloth.
5. Reinsert the dipstick as far as it goes.
6. Remove the dipstick and read the oil level, which should always be within the range in-
dicated.
7. If the oil level is below the specified limit, re- move the cap located on the cylinder head
cover and add enough oil to raise the level to
within the specified range. Do not overfill to
avoid engine damage. Be sure to use the speci-
fied engine oil and do not mix various types
of oil. Maintenance
8-04
8
OGWE12E1
Page 316 of 378

NOTE
l Use
of additives is not recommended since
they may reduce the effectiveness of addi-
tives already included in the engine oil. It
may result in failure of the mechanical assem-
bly. Engine coolant
E01000501736
To check the coolant level
A
transparent coolant reserve tank (A) is located in
the engine compartment.
The coolant level in this tank should be kept be-
tween the “LOW” and “FULL” marks when meas-
ured while the engine is cold.
FULL
LOW To add coolant
The
cooling system is a closed system and normal-
ly the loss of coolant should be very slight. A no-
ticeable drop in the coolant level could indicate leak-
age. If this occurs, we recommend you to have the
system checked as soon as possible.
If the level should drop below the “LOW” level on
the reserve tank, open the lid and add coolant.
Also, if the reserve tank is completely empty, re-
move the radiator cap (B) and add coolant until the
level reaches the filler neck. WARNING
l Do
not open the radiator cap (B) while
the engine is hot. The coolant system is un-
der pressure and any hot coolant escap-
ing could cause severe burns.
Anti-freeze
The
engine coolant contains an ethylene glycol anti-
corrosion agent. Some parts of the engine are cast
aluminium alloy, and periodic changing of the en-
gine coolant is necessary to prevent corrosion of
these parts.
Use “DIA QUEEN SUPER LONG LIFE COOL-
ANT PREMIUM” or equivalent*.
*: similar high quality ethylene glycol based non-
silicate, non-amine, non-nitrate and non-borate cool-
ant with long life hybrid organic acid technology
MITSUBISHI Genuine Coolant has excellent pro-
tection against corrosion and rust formation of all
metals including aluminium and can avoid block-
ages in the radiator, heater, cylinder head, engine
block, etc.
Because of the necessity of this anti-corrosion
agent, the coolant must not be replaced with plain
water even in summer. The required concentration
of anti-freeze differs depending on the expected am-
bient temperature.
Above - 35 °C: 50 % concentration of anti-freeze
Below - 35 °C: 60 % concentration of anti-freeze Maintenance
8-06
8
OGWE12E1
Page 317 of 378
CAUTION
l
Do not use alcohol or methanol anti-
freeze or any engine coolants mixed with
alcohol or methanol anti-freeze. The use
of an improper anti-freeze can cause cor-
rosion of the aluminium components.
l Do not use water to adjust the concentra-
tion of coolant.
l Concentrations exceeding 60 % will re-
sult in a reduction of both the anti-freeze
and cooling performance thus adversely
affecting the engine.
l Do not top up with water only.
Water by itself reduces the rust-protec-
tive and anti-freeze qualities of the cool-
ant and has a lower boiling point. It can
also cause damage to the cooling system if
it should freeze. Do not use tapwater, as it
can cause corrosion and rust formation.
During cold weather
If
the temperatures in your area drop below freez-
ing, there is the danger that the coolant in the en-
gine or radiator could freeze and cause severe dam-
age to the engine and/or radiator. Add a sufficient
amount of anti-freeze to the coolant to prevent it
from freezing.
The concentration should be checked before the
start of cold weather and anti-freeze added to the
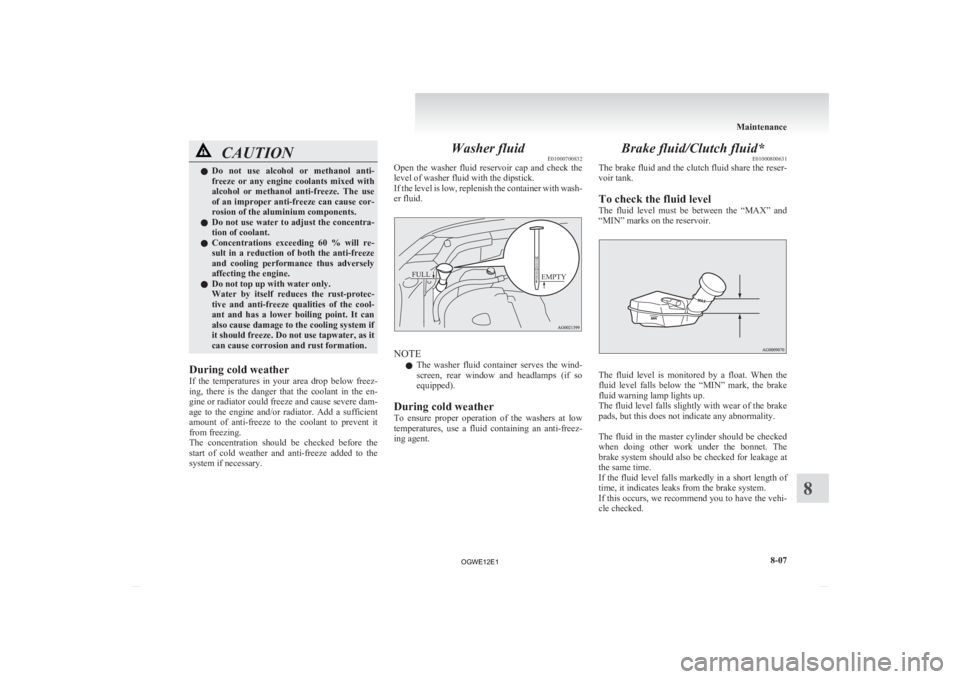
system if necessary. Washer fluid
E01000700832
Open
the washer fluid reservoir cap and check the
level of washer fluid with the dipstick.
If the level is low, replenish the container with wash-
er fluid.
EMPTY
FULL NOTE
l The
washer fluid container serves the wind-
screen, rear window and headlamps (if so
equipped).
During cold weather
To ensure proper operation of the washers at low
temperatures, use a fluid containing an anti-freez-
ing agent. Brake fluid/Clutch fluid*
E01000800631
The
brake fluid and the clutch fluid share the reser-
voir tank.
To check the fluid level
The fluid level must be between the “MAX” and
“MIN” marks on the reservoir. The fluid level is monitored by a float. When the
fluid
level falls below the “MIN” mark, the brake
fluid warning lamp lights up.
The fluid level falls slightly with wear of the brake
pads, but this does not indicate any abnormality.
The fluid in the master cylinder should be checked
when doing other work under the bonnet. The
brake system should also be checked for leakage at
the same time.
If the fluid level falls markedly in a short length of
time, it indicates leaks from the brake system.
If this occurs, we recommend you to have the vehi-
cle checked. Maintenance
8-07 8
OGWE12E1
Page 323 of 378

Wheel condition
E010018008851- Location of the tread wear indicator
2-
Tread wear indicator
Check the tyres for cuts, cracks and other damage.
Replace the tyres if there are deep cuts or cracks.
Also check each tyre for pieces of metal or pebbles.
The use of worn tyres can be very dangerous be-
cause of the greater chance of skidding or hydro-
planing. The tread depth of the tyres must exceed
1.6 mm in order for the tyres to meet the minimum
requirement for use.
Tread wear indicators will appear on the surface of
the tyre as the tyre wears, thereby indicating that
the tyre no longer meets the minimum requirement
for use. When these wear indicators appear, the
tyres must be replaced with new ones.
On 4-wheel drive vehicles, when replacement of
any of the tyres is necessary, replace all of them. CAUTION
l
Always
use tyres of the same size, same
type, and same brand, and which have no
wear differences.
Using tyres of different size, type, brands
or degree of wear, will increase the differ-
ential oil temperature, resulting in possi-
ble damage to the driving system. Fur-
ther, the drive train will be subjected to
excessive loading, possibly leading to oil
leakage, component seizure, or other seri-
ous faults.
Replacing tyres and wheels E01007200243 CAUTION
l
Avoid
using different size tyres from the
one listed and the combined use of differ-
ent types of tyres, as this can affect driv-
ing safety.
Refer to “Tyres and wheels” on page
9-13.
l Even if a wheel has the same rim size and
offset as the specified type of wheel, its
shape may prevent it from being fitted cor-
rectly. We recommend you to consult a
specialist before using wheels that you
have. Tyre rotation
E01001901317
Tyre
wear varies with vehicle conditions, road sur-
face conditions and individual driver’s driving hab-
its. To equalize the wear and help extend tyre life,
it is recommended to rotate the tyres immediately
after discovery of abnormal wear, or whenever the
wear difference between the front and rear tyres is
recognizable.
When rotating tyres, check for uneven wear and
damage. Abnormal wear is usually caused by incor-
rect tyre pressure, improper wheel alignment, out
of balance wheel, or severe braking. We recom-
mend you to have it checked to determine the
cause of irregular tread wear.
Front Front Front
Spare tyre used*
Spare tyre not used
Tyres with arrows showing rotation direction Maintenance
8-13 8
OGWE12E1
Page 327 of 378

General maintenance
E01002700520
Fuel, engine coolant, oil and exhaust
gas leakage
Look
under the body of your vehicle to check for
fuel, engine coolant, oil and exhaust gas leaks. WARNING
l If
you see a suspicious fuel leak or if you
smell fuel, do not operate the vehicle; call
your MITSUBISHI MOTORS Author-
ized Service Point for assistance.
Exterior and interior lamp operation
Operate
the combination lamp switch to check that
all lamps are functioning properly.
If the lamps do not illuminate, the probable cause
is a blown fuse or defective lamp bulb. Check the
fuses first. If there is no blown fuse, check the
lamp bulbs.
For information regarding the inspection and re-
placement of the fuses and the lamp bulbs, refer to
“Fuses” on page 8-18 and “Replacement of lamp
bulbs” on page 8-24.
If the fuses and bulbs are all OK, we recommend
you to have your vehicle checked and repaired.
Meter, gauge and indicator/warning
lamps operation
Start the engine and check the operation of all in-
struments, gauges and indication and warning lamps.
If there is anything wrong, we recommend you to
have your vehicle inspected. Hinges and latches lubrication
Check
all latches and hinges, and, if necessary,
have them lubricated. For cold and snowy weather
E01002800361
Ventilation slots
The
ventilation slots in front of the windscreen
should be kept clear of leaves or brushed clear after
heavy snowfall, so that the operation of the heating
and ventilation systems will not be impaired.
Weatherstripping
To prevent freezing of the weatherstripping on the
doors, bonnet, etc., they should be treated with sili-
cone grease.
Additional equipment
It is a good idea to carry a shovel or a short-han-
dled spade in the vehicle during the winter so that
you can clear away snow if you get stranded. A
small hand-brush for sweeping snow off the vehi-
cle and a plastic scraper for the windscreen and
rear window are also useful. Maintenance
8-17 8
OGWE12E1
Page 333 of 378

Identification of fuse
Capacity Colour
7.5 A Brown
10 A Red
15 A Blue
20 A Yellow
25 A Natural (White)
30 A Green (fuse type)/
Pink (fusible link type)
40 A Green (fusible link type) Fuse replacement
E01007800630
1. Before replacing a fuse, always turn off the
electrical circuit concerned and turn the igni-
tion switch to the “LOCK” position or put
the operation mode in OFF.
2. Remove the fuse puller (A) from the inside of the fuse box in the engine compartment. 3. Referring
to the fuse load capacity table,
check the fuse pertaining to the problem. B- Fuse is OK
C- Blown fuse
NOTE l If
any system does not function but the fuse
corresponding to that system is normal, there
may be a fault in the system elsewhere. We
recommend you to have your vehicle checked.
4. Use the fuse puller to insert a new fuse with the same capacity. Make sure you insert the
fuse into the same location in the fuse block. CAUTION
l
If
the newly inserted fuse blows again af-
ter a short time, we recommend you to
have the electrical system checked to find
the cause and rectify it.
l Never use a fuse with a larger capacity
than specified or a substitute (such as a ca-
ble or foil). Doing so could cause the cir-
cuit wires to overheat and create a fire. Maintenance
8-23 8
OGWE12E1
Page 334 of 378

Replacement of lamp bulbs
E01003100488
Before
replacing a bulb, ensure the lamp is off. Do
not touch the glass part of the new bulb with your
bare fingers; the skin oil left on the glass will evap-
orate when the bulb gets hot and the vapour will
condense on the reflector and dim the surface. CAUTION
l
Bulbs
are extremely hot immediately af-
ter being turned off.
When replacing a bulb, wait for it to cool
sufficiently before touching it. You could
otherwise be burnt.
NOTE l If
you are unsure of how to carry out the
work as required, we recommend you to con-
sult a specialist.
l Be careful not to scratch the vehicle body
when removing a lamp or lens.
l When it rains or when the vehicle has been
washed, the inside of the lens sometimes be-
comes foggy. This is the same phenomenon
as when window glass mists up on a humid
day, and does not indicate a functional prob-
lem.
When the lamp is switched on, the heat will
remove the fog. However, if water gathers in-
side the lamp, we recommend you to have
the lamp checked.
Bulb capacity E01003200290
When replacing a bulb, use a new bulb with the
same wattage and colour. Outside
E01003302758
Front 1- Front turn-signal lamps: 21 W (WY21W)
2-
Headlamps, high-beam: 60 W (HB3)
3- Type 1 Front fog lamps: 35 W (H8)
Daytime running lamps: 13 W (P13W)
Type 2 Daytime running lamps: 13 W (P13W)
Type 3 Front fog lamps: 55 W (H11)
4- Headlamps, low beam Halogen: 55 W (H11)
High intensity discharge *2
: 35 W
5- Position lamps: 5 W (W5W)
6- Side turn-signal lamps (on fender) *1
,*2
: 5 W
7- Side turn-signal lamps (on outside rear-view
mirror) *1
*1 : if so equipped
*2 : Have the lamps bulbs replaced at a
MITSUBISHI MOTORS
Authorized
Service Point.
Codes in parentheses indicate bulb types. WARNING
l Always
consult a specialist when repair-
ing or replacing the bulbs of high intensi-
ty discharge headlamps.
This is because the power circuit, bulbs
and electrodes generate a high voltage
that could cause an electric shock.
NOTE l An
LED, not a bulb, is used in the side turn-
signal lamp (on outside rear-view mirror).
Contact a MITSUBISHI MOTORS Author-
ized Service Point when there is a need for re-
pair or replacement.
l For the side turn-signal lamp (on fender), it
is not possible to repair or replace just the bulb.
Contact a MITSUBISHI MOTORS Author-
ized Service Point when there is a need for re-
pair or replacement.
Rear 8- High-mounted stop lamp
9-
Licence plate lamps: 5 W (W5W)
10- Rear fog lamp: 21 W (W21W)
11- Reversing lamps: 16 W (W16W) Maintenance
8-24
8
OGWE12E1