2012 MINI COUPE ROADSTER CONVERTIBLE key
[x] Cancel search: keyPage 40 of 283
Opening and closingCONTROLS
39
Initializing electric power windows
If the battery was disconnected, e.g. for
changing batteries or vehicle storage,
reinitialize the power wi ndows; otherwise, the
windows will not be lowered.
MINI Convertible: opening the convertible top is
not possible. <
1. Close the doors.
2. Open both windows.
3. Close both windows.
In the event of a system malfunction, please
contact your MINI dealer.
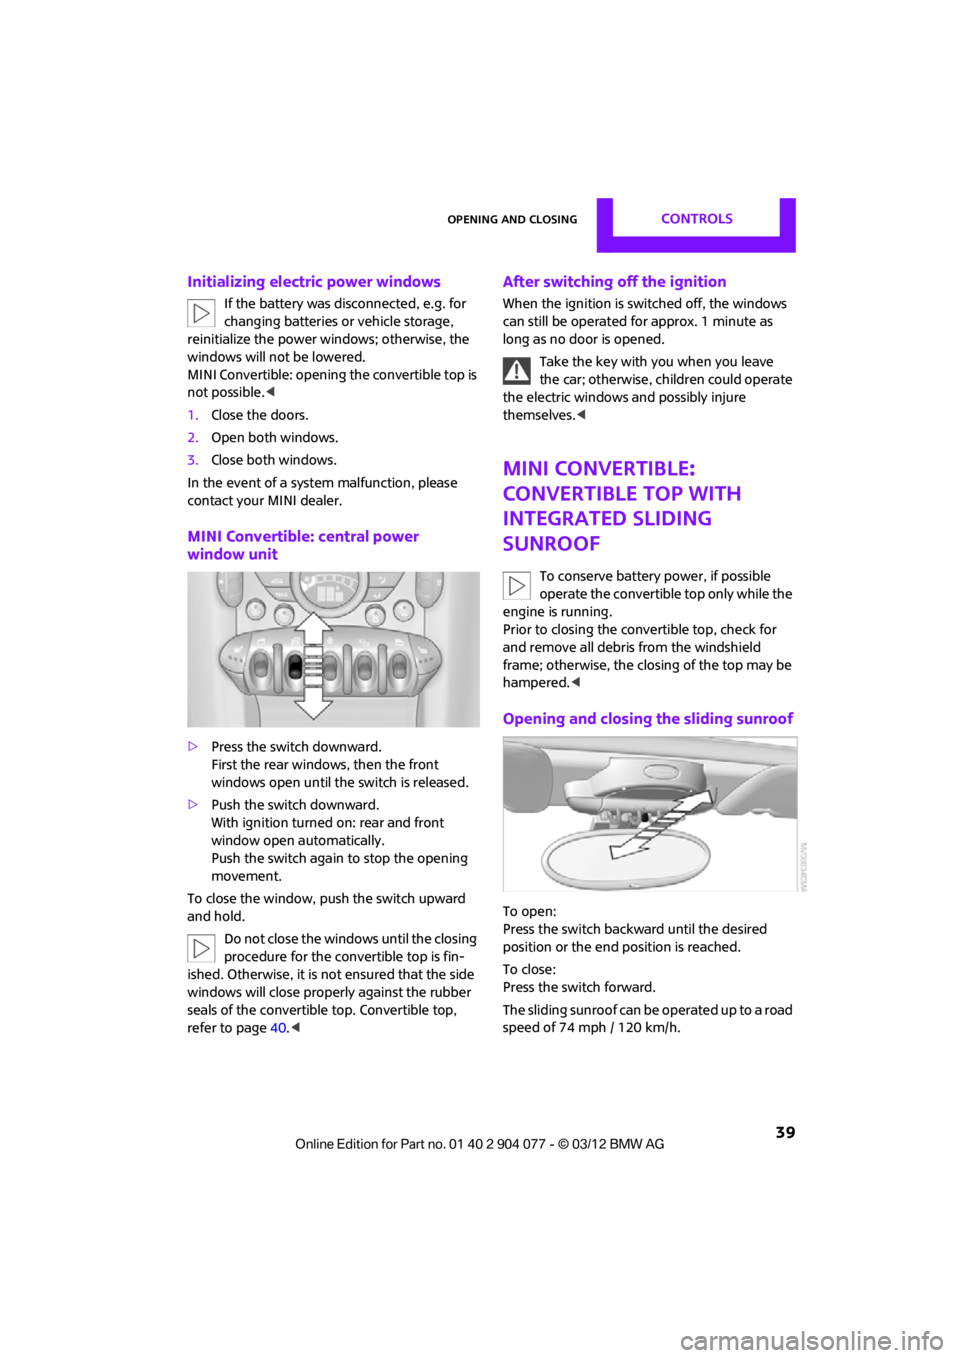
MINI Convertible: central power
window unit
> Press the switch downward.
First the rear windows, then the front
windows open until the switch is released.
> Push the switch downward.
With ignition turned on: rear and front
window open automatically.
Push the switch again to stop the opening
movement.
To close the window, push the switch upward
and hold. Do not close the windows until the closing
procedure for the convertible top is fin-
ished. Otherwise, it is not ensured that the side
windows will close properly against the rubber
seals of the convertible top. Convertible top,
refer to page 40.<
After switching off the ignition
When the ignition is sw itched off, the windows
can still be operated for approx. 1 minute as
long as no door is opened.
Take the key with you when you leave
the car; otherwise, children could operate
the electric windows and possibly injure
themselves. <
MINI Convertible:
Convertible top with
integrated sliding
sunroof
To conserve battery power, if possible
operate the convertible top only while the
engine is running.
Prior to closing the convertible top, check for
and remove all debris from the windshield
frame; otherwise, the closing of the top may be
hampered. <
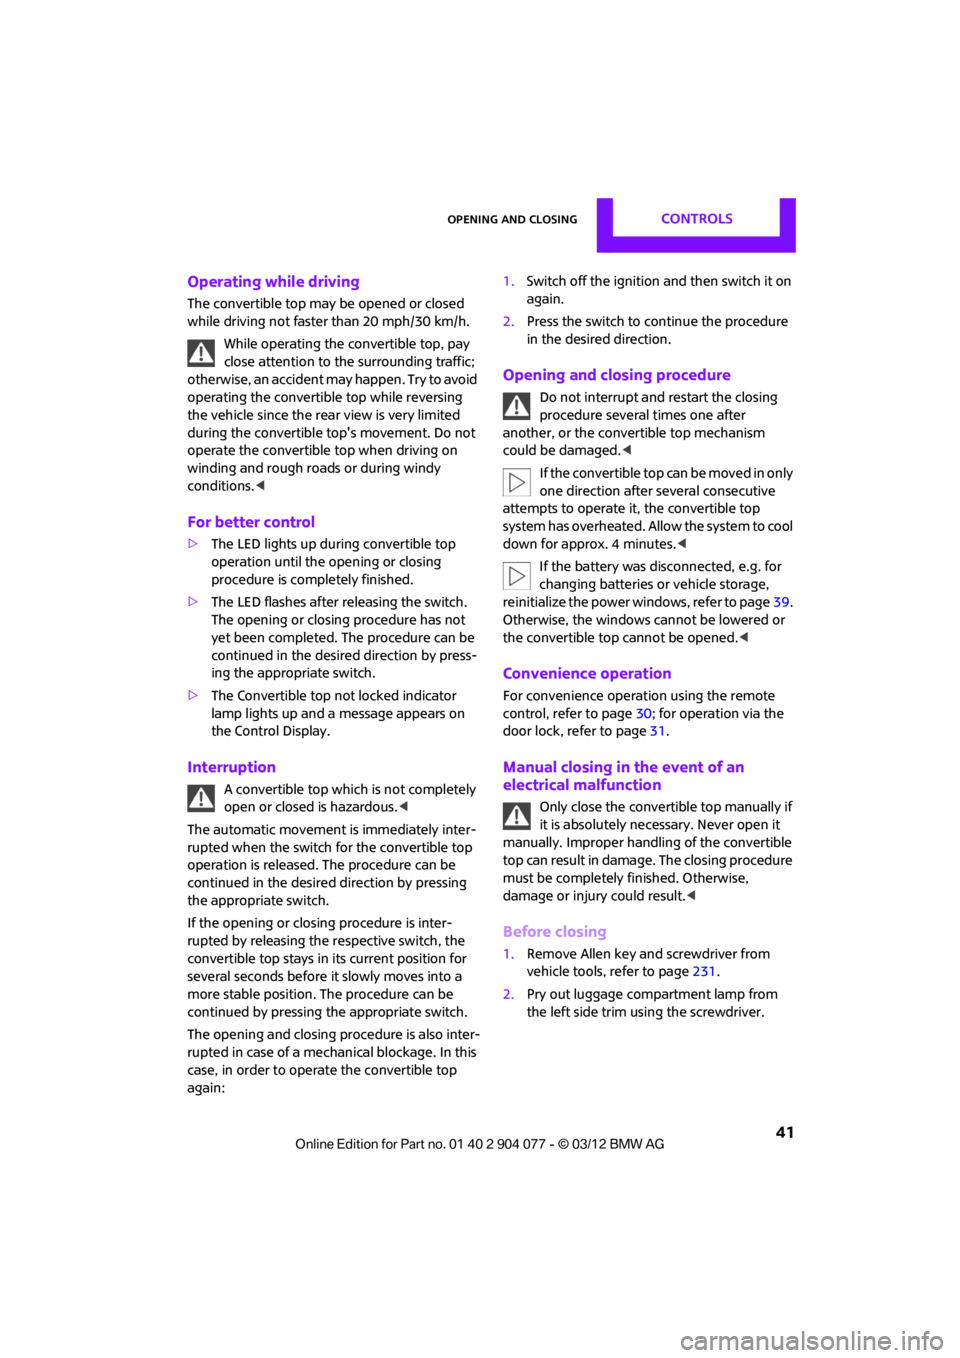
Opening and closing the sliding sunroof
To open:
Press the switch backwa rd until the desired
position or the end position is reached.
To close:
Press the switch forward.
The sliding sunroof can be operated up to a road
speed of 74 mph / 120 km/h.
00320051004F004C00510048000300280047004C0057004C005200510003
Page 42 of 283
Opening and closingCONTROLS
41
Operating while driving
The convertible top may be opened or closed
while driving not faster than 20 mph/30 km/h.
While operating the convertible top, pay
close attention to the surrounding traffic;
otherwise, an accident may happen. Try to avoid
operating the convertible top while reversing
the vehicle since the rear view is very limited
during the convertible top's movement. Do not
operate the convertible top when driving on
winding and rough roads or during windy
conditions. <
For better control
>The LED lights up during convertible top
operation until the opening or closing
procedure is completely finished.
> The LED flashes after releasing the switch.
The opening or closing procedure has not
yet been completed. The procedure can be
continued in the desired direction by press-
ing the appropriate switch.
> The Convertible top not locked indicator
lamp lights up and a message appears on
the Control Display.
Interruption
A convertible top which is not completely
open or closed is hazardous. <
The automatic movement is immediately inter-
rupted when the switch for the convertible top
operation is released. The procedure can be
continued in the desired direction by pressing
the appropriate switch.
If the opening or closing procedure is inter-
rupted by releasing the respective switch, the
convertible top stays in its current position for
several seconds before it slowly moves into a
more stable position. The procedure can be
continued by pressing the appropriate switch.
The opening and cl osing procedure is also inter-
rupted in case of a mech anical blockage. In this
case, in order to operate the convertible top
again: 1.
Switch off the ignition and then switch it on
again.
2. Press the switch to continue the procedure
in the desired direction.
Opening and closing procedure
Do not interrupt and restart the closing
procedure several times one after
another, or the convertible top mechanism
could be damaged. <
If the convertible top can be moved in only
one direction after several consecutive
attempts to operate it, the convertible top
system has overheated. Allow the system to cool
down for approx. 4 minutes. <
If the battery was disconnected, e.g. for
changing batteries or vehicle storage,
reinitialize the power windows, refer to page 39.
Otherwise, the windows cannot be lowered or
the convertible top cannot be opened. <
Convenience operation
For convenience operation using the remote
control, refer to page30; for operation via the
door lock, refer to page 31.
Manual closing in the event of an
electrical malfunction
Only close the convertible top manually if
it is absolutely necessary. Never open it
manually. Improper handling of the convertible
top can result in damage. The closing procedure
must be completely finished. Otherwise,
damage or injury could result.<
Before closing
1.Remove Allen key and screwdriver from
vehicle tools, refer to page 231.
2. Pry out luggage compartment lamp from
the left side trim using the screwdriver.
00320051004F004C00510048000300280047004C0057004C005200510003
Page 61 of 283

CONTROLSDriving
60
Driving
Vehicle equipment
In this chapter, all production, country, and
optional equipment that is offered in the model
range is described. Equipment is also described
that is not available because of, for example,
selected options or coun try version. This also
applies to safety relate d functions and systems.
Ignition lock
Inserting the key into the ignition lock
Insert the key all the way into the ignition lock.
Radio readiness
Individual electrical consumers can operate.
Removing the key from the ignition lock
Press in the key briefly. It is ejected slightly.
At the same time:
>The ignition is switched off if it was on
beforehand.
Automatic transmission
The key can only be removed if the selector lever
is in position P: interlock.
Start/Stop button
Press the Start/Stop button to switch radio readi-
ness or the ignition on and off. Do not depress
the brake or clutch while doing so.
If the Start/Stop button is pressed while
the clutch is depressed in the manual
transmission or the brake pedal is depressed in
the automatic transmission, the engine starts. <
Radio readiness
Individual electrical consumers can operate. The
time and external temperature are displayed in
the tachometer.
Radio readiness is switched off automatically:
>When the key is removed from the ignition
lock
> When using Comfort Access by pressing
the button on the door handle or the
button on the remote control, refer to
Locking on page 37
> After a certain has elapsed
Ignition on
Most indicator and warn ing lamps in indicator
area 1, page 13, light up for varying lengths of
time.
When the engine is off, switch off the
ignition and any unnecessary electrical
consumers in order to preserve the battery. <
00320051004F004C00510048000300280047004C0057004C005200510003
Page 62 of 283

DrivingCONTROLS
61
Radio readiness and ignition off
All indicator and warning lamps in the displays
go out.
The ignition switches off automatically if the
driver's door is opened. Pressing the Start/Stop
button again switches the ignition back on.
The ignition is not switched off in situations such
as the following:
>The clutch or brake is depressed
> The low beams are switched on
Starting the engine
Do not allow the engine to run in enclosed
areas; otherwise, inhalation of the noxious
exhaust gases can lead to loss of consciousness
and death. Exhaust gases contain carbon mon-
oxide, an odorless and colorless, but highly toxic
gas. Never leave an unattended vehicle with the
engine running; otherwise, such a vehicle repre-
sents a potential safety hazard.
Before leaving the car while the engine is run-
ning, place the transmission in neutral or move
the selector lever to position P and forcefully
apply the parking brake to prevent the car from
moving. <
Avoid frequent starting in quick succes-
sion or repeated start attempts in which
the engine does not start. Otherwise, the fuel
is not burned or inadequately burned and there
is a danger of overheating and damaging the
catalytic converter. <
Do not let the engine warm up with the vehicle
at a standstill. Move of f immediately at a moder-
ate engine speed.
When starting the engine, do not depress the
accelerator pedal.
Manual transmission
Key in ignition lock or inside vehicle with
Comfort Access, refer to page 36.
1. Depress the brake.
2. Depress the clutch.
3. Press the Start/Stop button.
Automatic transmission
Key in ignition lock or inside vehicle with
Comfort Access, refer to page 36.
1. Depress the brake.
2. Shift the selector lever into position P or N.
3. Press the Start/Stop button.
The starter operates auto matically for a certain
time, and stops automatically as soon as the
engine has started.
Switching off the engine
Always take the key with you when you
leave the vehicle.
When parking, apply the parking brake force-
fully; otherwise, the vehicle could begin to roll.
Secure the vehicle on steep upward and down-
ward slopes, for example, turn the steering
wheel towards the curb. <
Manual transmission
1.With the car at a standstill, press the
Start/Stop button.
2. Shift into first gear or reverse.
3. Forcefully apply the parking brake.
00320051004F004C00510048000300280047004C0057004C005200510003
Page 64 of 283
DrivingCONTROLS
63
Removing the key
To remove the key from the ignition lock, first
move the selector lever into position P and then
switch off the engine: interlock. Remove the key
from the ignition lock, refer to page60.
Selector lever positions
P R N D M/S + –
Displays in the tachometer
P R N D DS M1 to M6
The selector lever position is displayed, or the
current gear in the manual mode.
Changing selector lever positions
>The selector lever can only be moved out of
position P when the ignition is switched on
or the engine is running.
> Before moving the lever away from P or N
with the vehicle stationary, first depress the
brake; otherwise, the selector lever will
refuse to move: shiftlock.
To prevent the vehicle from creeping
after you select a driving position,
depress the brake until you are ready to
start. <
A lock prevents accidental shifting into selector
lever positions R and P.
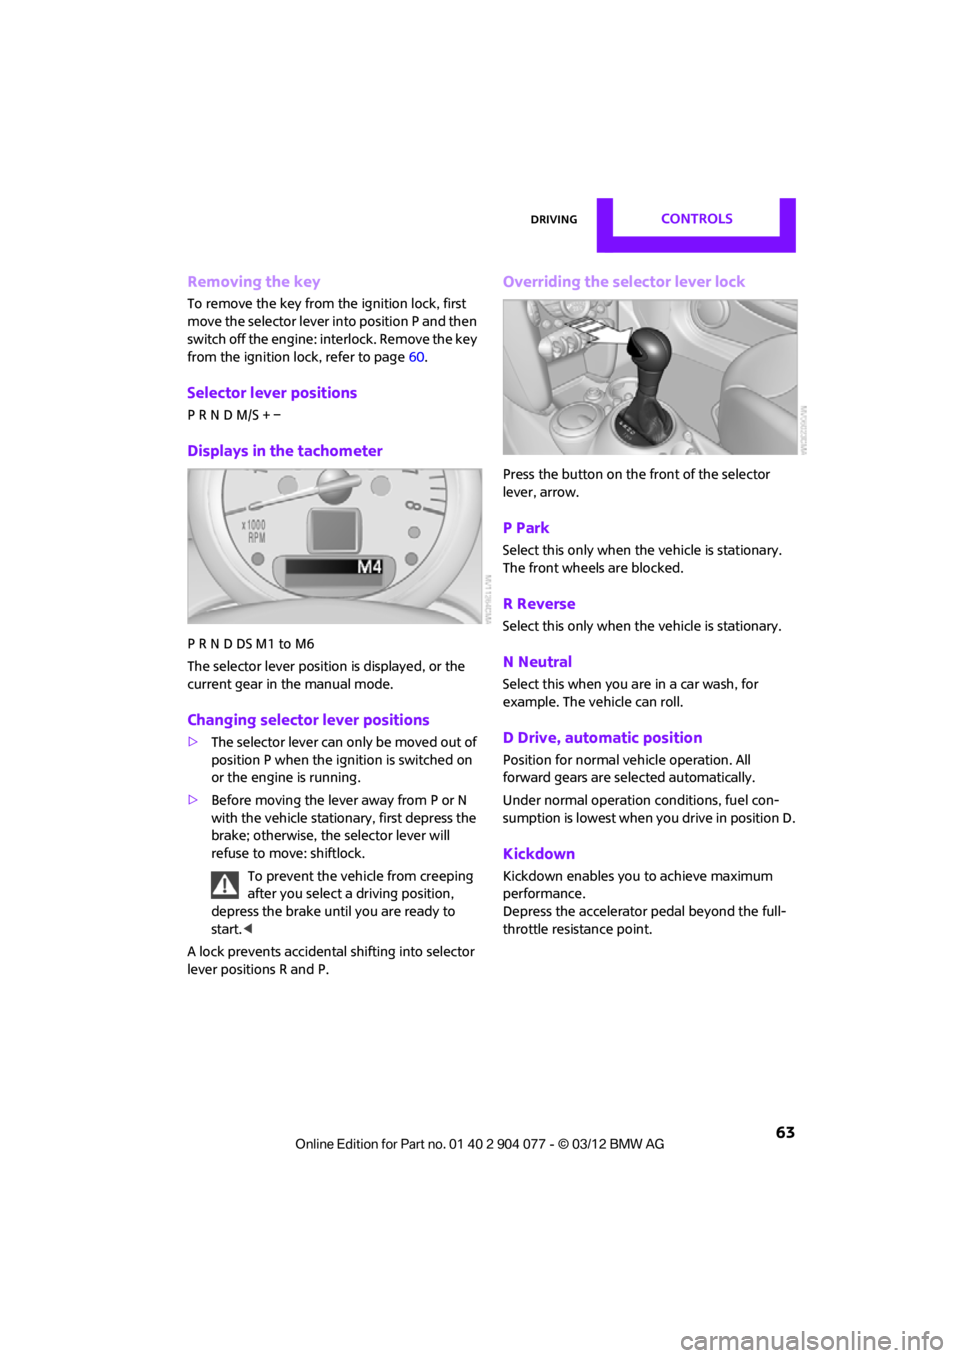
Overriding the selector lever lock
Press the button on the front of the selector
lever, arrow.
P Park
Select this only when the vehicle is stationary.
The front wheels are blocked.
R Reverse
Select this only when the vehicle is stationary.
N Neutral
Select this when you are in a car wash, for
example. The vehicle can roll.
D Drive, automatic position
Position for normal ve hicle operation. All
forward gears are selected automatically.
Under normal operation conditions, fuel con-
sumption is lowest when you drive in position D.
Kickdown
Kickdown enables you to achieve maximum
performance.
Depress the accelerator pedal beyond the full-
throttle resistance point.
00320051004F004C00510048000300280047004C0057004C005200510003
Page 108 of 283
Practical interior accessoriesCONTROLS
107
Practical interior accessories
Vehicle equipment
In this chapter, all production, country, and
optional equipment that is offered in the model
range is described. Equipment is also described
that is not available because of, for example,
selected options or count ry version. This also
applies to safety related functions and systems.
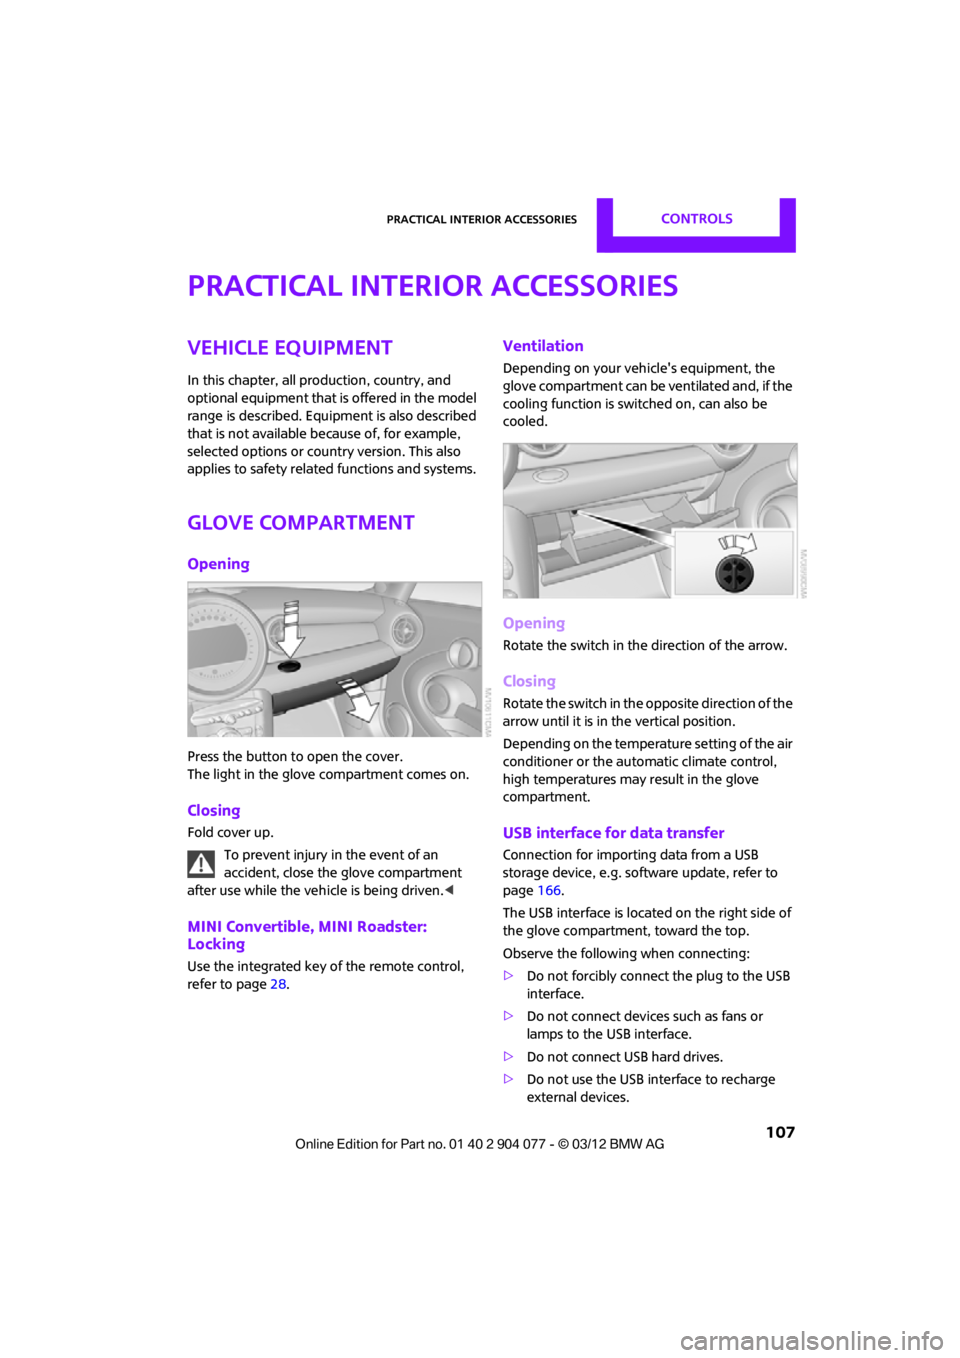
Glove compartment
Opening
Press the button to open the cover.
The light in the glove compartment comes on.
Closing
Fold cover up.
To prevent injury in the event of an
accident, close the glove compartment
after use while the vehi cle is being driven.<
MINI Convertible, MINI Roadster:
Locking
Use the integrated key of the remote control,
refer to page28.
Ventilation
Depending on your vehicle's equipment, the
glove compartment can be ventilated and, if the
cooling function is swit ched on, can also be
cooled.
Opening
Rotate the switch in the direction of the arrow.
Closing
Rotate the switch in the opposite direction of the
arrow until it is in the vertical position.
Depending on the temperature setting of the air
conditioner or the automatic climate control,
high temperatures may result in the glove
compartment.
USB interface for data transfer
Connection for importing data from a USB
storage device, e.g. soft ware update, refer to
page 166.
The USB interface is locate d on the right side of
the glove compartment, toward the top.
Observe the following when connecting:
> Do not forcibly connect the plug to the USB
interface.
> Do not connect devices such as fans or
lamps to the USB interface.
> Do not connect USB hard drives.
> Do not use the USB interface to recharge
external devices.
00320051004F004C00510048000300280047004C0057004C005200510003
Page 110 of 283
Practical interior accessoriesCONTROLS
109
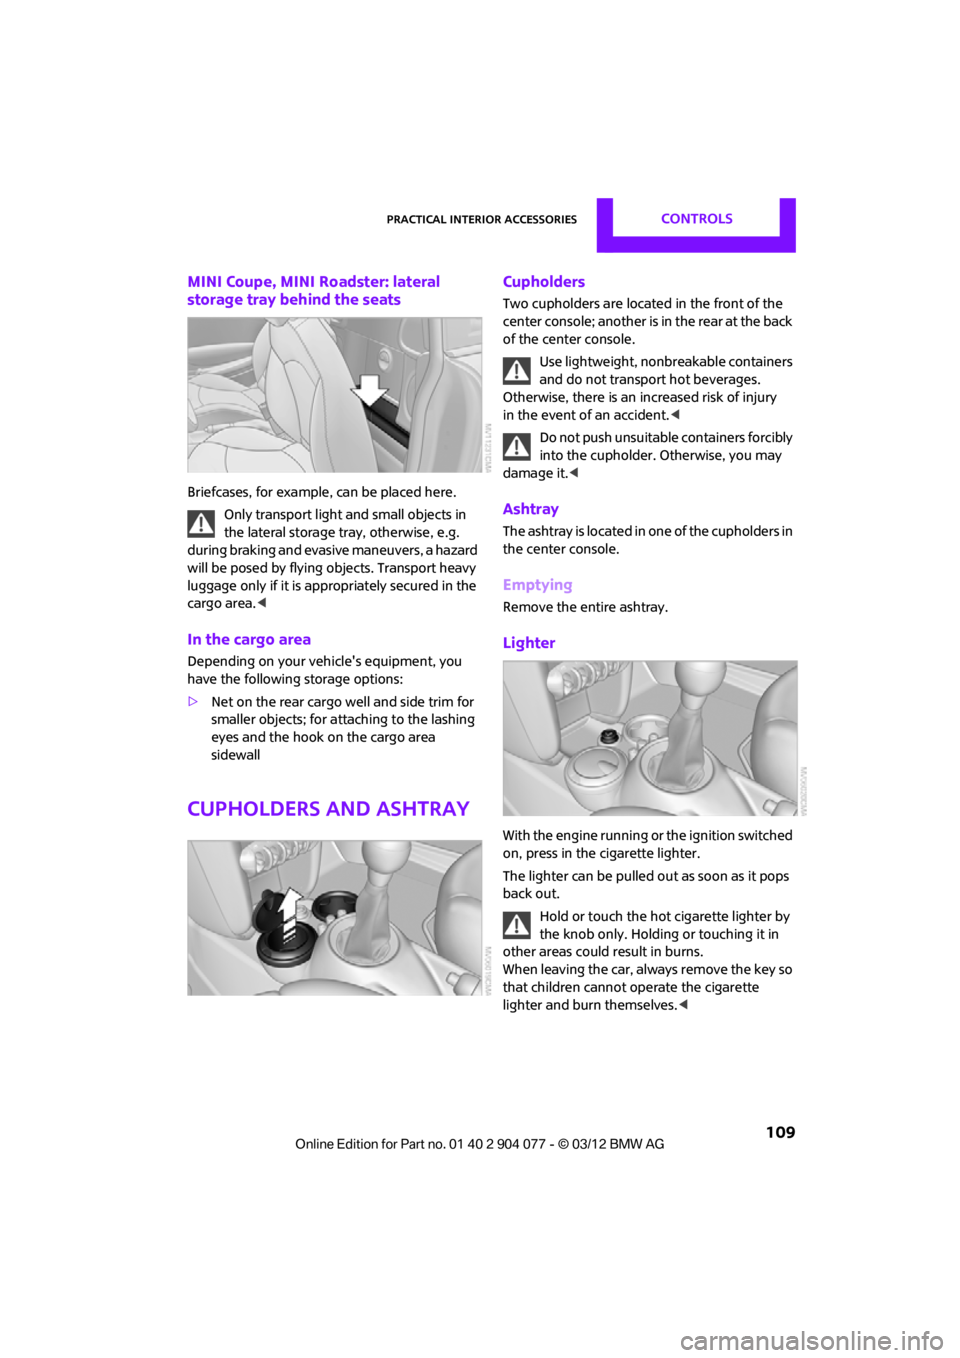
MINI Coupe, MINI Roadster: lateral
storage tray behind the seats
Briefcases, for example, can be placed here.
Only transport light and small objects in
the lateral storage tray, otherwise, e.g.
during braking and evasive maneuvers, a hazard
will be posed by flying objects. Transport heavy
luggage only if it is appropriately secured in the
cargo area. <
In the cargo area
Depending on your vehicle's equipment, you
have the following storage options:
>Net on the rear cargo well and side trim for
smaller objects; for attaching to the lashing
eyes and the hook on the cargo area
sidewall
Cupholders and ashtray
Cupholders
Two cupholders are located in the front of the
center console; another is in the rear at the back
of the center console.
Use lightweight, nonbreakable containers
and do not transport hot beverages.
Otherwise, there is an increased risk of injury
in the event of an accident. <
Do not push unsuitable containers forcibly
into the cupholder. Otherwise, you may
damage it.<
Ashtray
The ashtray is located in one of the cupholders in
the center console.
Emptying
Remove the entire ashtray.
Lighter
With the engine running or the ignition switched
on, press in the cigarette lighter.
The lighter can be pulled out as soon as it pops
back out.
Hold or touch the hot cigarette lighter by
the knob only. Holding or touching it in
other areas could result in burns.
When leaving the car, always remove the key so
that children cannot operate the cigarette
lighter and burn themselves. <
00320051004F004C00510048000300280047004C0057004C005200510003
Page 118 of 283
Things to remember when drivingDRIVING TIPS
117
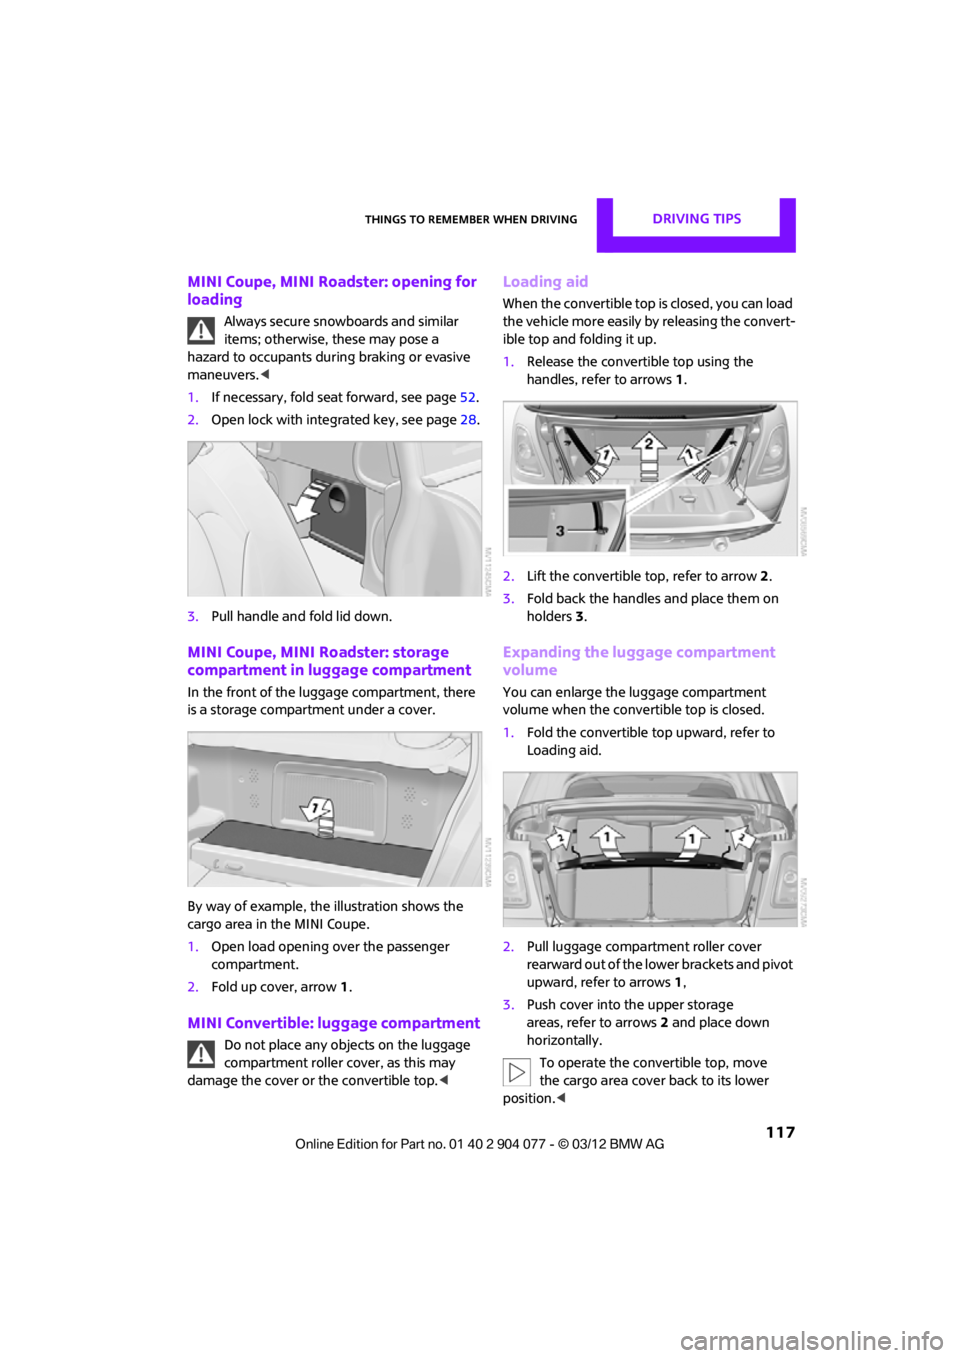
MINI Coupe, MINI Roadster: opening for
loading
Always secure snowboards and similar
items; otherwise, these may pose a
hazard to occupants during braking or evasive
maneuvers. <
1. If necessary, fold seat forward, see page 52.
2. Open lock with integrated key, see page 28.
3. Pull handle and fold lid down.
MINI Coupe, MINI Roadster: storage
compartment in luggage compartment
In the front of the luggage compartment, there
is a storage compartment under a cover.
By way of example, the illustration shows the
cargo area in the MINI Coupe.
1. Open load opening over the passenger
compartment.
2. Fold up cover, arrow 1.
MINI Convertible: luggage compartment
Do not place any objects on the luggage
compartment roller cover, as this may
damage the cover or the convertible top. <
Loading aid
When the convertible top is closed, you can load
the vehicle more easily by releasing the convert-
ible top and folding it up.
1.Release the convertible top using the
handles, refer to arrows 1.
2. Lift the convertible top, refer to arrow2.
3. Fold back the handles and place them on
holders 3.
Expanding the luggage compartment
volume
You can enlarge the luggage compartment
volume when the convertible top is closed.
1. Fold the convertible top upward, refer to
Loading aid.
2. Pull luggage compartment roller cover
rearward out of the lower brackets and pivot
upward, refer to arrows 1,
3. Push cover into the upper storage
areas, refer to arrows 2 and place down
horizontally.
To operate the convertible top, move
the cargo area cover back to its lower
position. <
00320051004F004C00510048000300280047004C0057004C005200510003