2012 MINI COUPE ROADSTER CONVERTIBLE air condition
[x] Cancel search: air conditionPage 15 of 283
AT A GLANCECockpit
14
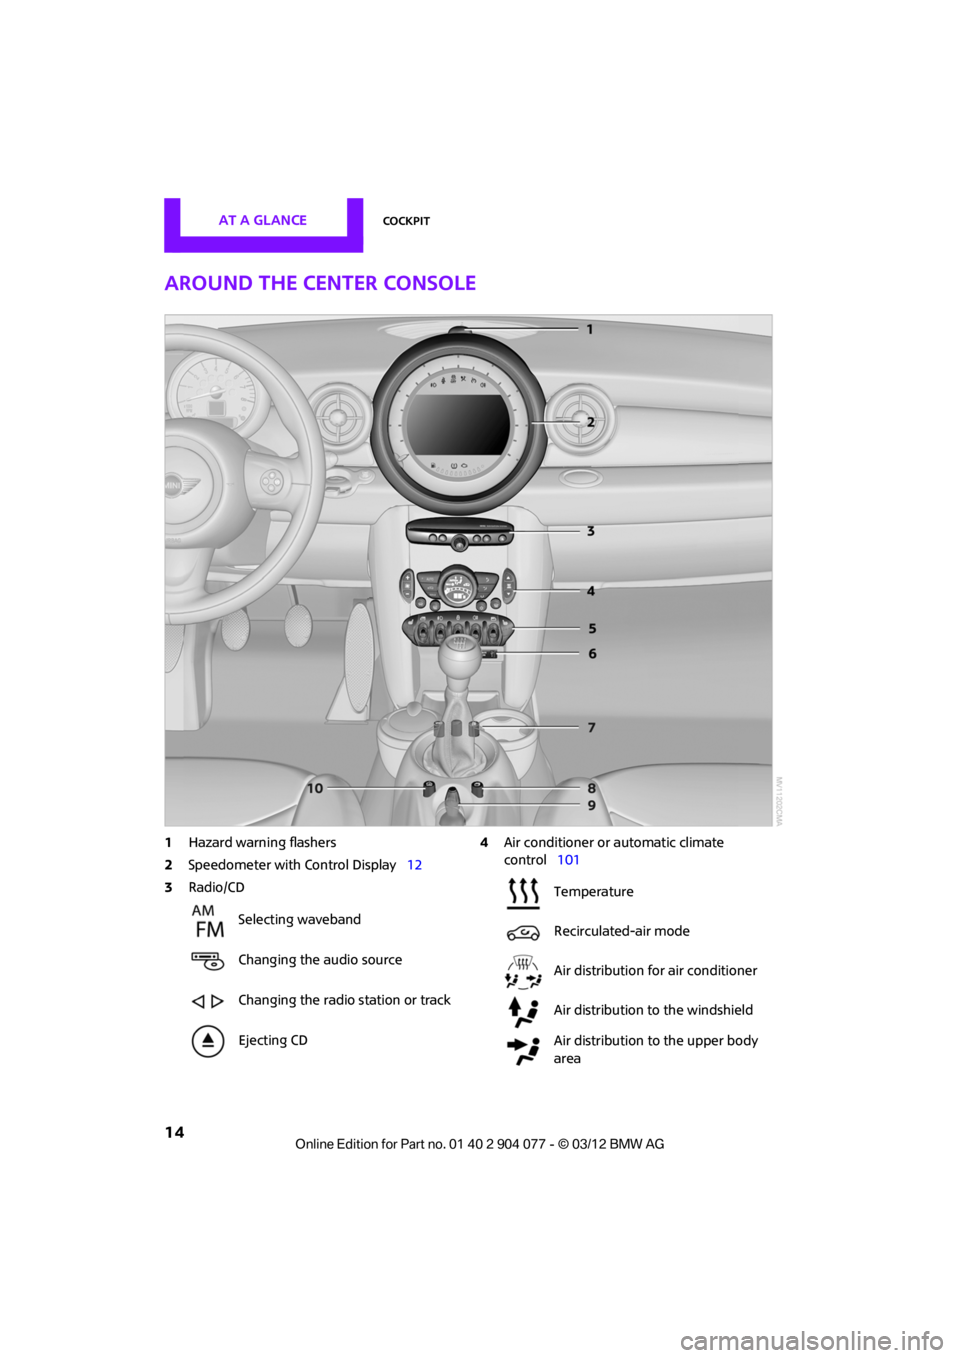
Around the center console
1Hazard warning flashers
2 Speedometer with Control Display 12
3 Radio/CD 4
Air conditioner or automatic climate
control 101
Selecting waveband
Changing the audio source
Changing the radio station or track
Ejecting CD
Temperature
Recirculated-air mode
Air distribution for air conditioner
Air distribution to the windshield
Air distribution to the upper body
area
00320051004F004C00510048000300280047004C0057004C005200510003
Page 89 of 283
CONTROLSTechnology for driving comfort and safety
88
The initialization is completed during driv-
ing, which can be interrupted at any time.
When driving resumes, the initialization is
continued automatically. <
Indication of a flat tire
The warning lamps come on in yellow
and red. A message appears on the
Control Display. An acoustic signal also
sounds. There is a flat tire or a major loss
in tire inflation pressure.
1. Reduce speed and stop the vehicle with
caution. Avoid sudden braking and steering
maneuvers.
2. Check whether the vehicle is equipped with
normal tires or with run-flat tires.
Run-flat tires, refer to page 218, are identi-
fied by a circular symbol containing the
letters RSC on the tire sidewall.
If the vehicle is not equipped with run-flat
tires, do not continue driving; continuing
to drive can result in serious accidents.<
When a flat tire is repo rted, the Dynamic Stability
Control DSC is activated.
Actions in the event of a flat tire
Normal tires
1. Identify the damaged tire.
To do so, check the infl ation pressure in all
four tires.
The inflation pressure display of the Mobility
Kit, page 237, can be used for this purpose.
If the inflation pressure in all four tires is cor-
rect, the Flat Tire Mo nitor might not have
been initialized. The system must then be
initialized.
If it is not possible to identify the damaged
tire, contact your MINI dealer.
2. Use the Mobility Kit to remedy the flat tire on
the damaged wheel, refer to page 237, or to
replace the damaged wheel, refer to
page 239.
Run-flat tires
You can continue driving with a damaged tire at
speeds up to 50 mph or 80 km/h.
Continued driving with a flat tire
When driving with a damaged tire:
1.Avoid sudden braking and steering
maneuvers.
2. Do not exceed a speed of 50 mph or
80 km/h.
3. At the next opportunity, check the air
pressure in all four tires.
If the inflation pressure in all four tires is cor-
rect, the Flat Tire Monitor might not have
been initialized. The system must then be
initialized.
Possible driving distance with complete loss of
tire inflation pressure:
The distance it is possible to drive with a flat tire
depends on the load and the stress on the vehi-
cle while driving.
With an average load, it may be possible to drive
for approx. 50 miles/80 km.
When driving with damaged tires, the handling
characteristics change, e. g. the vehicle will skid
sooner when braking, braking distances will be
longer, or self-steerin g response will change.
Adapt your driving style accordingly. Avoid turn-
ing abruptly and driving over obstacles such as
curbs, potholes, etc.
Since the possible driving distance depends to a
considerable degree on the strain exerted on
the vehicle while driving, it can be shorter or,
with a gentle driving styl e, can also be longer,
depending on the speed, road condition, exter-
nal temperature, vehicle load, etc.
Drive cautiously and do not exceed a
speed of 50 mph/80 km/h.
A loss of tire inflation pressure results in a
change in the handling characteristics, e.g.
reduced lane stability during braking, a longer
braking distance and altered self-steering
properties. <
00320051004F004C00510048000300280047004C0057004C005200510003
Page 92 of 283
Technology for driving comfort and safetyCONTROLS
91
Continued driving with a flat tire
When driving with a damaged tire:
1.Avoid sudden braking and steering
maneuvers.
2. Do not exceed a speed of 50 mph/80 km/h.
3. At the next opportunity, check the air
pressure in all four tires.
If the inflation pressure is correct in all four
tires, then the Tire Pressure Monitor may not
have been reset. The system must then be
reset.
Possible driving distance with complete loss of
tire inflation pressure:
The distance it is possible to drive with a flat tire
depends on the load and the stress on the vehi-
cle while driving.
With an average load, it may be possible to drive
for approx. 50 miles/80 km.
When driving with damaged tires, the handling
characteristics change, e. g. the vehicle will skid
sooner when braking, braking distances will be
longer, or self-steering response will change.
Adapt your driving style accordingly. Avoid turn-
ing abruptly and driving over obstacles such as
curbs, potholes, etc.
Since the possible driving distance depends to a
considerable degree on the strain exerted on
the vehicle while driving, it can be shorter or,
with a gentle dr iving style, can also be longer,
depending on the speed, road condition, exter-
nal temperature, vehicle load, etc.
Drive cautiously and do not exceed a
speed of 50 mph/80 km/h.
A loss of tire inflation pr essure results in a change
in the handling characteristics, e.g. reduced lane
stability during braking, a longer braking dis-
tance and altered self-steering properties. <
Vibrations or loud noises while driving can
indicate complete failure of the tire.
Reduce your speed and bring the vehicle to a
stop; otherwise, pieces of tire may come off,
which could result in an accident. Do not con-
tinue driving and contact your MINI dealer. <
Malfunction
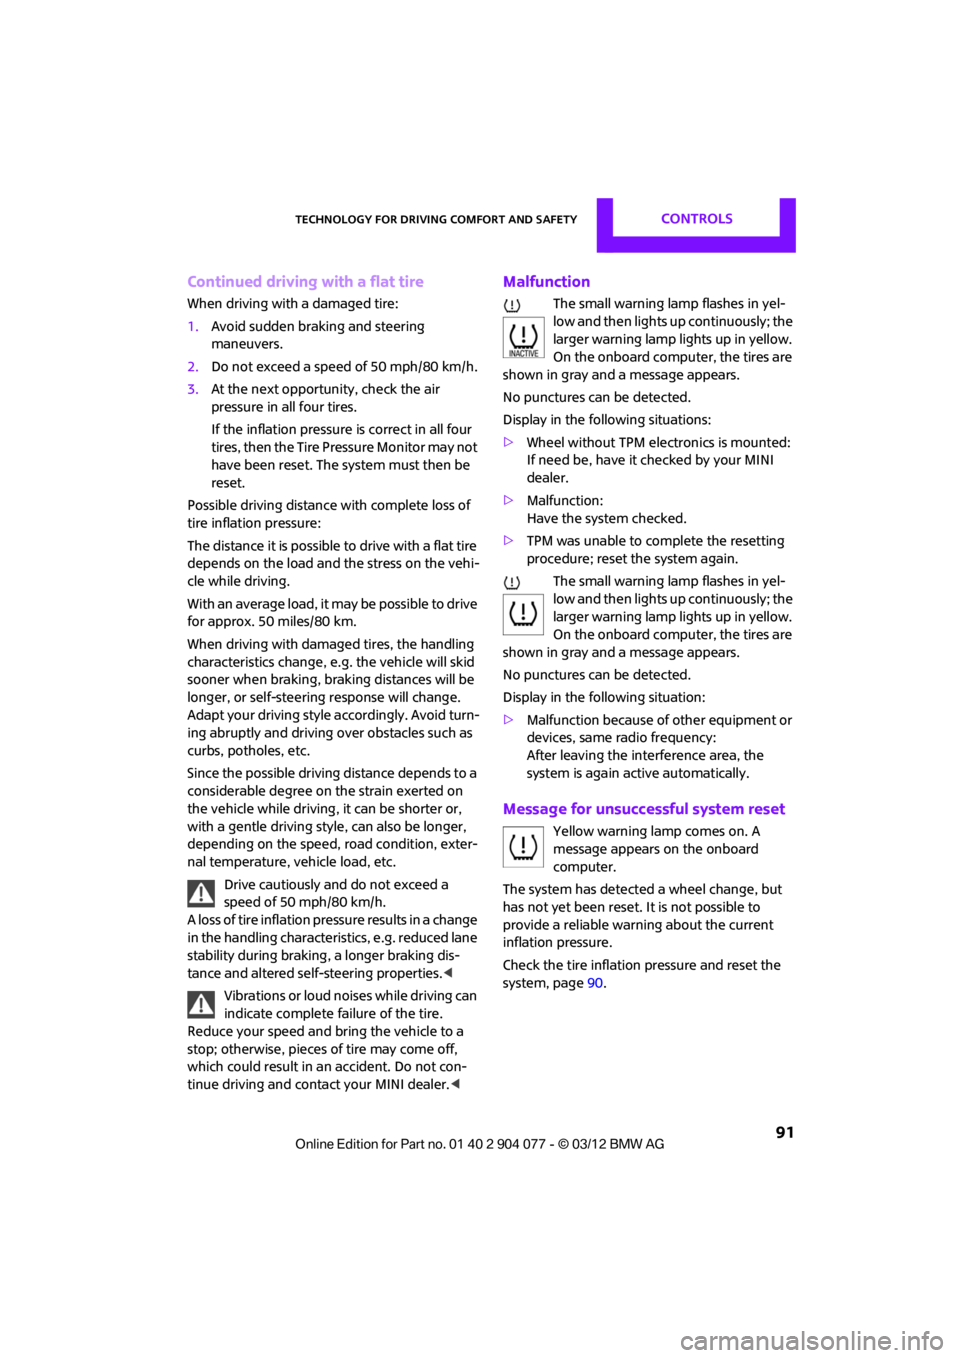
The small warning lamp flashes in yel-
low and then lights up continuously; the
larger warning lamp lights up in yellow.
On the onboard computer, the tires are
shown in gray and a message appears.
No punctures can be detected.
Display in the following situations:
> Wheel without TPM electronics is mounted:
If need be, have it checked by your MINI
dealer.
> Malfunction:
Have the system checked.
> TPM was unable to complete the resetting
procedure; reset the system again.
The small warning lamp flashes in yel-
low and then lights up continuously; the
larger warning lamp lights up in yellow.
On the onboard computer, the tires are
shown in gray and a message appears.
No punctures can be detected.
Display in the following situation:
> Malfunction because of other equipment or
devices, same radio frequency:
After leaving the inte rference area, the
system is again active automatically.
Message for unsuccessful system reset
Yellow warning lamp comes on. A
message appears on the onboard
computer.
The system has detected a wheel change, but
has not yet been reset. It is not possible to
provide a reliable warn ing about the current
inflation pressure.
Check the tire inflation pressure and reset the
system, page 90.
00320051004F004C00510048000300280047004C0057004C005200510003
Page 102 of 283
ClimateCONTROLS
101
Climate
Vehicle equipment
In this chapter, all production, country, and
optional equipment that is offered in the model
range is described. Equipment is also described that is not available because of, for example,
selected options or count
ry version. This also
applies to safety related functions and systems.
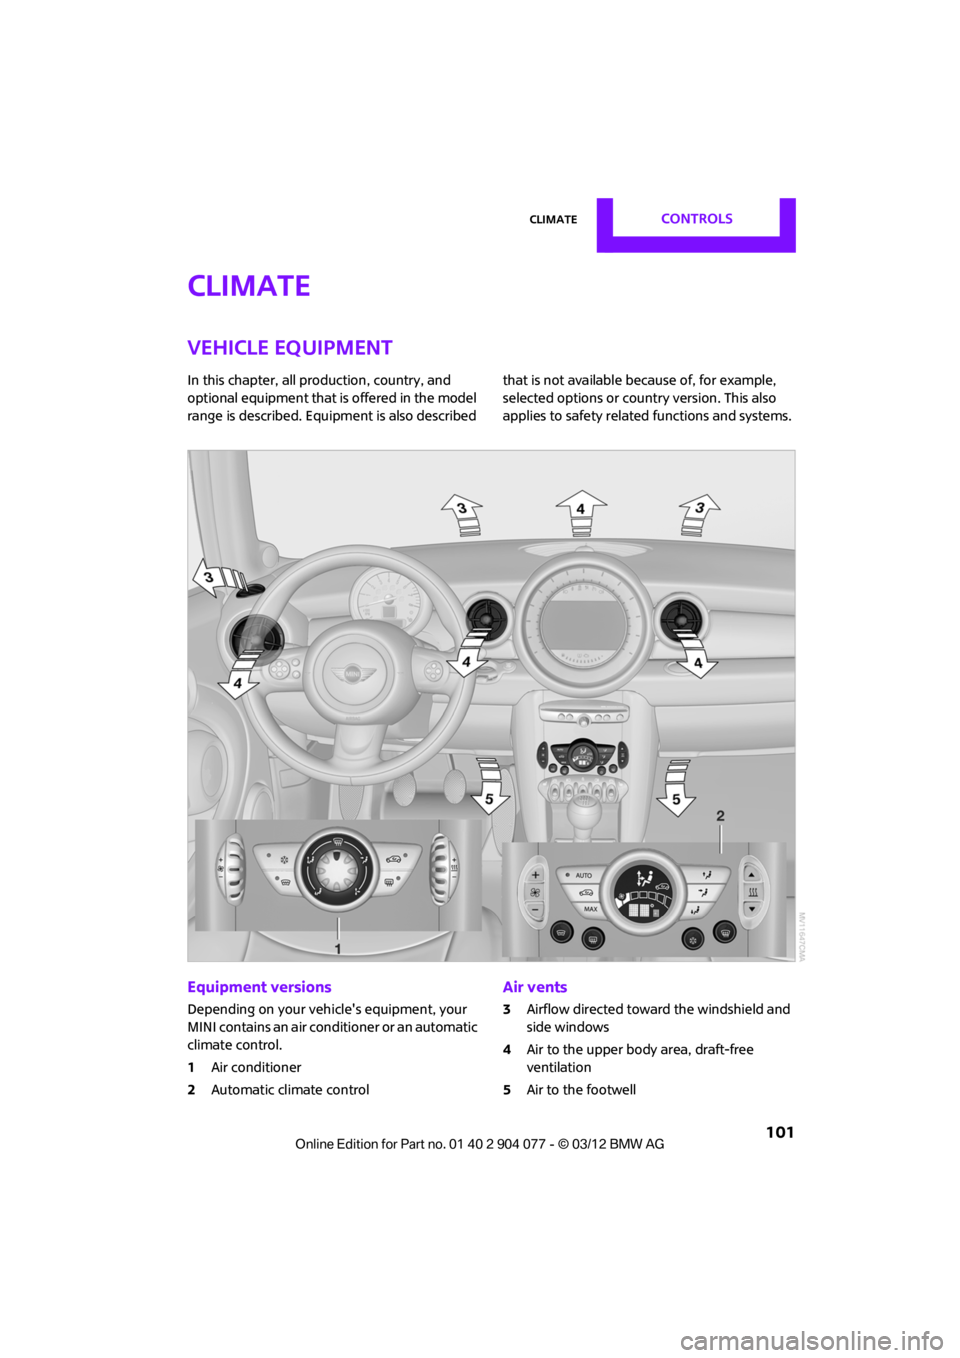
Equipment versions
Depending on your vehicle's equipment, your
MINI contains an air conditioner or an automatic
climate control.
1 Air conditioner
2 Automatic climate control
Air vents
3Airflow directed toward the windshield and
side windows
4 Air to the upper body area, draft-free
ventilation
5 Air to the footwell
00320051004F004C00510048000300280047004C0057004C005200510003
Page 103 of 283
CONTROLSClimate
102
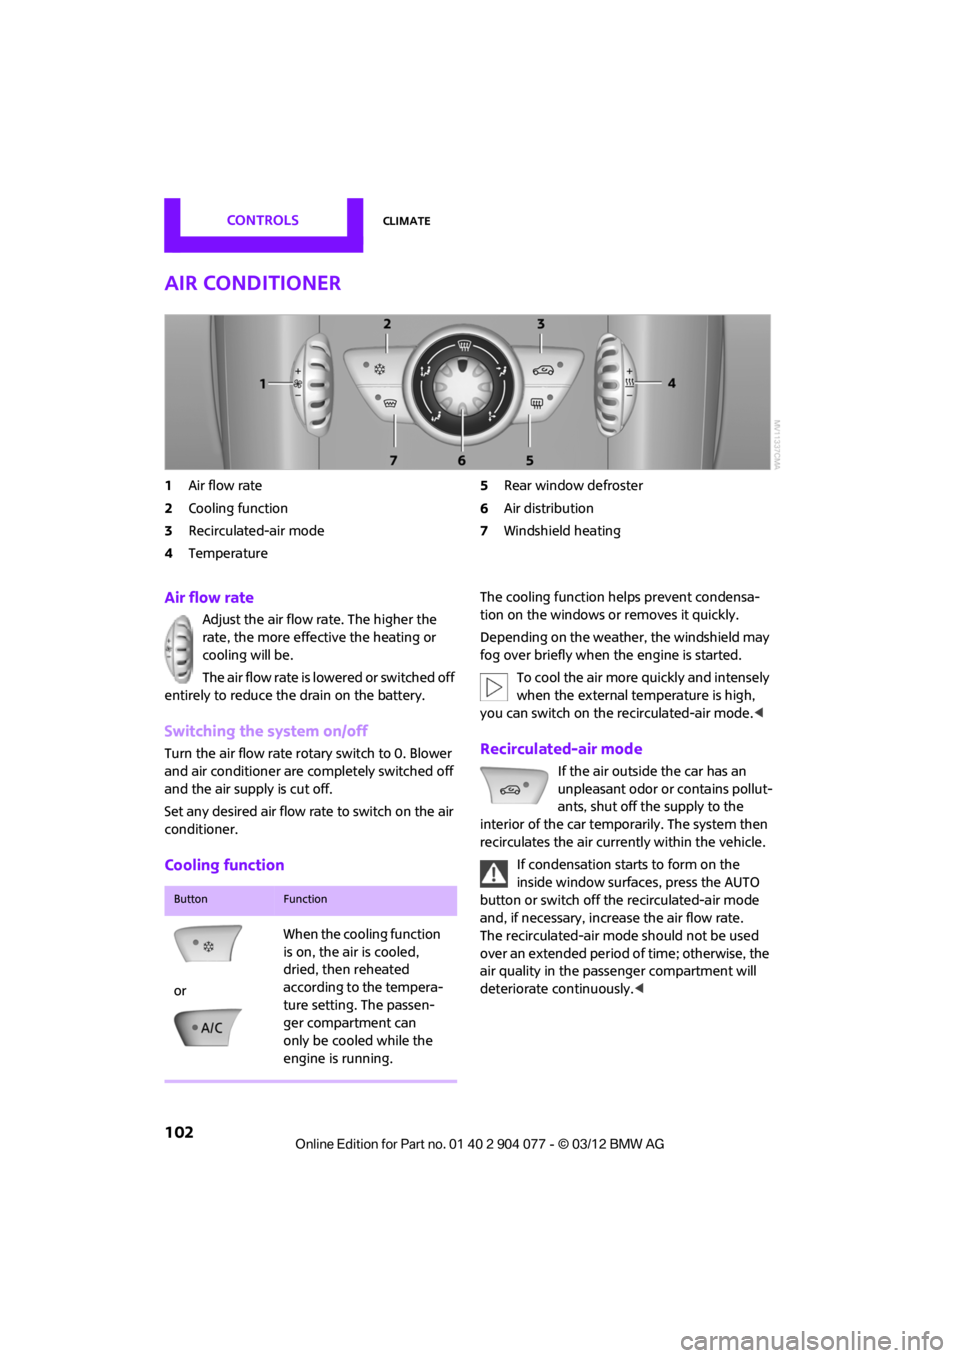
Air conditioner
1Air flow rate
2 Cooling function
3 Recirculated-air mode
4 Temperature 5
Rear window defroster
6 Air distribution
7 Windshield heating
Air flow rate
Adjust the air flow rate. The higher the
rate, the more effective the heating or
cooling will be.
The air flow rate is lowered or switched off
entirely to reduce the drain on the battery.
Switching the system on/off
Turn the air flow rate rota ry switch to 0. Blower
and air conditioner are co mpletely switched off
and the air supply is cut off.
Set any desired air flow rate to switch on the air
conditioner.
Cooling function
The cooling function helps prevent condensa-
tion on the windows or removes it quickly.
Depending on the weather, the windshield may
fog over briefly when the engine is started.
To cool the air more quickly and intensely
when the external temperature is high,
you can switch on the recirculated-air mode.<
Recirculated-air mode
If the air outside the car has an
unpleasant odor or contains pollut-
ants, shut off the supply to the
interior of the car temporarily. The system then
recirculates the air currently within the vehicle.
If condensation starts to form on the
inside window surfac es, press the AUTO
button or switch off the recirculated-air mode
and, if necessary, increa se the air flow rate.
The recirculated-air mode should not be used
over an extended period of time; otherwise, the
air quality in the passenger compartment will
deteriorate continuously.<
ButtonFunction
or When the cooling function
is on, the air is cooled,
dried, then reheated
according to the tempera-
ture setting. The passen-
ger compartment can
only be cooled while the
engine is running.
00320051004F004C00510048000300280047004C0057004C005200510003
Page 105 of 283
CONTROLSClimate
104
Comfortable interior climate
AUTO program2 offers the ideal air distribution
and air flow rate for almo st all conditions, refer
to AUTO program below. All you need to do is
select an interior temperature which is comfort-
able for you.
The following sections inform you in detail about
how to adjust the settings.
Most settings are stored for the remote control
currently in use, refer also to Personal Profile set-
tings on page 29.
Air flow rate, manual
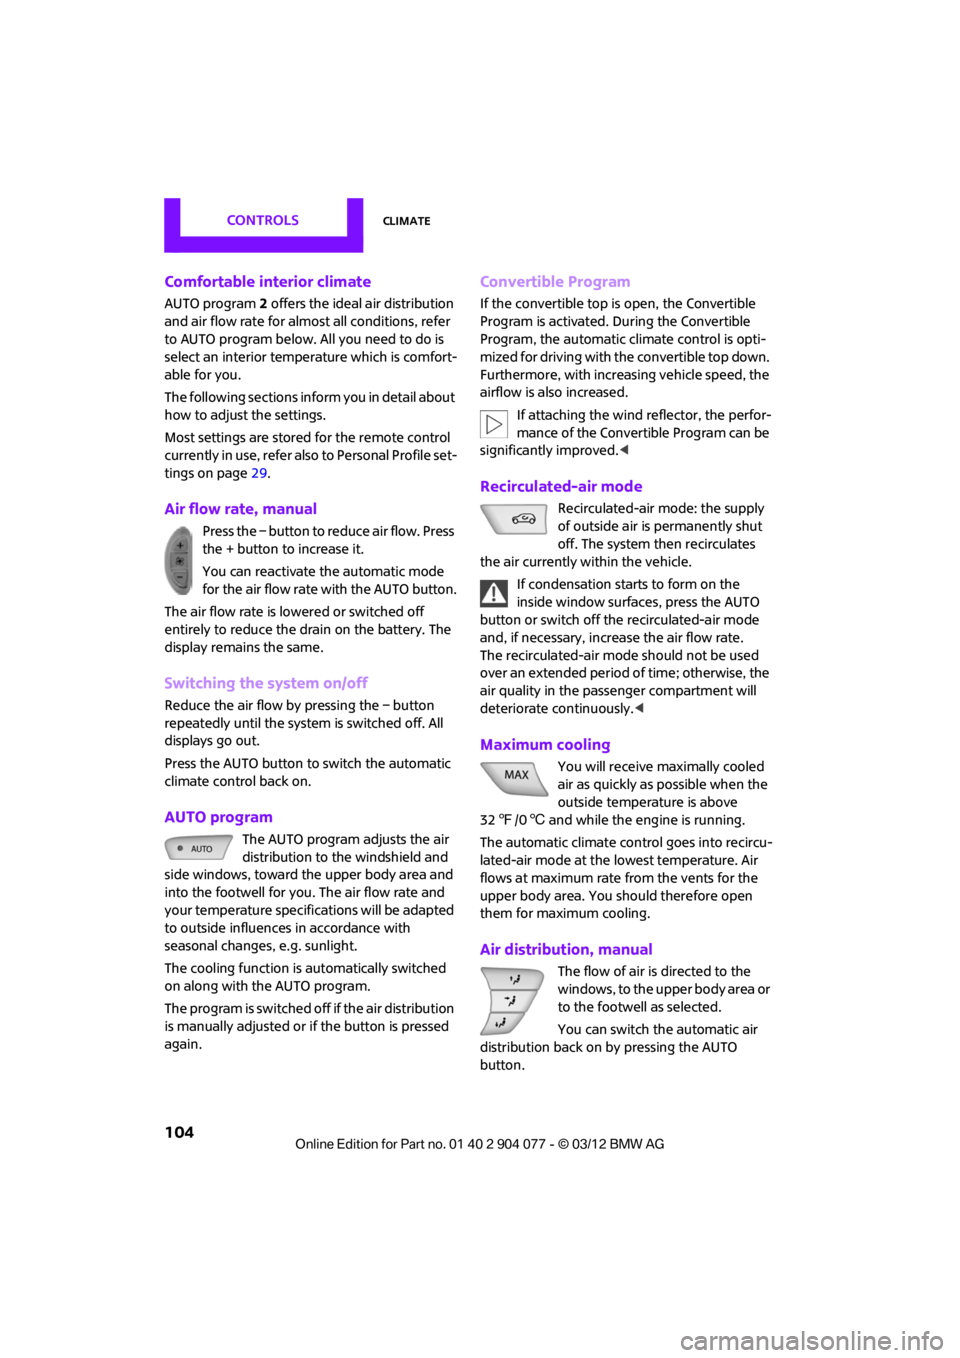
Press the – button to reduce air flow. Press
the + button to increase it.
You can reactivate the automatic mode
for the air flow rate with the AUTO button.
The air flow rate is lo wered or switched off
entirely to reduce the drain on the battery. The
display remains the same.
Switching the system on/off
Reduce the air flow by pressing the – button
repeatedly until the system is switched off. All
displays go out.
Press the AUTO button to switch the automatic
climate control back on.
AUTO program
The AUTO program adjusts the air
distribution to the windshield and
side windows, toward the upper body area and
into the footwell for you. The air flow rate and
your temperature specifications will be adapted
to outside influences in accordance with
seasonal changes, e.g. sunlight.
The cooling function is automatically switched
on along with the AUTO program.
The program is switched off if the air distribution
is manually adjusted or if the button is pressed
again.
Convertible Program
If the convertible top is open, the Convertible
Program is activated. During the Convertible
Program, the automatic climate control is opti-
mized for driving with the convertible top down.
Furthermore, with increasing vehicle speed, the
airflow is also increased.
If attaching the wind reflector, the perfor-
mance of the Convertible Program can be
significantly improved. <
Recirculated-air mode
Recirculated-air mode: the supply
of outside air is permanently shut
off. The system then recirculates
the air currently within the vehicle.
If condensation starts to form on the
inside window surfac es, press the AUTO
button or switch off the recirculated-air mode
and, if necessary, increa se the air flow rate.
The recirculated-air mode should not be used
over an extended period of time; otherwise, the
air quality in the passenger compartment will
deteriorate continuously.<
Maximum cooling
You will receive maximally cooled
air as quickly as possible when the
outside temperature is above
32 7 /06 and while the engine is running.
The automatic clim ate control goes into recircu-
lated-air mode at the lowest temperature. Air
flows at maximum rate from the vents for the
upper body area. You should therefore open
them for maximum cooling.
Air distribution, manual
The flow of air is directed to the
windows, to the upper body area or
to the footwell as selected.
You can switch the automatic air
distribution back on by pressing the AUTO
button.
00320051004F004C00510048000300280047004C0057004C005200510003
Page 108 of 283
Practical interior accessoriesCONTROLS
107
Practical interior accessories
Vehicle equipment
In this chapter, all production, country, and
optional equipment that is offered in the model
range is described. Equipment is also described
that is not available because of, for example,
selected options or count ry version. This also
applies to safety related functions and systems.
Glove compartment
Opening
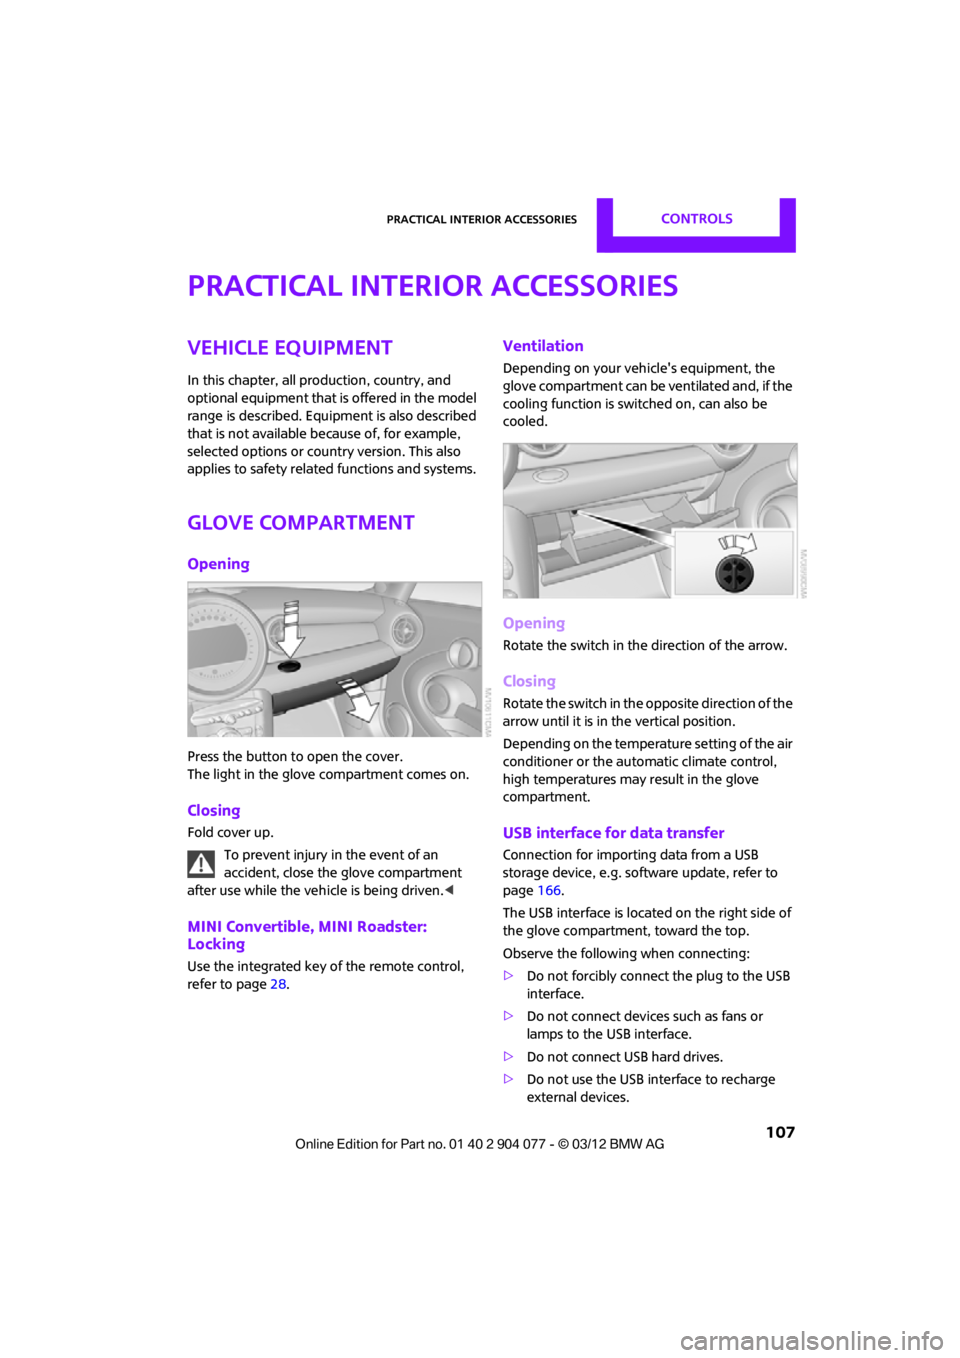
Press the button to open the cover.
The light in the glove compartment comes on.
Closing
Fold cover up.
To prevent injury in the event of an
accident, close the glove compartment
after use while the vehi cle is being driven.<
MINI Convertible, MINI Roadster:
Locking
Use the integrated key of the remote control,
refer to page28.
Ventilation
Depending on your vehicle's equipment, the
glove compartment can be ventilated and, if the
cooling function is swit ched on, can also be
cooled.
Opening
Rotate the switch in the direction of the arrow.
Closing
Rotate the switch in the opposite direction of the
arrow until it is in the vertical position.
Depending on the temperature setting of the air
conditioner or the automatic climate control,
high temperatures may result in the glove
compartment.
USB interface for data transfer
Connection for importing data from a USB
storage device, e.g. soft ware update, refer to
page 166.
The USB interface is locate d on the right side of
the glove compartment, toward the top.
Observe the following when connecting:
> Do not forcibly connect the plug to the USB
interface.
> Do not connect devices such as fans or
lamps to the USB interface.
> Do not connect USB hard drives.
> Do not use the USB interface to recharge
external devices.
00320051004F004C00510048000300280047004C0057004C005200510003
Page 115 of 283
DRIVING TIPSThings to remember when driving
114
Things to remember when driving
Vehicle equipment
In this chapter, all production, country, and
optional equipment that is offered in the model
range is described. Equipment is also described
that is not available because of, for example,
selected options or coun try version. This also
applies to safety relate d functions and systems.
Break-in period
Moving parts need breaking-in time to adjust to
each other. Please follow the instructions below
in order to achieve the optimal service life and
economy of operation for your vehicle.
Engine and differential
Always obey all official speed limits.
Up to 1,200 miles/2,000 km
Drive at varying engine and road speeds, but do
not exceed the following:
> Gasoline engine
4,500 rpm or 100 mph/160 km/h
Avoid full-throttle operation and use of the
transmission's kickdown mode.
After driving 1,200 miles/2,000 km
Engine and vehicle speeds can be gradually
increased.
Tires
Due to technical factors associated with their
manufacture, tires do not achieve their full
traction potential until af ter an initial break-in
period. Therefore, drive cautiously during the
first 200 miles/300 km.
Brake system
Brakes require an initial break-in period of
approx. 300 miles/500 km to achieve optimized
contact and wear patterns between brake pads
and rotors. Drive cautiously during this break-in
period.
Clutch
The function of the clutch reaches its optimal
level only after a distan ce driven of approx.
300 miles/500 km. During this break-in period,
engage the clutch gently.
Following part replacement
The same break-in procedures should be
observed if any of the components mentioned
above have to be renewed in the course of the
vehicle's operating life.
General driving notes
Close the tailgate
Only drive with the t ailgate closed. Failure
to do so may endanger passengers or
other road users or may damage the vehicle in
the event of an accident or a braking and eva-
sive maneuver. In addi tion, exhaust gas may
flow into the passenger compartment. <
If special circumstances make it absolutely
necessary to drive with the tailgate open:
1. Coupe: close all windows.
2. Switch off the recirculated-air mode and
switch the airflow contro l of the heating, air
conditioner, or automa tic climate control to
high, refer to page 102 or104.
00320051004F004C00510048000300280047004C0057004C005200510003