Page 105 of 259
 DRIVING TIPSThings to remember when driving
104
You can increase the engines braking effect by
shifting down, all the way to first gear if neces-
sary. This strategy helps you avoid placing
excessi")
DRIVING TIPSThings to remember when driving
104
You can increase the engine's braking effect by
shifting down, all the way to first gear if neces-
sary. This strategy helps you avoid placing
excessive loads on the brake system. Downshift-
ing in manual mode of the automatic trans-
mission, page52.
Never drive with the clutch held down,
with the transmission in neutral or with
the engine switched off; otherwise, engine
braking action will not be present or there will be
no power assistance to the brakes or steering.
Never allow floor mats, carpets or any other
objects to protrude into the area around the
pedals; otherwise, pedal function could be
impaired. <
Corrosion on brake rotors
When the vehicle is driven only occasionally,
during extended periods when the vehicle is not
used at all, and in op erating conditions where
brake applications are less frequent, there is an
increased tendency for corrosion to form on
rotors, while contaminants accumulate on the
brake pads. This occurs because the minimum
pressure which must be exerted by the pads
during brake applications to clean the rotors is
not reached.
Should corrosion form on the brake rotors, the
brakes will tend to respond with a pulsating
effect that even extended application will fail to
cure.
When the vehicle is parked
Condensation forms while the automatic climate
control is in operation, and then exits under the
vehicle. Traces of condensed water under the
vehicle are therefore normal.
In the MINI Cooper S, the coolant pump may
continue to run for some time after the engine is
switched off. This will generate noise in the
engine compartment.
Cargo loading
To avoid loading the tires beyond their
approved carrying capacity, never over-
load the vehicle. Overloading can lead to over-
heating and increases the rate at which damage
develops inside the tires. The ultimate result can
assume the form of a sudden blowout. <
Avoid fluid spills in the cargo area as they
could damage the vehicle. <
Expanding cargo area
Cargo area cover
Do not place any objects on the cover;
otherwise, they could endanger the car's
occupants, e.g. in the case of braking or sudden
swerving, or they may damage the cover. <
When you open the tailgate, the roll-up cover is
raised.
To load bulky luggage, the cover can be
removed.
1. Unhook the lift straps from the tailgate.
2. Lift the cover slightly, arrow 1, and pull it
rearward out of the bracket, arrow 2.
Rear seat backrest
Before folding down the rear seat back-
rests, ensure that th e range of motion for
the backrests is unobstructed. Particularly with a
folded down middle section, ensure that there is
no one within the range of motion of the back-
rest and that no one re aches into that region.
Otherwise, injury or damage can result. <
Online Edition for Part no. 01 40 2 914 849 - \251 07/12 BMW AG
Page 106 of 259
 Things to remember when drivingDRIVING TIPS
105
To ensure that the safety systems con-
tinue to provide optimized protection,
observe the safety belt information on
page 40.<
5 seater: the rear sea")
Things to remember when drivingDRIVING TIPS
105
To ensure that the safety systems con-
tinue to provide optimized protection,
observe the safety belt information on
page 40.<
5 seater: the rear seat back is divided in the fol-
lowing proportions: 40-20-40. When the outer rear seat backs are folded
down, no one may sit in the middle posi-
tion. <
If necessary, remove the third head restraint,
refer to Removing head restraints, page 39.
Open the center belt and insert in the take-up
on the headliner, see page 41.
Expand the cargo area by raising the rear seat
backrests to a steeper angle.
The backrests can be adjusted as needed in
10 stages between a comfort position and a
transport position or can be folded down.
In the comfort position, the backrests are as far
back as possible; in the transport position, they
are in an approximatel y vertical position.
Before installing a ch ild restraint system,
observe the instructio ns starting on page44.
1. Hold on to the backrest near the top, for
example on the headrest, and pull on the
loop, arrow.
2. Lock backrest in the de sired position or fold
down.
Folding the backrests back into position
When folding the backrest, ensure that the
lock properly engages. Otherwise, for
example during braking and avoidance maneu-
vers, cargo can be thrown into the interior and
endanger the occupants. < If the rear seat backrests are positioned at
a steeper angle, do not install child
restraint systems in the rear of the vehicle as
their protective featur es may be ineffective.<
When backrests are folded back from the
folded-down position, they lock in the transport
position.
To set the desired backrest angle or a comfort-
able position, pull the lo op forward and adjust
the backrest.
Cargo area privacy screen
Between the cargo area an d the rear seat back-
rest, there is a cargo area privacy screen. It can
be folded down and used as a loading platform.
When the rear seat backrests are folded
down, do not fold the privacy screen
upright. In an accident, cargo could fold down
the privacy screen and damage it. <
Folding down the privacy screen
1.If necessary, remove the cargo area cover,
refer to page 104.
2. Fold the privacy screen up and to the rear,
arrow 1.
3. Release the locking mechanisms on the left
and right sides, arrows 2.
4. Grasp the outer sides of the privacy screen
and guide it downward.
Do not exceed the maximum load of
330 lbs/150 kg of the privacy screen when
it is in folded down into the loading platform
position; otherwise, damage may occur. <
Online Edition for Part no. 01 40 2 914 849 - \251 07/12 BMW AG
Page 107 of 259
 DRIVING TIPSThings to remember when driving
106
Folding the privacy screen forward
1.Fold down rear seat backrests.
2. Unlock privacy screen, see above.
3. Grasp the outer sides of the privacy screen")
DRIVING TIPSThings to remember when driving
106
Folding the privacy screen forward
1.Fold down rear seat backrests.
2. Unlock privacy screen, see above.
3. Grasp the outer sides of the privacy screen
and guide it forward onto the folded-down
rear seat backrests.
Removing
1.Removing cargo area cover, page 104.
2. Fold the privacy screen up and to the rear
and unlock it, refer to Folding the privacy
screen forward.
3. Remove it from the guides on the cargo area
floor, arrows, and remove the privacy
screen.
Flat load floor
Do not exceed a maximum load of
330 lbs/150 kg on the load floor; other-
wise, damage may result.<
Access to the storage space
Under the load floor, there is storage space, e.g.,
for the cargo net. 1.
Reach into the recess, arrow 1, at the back
edge of the load floor.
2. Lift up load floor behind and fold forwards,
arrow 2.
Before closing the tailgate, put the load floor
back on the cargo area floor.
Removing
If necessary, the load floor can be removed.
1. Fold load floor together.
2. Pull the load floor back slightly out of the
take-up.
3. Then take it out toward the top.
The folded together load floor can be placed into
the luggage compartment.
Cargo net
Ensure that the cargo net is firmly
attached; otherwise, injuries may occur. <
Before installing
1.Remove the pouch with the cargo net from
the storage compartment under the pull-out
floor panel in the cargo area.
2. Remove the cargo net from the pouch, then
unroll and unfold it.
After use, fold the cargo net together, roll it
back up in the same way, and place it in the
pouch so that it can be stowed under the
floor panel again. When doing so, make sure
that hooks and tensioning buckles do not
rest against the rod elements.
3. Unfold the cargo net until the rod elements
snap into place.
Online Edition for Part no. 01 40 2 914 849 - \251 07/12 BMW AG
Page 108 of 259
 Things to remember when drivingDRIVING TIPS
107
Installing behind the front seats
1.If necessary, remove the cargo area cover.
2. Fold down the rear seat backrests, refer to
Expanding cargo area.
3.")
Things to remember when drivingDRIVING TIPS
107
Installing behind the front seats
1.If necessary, remove the cargo area cover.
2. Fold down the rear seat backrests, refer to
Expanding cargo area.
3. Insert each cargo net mounting pin all the
way into its respective front mount in the
headliner, arrow 1, and push it forward.
4. Attach the hook, arrow 2, at the bottom of
each retaining strap to the respective eye on
the vehicle floor.
5. Lash the cargo net se curely. To do so,
tighten the retaining straps at the tensioning
buckles.
Removing
When removing and stowing the cargo net, pro-
ceed in the reverse sequence.
To fold closed, press the release button, arrow.
Bag holders
Holders on the left and right side of the support
for the cargo area cover, arrow, e.g. for hanging
shopping bags or storage bags.
Only hang light shopping bags or suitable
items on the holders. Otherwise, this may
create a hazard due to flying objects, for exam-
ple in the event of braking and evasive maneu-
vers.
Transport heavy luggage only if it is appro-
priately secured in the cargo area. <
Determining cargo limit
1.Locate the following statement on your
vehicle's placard:
The combined weight of occupants
and cargo should never exceed
XXX kg or YYY lbs. Otherwise, this could
damage the vehicle and produce unstable
vehicle operating conditions. <
2. Determine the combined weight of the
driver and passengers that will be riding in
your vehicle.
3. Subtract the combined weight of the driver
and passengers from XXX pounds or YYY
kilograms.
Online Edition for Part no. 01 40 2 914 849 - \251 07/12 BMW AG
Page 109 of 259
 DRIVING TIPSThings to remember when driving
108
4.The resulting figure equals the available
amount of cargo and luggage load capacity.
For example, if the XXX amount equals
1,400 lbs and there will")
DRIVING TIPSThings to remember when driving
108
4.The resulting figure equals the available
amount of cargo and luggage load capacity.
For example, if the XXX amount equals
1,400 lbs and there will be four 150 lbs
passengers in your vehicle, the amount of
available cargo and luggage load capacity is
650 lbs:
1,400 lbs minus 750 lbs = 650 lbs.
5. Determine the combined weight of luggage
and cargo being loaded on the vehicle. That
weight may not safely exceed the available
cargo and luggage load capacity calculated
in step 4.
6. If your vehicle will be towing a trailer, part of
the load from your trailer will be transferred
to your vehicle. Consult the manual for
transporting a trailer to determine how this
may reduce the available cargo and luggage
load capacity of your vehicle.
Load
4-seater:
5-seater:
The permissible load is the sum of the occu-
pants' weights and the we ight of the cargo. The greater the weight of the occupants, the less
cargo/luggage can be transported.
Stowing cargo
>
Position heavy objects as low and as far
forward as possible, ideally directly behind
the rear seat backrests.
> Cover sharp edges and corners.
> For very heavy cargo wh en the rear seat is
not occupied, secure each safety belt in the
respective opposite buckle.
> Do not stack higher than the top edge of the
backrests.
> Use the cargo net, refer to page 106. Ensure
that no objects can penetrate through the
net.
Securing cargo
> Secure smaller and lighter items using
retaining or draw straps.
> Heavy-duty cargo straps for securing larger
and heavier objects are available at your
MINI dealer.
> These cargo straps are fastened using eight
securing eyes.
Online Edition for Part no. 01 40 2 914 849 - \251 07/12 BMW AG
Page 110 of 259
 Things to remember when drivingDRIVING TIPS
109
Two of them are located on the side wall,
arrows1, of the cargo area.
Two of them are located on the rear wall,
arrows 2, of the cargo area.
To use t")
Things to remember when drivingDRIVING TIPS
109
Two of them are located on the side wall,
arrows1, of the cargo area.
Two of them are located on the rear wall,
arrows 2, of the cargo area.
To use the lower lashing eyes, raise or remove
the pull-out floor panel.
Comply with the information enclosed with the
load-securing devices. Always position and secure the cargo as
described above, so th at it cannot endan-
ger the car's occupants, for example if sudden
braking or swerves are necessary.
Do not exceed the approved gross vehicle
weight and axle loads, page 234; otherwise, the
vehicle's operating safety is no longer assured
and the vehicle will not be in compliance with
the construction and use regulations.
Heavy or hard objects should not be carried
loose inside the car, since they could be thrown
around, for example as a result of heavy braking,
sudden swerves, etc., and endanger the occu-
pants. Do not secure cargo using the fastening
points for the tether strap, page 45; they may
become damaged. <
Roof-mounted luggage
rack
A special rack system is av ailable as an option for
your MINI. Your MINI dealer will be glad to
advise you. Comply with the installation instruc-
tions supplied with the rack system.
Loading roof-mounted luggage rack
Because roof racks raise the vehicle's center of
gravity when loaded, they have a major effect
on vehicle handling and steering response.
You should therefore always remember not to
exceed the approved roof load capacity, the
approved gross vehicle weight or the axle loads
when loading the rack.
You can find more information under Weights in
the technical specifications. The roof load must be distributed uniformly and
should not be too large in area. Heavy items
should always be placed at the bottom.
When loading, make sure
that there is sufficient
space for the movement of the glass roof.
Fasten roof-mounted cargo correctly and
securely to prevent it from shifting or falling off
during the trip.
Drive smoothly. Avoid su dden acceleration and
braking maneuvers, and take corners gently.
Rear luggage rack
A special rear-mounted luggage rack is available
as an optional accessory . It does not require a
trailer hitch.
Please comply with the precautions included
with the installation instructions.
Mounting points
The mounting points are located under the
covers in the bumper.
Remove the covers , refer to page227.
Loading rear luggage rack
When loading, make su re that you do not
exceed the approved gross vehicle weight and
axle loads.
You can find more information under Weights in
the technical specifications.
Online Edition for Part no. 01 40 2 914 849 - \251 07/12 BMW AG
Page 111 of 259
 DRIVING TIPSThings to remember when driving
110
Saving fuel
General information
Your vehicle incorporates numerous techno-
logies for reducing fuel consumption and
emissions.
Fuel consumption depends")
DRIVING TIPSThings to remember when driving
110
Saving fuel
General information
Your vehicle incorporates numerous techno-
logies for reducing fuel consumption and
emissions.
Fuel consumption depends on a number of
different factors. Fuel consumption and environ-
mental pollution are affected by various actions,
the manner of driving and regular maintenance.
Remove unnecessary cargo
Additional weight increases fuel consumption.
Remove attached parts no longer in use
Attached parts on the ve hicle affect its aerody-
namics and increase fuel consumption.
Closing windows
Open windows increase air resistance and
therefore fuel consumption.
Check tire inflation pressure regularly
Check and, if necessary, correct tire inflation
pressure at least twice a month and before start-
ing on a long trip.
Low inflation pressure increases rolling resis-
tance and thus leads to greater fuel consump-
tion and tire wear.
Drive off immediately
Do not wait for the engine to warm up while the
vehicle remains stationary. Start driving right
away, but at moderate engi ne speeds. This is the
fastest way for the cold engine to reach its
operating temperature.
Think ahead while driving
Avoid unnecessary accelera tion and braking. by
maintaining a suitable di stance to the vehicle
driving ahead.
Looking-ahead and smooth driving reduces fuel
consumption.
Avoid high engine speeds
Use first gear only for driving off. In second and
higher gears, accelerate smoothly to a suitable
engine and road speed. In doing so, avoid high
engine speeds and shift up early.
When you reach your desired traveling speed,
shift to the highest suit able gear and drive at
constant speed.
As a rule: driving at lo w engine speeds lowers
fuel consumption and reduces wear.
Coasting
When approaching a red traffic light, take your
foot off the accelerator and let the car roll to a
stop in the highest gear possible.
On a downhill gradient, take your foot off the
accelerator and let the vehicle coast in a suitable
gear.
Fuel supply is shut off automatically when the
vehicle is coasting.
Switch off the engine during lengthy
stops
Switch off the engine when stopping for lengthy
periods, e.g. at traffic li ghts, railroad crossings or
in traffic jams.
Switch off any features that are not
currently required
Features such as air co nditioning, seat heaters
and the rear window defroster require a great
deal of energy and result in greater fuel con-
sumption, especially in city driving and during
Stop & Go operation. For this reason, switch off
these features if they are not really needed.
Have the vehicle serviced
Have your vehicle servic ed regularly to achieve
good economy and a long vehicle life. The man-
ufacturer of your MINI recommends having the
vehicle serviced by a MINI dealer. Also note the
MINI Maintenance System, page 209.
Online Edition for Part no. 01 40 2 914 849 - \251 07/12 BMW AG
Page 112 of 259
 Things to remember when drivingDRIVING TIPS
111
Driving on poor roads
Your MINI with ALL4 drive is at home on any
type of street or road. It combines an all-wheel
drive system with the advantages o")
Things to remember when drivingDRIVING TIPS
111
Driving on poor roads
Your MINI with ALL4 drive is at home on any
type of street or road. It combines an all-wheel
drive system with the advantages of a normal
passenger car.Do not drive on unpaved terrain, as other-
wise the vehicle may be damaged. <
When you are driving on poor roads, there are a
few points which you shou ld strictly observe for
your own safety, for that of your passengers,
and for the safety of the vehicle:
> Familiarize yourself with the vehicle before
beginning to drive an d do not take risks
under any circumstances.
> Adapt your speed to road conditions. The
steeper and rougher the road surface is, the
lower the speed should be.
> When driving on very steep uphill or down-
hill grades, make sure in advance that the
engine oil and coolant levels are close to the
maximum mark, refer to page 206.
> While driving, watch carefully for obstacles
such as rocks or holes. Try to avoid these
obstacles whenever possible.
> Make sure that the un dercarriage does not
touch the ground, for example on hilltops
and bumpy roads. The ground clearance of
the vehicle is a maximum of approx. 6.0 in/
15 cm. Please note that the ground clear-
ance can vary depending on loading and the
driving conditions of the vehicle.
> Only drive through road surface water up to
a maximum water depth of 1 ft/30 cm and
only at walking speed; do not remain sta-
tionary.
> After driving through water at low speed,
lightly press the brake pedal several times to
dry the brakes and to prevent the braking
effect from being reduced by wetness.
> Depending on the condition of the surface, it
may be practical to briefly activate DTC, refer
to DTC Dynamic Traction Control on
page 71. >
If the drive wheels spin on one side, depress
the accelerator pedal sufficiently so that the
driving stability control systems can distrib-
ute the drive forces to the individual wheels.
After driving on poor roads, please observe the
following points to maintain the driving safety of
the vehicle:
> Clean the coarsest dirt from the body.
> Clean mud, snow, ice, etc. from the wheels
and tires and check the tires for damage.
Online Edition for Part no. 01 40 2 914 849 - \251 07/12 BMW AG
 1
1 2
2 3
3 4
4 5
5 6
6 7
7 8
8 9
9 10
10 11
11 12
12 13
13 14
14 15
15 16
16 17
17 18
18 19
19 20
20 21
21 22
22 23
23 24
24 25
25 26
26 27
27 28
28 29
29 30
30 31
31 32
32 33
33 34
34 35
35 36
36 37
37 38
38 39
39 40
40 41
41 42
42 43
43 44
44 45
45 46
46 47
47 48
48 49
49 50
50 51
51 52
52 53
53 54
54 55
55 56
56 57
57 58
58 59
59 60
60 61
61 62
62 63
63 64
64 65
65 66
66 67
67 68
68 69
69 70
70 71
71 72
72 73
73 74
74 75
75 76
76 77
77 78
78 79
79 80
80 81
81 82
82 83
83 84
84 85
85 86
86 87
87 88
88 89
89 90
90 91
91 92
92 93
93 94
94 95
95 96
96 97
97 98
98 99
99 100
100 101
101 102
102 103
103 104
104 105
105 106
106 107
107 108
108 109
109 110
110 111
111 112
112 113
113 114
114 115
115 116
116 117
117 118
118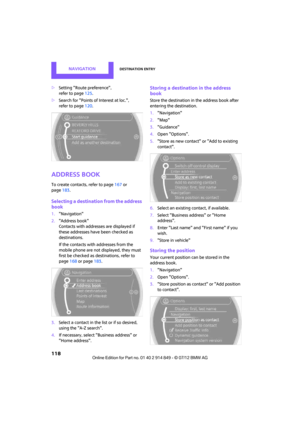 119
119 120
120 121
121 122
122 123
123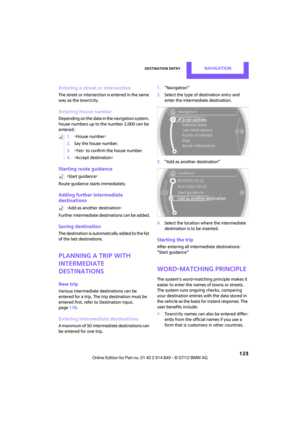 124
124 125
125 126
126 127
127 128
128 129
129 130
130 131
131 132
132 133
133 134
134 135
135 136
136 137
137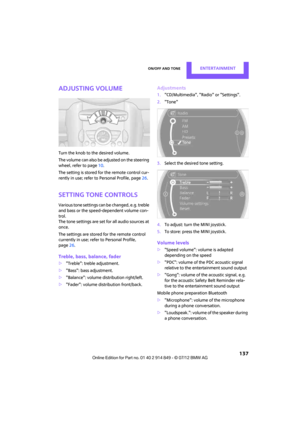 138
138 139
139 140
140 141
141 142
142 143
143 144
144 145
145 146
146 147
147 148
148 149
149 150
150 151
151 152
152 153
153 154
154 155
155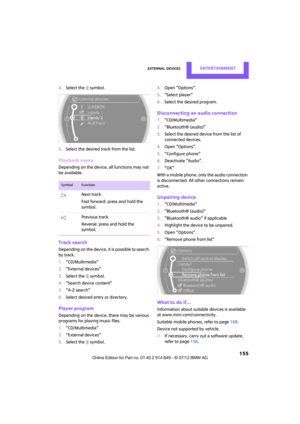 156
156 157
157 158
158 159
159 160
160 161
161 162
162 163
163 164
164 165
165 166
166 167
167 168
168 169
169 170
170 171
171 172
172 173
173 174
174 175
175 176
176 177
177 178
178 179
179 180
180 181
181 182
182 183
183 184
184 185
185 186
186 187
187 188
188 189
189 190
190 191
191 192
192 193
193 194
194 195
195 196
196 197
197 198
198 199
199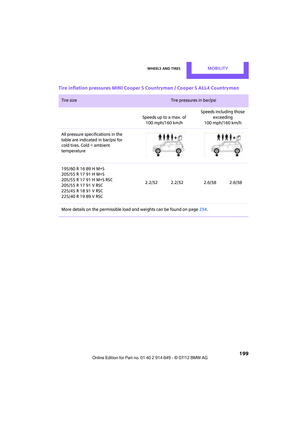 200
200 201
201 202
202 203
203 204
204 205
205 206
206 207
207 208
208 209
209 210
210 211
211 212
212 213
213 214
214 215
215 216
216 217
217 218
218 219
219 220
220 221
221 222
222 223
223 224
224 225
225 226
226 227
227 228
228 229
229 230
230 231
231 232
232 233
233 234
234 235
235 236
236 237
237 238
238 239
239 240
240 241
241 242
242 243
243 244
244 245
245 246
246 247
247 248
248 249
249 250
250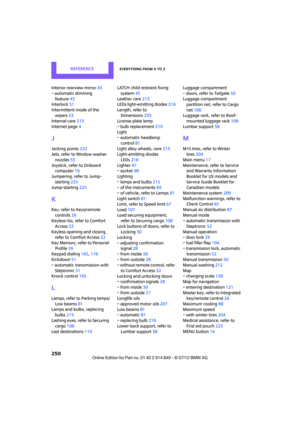 251
251 252
252 253
253 254
254 255
255 256
256 257
257 258
258