2012 MERCEDES-BENZ SLS AMG ROADSTER spare wheel
[x] Cancel search: spare wheelPage 10 of 288
Emergency releaseDriver's door .................................... 71
Trunk ............................................... 75
Vehicle ............................................. 71
Emergency Tensioning Devices
Function ........................................... 50
Safety guidelines ............................. 37
Emissions control
Service and warranty information ....18
Engine
Display message ............................ 176
Engine number ............................... 278
Irregular running ............................ 118
Starting .......................................... 116
Starting problems ..........................118
Starting the engine with the key ....116
Starting with the KEYLESS-GO
start function ................................. 116
Switching off .................................. 130
Engine diagnostics warning lamp .... 194
Engine electronics Problem (malfunction) ...................118
Engine oil
Adding ........................................... 220
Additives ........................................ 282
Checking the oil level ..................... 219
Display
message ................................ 178, 179
Filling capacity ............................... 280
Notes about oil grades ................... 282
Notes on oil level/consumption ....219
Temperature (on-board computer) . 160
Temperature gauge ........................ 148
Viscosity ........................................ 282
E-SELECT lever ................................... 119
ESP ®
(Electronic Stability
Program) Deactivating/activating ...................57
Display message ............................ 170
Function/notes ................................ 56
Important safety information ...........56
Warning lamp ................................. 192
ETS (Electronic Traction System) ....... 56
Exhaust check ................................... 133
Exhaust tail pipe (cleaning
instructions) ...................................... 228Exterior lighting
see Lights
Exterior mirrors
Adjusting ......................................... 89
Dipping (automatic) .........................90
Folding in/out (automatically) .........90
Folding in/out (electrically) .............90
Folding in when locking (on-board
computer) ...................................... 160
Out of position (troubleshooting) .....90
Setting ............................................. 90
Storing settings (memory
function) .......................................... 91
Storing the parking position ............. 91
F
Filler cap see Fuel filler flap
First-aid kit ......................................... 232
Flat tire Changing a wheel/mounting the
spare wheel ................................... 236
Preparing the vehicle .....................233
Raising the vehicle .........................237
TIREFIT kit ...................................... 233
Floormat ............................................. 216
Front windshield see Windshield
Fuel
Additives ........................................ 281
Consumption statistics ..................152
Displaying the range ......................152
Driving tips .................................... 132
Fuel gauge ....................................... 27
Important safety notes ..................280
Premium-grade unleaded gasoline . 281
Problem (malfunction) ...................129
Refueling ........................................ 127
Specifications ................................ 281
Tank content/reserve fuel .............280
Fuel filler flap, opening/closing ....... 127
Fuel filter (display message) ............ 180
Fuel level Calling up the range (on-board
computer) ...................................... 152
8Index
Page 15 of 288
Notes ............................................. 222
Service messages ..........................222
Service menu (on-board computer) . 157
Service products Brake fluid ..................................... 282
Capacities ...................................... 280
Coolant (engine) ............................ 283
Engine oil ....................................... 282
Fuel ................................................ 280
Important safety notes ..................278
Notes ............................................. 278
Refrigerant (air-conditioning
system) .......................................... 282
Washer fluid ................................... 284
Settings
Factory (on-board computer) .........160
On-board computer .......................157
Setting the air distribution ............... 107
Setting the airflow ............................ 108
SETUP (on-board computer) ............. 160
Shift ranges ....................................... 125
Side impact air bag ............................. 40
Side marker lamp (display
message) ............................................ 176
Side windows Convenience closing feature ............77
Convenience opening feature ..........77
Important safety information ...........75
Opening/closing .............................. 76
Opening/closing (all) .......................77
Problem (malfunction) .....................77
SmartKey ............................................. 69
Changing the battery .......................66
Changing the programming .............65
Checking the battery .......................66
Convenience closing feature ............77
Convenience opening
feature ............................................. 77
Display message ............................ 185
Door central locking/unlocking .......64
Loss ................................................. 67
Mechanical key ................................ 65
Opening/closing soft top .................79
Problem (malfunction) .....................67
Starting the engine ........................116
Unlocking/locking vehicle ...............69
SmartKey positions
KEYLESS-GO start function ............115Snow chains ...................................... 252
Socket Glove box ....................................... 204
Sockets
Center console .............................. 204
Points to observe before use .........204
Soft top
Cleaning ......................................... 226
Display message ............................ 184
Important safety notes ....................78
Opening/closing (SmartKey) ...........79
Opening/closing (with soft-top
switch) ............................................. 78
Problem (malfunction) .....................82
Relocking ......................................... 80
wind screen ..................................... 80
Soft-top switch .................................... 78
Spare wheel see Emergency spare wheel
Specialist workshop ............................ 21
Speed, controlling see Cruise control
Speedometer
Activating/deactivating the
additional speedometer .................157
Digital ............................................ 152
In the Instrument cluster .................27
Selecting the unit of
measurement ................................ 157
see Instrument cluster
SPORT handling mode
Activating/deactivating ...................58
Warning lamp ................................. 193
SRS (Supplemental Restraint
System) Display message ............................ 173
Introduction ..................................... 36
Warning lamp ................................. 193
Warning lamp (function) ................... 36
Standing lamps
Display message ............................ 176
Starting (engine) ................................ 116
Steering wheel Adjusting (electrically) .....................88
Button overview ............................... 29
Buttons (on-board computer) ......... 149
Important safety notes ....................88Index13
Page 60 of 288
GWARNING
ESP®
is deactivated if the h and å
warning lamps in the instrument cluster are
lit continuously when the engine is running.
There is an increased risk of your vehicle
skidding in certain situations.
You should always adapt your driving style to
suit the prevailing road and weather
conditions.
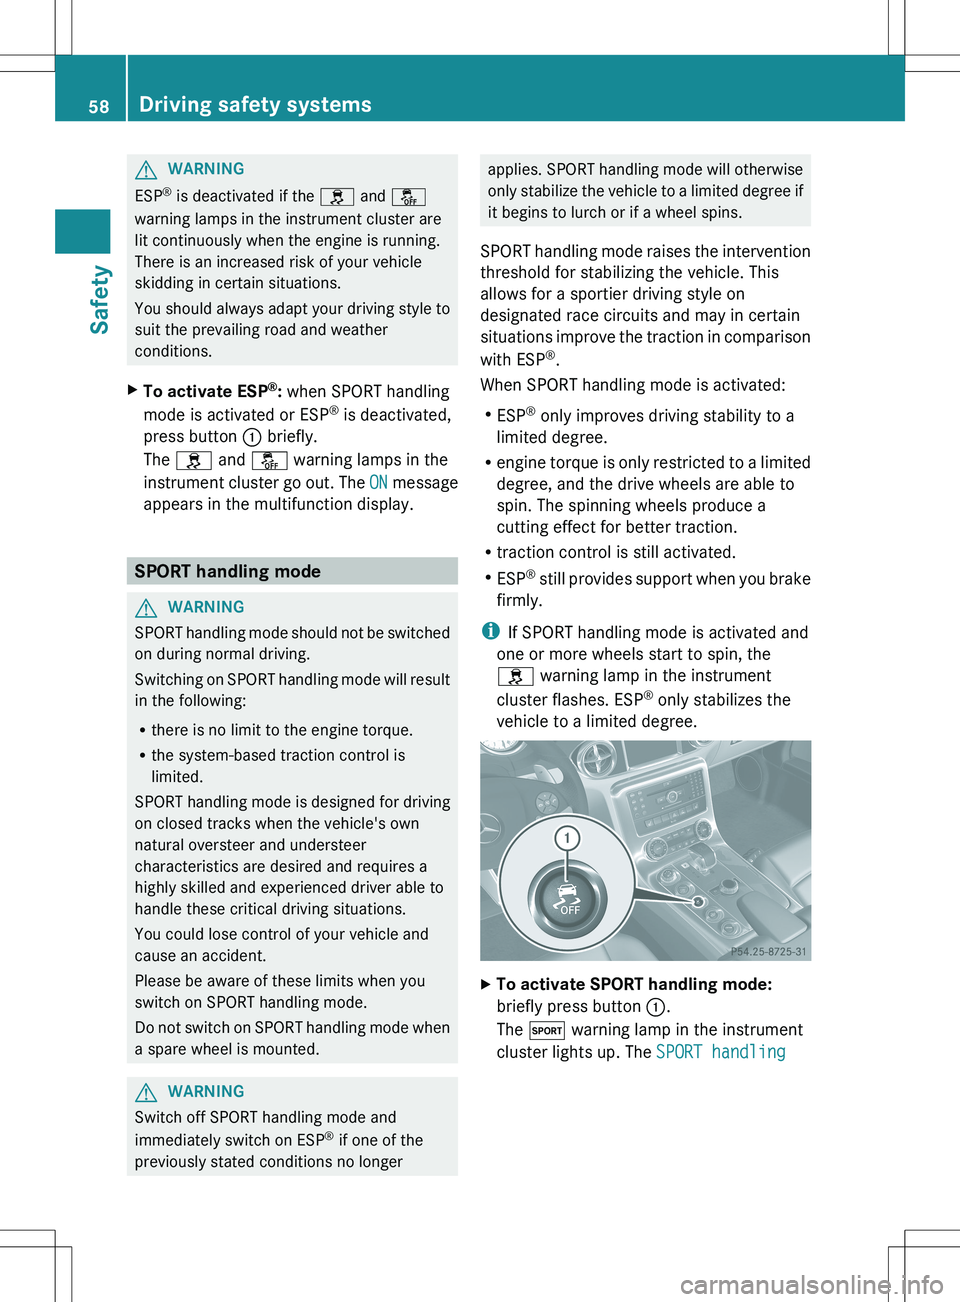
XTo activate ESP ®
: when SPORT handling
mode is activated or ESP ®
is deactivated,
press button : briefly.
The h and å warning lamps in the
instrument cluster go out. The ON message
appears in the multifunction display.
SPORT handling mode
GWARNING
SPORT handling mode should not be switched
on during normal driving.
Switching on SPORT handling mode will result
in the following:
R there is no limit to the engine torque.
R the system-based traction control is
limited.
SPORT handling mode is designed for driving
on closed tracks when the vehicle's own
natural oversteer and understeer
characteristics are desired and requires a
highly skilled and experienced driver able to
handle these critical driving situations.
You could lose control of your vehicle and
cause an accident.
Please be aware of these limits when you
switch on SPORT handling mode.
Do not switch on SPORT handling mode when
a spare wheel is mounted.
GWARNING
Switch off SPORT handling mode and
immediately switch on ESP ®
if one of the
previously stated conditions no longer
applies. SPORT handling mode will otherwise
only stabilize the vehicle to a limited degree if
it begins to lurch or if a wheel spins.
SPORT handling mode raises the intervention
threshold for stabilizing the vehicle. This
allows for a sportier driving style on
designated race circuits and may in certain
situations improve the traction in comparison
with ESP ®
.
When SPORT handling mode is activated:
R ESP ®
only improves driving stability to a
limited degree.
R engine torque is only restricted to a limited
degree, and the drive wheels are able to
spin. The spinning wheels produce a
cutting effect for better traction.
R traction control is still activated.
R ESP ®
still provides support when you brake
firmly.
i If SPORT handling mode is activated and
one or more wheels start to spin, the
h warning lamp in the instrument
cluster flashes. ESP ®
only stabilizes the
vehicle to a limited degree.XTo activate SPORT handling mode:
briefly press button :.
The M warning lamp in the instrument
cluster lights up. The SPORT handling 58Driving safety systemsSafety
Page 198 of 288
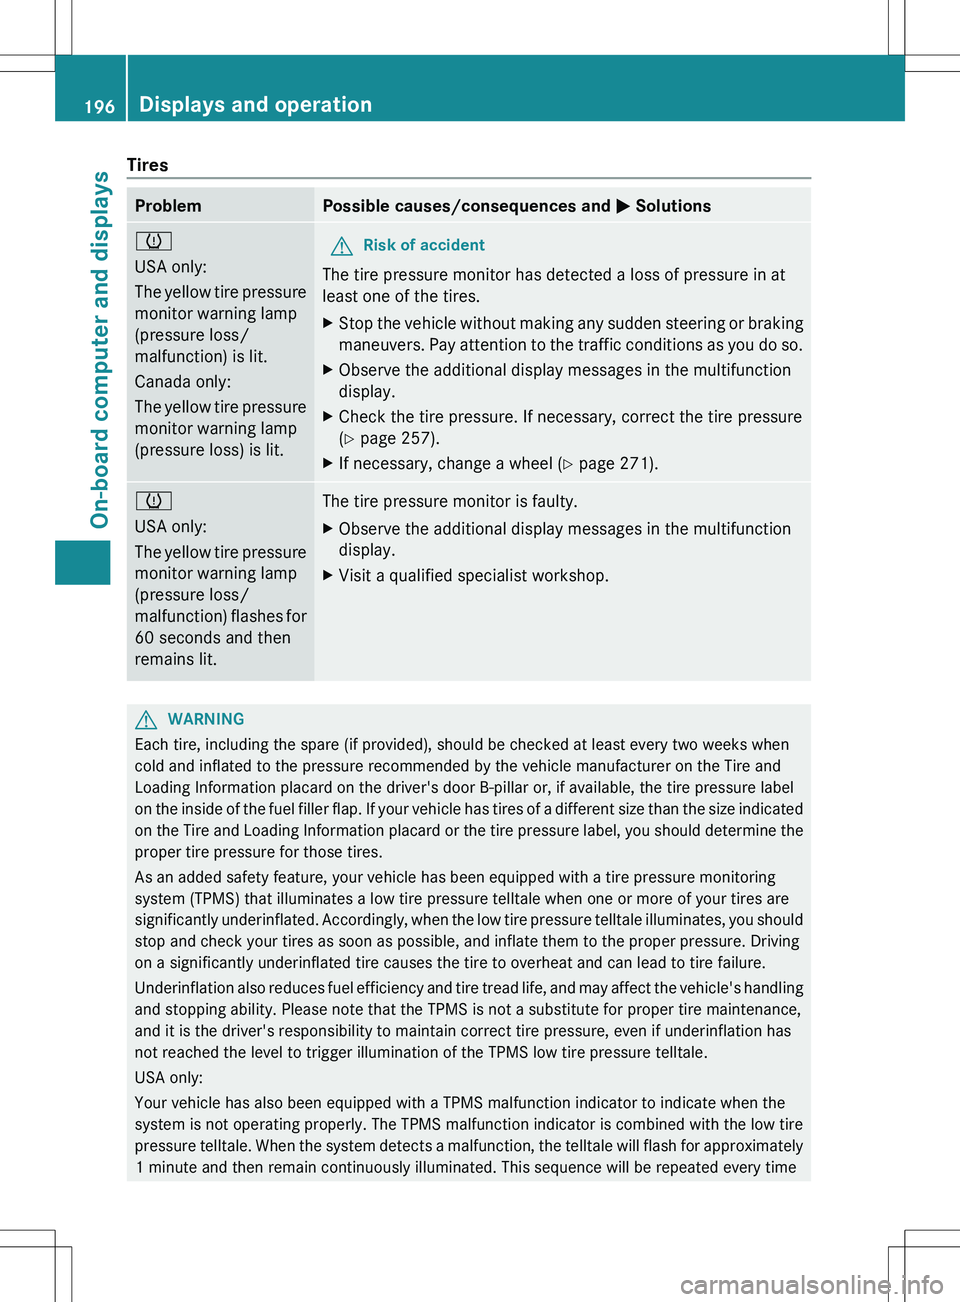
TiresProblemPossible causes/consequences and M Solutionsh
USA only:
The yellow tire pressure
monitor warning lamp
(pressure loss/
malfunction) is lit.
Canada only:
The yellow tire pressure
monitor warning lamp
(pressure loss) is lit.GRisk of accident
The tire pressure monitor has detected a loss of pressure in at
least one of the tires.
XStop the vehicle without making any sudden steering or braking
maneuvers. Pay attention to the traffic conditions as you do so.XObserve the additional display messages in the multifunction
display.XCheck the tire pressure. If necessary, correct the tire pressure
( Y page 257).XIf necessary, change a wheel ( Y page 271).h
USA only:
The yellow tire pressure
monitor warning lamp
(pressure loss/
malfunction) flashes for
60 seconds and then
remains lit.The tire pressure monitor is faulty.XObserve the additional display messages in the multifunction
display.XVisit a qualified specialist workshop.GWARNING
Each tire, including the spare (if provided), should be checked at least every two weeks when
cold and inflated to the pressure recommended by the vehicle manufacturer on the Tire and
Loading Information placard on the driver's door B-pillar or, if available, the tire pressure label
on the inside of the fuel filler flap. If your vehicle has tires of a different size than the size indicated
on the Tire and Loading Information placard or the tire pressure label, you should determine the
proper tire pressure for those tires.
As an added safety feature, your vehicle has been equipped with a tire pressure monitoring
system (TPMS) that illuminates a low tire pressure telltale when one or more of your tires are
significantly underinflated. Accordingly, when the low tire pressure telltale illuminates, you should
stop and check your tires as soon as possible, and inflate them to the proper pressure. Driving
on a significantly underinflated tire causes the tire to overheat and can lead to tire failure.
Underinflation also reduces fuel efficiency and tire tread life, and may affect the vehicle's handling
and stopping ability. Please note that the TPMS is not a substitute for proper tire maintenance,
and it is the driver's responsibility to maintain correct tire pressure, even if underinflation has
not reached the level to trigger illumination of the TPMS low tire pressure telltale.
USA only:
Your vehicle has also been equipped with a TPMS malfunction indicator to indicate when the
system is not operating properly. The TPMS malfunction indicator is combined with the low tire
pressure telltale. When the system detects a malfunction, the telltale will flash for approximately
1 minute and then remain continuously illuminated. This sequence will be repeated every time
196Displays and operationOn-board computer and displays
Page 238 of 288
The sticker must be attached on the
instrument cluster where it will be easily seen
by the driver.
Vehicle handling characteristics of a TIREFIT
repaired tire may change. Adapt your driving
accordingly.XStop after driving for approximately ten
minutes and check the tire pressure with
the tire inflation compressor.
i On tires that are equipped with a tire
pressure sensor (tire pressure monitor),
the use of sealant can lead to error
messages and incorrect displays.
Therefore, use pressure gauge B in the
TIREFIT kit to check and correct the tire
pressure.
GWARNING
If tire inflation pressure has fallen below
130 kPa (1.3 bar/26 psi) do not continue to
drive the vehicle.
Park your vehicle safely away from the
roadway and contact the nearest authorized
Mercedes-Benz Center or Roadside
Assistance.
Have the damaged tire replaced.
XCorrect the tire pressure if it is at least
130 kPa (1.3 bar/20 psi) (for the required
values see the Tire and Loading Information
placard on the driver's side B-pillar or the
tire pressure table inside the fuel filler flap).
To increase the tire pressure: switch on
the tire inflation compressor.
To reduce the tire pressure: open release
screw C.
!
The manufacturer does not guarantee
that all tire damage can be repaired using
the TIREFIT kit, particularly in the case of
cuts and punctures with a diameter of more
than four millimeters or on the sidewall. The
manufacturer is not responsible for
damage caused by inappropriate use of the
TIREFIT kit.
XDrive to the nearest workshop and have the
tire changed there.XHave the tire sealant bottle replaced as
soon as possible at a qualified specialist
workshop, e.g. at an authorized Mercedes-
Benz Center.HEnvironmental note
Have the used tire sealant bottle disposed of
professionally, e.g. at an authorized
Mercedes-Benz Center.
XHave the TIREFIT kit replaced every four
years at a qualified specialist workshop,
e.g. an authorized Mercedes-Benz Center.
Changing a wheel and mounting the
spare wheel
Preparing the vehicle
XPrepare the vehicle as described
( Y page 233).XBring the wheels into the straight-ahead
position.XTake the following objects from the left-
hand stowage compartment and the left-
hand stowage space in the trunk:
R the lug wrench
R the folding wheel chock
R the jack
R the alignment boltXSecure the vehicle to prevent it from rolling
away.
Securing the vehicle to prevent it from
rolling away
GWARNING
Only jack up the vehicle on level ground or on
slight inclines/declines. The vehicle could
otherwise fall off the jack and injure you or
others.
236Flat tireBreakdown assistance
Page 253 of 288
Notes on regularly inspecting wheels
and tiresGWARNING
Regularly check the tires for damage.
Damaged tires can cause tire inflation
pressure loss. As a result, you could lose
control of your vehicle.
Worn, old tires can cause accidents. If the tire
tread is worn to minimum tread depth, or if
the tires have sustained damage, replace
them.
R Regularly check the wheels and tires of
your vehicle for damage (e.g. cuts,
punctures, tears, bulges on tires and
deformation or cracks or severe corrosion
on wheels) at least once a month, as well
as after driving off-road or on rough roads.
Damaged wheels can cause a loss of tire
pressure.
R Regularly check the tire tread depth and
the condition of the tread across the whole
width of the tire (Y page 251). If necessary,
turn the front wheels to full lock in order to
inspect the inner side of the tire surface.
R All wheels must have a valve cap to protect
the valve against dirt and moisture. Do not
mount anything onto the valve (such as tire
pressure monitoring systems) other than
the standard valve cap or other valve caps
approved by Mercedes-Benz for your
vehicle.
R Regularly check the pressure of all the tires
including the emergency spare wheel or the
spare wheel, particularly prior to long trips,
and correct the pressure as necessary
( Y page 253).
Tire tread
GWARNING
Although the applicable federal motor vehicle
safety laws consider a tire to be worn when
the tread wear indicators (TWI) become
visible at approximately 1
/ 16 in (1.6 mm), we
recommend that you do not allow your tires
to wear down to that level. As tread depth
approaches 1
/ 8 in (3 mm), the adhesion
properties on a wet road are sharply reduced.
Depending upon the weather and/or road
surface (conditions), the tire traction varies
widely.
Do not use tires that are excessively worn as
the tire traction on wet road surfaces
decreases significantly when the tread depth
is less than ⅛ inch (3 mm).
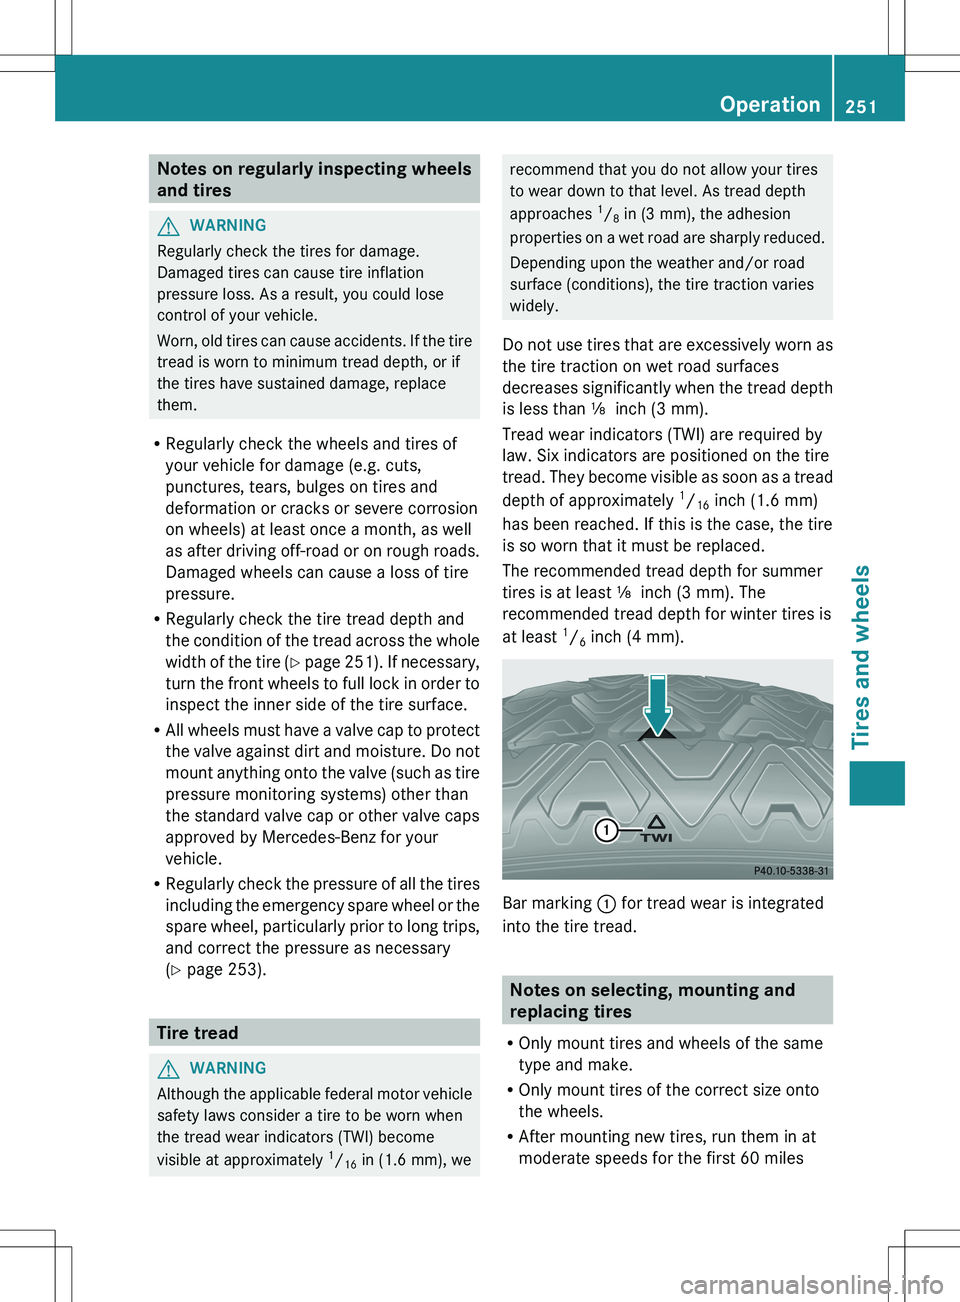
Tread wear indicators (TWI) are required by
law. Six indicators are positioned on the tire
tread. They become visible as soon as a tread
depth of approximately 1
/ 16 inch (1.6 mm)
has been reached. If this is the case, the tire
is so worn that it must be replaced.
The recommended tread depth for summer
tires is at least ⅛ inch (3 mm). The
recommended tread depth for winter tires is
at least 1
/ 6 inch (4 mm).
Bar marking
: for tread wear is integrated
into the tire tread.
Notes on selecting, mounting and
replacing tires
R Only mount tires and wheels of the same
type and make.
R Only mount tires of the correct size onto
the wheels.
R After mounting new tires, run them in at
moderate speeds for the first 60 miles
Operation251Tires and wheelsZ
Page 254 of 288
(100 km) as they only reach their full
performance after this distance.
R Do not use tires that are excessively worn
as the tire traction on wet road surfaces
decreases significantly when the tread
depth is less than 1
/ 8 inch (3 mm).
R Replace the tires after six years at the
latest, regardless of wear. This also applies
to the spare wheel/emergency spare
wheel.
The service life of tires depends on the
following factors amongst other things:
R driving style
R tire pressure
R mileage
Winter operation
General notes
Have your vehicle winterproofed at a qualified
specialist workshop at the onset of winter.
Observe the notes in the "Changing a wheel"
section ( Y page 271).
Driving with summer tires
At temperatures below 45 ‡ (+7 †), the
elasticity of summer tires and therefore also
the traction and braking capability are
reduced considerably — equip your vehicle
with M+S tires. Using summer tires at very
cold temperatures could cause tears to form,
thereby damaging the tires permanently.
Mercedes-Benz cannot accept responsibility
for this type of damage.
Snow chains
! There is not enough space for snow
chains on some wheel sizes. Observe the
information under "Tires and wheels" in the
"Technical Data" section to avoid damage
to the vehicle or the wheels.
For safety reasons, Mercedes-Benz
recommends that you only use snow chains
that have been specially approved for your
vehicle by Mercedes-Benz, or are of a
corresponding standard of quality.
R local regulations may restrict the use of
snow chains. Observe the appropriate
regulations if you wish to mount snow
chains.
R only use snow chains when driving on roads
completely covered by snow. Remove the
snow chains as soon as possible when you
come to a road that is not snow-covered.
R Do not exceed the maximum permissible
speed of 30 mph (50 km/h).
R you may not mount snow chains to all
wheel-tire combinations; see the
information under "Wheels and tires" in the
"Technical data" section.
R snow chains must not be mounted on
emergency spare wheels.
R mount snow chains only in pairs and only
on the rear wheels. Observe the
manufacturer's installation instructions.
! If snow chains are mounted on the front
wheels, the snow chains could grind
against the bodywork or components of the
chassis. This could result in damage to the
vehicle or the tires.
i You may wish to deactivate
ESP ®
(Y page 56) when pulling away with
snow chains mounted. This way you can
allow the wheels to spin in a controlled
manner, achieving an increased driving
force (cutting action).
M+S tires
GWARNING
M+S tires with a tread depth of less than 1
/ 6
inch (4 mm) must be replaced. They are no
longer suitable for winter operation.
252Winter operationTires and wheels
Page 255 of 288
GWARNING
If you mount the spare wheel when driving
with M+S tires, bear in mind that driving
stability will be impaired due to unstable
cornering characteristics caused by the
different tire characteristics. Adapt your style
of driving accordingly.
Have the spare wheel replaced by a normal
wheel with an M+S tire at the nearest
Mercedes-Benz Center.
At temperatures below 45 ‡(+7 †), use
winter tires or all-season tires. Both types of
tire are identified by the M+S marking.
Only winter tires bearing the i snowflake
symbol in addition to the M+S marking
provide the best possible grip in wintry road
conditions. Only these tires will allow driving
safety systems such as ABS and ESP ®
to
function optimally in winter, as these tires
have been designed specifically for driving on
snow.
Use M+S tires of the same make and tread on
all wheels to maintain safe handling
characteristics.
Always observe the maximum permissible
speed specified for the M+S tires you have
mounted.
When you have installed the M+S tires:
XCheck the tire pressures ( Y page 253).XRestart the tire pressure monitor
( Y page 259).
Tire pressure
Tire pressure specifications
GWARNING
Follow recommended tire inflation pressures.
Do not underinflate tires. Underinflated tires
wear excessively and/or unevenly, adversely
affect handling and fuel economy, and are
more likely to fail from being overheated.
Do not overinflate tires. Overinflated tires can
adversely affect handling and ride comfort,
wear unevenly, increase stopping distance,
and result in sudden deflation (blowout)
because they are more likely to become
punctured or damaged by road debris,
potholes etc.
Do not overload the tires by exceeding the
specified load limit as indicated on the Tire
and Loading Information placard on the
driver's door B-pillar. Overloading the tires
can overheat them, possibly causing a
blowout. Overloading the tires can also result
in handling or steering problems, or brake
failure.
You will find a table of recommended tire
pressures on the Tire and Loading
Information placard on the B-pillar on the
driver's side ( Y page 259). You will find a
table of tire pressures for various operating
conditions on the inside of your vehicle's fuel
filler flap.
To test tire pressure, use a suitable pressure
gauge. The outer appearance of a tire does
not permit any reliable conclusion about the
tire pressure. On vehicles equipped with the
electronic tire pressure monitoring system,
the tire pressure can be checked using the
on-board computer.GWARNING
Should the tire pressure drop repeatedly:
R check the tire for foreign bodies.
R check whether the wheel is losing air or the
valve is leaking.
R make sure that only a valve cap approved
by Mercedes-Benz is installed on the tire
valve.
Tire pressures that are too low have a
negative effect on vehicle safety, which could
lead you to cause an accident.
Only correct tire pressures when the tires are
cold. The tires are cold when the vehicle has
been parked for at least three hours or driven
for less than 1 mile (1.6 km). The tire
temperature changes depending on the
outside temperature, the vehicle speed and
Tire pressure253Tires and wheelsZ