2012 MERCEDES-BENZ SLS AMG ROADSTER wheel alignment
[x] Cancel search: wheel alignmentPage 234 of 288
Useful information
i This Operator's Manual describes all
models and all standard and optional
equipment of your vehicle available at the
time of publication of the Operator's
Manual. Country-specific differences are
possible. Please note that your vehicle may
not be equipped with all features
described. This also applies to safety-
related systems and functions.
i Please read the information on qualified
specialist workshops ( Y page 21).
Where will I find...?
First-aid kit
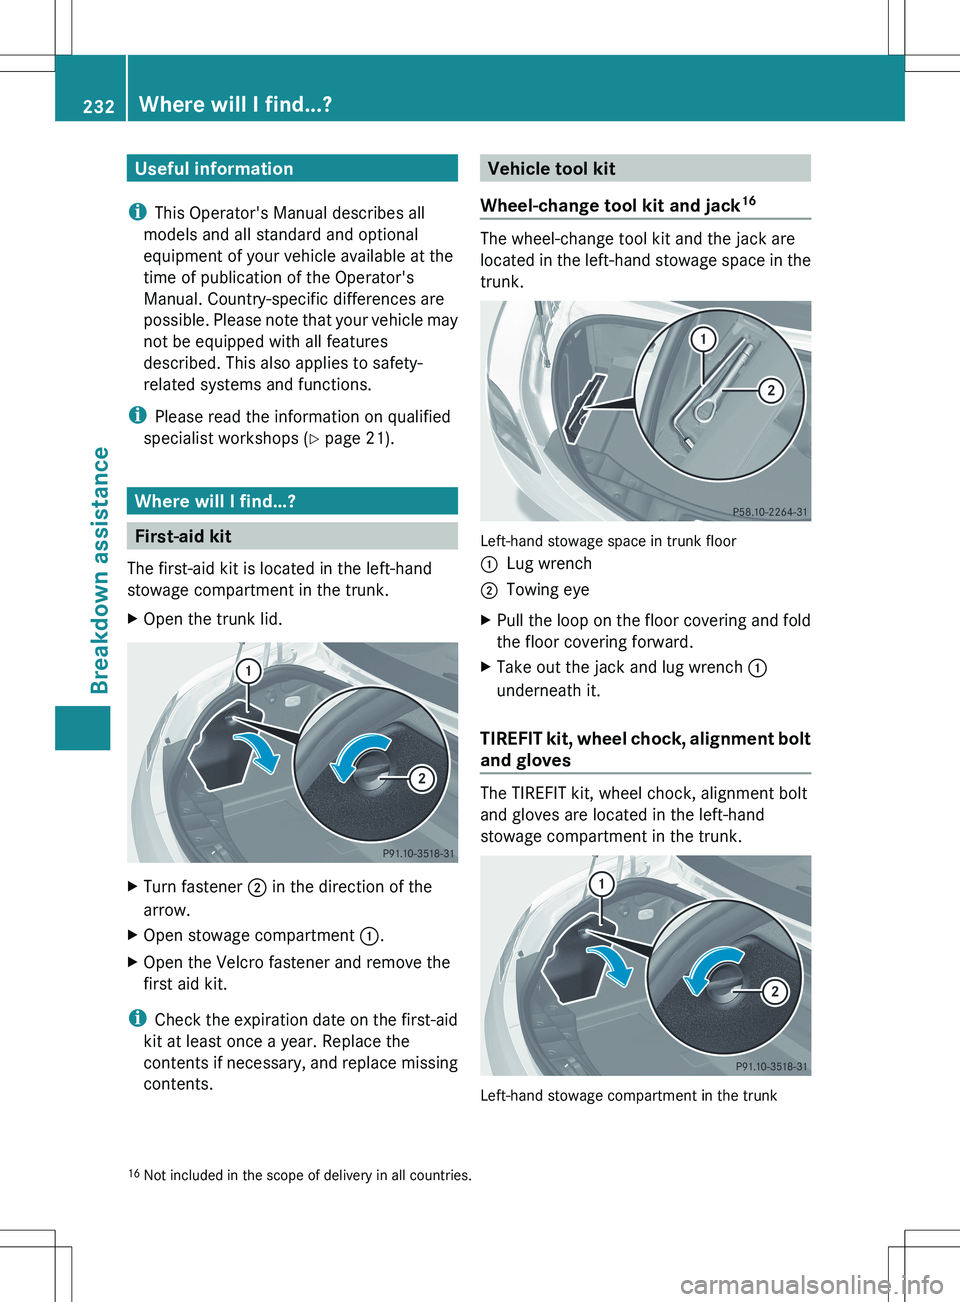
The first-aid kit is located in the left-hand
stowage compartment in the trunk.
XOpen the trunk lid.XTurn fastener ; in the direction of the
arrow.XOpen stowage compartment :.XOpen the Velcro fastener and remove the
first aid kit.
i Check the expiration date on the first-aid
kit at least once a year. Replace the
contents if necessary, and replace missing
contents.
Vehicle tool kit
Wheel-change tool kit and jack 16
The wheel-change tool kit and the jack are
located in the left-hand stowage space in the
trunk.
Left-hand stowage space in trunk floor
:Lug wrench;Towing eyeXPull the loop on the floor covering and fold
the floor covering forward.XTake out the jack and lug wrench :
underneath it.
TIREFIT kit, wheel chock, alignment bolt
and gloves
The TIREFIT kit, wheel chock, alignment bolt
and gloves are located in the left-hand
stowage compartment in the trunk.
Left-hand stowage compartment in the trunk
16 Not included in the scope of delivery in all countries.232Where will I find...?Breakdown assistance
Page 235 of 288
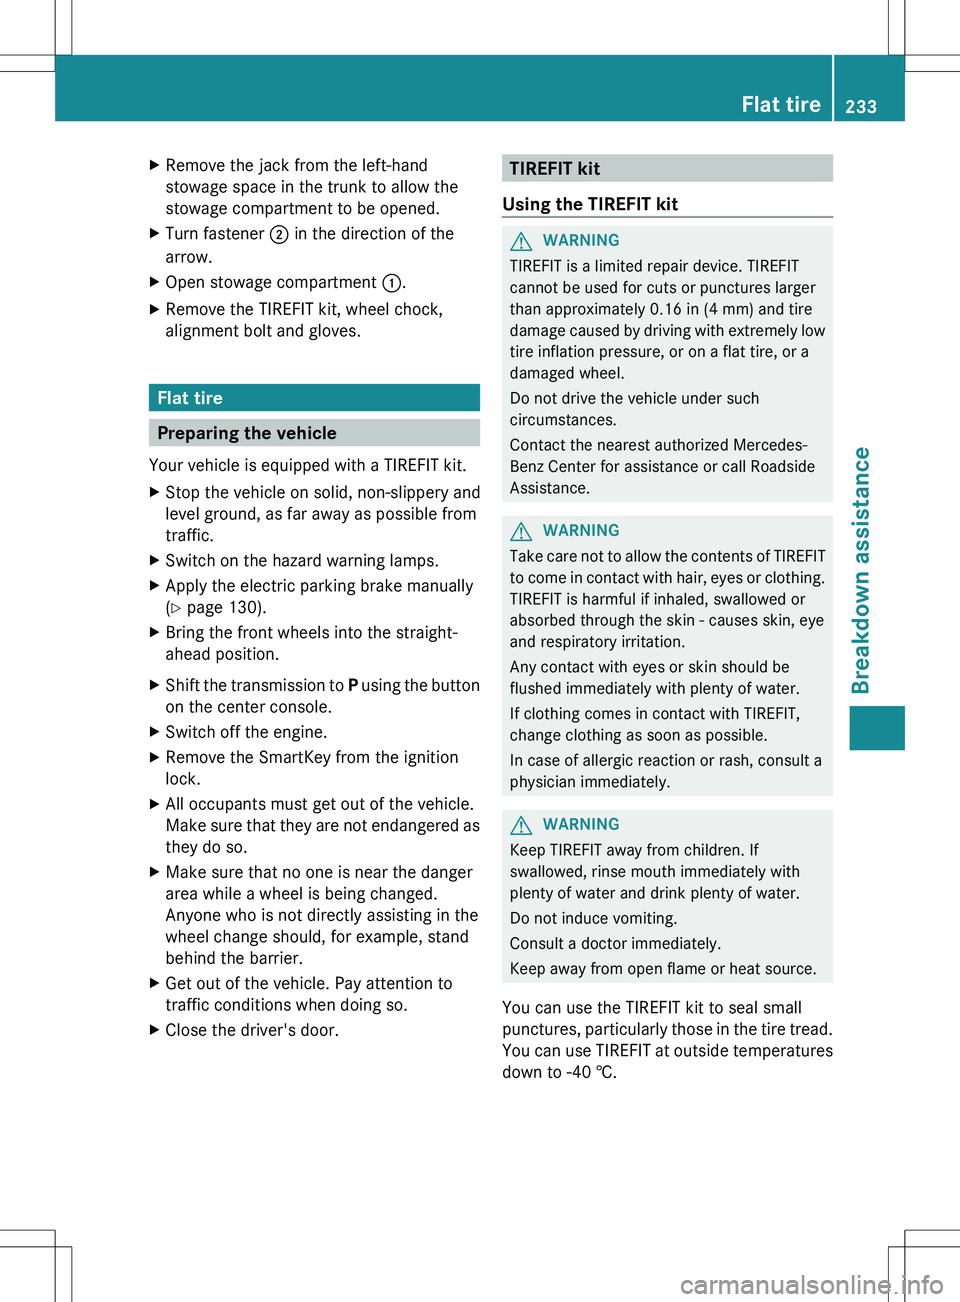
XRemove the jack from the left-hand
stowage space in the trunk to allow the
stowage compartment to be opened.XTurn fastener ; in the direction of the
arrow.XOpen stowage compartment :.XRemove the TIREFIT kit, wheel chock,
alignment bolt and gloves.
Flat tire
Preparing the vehicle
Your vehicle is equipped with a TIREFIT kit.
XStop the vehicle on solid, non-slippery and
level ground, as far away as possible from
traffic.XSwitch on the hazard warning lamps.XApply the electric parking brake manually
( Y page 130).XBring the front wheels into the straight-
ahead position.XShift the transmission to P using the button
on the center console.XSwitch off the engine.XRemove the SmartKey from the ignition
lock.XAll occupants must get out of the vehicle.
Make sure that they are not endangered as
they do so.XMake sure that no one is near the danger
area while a wheel is being changed.
Anyone who is not directly assisting in the
wheel change should, for example, stand
behind the barrier.XGet out of the vehicle. Pay attention to
traffic conditions when doing so.XClose the driver's door.TIREFIT kit
Using the TIREFIT kitGWARNING
TIREFIT is a limited repair device. TIREFIT
cannot be used for cuts or punctures larger
than approximately 0.16 in (4 mm) and tire
damage caused by driving with extremely low
tire inflation pressure, or on a flat tire, or a
damaged wheel.
Do not drive the vehicle under such
circumstances.
Contact the nearest authorized Mercedes-
Benz Center for assistance or call Roadside
Assistance.
GWARNING
Take care not to allow the contents of TIREFIT
to come in contact with hair, eyes or clothing.
TIREFIT is harmful if inhaled, swallowed or
absorbed through the skin - causes skin, eye
and respiratory irritation.
Any contact with eyes or skin should be
flushed immediately with plenty of water.
If clothing comes in contact with TIREFIT,
change clothing as soon as possible.
In case of allergic reaction or rash, consult a
physician immediately.
GWARNING
Keep TIREFIT away from children. If
swallowed, rinse mouth immediately with
plenty of water and drink plenty of water.
Do not induce vomiting.
Consult a doctor immediately.
Keep away from open flame or heat source.
You can use the TIREFIT kit to seal small
punctures, particularly those in the tire tread.
You can use TIREFIT at outside temperatures
down to -40 †.
Flat tire233Breakdown assistanceZ
Page 238 of 288
The sticker must be attached on the
instrument cluster where it will be easily seen
by the driver.
Vehicle handling characteristics of a TIREFIT
repaired tire may change. Adapt your driving
accordingly.XStop after driving for approximately ten
minutes and check the tire pressure with
the tire inflation compressor.
i On tires that are equipped with a tire
pressure sensor (tire pressure monitor),
the use of sealant can lead to error
messages and incorrect displays.
Therefore, use pressure gauge B in the
TIREFIT kit to check and correct the tire
pressure.
GWARNING
If tire inflation pressure has fallen below
130 kPa (1.3 bar/26 psi) do not continue to
drive the vehicle.
Park your vehicle safely away from the
roadway and contact the nearest authorized
Mercedes-Benz Center or Roadside
Assistance.
Have the damaged tire replaced.
XCorrect the tire pressure if it is at least
130 kPa (1.3 bar/20 psi) (for the required
values see the Tire and Loading Information
placard on the driver's side B-pillar or the
tire pressure table inside the fuel filler flap).
To increase the tire pressure: switch on
the tire inflation compressor.
To reduce the tire pressure: open release
screw C.
!
The manufacturer does not guarantee
that all tire damage can be repaired using
the TIREFIT kit, particularly in the case of
cuts and punctures with a diameter of more
than four millimeters or on the sidewall. The
manufacturer is not responsible for
damage caused by inappropriate use of the
TIREFIT kit.
XDrive to the nearest workshop and have the
tire changed there.XHave the tire sealant bottle replaced as
soon as possible at a qualified specialist
workshop, e.g. at an authorized Mercedes-
Benz Center.HEnvironmental note
Have the used tire sealant bottle disposed of
professionally, e.g. at an authorized
Mercedes-Benz Center.
XHave the TIREFIT kit replaced every four
years at a qualified specialist workshop,
e.g. an authorized Mercedes-Benz Center.
Changing a wheel and mounting the
spare wheel
Preparing the vehicle
XPrepare the vehicle as described
( Y page 233).XBring the wheels into the straight-ahead
position.XTake the following objects from the left-
hand stowage compartment and the left-
hand stowage space in the trunk:
R the lug wrench
R the folding wheel chock
R the jack
R the alignment boltXSecure the vehicle to prevent it from rolling
away.
Securing the vehicle to prevent it from
rolling away
GWARNING
Only jack up the vehicle on level ground or on
slight inclines/declines. The vehicle could
otherwise fall off the jack and injure you or
others.
236Flat tireBreakdown assistance
Page 241 of 288
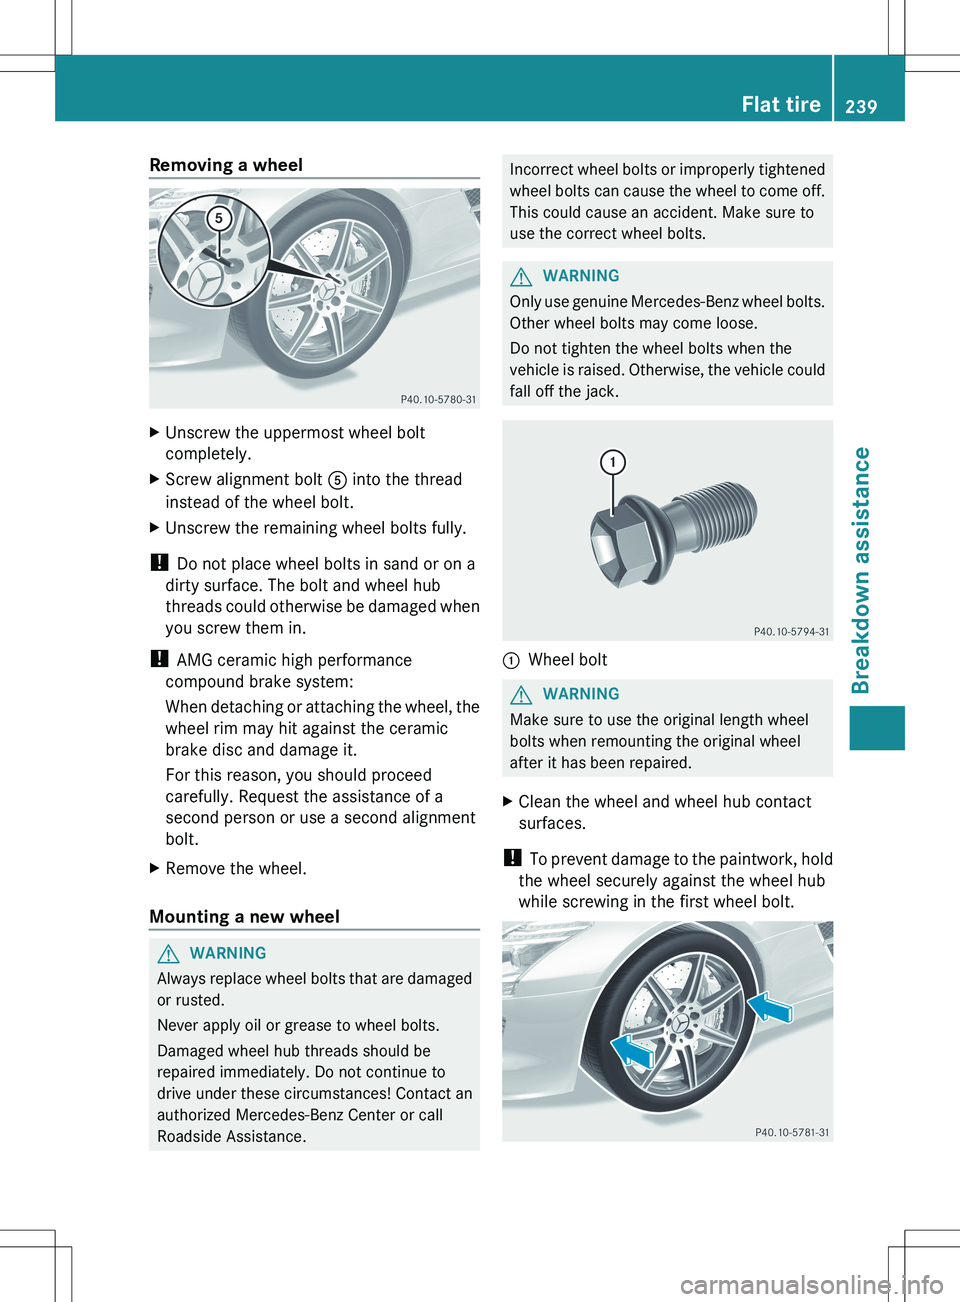
Removing a wheelXUnscrew the uppermost wheel bolt
completely.XScrew alignment bolt A into the thread
instead of the wheel bolt.XUnscrew the remaining wheel bolts fully.
! Do not place wheel bolts in sand or on a
dirty surface. The bolt and wheel hub
threads could otherwise be damaged when
you screw them in.
! AMG ceramic high performance
compound brake system:
When detaching or attaching the wheel, the
wheel rim may hit against the ceramic
brake disc and damage it.
For this reason, you should proceed
carefully. Request the assistance of a
second person or use a second alignment
bolt.
XRemove the wheel.
Mounting a new wheel
GWARNING
Always replace wheel bolts that are damaged
or rusted.
Never apply oil or grease to wheel bolts.
Damaged wheel hub threads should be
repaired immediately. Do not continue to
drive under these circumstances! Contact an
authorized Mercedes-Benz Center or call
Roadside Assistance.
Incorrect wheel bolts or improperly tightened
wheel bolts can cause the wheel to come off.
This could cause an accident. Make sure to
use the correct wheel bolts.GWARNING
Only use genuine Mercedes-Benz wheel bolts.
Other wheel bolts may come loose.
Do not tighten the wheel bolts when the
vehicle is raised. Otherwise, the vehicle could
fall off the jack.
:Wheel boltGWARNING
Make sure to use the original length wheel
bolts when remounting the original wheel
after it has been repaired.
XClean the wheel and wheel hub contact
surfaces.
! To prevent damage to the paintwork, hold
the wheel securely against the wheel hub
while screwing in the first wheel bolt.
Flat tire239Breakdown assistanceZ
Page 242 of 288
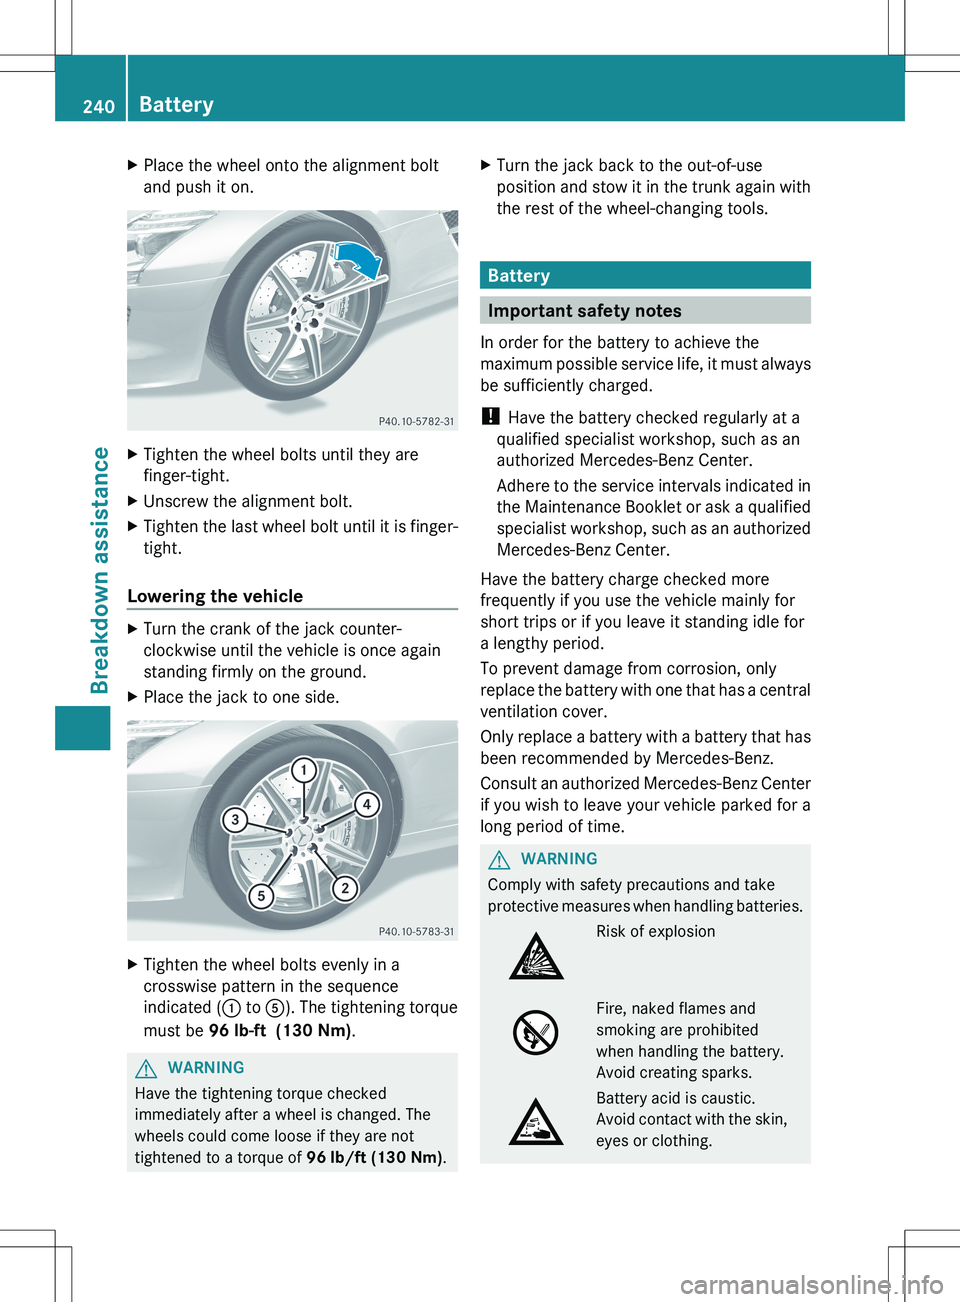
XPlace the wheel onto the alignment bolt
and push it on.XTighten the wheel bolts until they are
finger-tight.XUnscrew the alignment bolt.XTighten the last wheel bolt until it is finger-
tight.
Lowering the vehicle
XTurn the crank of the jack counter-
clockwise until the vehicle is once again
standing firmly on the ground.XPlace the jack to one side.XTighten the wheel bolts evenly in a
crosswise pattern in the sequence
indicated ( : to A). The tightening torque
must be 96 lb-ft (130 Nm) .GWARNING
Have the tightening torque checked
immediately after a wheel is changed. The
wheels could come loose if they are not
tightened to a torque of 96 lb/ft (130 Nm).
XTurn the jack back to the out-of-use
position and stow it in the trunk again with
the rest of the wheel-changing tools.
Battery
Important safety notes
In order for the battery to achieve the
maximum possible service life, it must always
be sufficiently charged.
! Have the battery checked regularly at a
qualified specialist workshop, such as an
authorized Mercedes-Benz Center.
Adhere to the service intervals indicated in
the Maintenance Booklet or ask a qualified
specialist workshop, such as an authorized
Mercedes-Benz Center.
Have the battery charge checked more
frequently if you use the vehicle mainly for
short trips or if you leave it standing idle for
a lengthy period.
To prevent damage from corrosion, only
replace the battery with one that has a central
ventilation cover.
Only replace a battery with a battery that has
been recommended by Mercedes-Benz.
Consult an authorized Mercedes-Benz Center
if you wish to leave your vehicle parked for a
long period of time.
GWARNING
Comply with safety precautions and take
protective measures when handling batteries.
Risk of explosionFire, naked flames and
smoking are prohibited
when handling the battery.
Avoid creating sparks.Battery acid is caustic.
Avoid contact with the skin,
eyes or clothing.240BatteryBreakdown assistance