2012 MERCEDES-BENZ SLS AMG COUPE garage door opener
[x] Cancel search: garage door openerPage 11 of 288
Fuel tankCapacity ........................................ 280
Problem (malfunction) ...................129
Fuse box
Front-passenger footwell ...............247
Rear compartment .........................248
Fuses
Allocation chart ............................. 247
Before changing ............................. 247
Important safety notes ..................247
G
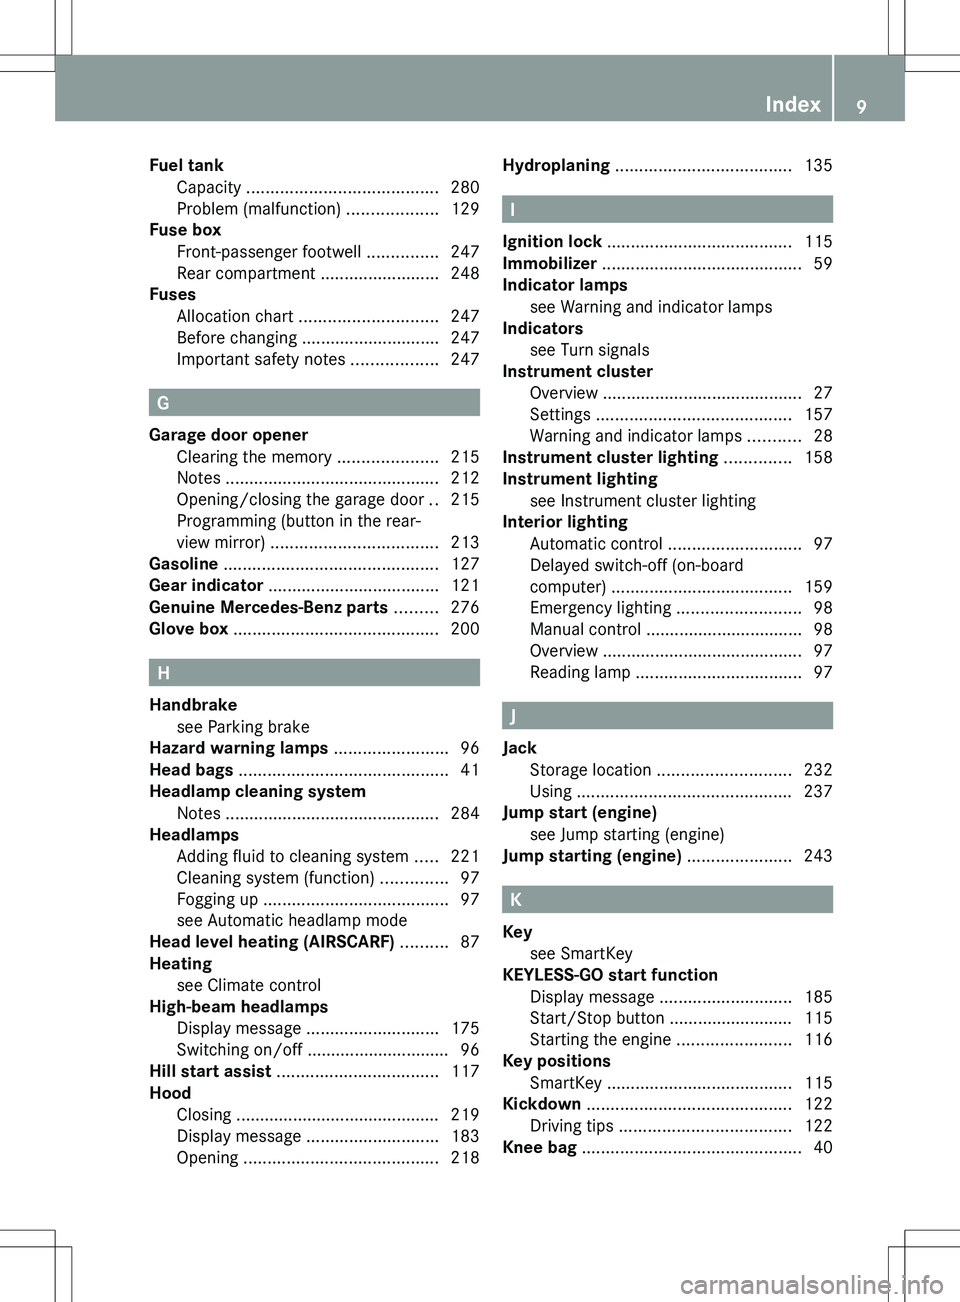
Garage door opener Clearing the memory .....................215
Notes ............................................. 212
Opening/closing the garage door ..215
Programming (button in the rear-
view mirror) ................................... 213
Gasoline ............................................. 127
Gear indicator .................................... 121
Genuine Mercedes-Benz parts ......... 276
Glove box ........................................... 200
H
Handbrake see Parking brake
Hazard warning lamps ........................ 96
Head bags ............................................ 41
Headlamp cleaning system Notes ............................................. 284
Headlamps
Adding fluid to cleaning system .....221
Cleaning system (function) ..............97
Fogging up ....................................... 97
see Automatic headlamp mode
Head level heating (AIRSCARF) .......... 87
Heating see Climate control
High-beam headlamps
Display message ............................ 175
Switching on/off .............................. 96
Hill start assist .................................. 117
Hood Closing ........................................... 219
Display message ............................ 183
Opening ......................................... 218
Hydroplaning ..................................... 135
I
Ignition lock ....................................... 115
Immobilizer .......................................... 59
Indicator lamps see Warning and indicator lamps
Indicators
see Turn signals
Instrument cluster
Overview .......................................... 27
Settings ......................................... 157
Warning and indicator lamps ...........28
Instrument cluster lighting .............. 158
Instrument lighting see Instrument cluster lighting
Interior lighting
Automatic control ............................ 97
Delayed switch-off (on-board
computer) ...................................... 159
Emergency lighting ..........................98
Manual control ................................. 98
Overview .......................................... 97
Reading lamp ................................... 97
J
Jack Storage location ............................ 232
Using ............................................. 237
Jump start (engine)
see Jump starting (engine)
Jump starting (engine) ...................... 243
K
Key see SmartKey
KEYLESS-GO start function
Display message ............................ 185
Start/Stop button .......................... 115
Starting the engine ........................116
Key positions
SmartKey ....................................... 115
Kickdown ........................................... 122
Driving tips .................................... 122
Knee bag .............................................. 40
Index9
Page 14 of 288
Product information ............................ 18
Program selector ............................... 122
Pulling away ...................................... 117
Q
Qualified specialist workshop ........... 21
R
RACE START ....................................... 123
RACETIMER (on-board computer) .... 161
Radio Selecting a station .........................154
see separate operating instructions
Reading lamp ....................................... 97
Rear spoiler Display message ............................ 189
Extending/retracting .....................210
Problem ......................................... 212
Rear view camera
Cleaning instructions .....................228
Function/notes ............................. 142
Rear-view mirror
Anti-glare (manual) ..........................89
Dipping (automatic) .........................90
Rear window defroster
Problem (malfunction) ...................109
Switching on/off ........................... 109
Refueling
Fuel gauge ....................................... 27
Important safety notes ..................127
Refueling process ..........................127
see Fuel
Remote control
Garage door opener .......................212
Reporting safety defects .................... 22
Reserve (fuel tank) see Fuel
Reserve fuel
Display message ............................ 179
Warning lamp ................................. 195
see Fuel
Restraint system
see SRS (Supplemental Restraint
System)
Roadside Assistance (breakdown) .... 19
Roof
see Soft top
Route
see Route guidance (navigation)
Route guidance (navigation) ............ 153
S
Safety Children in the vehicle .....................51
Child restraint systems ....................51
Occupant Classification System
(OCS) ............................................... 42
Overview of occupant safety
systems ........................................... 36
Safety systems
see Driving safety systems
Seat belts
Belt force limiters ............................ 50
Cleaning ......................................... 229
Correct usage .................................. 48
Emergency Tensioning Devices ........ 50
Fastening ......................................... 49
Important safety guidelines .............47
Releasing ......................................... 49
Safety guidelines ............................. 37
Special seat belt retractor ...............53
Warning lamp ................................. 191
Warning lamp (function) ................... 49
Seats
Adjusting (electrically) .....................86
Adjusting lumbar support ................86
Cleaning the cover .........................229
Correct driver's seat position ........... 84
Important safety notes ....................85
Seat heating problem ......................87
Storing settings (memory
function) .......................................... 91
Switching AIRSCARF on/off ............87
Switching seat heating on/off .........86
Selector lever
Positions ........................................ 119
Sensors (cleaning instructions) ....... 228
Service Center see Qualified specialist workshop
Service interval display
Displaying service messages .........222
Hiding service messages ...............222
12Index
Page 34 of 288
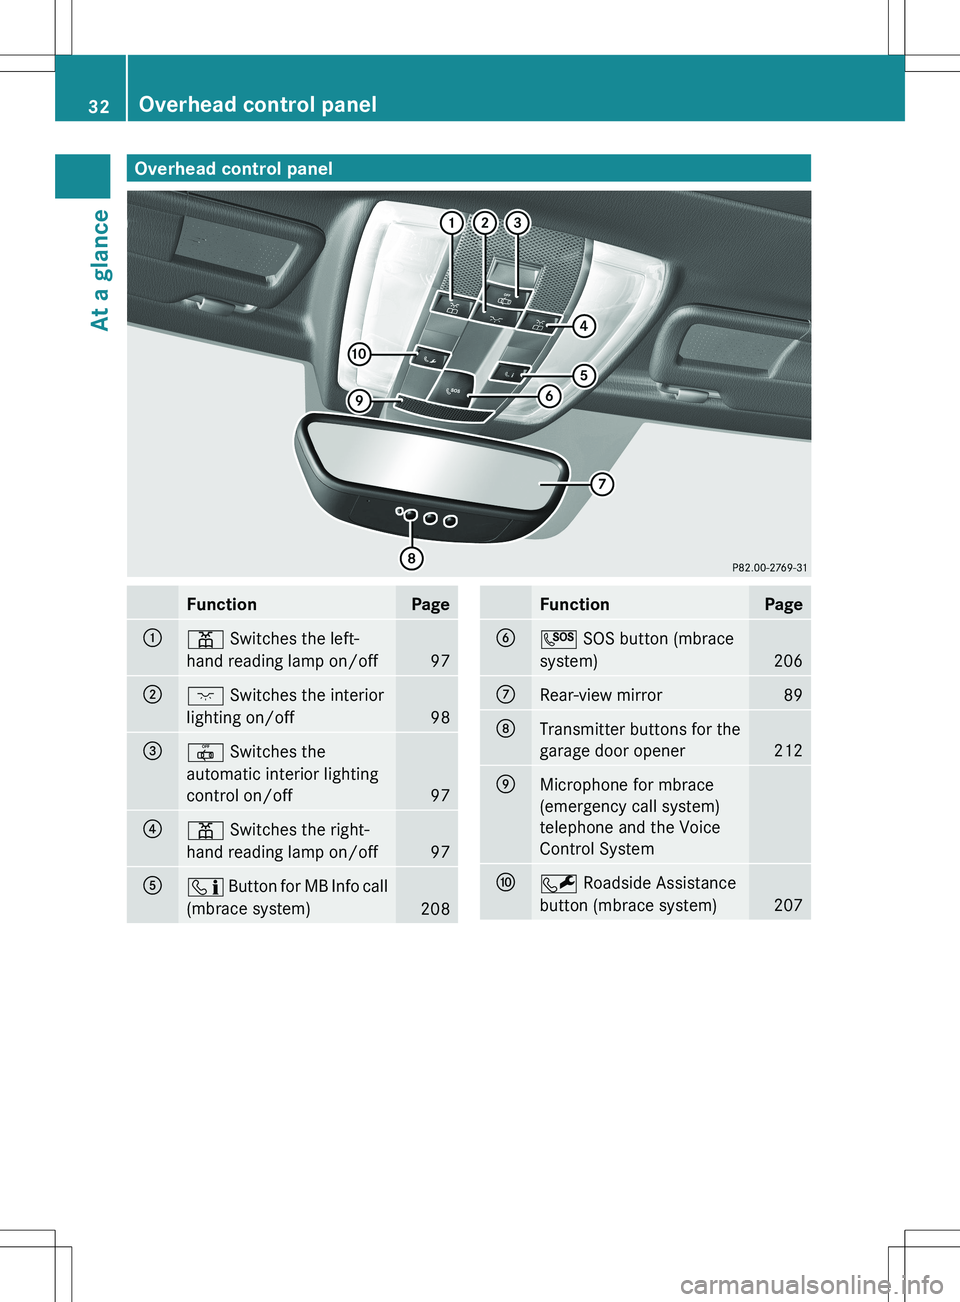
Overhead control panelFunctionPage:p Switches the left-
hand reading lamp on/off
97
;c Switches the interior
lighting on/off
98
=| Switches the
automatic interior lighting
control on/off
97
?p Switches the right-
hand reading lamp on/off
97
Aï Button for MB Info call
(mbrace system)
208
FunctionPageBG SOS button (mbrace
system)
206
CRear-view mirror89DTransmitter buttons for the
garage door opener
212
EMicrophone for mbrace
(emergency call system)
telephone and the Voice
Control SystemFF Roadside Assistance
button (mbrace system)
207
32Overhead control panelAt a glance
Page 214 of 288
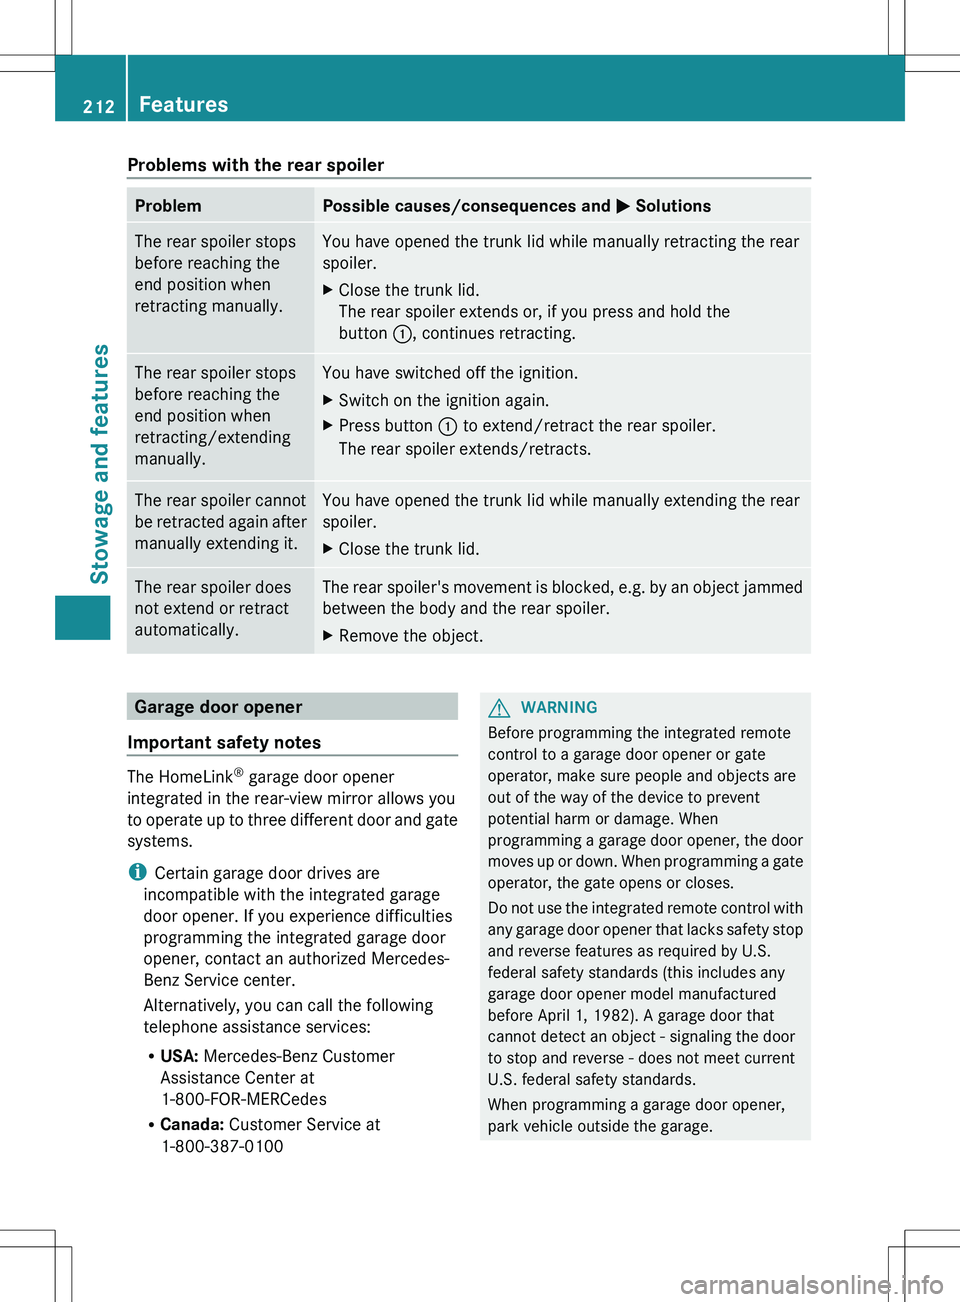
Problems with the rear spoilerProblemPossible causes/consequences and M SolutionsThe rear spoiler stops
before reaching the
end position when
retracting manually.You have opened the trunk lid while manually retracting the rear
spoiler.XClose the trunk lid.
The rear spoiler extends or, if you press and hold the
button :, continues retracting.The rear spoiler stops
before reaching the
end position when
retracting/extending
manually.You have switched off the ignition.XSwitch on the ignition again.XPress button : to extend/retract the rear spoiler.
The rear spoiler extends/retracts.The rear spoiler cannot
be retracted again after
manually extending it.You have opened the trunk lid while manually extending the rear
spoiler.XClose the trunk lid.The rear spoiler does
not extend or retract
automatically.The rear spoiler's movement is blocked, e.g. by an object jammed
between the body and the rear spoiler.XRemove the object.Garage door opener
Important safety notes
The HomeLink ®
garage door opener
integrated in the rear-view mirror allows you
to operate up to three different door and gate
systems.
i Certain garage door drives are
incompatible with the integrated garage
door opener. If you experience difficulties
programming the integrated garage door
opener, contact an authorized Mercedes-
Benz Service center.
Alternatively, you can call the following
telephone assistance services:
R USA: Mercedes-Benz Customer
Assistance Center at
1-800-FOR-MERCedes
R Canada: Customer Service at
1-800-387-0100
GWARNING
Before programming the integrated remote
control to a garage door opener or gate
operator, make sure people and objects are
out of the way of the device to prevent
potential harm or damage. When
programming a garage door opener, the door
moves up or down. When programming a gate
operator, the gate opens or closes.
Do not use the integrated remote control with
any garage door opener that lacks safety stop
and reverse features as required by U.S.
federal safety standards (this includes any
garage door opener model manufactured
before April 1, 1982). A garage door that
cannot detect an object - signaling the door
to stop and reverse - does not meet current
U.S. federal safety standards.
When programming a garage door opener,
park vehicle outside the garage.
212FeaturesStowage and features
Page 215 of 288
Do not run the engine while programming the
integrated remote control. Inhalation of
exhaust gas is hazardous to your health. All
exhaust gas contains carbon monoxide (CO),
and inhaling it can cause unconsciousness
and possible death. All exhaust gas contains
carbon monoxide (CO), and inhaling it can
cause unconsciousness and possible death.
i USA only:
this device complies with part 15 of the
FCC Rules. Operation is subject to the
following two conditions:
1. This device may not cause harmful
interference, and
2. this device must accept any interference
received, including interference that may
cause undesired operation.
Any unauthorized modification to this
device could void the user's authority to
operate the equipment.
FCC ID: CB2HMIHL4
i Canada only:
This device complies with RSS-210 of
Industry Canada. Operation is subject to
the following two conditions:
1. This device may not cause harmful
interference, and
2. this device must accept any interference
received, including interference that may
cause undesired operation of the device.
Any unauthorized modification to this
device could void the user's authority to
operate the equipment.
IC: 279B-HMIHL4
Programming the integrated garage
door opener on the rear-view mirror
Programming
GWARNING
Only press the button on the integrated
garage door opener if there are no persons or
objects present within the sweep of the
garage door. Persons could otherwise be
injured as the door moves.
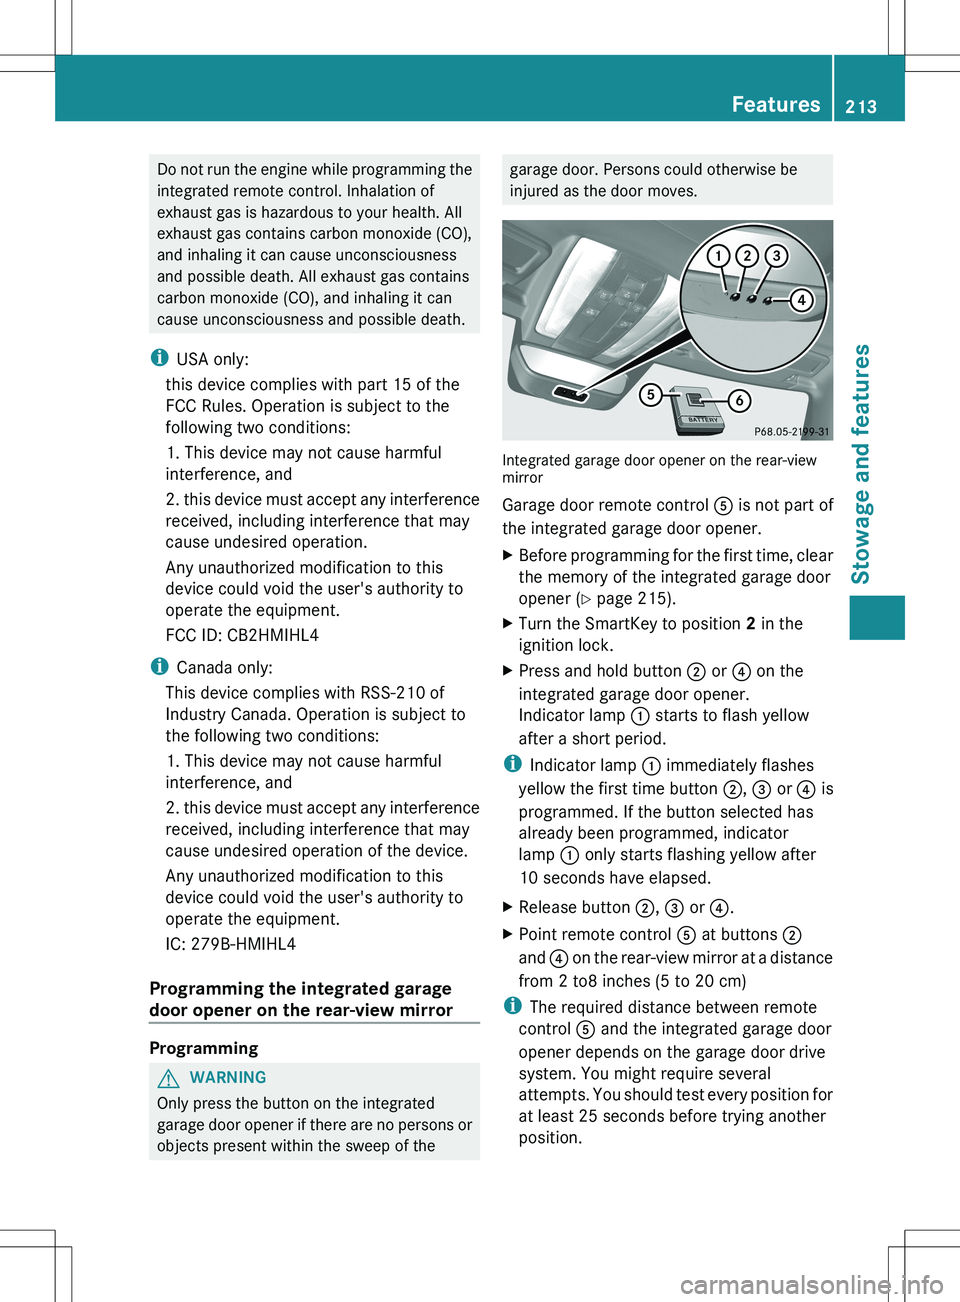
Integrated garage door opener on the rear-view
mirror
Garage door remote control A is not part of
the integrated garage door opener.
XBefore programming for the first time, clear
the memory of the integrated garage door
opener ( Y page 215).XTurn the SmartKey to position 2 in the
ignition lock.XPress and hold button ; or ? on the
integrated garage door opener.
Indicator lamp : starts to flash yellow
after a short period.
i Indicator lamp : immediately flashes
yellow the first time button ;, = or ? is
programmed. If the button selected has
already been programmed, indicator
lamp : only starts flashing yellow after
10 seconds have elapsed.
XRelease button ;, = or ?.XPoint remote control A at buttons ;
and ? on the rear-view mirror at a distance
from 2 to8 inches (5 to 20 cm)
i The required distance between remote
control A and the integrated garage door
opener depends on the garage door drive
system. You might require several
attempts. You should test every position for
at least 25 seconds before trying another
position.
Features213Stowage and featuresZ
Page 216 of 288
XPress and hold button B on remote control
A until indicator lamp : lights up green.
The programming has been successful if
indicator lamp : lights up or flashes
green.XRelease button ;, = or ? on the
integrated garage door opener and button
B on garage door remote control A.
If indicator lamp : lights up red:
XRepeat the programming operation for the
corresponding button on the rear-view
mirror. When doing so, vary the distance
between remote control A and the rear-
view mirror.
i If the indicator lamp flashes green after
successful programming, the garage door
system is operating on a rolling code. After
programming, you must synchronize the
garage door opener integrated in the rear-
view mirror with the receiver of the garage
door system.
Synchronizing the rolling code
Your vehicle must be within range of the
garage or gate opener drive. Make sure that
neither your vehicle nor any persons/objects
are present within the sweep of the door or
gate.
Observe the safety notes when performing
the rolling code synchronization
( Y page 212).
XTurn the SmartKey to position 2 in the
ignition lock.XPress the programming button of the door
or gate drive (see the door or gate drive
operating instructions, e.g. under
"Programming of additional remote
controls").
i Usually, you now have 30seconds to
initiate the next step.
XPress the previously programmed
button ;, = or ? of the integratedgarage door opener repeatedly until the
door starts to move.
The rolling code synchronization is then
complete.
Notes on programming the remote
control
Canadian radio frequency laws require a
"break" (or interruption) of the transmission
signals after broadcasting for a few seconds.
Therefore, these signals may not last long
enough for the integrated remote control. The
signal is not recognized during programming.
Comparable with Canadian law, some U.S.
garage door openers are designed to "time-
out" in the same manner.
Proceed as follows:
R if you live in Canada.
R if you have difficulties programming the
garage door opener (regardless of where
you live) when using the programming
steps.
XPress and hold one of the buttons ;
to ? on the integrated garage door
opener.
Indicator lamp : starts to flash yellow
after a short period.XRelease the switch.XPress button B of garage door remote
control A for two seconds, then release it
for two seconds.XPress button B again for two seconds.XRepeat this sequence on button B of
remote control A until indicator lamp :
lights up green.
Repeat the process if indicator lamp :
turns red.XContinue with the other programming
steps (see above).214FeaturesStowage and features
Page 217 of 288
Problems when programming
If you are experiencing problems
programming the integrated garage door
opener on the rear-view mirror, take note of
the following instructions:
R Check remote control frequency of garage
door drive remote control A. This is
usually located on the back of the remote
control.
The integrated garage door opener is
compatible with devices that have units
which operate in the frequency range of
280 to 390 MHz.
R Change the batteries in garage door remote
control A. This increases the likelihood
that garage door remote control A will
send a strong and precise signal to the
integrated garage door opener in the rear-
view mirror.
R When programming, hold remote control
A at varying distances and angles from the
button which you are programming. Try
various angles at a distance of between 2
to 12 inches (5 to 30 cm) or at the same
angle but at varying distances.
R if another remote control for the same
garage door drive is available, repeat the
same programming steps with this remote
control. Before performing these steps,
make sure that new batteries have been
installed in garage door drive remote
control A.
R note that some remote controls only
transmit for a limited amount of time (the
indicator lamp on the remote control goes
out). Press button B on remote control
A before transmission ends.
R align the antenna cable of the garage door
opener unit. This can improve signal
reception/transmission.
Opening/closing the garage door
After it has been programmed, the integrated
garage door opener performs the function of
the garage door system remote control.
Please also read the operating instructions
for the garage door system.XTurn the SmartKey to position 2 in the
ignition lock.XPress one of the buttons ;, = or ?;
whichever one is programmed to operate
the garage door.
Garage door system with a fixed code:
indicator lamp : lights up green.
Garage door system with a rolling code:
indicator lamp : flashes green.
i
The transmitter will transmit a signal for
as long as the button is pressed. The
transmission is halted after a maximum of
ten seconds and indicator lamp : flashes
yellow. Press button ;, = or ? again if
necessary.
Clearing the memory of the integrated
garage door opener on the rear-view
mirror
XTurn the SmartKey to position 2 in the
ignition lock.XPress buttons ; and ?.
The indicator lamp lights up yellow.XPress and hold buttons ; and ? until the
indicator lamp turns green.
i Make sure that you clear the memory of
the integrated garage door opener before
selling the vehicle.
Charge maintenance socket
The battery may drain if the vehicle is left
stationary for long periods. In this case,
Mercedes-Benz recommends attaching the
trickle charger to the charge maintenance
socket.
The charge maintenance socket is designed
solely for connecting a trickle charger. A
trickle charger can be obtained from an
authorized Mercedes-Benz Center, for
example.
Features215Stowage and featuresZ