2012 MERCEDES-BENZ SLS AMG COUPE light
[x] Cancel search: lightPage 140 of 288
vehicle's speed to the last speed stored
after you have finished overtaking.
Making adjustments in 1 mph
incrementsXBriefly press the cruise control lever to the
pressure point, up : for a higher speed or
down ; for a lower speed.
The last speed stored is increased or
reduced.
Making adjustments in 10 mph
increments
XBriefly press the cruise control lever
beyond the pressure point, up : for a
higher speed or down ; for a lower speed.
The last speed stored is increased or
reduced.
Deactivating cruise control
There are several ways to deactivate cruise
control:
XBriefly press the cruise control lever
forwards =.
or
XBrake.
Cruise control is automatically deactivated if:
R you press the electric parking brake
handle.
R you are driving below 20 mph (30 km/h).
R ESP ®
intervenes or you deactivate ESP ®
.
R you shift the transmission to N while the
vehicle is in motion.
If cruise control is deactivated, you will hear
a warning tone. The Cruise control Off
message is displayed in the multifunction
display for approximately five seconds.
i The last speed stored is cleared when you
switch off the engine.
AMG adaptive sport suspension
system
General notes
The electronically controlled damping system
works continuously. This improves driving
safety and ride comfort.
The damping is tuned individually to each
wheel and depends on:
R your driving style, e.g. sporty
R the road surface condition, e.g. bumps
R your individual selection of Sport, Sport +
or Comfort
If you select Sport or Sport + mode and
restart the engine, the suspension setting
reverts to Comfort mode.
Sport mode
The firmer suspension tuning in Sport mode
ensures even better contact with the road.
Select this mode when employing a sporty
driving style, e.g. on winding country roads.
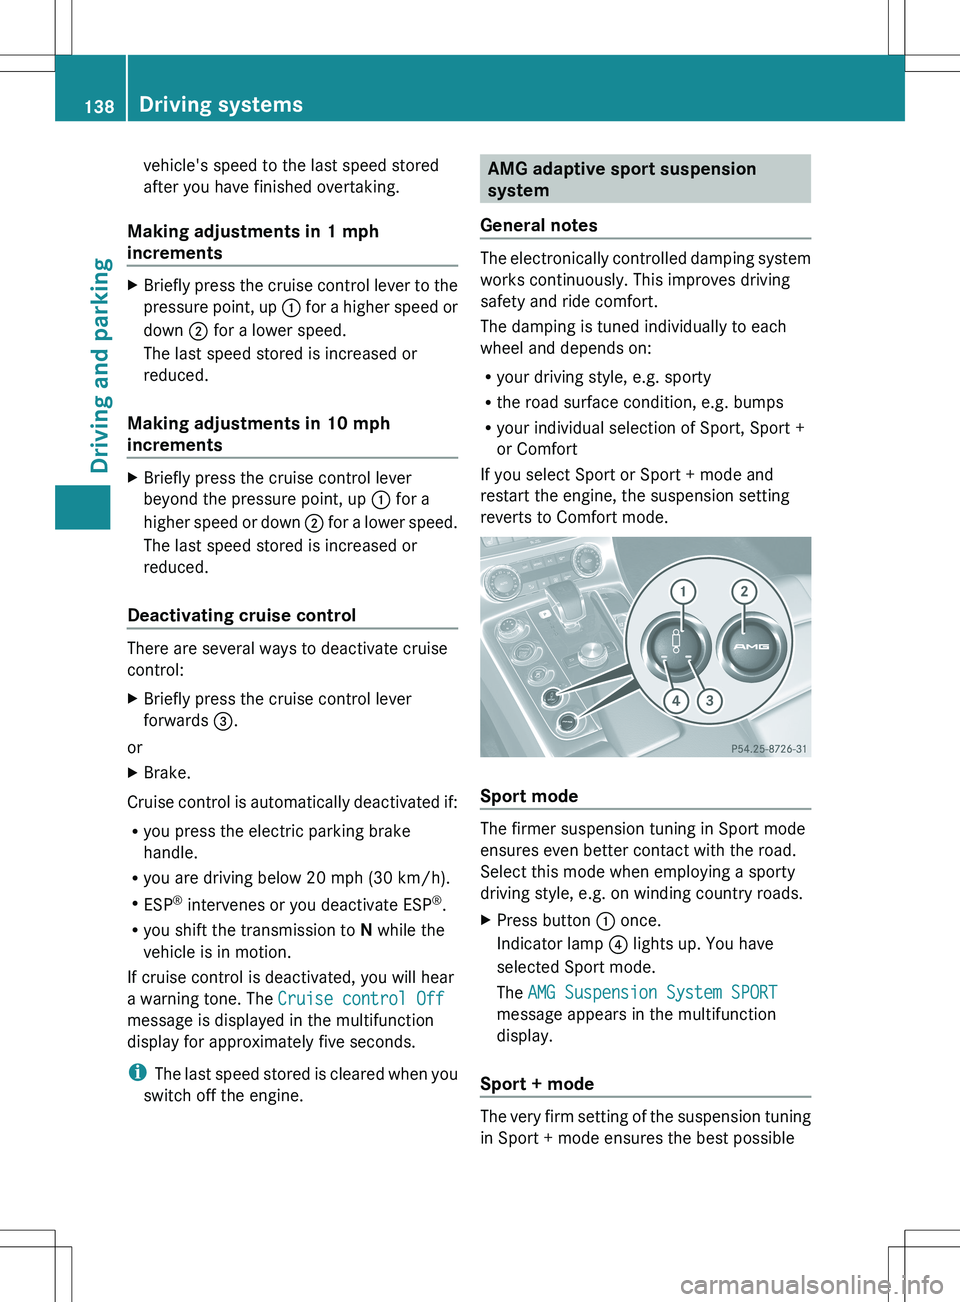
XPress button : once.
Indicator lamp ? lights up. You have
selected Sport mode.
The AMG Suspension System SPORT
message appears in the multifunction
display.
Sport + mode
The very firm setting of the suspension tuning
in Sport + mode ensures the best possible
138Driving systemsDriving and parking
Page 141 of 288
contact with the road. Select this mode only
when driving on race circuits.
If indicator lamps = and ? are off:XPress button : twice.
Indicator lamps = and ? light up. You
have selected Sport + mode.
The AMG Suspension System SPORT +
message appears in the multifunction
display.
If indicator lamp ? lights up:
XPress button : once.
The second indicator lamp = lights up. You
have selected Sport + mode.
The AMG Suspension System SPORT +
message appears in the multifunction
display.
Comfort mode
In comfort mode, the driving characteristics
of your vehicle are more comfortable. Select
this mode if you favor a more comfortable
driving style, but also when driving fast on
straight roads, e.g. freeways.
XPress button : repeatedly until indicator
lamps = and ? go out.
You have selected Comfort mode.
The AMG Suspension System COMFORT
message appears in the multifunction
display.
Storing and calling up settings
Once the suspension tuning and drive
program have been selected, you can store
and call up your settings using AMG
button ;.
XTo store: press AMG button ; until you
hear a tone.XTo call up: press AMG button ;.
The stored suspension tuning and drive
program are selected.XTo display: briefly press AMG button ;.
Your selection appears in the multifunction
display.
PARKTRONIC
Important safety notes
GWARNING
The PARKTRONIC is a supplemental system.
It is not intended to, nor does it replace, the
need for extreme care. The responsibility
during parking and other critical maneuvers
always remains with the driver.
GWARNING
Make sure no persons or animals are in or
near the area in which you are parking/
maneuvering. Otherwise, they could be
injured.
PARKTRONIC is an electronic parking aid with
ultrasonic sensors. It indicates visually and
audibly the distance between your vehicle
and an object.
PARKTRONIC is activated automatically when
you:
R switch on the ignition
R release the electric parking brake
PARKTRONIC is deactivated at speeds above
11 mph (18 km/h). It is reactivated at lower
speeds.
PARKTRONIC monitors the area around your
vehicle using four sensors in the front bumper
and four sensors in the rear bumper.
Driving systems139Driving and parkingZ
Page 142 of 288
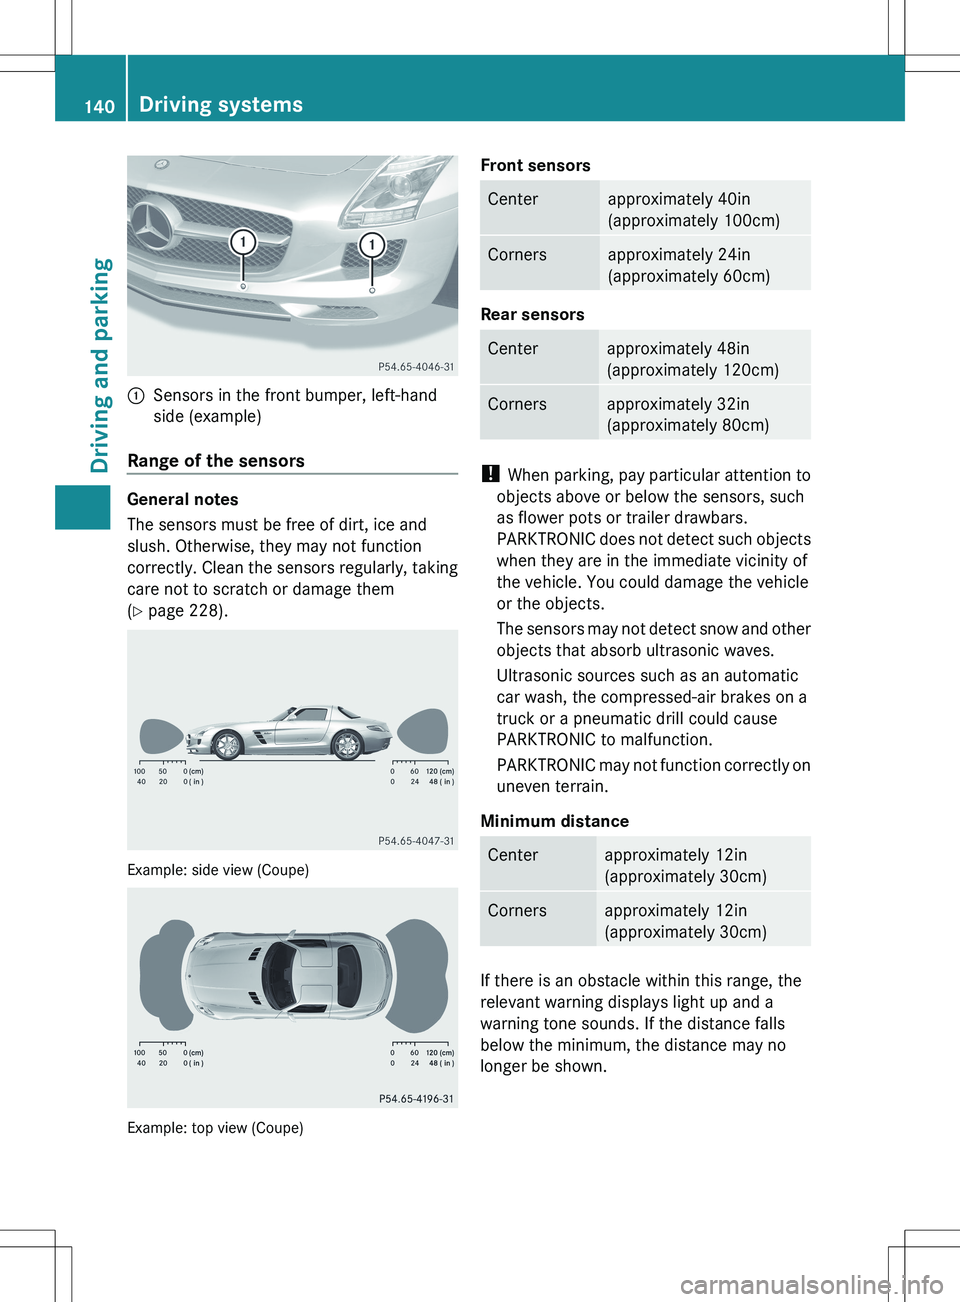
:Sensors in the front bumper, left-hand
side (example)
Range of the sensors
General notes
The sensors must be free of dirt, ice and
slush. Otherwise, they may not function
correctly. Clean the sensors regularly, taking
care not to scratch or damage them
( Y page 228).
Example: side view (Coupe)
Example: top view (Coupe)
Front sensorsCenterapproximately 40in
(approximately 100cm)Cornersapproximately 24in
(approximately 60cm)
Rear sensors
Centerapproximately 48in
(approximately 120cm)Cornersapproximately 32in
(approximately 80cm)
! When parking, pay particular attention to
objects above or below the sensors, such
as flower pots or trailer drawbars.
PARKTRONIC does not detect such objects
when they are in the immediate vicinity of
the vehicle. You could damage the vehicle
or the objects.
The sensors may not detect snow and other
objects that absorb ultrasonic waves.
Ultrasonic sources such as an automatic
car wash, the compressed-air brakes on a
truck or a pneumatic drill could cause
PARKTRONIC to malfunction.
PARKTRONIC may not function correctly on
uneven terrain.
Minimum distance
Centerapproximately 12in
(approximately 30cm)Cornersapproximately 12in
(approximately 30cm)
If there is an obstacle within this range, the
relevant warning displays light up and a
warning tone sounds. If the distance falls
below the minimum, the distance may no
longer be shown.
140Driving systemsDriving and parking
Page 143 of 288
Warning displays
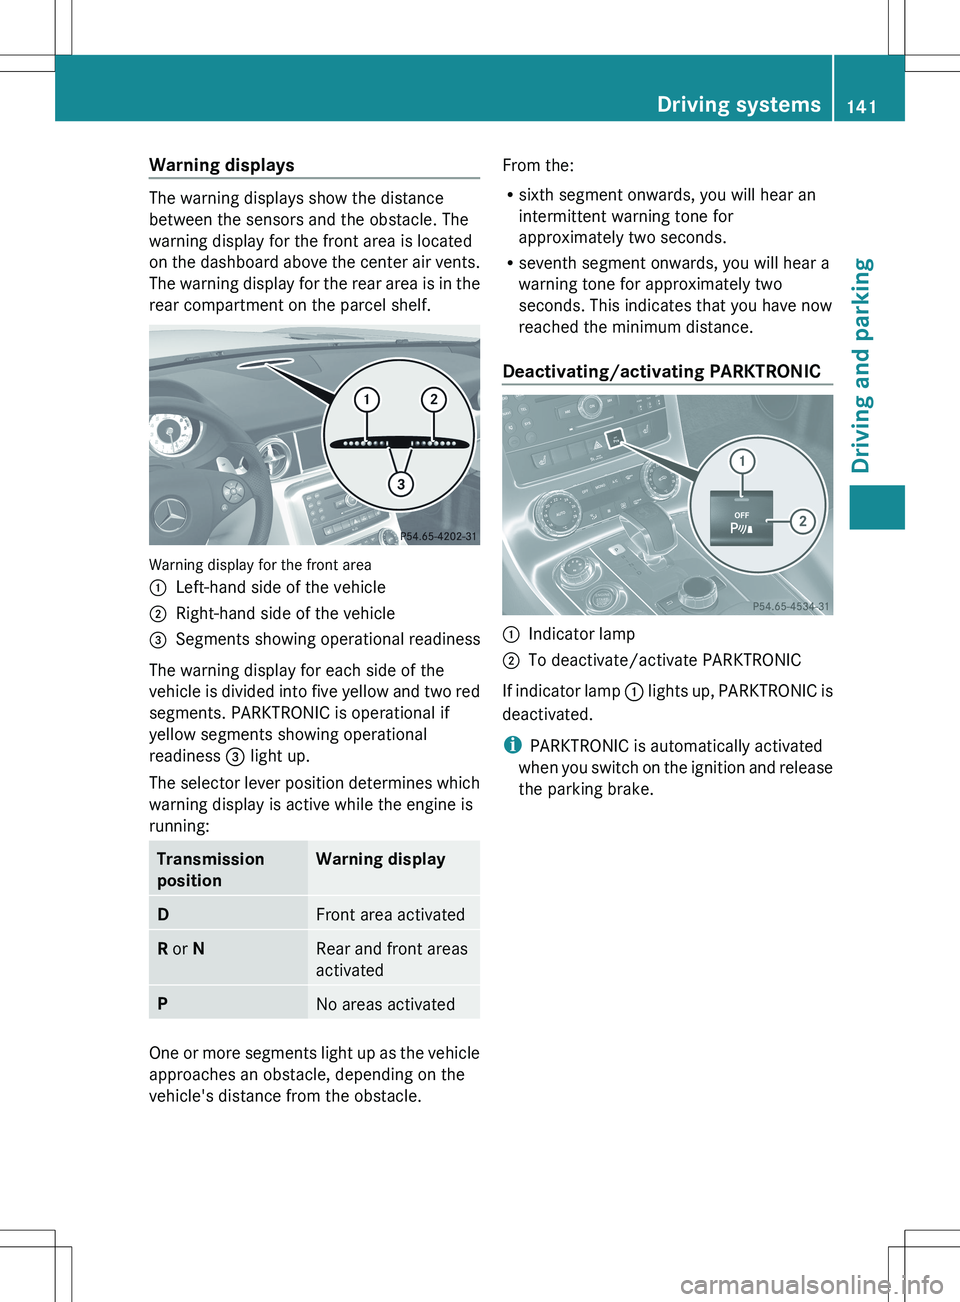
The warning displays show the distance
between the sensors and the obstacle. The
warning display for the front area is located
on the dashboard above the center air vents.
The warning display for the rear area is in the
rear compartment on the parcel shelf.
Warning display for the front area
:Left-hand side of the vehicle;Right-hand side of the vehicle=Segments showing operational readiness
The warning display for each side of the
vehicle is divided into five yellow and two red
segments. PARKTRONIC is operational if
yellow segments showing operational
readiness = light up.
The selector lever position determines which
warning display is active while the engine is
running:
Transmission
positionWarning displayDFront area activatedR or NRear and front areas
activatedPNo areas activated
One or more segments light up as the vehicle
approaches an obstacle, depending on the
vehicle's distance from the obstacle.
From the:
R sixth segment onwards, you will hear an
intermittent warning tone for
approximately two seconds.
R seventh segment onwards, you will hear a
warning tone for approximately two
seconds. This indicates that you have now
reached the minimum distance.
Deactivating/activating PARKTRONIC:Indicator lamp;To deactivate/activate PARKTRONIC
If indicator lamp : lights up, PARKTRONIC is
deactivated.
i PARKTRONIC is automatically activated
when you switch on the ignition and release
the parking brake.
Driving systems141Driving and parkingZ
Page 144 of 288
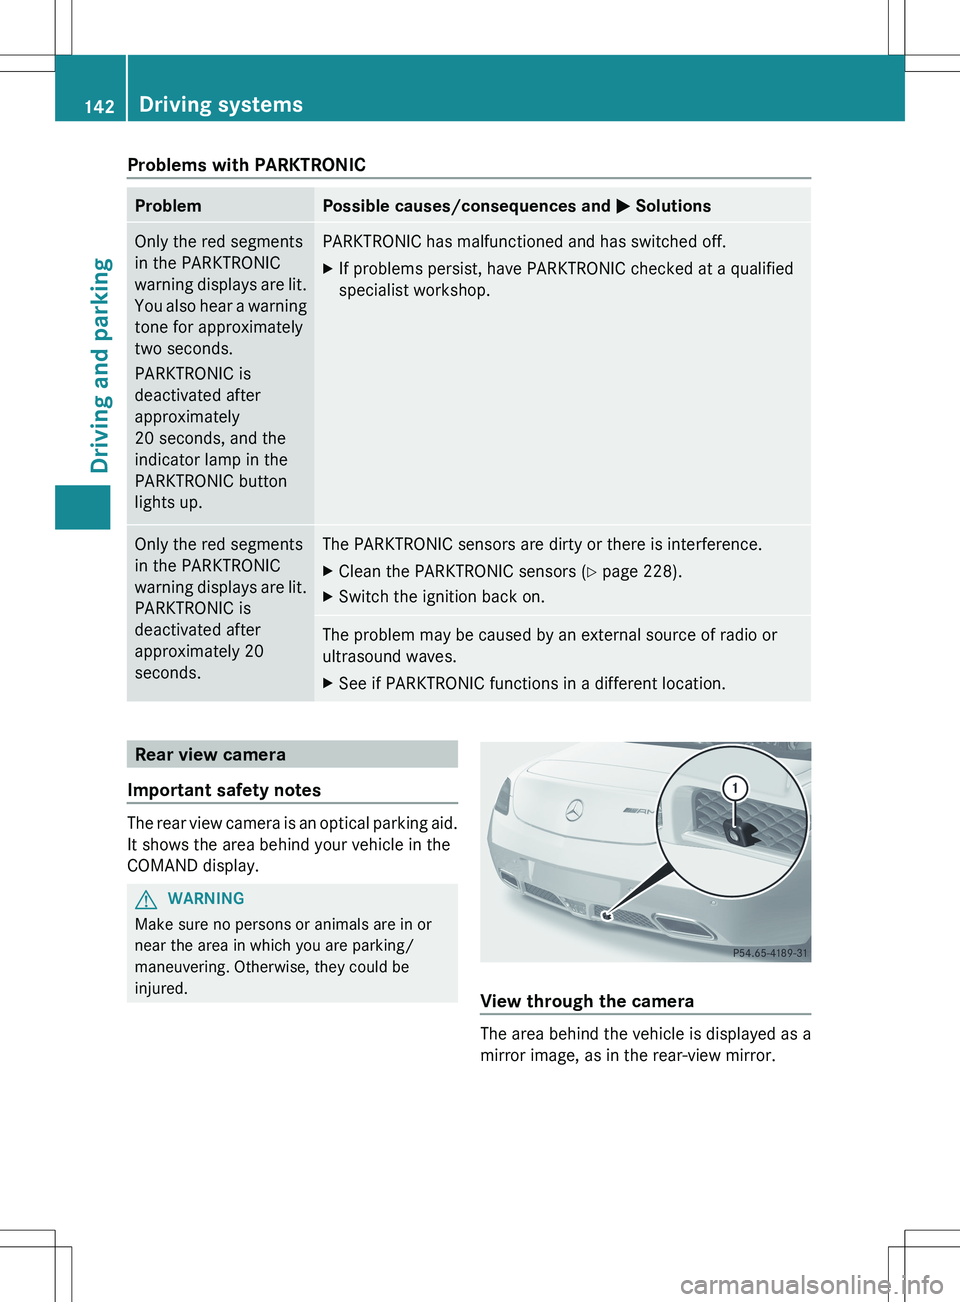
Problems with PARKTRONICProblemPossible causes/consequences and M SolutionsOnly the red segments
in the PARKTRONIC
warning displays are lit.
You also hear a warning
tone for approximately
two seconds.
PARKTRONIC is
deactivated after
approximately
20 seconds, and the
indicator lamp in the
PARKTRONIC button
lights up.PARKTRONIC has malfunctioned and has switched off.XIf problems persist, have PARKTRONIC checked at a qualified
specialist workshop.Only the red segments
in the PARKTRONIC
warning displays are lit.
PARKTRONIC is
deactivated after
approximately 20
seconds.The PARKTRONIC sensors are dirty or there is interference.XClean the PARKTRONIC sensors ( Y page 228).XSwitch the ignition back on.The problem may be caused by an external source of radio or
ultrasound waves.XSee if PARKTRONIC functions in a different location.Rear view camera
Important safety notes
The rear view camera is an optical parking aid.
It shows the area behind your vehicle in the
COMAND display.
GWARNING
Make sure no persons or animals are in or
near the area in which you are parking/
maneuvering. Otherwise, they could be
injured.
View through the camera
The area behind the vehicle is displayed as a
mirror image, as in the rear-view mirror.
142Driving systemsDriving and parking
Page 145 of 288
GWARNING
The rear view camera is only an aid, and may
display obstacles:
R from a distorted perspective
R incorrectly
R not at all.
The rear view camera does not relieve you of
the responsibility to take care. Take all
necessary care and pay particular attention to
the traffic conditions. The rear view camera
may not show objects that:
R are very near to the rear bumper
R are underneath the rear bumper
You are responsible for safety at all times and
must continue to pay attention to your
immediate surroundings when parking and
maneuvering. This includes the area behind,
in front of, and next to the vehicle. You could
otherwise put yourself and/or others in
danger.
GWARNING
The rear view camera does not work or does
not work properly if:
R it is raining heavily or if it is snowing or
foggy.
R it is night or if you are parking/
maneuvering your vehicle in a very dark
area.
R very bright white light is shining on the
camera.
R the immediate vicinity is illuminated with
fluorescent light (the display of the
COMAND system can flicker).
R the temperature changes abruptly, for
example if you drive out of the cold into a
heated garage (condensation on the lens).
R the camera lens is dirty or covered.
R the rear of your vehicle is damaged.
In this case, have the position and the
setting of the camera checked at a
specialist workshop. Mercedes-Benz
recommends that you consult a Mercedes-
Benz Center for this purpose.
Do not use the rear view camera in these
situations. You could otherwise injure
yourself and other people and/or cause
damage - including damage to your vehicle -
while parking/maneuvering.
Activating the rear view cameraXEnsure that key position 2 has been
selected with the Start/Stop button.XMake sure that the "rear view camera"
function is selected in COMAND (see the
separate operating instructions for
COMAND).XEngage reverse gear.
The COMAND display shows the area
behind the vehicle.
You can also switch off the display of the area
behind the vehicle in the COMAND display.
Blind Spot Assist
Important safety notes
Blind Spot Assist uses a radar sensor system
to monitor the areas on both sides of your
vehicle. It assists you from a speed of
approximately 20 mph(30 km/h). A warning
display in the exterior mirrors draws your
attention to vehicles detected in the
monitored area. If you then switch on the
corresponding turn signal to change lane, you
will also receive an optical and audible
collision warning. For this purpose, Blind Spot
Assist uses sensors in the rear bumper.
GWARNING
Blind Spot Assist is only an aid designed to
assist driving. It may fail to detect some
vehicles and is no substitute for attentive
driving.
Blind Spot Assist cannot detect road and
traffic conditions. It may fail to detect narrow
vehicles, such as motorcycles or bicycles, or
may only detect them too late.
Monitoring may be affected by dirty sensors,
strong spray or poor visibility caused by snow,
Driving systems143Driving and parkingZ
Page 147 of 288
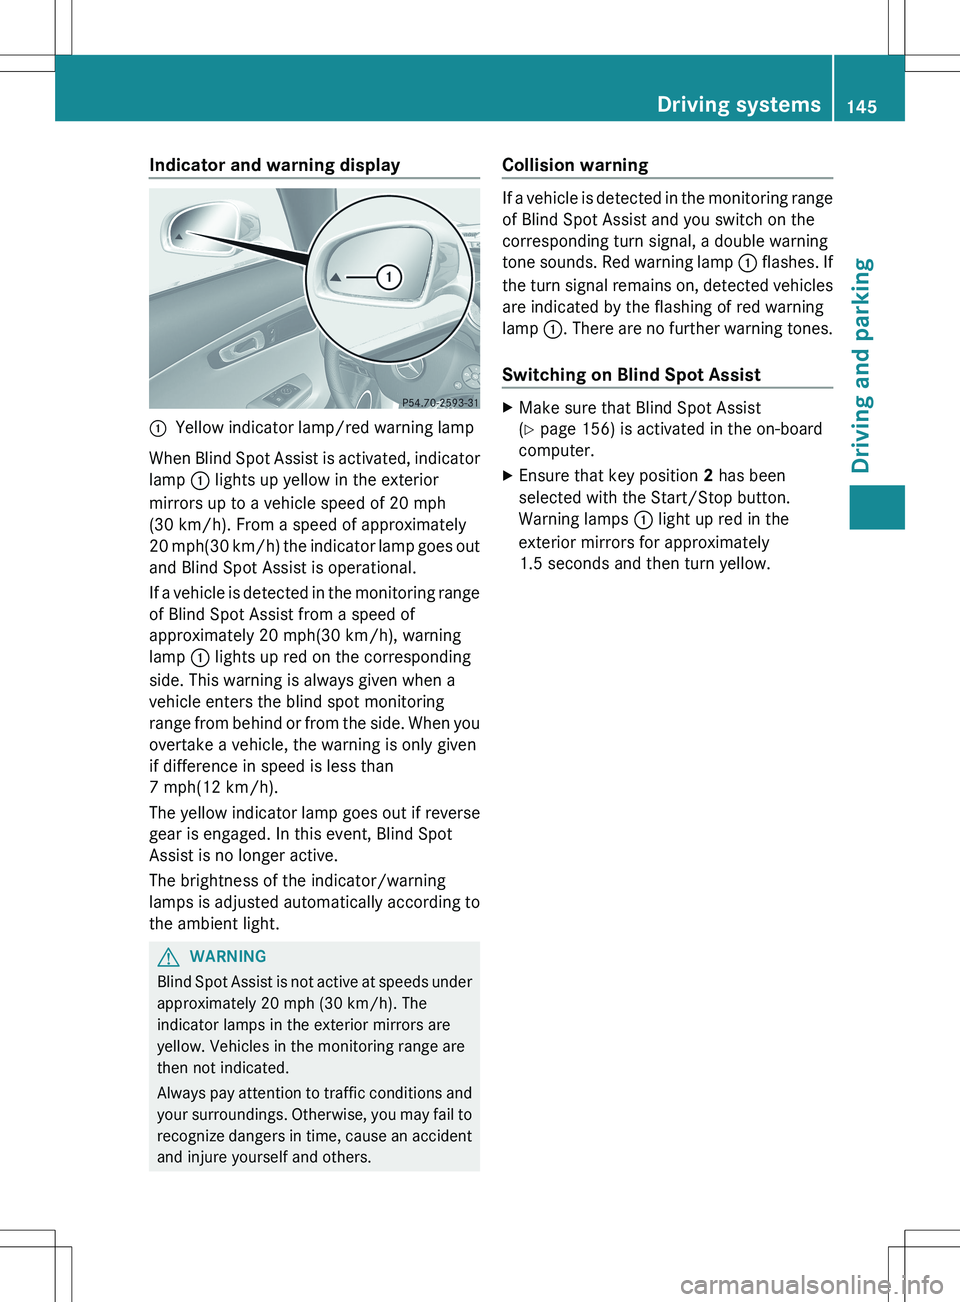
Indicator and warning display:Yellow indicator lamp/red warning lamp
When Blind Spot Assist is activated, indicator
lamp : lights up yellow in the exterior
mirrors up to a vehicle speed of 20 mph
(30 km/h). From a speed of approximately
20 mph (30 km/h) the indicator lamp goes out
and Blind Spot Assist is operational.
If a vehicle is detected in the monitoring range
of Blind Spot Assist from a speed of
approximately 20 mph(30 km/h), warning
lamp : lights up red on the corresponding
side. This warning is always given when a
vehicle enters the blind spot monitoring
range from behind or from the side. When you
overtake a vehicle, the warning is only given
if difference in speed is less than
7 mph(12 km/h).
The yellow indicator lamp goes out if reverse
gear is engaged. In this event, Blind Spot
Assist is no longer active.
The brightness of the indicator/warning
lamps is adjusted automatically according to
the ambient light.
GWARNING
Blind Spot Assist is not active at speeds under
approximately 20 mph (30 km/h). The
indicator lamps in the exterior mirrors are
yellow. Vehicles in the monitoring range are
then not indicated.
Always pay attention to traffic conditions and
your surroundings. Otherwise, you may fail to
recognize dangers in time, cause an accident
and injure yourself and others.
Collision warning
If a vehicle is detected in the monitoring range
of Blind Spot Assist and you switch on the
corresponding turn signal, a double warning
tone sounds. Red warning lamp : flashes. If
the turn signal remains on, detected vehicles
are indicated by the flashing of red warning
lamp :. There are no further warning tones.
Switching on Blind Spot Assist
XMake sure that Blind Spot Assist
( Y page 156) is activated in the on-board
computer.XEnsure that key position 2 has been
selected with the Start/Stop button.
Warning lamps : light up red in the
exterior mirrors for approximately
1.5 seconds and then turn yellow.Driving systems145Driving and parkingZ
Page 159 of 288
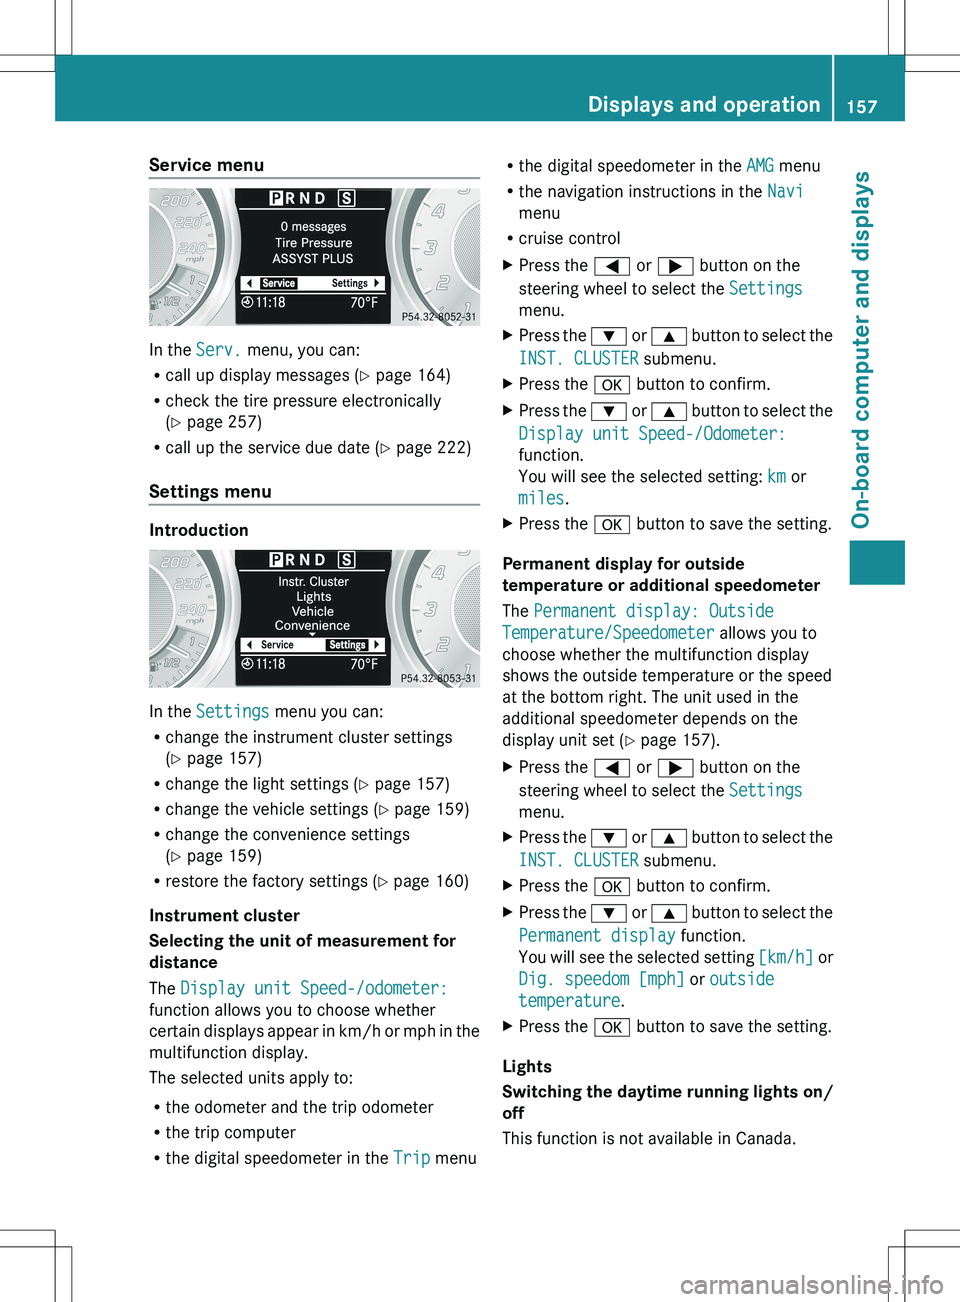
Service menu
In the Serv. menu, you can:
R call up display messages ( Y page 164)
R check the tire pressure electronically
( Y page 257)
R call up the service due date ( Y page 222)
Settings menu
Introduction
In the Settings menu you can:
R change the instrument cluster settings
( Y page 157)
R change the light settings ( Y page 157)
R change the vehicle settings ( Y page 159)
R change the convenience settings
( Y page 159)
R restore the factory settings ( Y page 160)
Instrument cluster
Selecting the unit of measurement for
distance
The Display unit Speed-/odometer:
function allows you to choose whether
certain displays appear in km/h or mph in the
multifunction display.
The selected units apply to:
R the odometer and the trip odometer
R the trip computer
R the digital speedometer in the Trip menu
R
the digital speedometer in the AMG menu
R the navigation instructions in the Navi
menu
R cruise controlXPress the = or ; button on the
steering wheel to select the Settings
menu.XPress the : or 9 button to select the
INST. CLUSTER submenu.XPress the a button to confirm.XPress the : or 9 button to select the
Display unit Speed-/Odometer:
function.
You will see the selected setting: km or
miles .XPress the a button to save the setting.
Permanent display for outside
temperature or additional speedometer
The Permanent display: Outside
Temperature/Speedometer allows you to
choose whether the multifunction display
shows the outside temperature or the speed
at the bottom right. The unit used in the
additional speedometer depends on the
display unit set ( Y page 157).
XPress the = or ; button on the
steering wheel to select the Settings
menu.XPress the : or 9 button to select the
INST. CLUSTER submenu.XPress the a button to confirm.XPress the : or 9 button to select the
Permanent display function.
You will see the selected setting [km/h] or
Dig. speedom [mph] or outside
temperature .XPress the a button to save the setting.
Lights
Switching the daytime running lights on/
off
This function is not available in Canada.
Displays and operation157On-board computer and displaysZ