2012 MERCEDES-BENZ SLS AMG COUPE change time
[x] Cancel search: change timePage 116 of 288
Useful information
i This Operator's Manual describes all
models and all standard and optional
equipment of your vehicle available at the
time of publication of the Operator's
Manual. Country-specific differences are
possible. Please note that your vehicle may
not be equipped with all features
described. This also applies to safety-
related systems and functions.
i Please read the information on qualified
specialist workshops ( Y page 21).
Breaking-in notes
The first 1000 miles (1500 km)
The more you look after the engine when it is
new, the more satisfied you will be with its
performance in the future.
R Drive at varying vehicle speeds and engine
speeds for the first 1000 miles (1500 km)
for this reason.
R Do not drive faster than 85 mph
(140 km/h) for the first 1000 miles
(1500 km).
R Only allow the engine to reach a maximum
engine speed of 4,500 rpm briefly.
R Avoid overstraining the vehicle during this
period, e.g. driving at full throttle. Do not
exceed ⅔ of the maximum permitted
engine speed for each gear.
R Select the manual drive program M in good
time.
R Do not carry out a RACE START.
R Do not manually shift to a lower gear to
brake the vehicle.
R If possible, do not depress the accelerator
pedal past the point of resistance
(kickdown).
R Only select the shift range limits 3, 2 or 1
when driving slowly, e.g. in mountainous
terrain.
After 1000 miles (1500 km), you can increase
the engine speed gradually and bring the
vehicle up to full speed.
i You should also observe these breaking-
in notes if your vehicle's engine or
transmission has been replaced.
i Always observe the respective speed
restrictions.
Driving
Important safety notes
GWARNING
Do not keep any objects in the driver's
footwell. If you use a floormat or carpet in the
driver's footwell, make sure that they are
correctly secured and that there is sufficient
clearance for the pedals.
Do not place several floormats on top of one
another.
The objects or floormats could otherwise get
between the pedals in the event of sudden
braking or acceleration. You may then no
longer be able to brake, change gear or
accelerate as intended. This may result in an
accident and injury.
GWARNING
Do not change down for additional engine
braking on a slippery road surface. This could
cause the drive wheels to lose their grip and
the vehicle could skid. This could cause you
to lose control of your vehicle and cause an
accident.
GWARNING
It is dangerous to shift the automatic
transmission out of parking position P or
neutral position N if the engine speed is
higher than idle speed. If your foot is not firmly
on the brake pedal, the vehicle could
accelerate quickly forward or in reverse. You
could lose control of the vehicle and hit
someone or something. Only shift into gear
114DrivingDriving and parking
Page 128 of 288
Manual drive program
In manual drive program M, you need to
change gear yourself using the steering wheel
paddle shifters ( Y page 123). The
transmission only shifts down automatically
at low engine speeds depending on the
respective gear.
! In manual drive program M, the
transmission does not shift up
automatically even when the engine
limiting speed for the current gear is
reached. When the engine limiting speed is
reached, the fuel supply is cut to prevent
the engine from overrevving. Always make
sure that the engine speed does not reach
the red area of the tachometer and observe
the upshift indicator. There is otherwise a
risk of engine damage.XTo activate the manual drive program:
turn the drive program selector switch until
M appears in the instrument cluster's
multifunction display.
M lights up in red on the drive program
selector switch.XTo deactivate the manual drive
program: turn the drive program selector
switch and select another drive program.
Upshift indicator
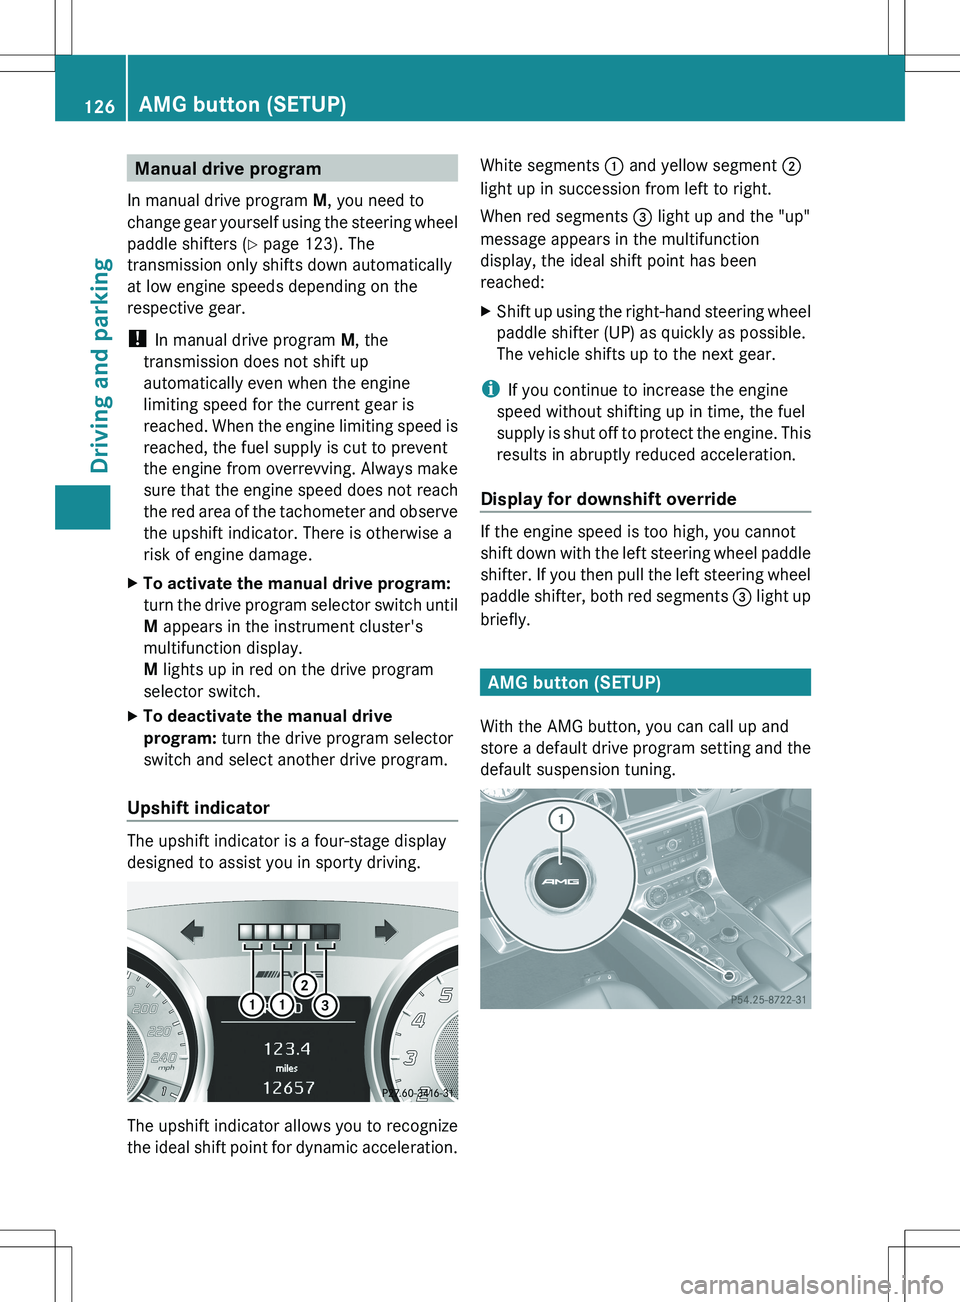
The upshift indicator is a four-stage display
designed to assist you in sporty driving.
The upshift indicator allows you to recognize
the ideal shift point for dynamic acceleration.
White segments : and yellow segment ;
light up in succession from left to right.
When red segments = light up and the "up"
message appears in the multifunction
display, the ideal shift point has been
reached:XShift up using the right-hand steering wheel
paddle shifter (UP) as quickly as possible.
The vehicle shifts up to the next gear.
i If you continue to increase the engine
speed without shifting up in time, the fuel
supply is shut off to protect the engine. This
results in abruptly reduced acceleration.
Display for downshift override
If the engine speed is too high, you cannot
shift down with the left steering wheel paddle
shifter. If you then pull the left steering wheel
paddle shifter, both red segments = light up
briefly.
AMG button (SETUP)
With the AMG button, you can call up and
store a default drive program setting and the
default suspension tuning.
126AMG button (SETUP)Driving and parking
Page 135 of 288
Do not turn off the engine while the vehicle is
in motion.
Exhaust checkGWARNING
Inhalation of exhaust gas is hazardous to your
health. All exhaust gas contains carbon
monoxide (CO), and inhaling it can cause
unconsciousness and possible death.
Do not run the engine in confined areas (such
as a garage) which are not properly ventilated.
If you think that exhaust gas fumes are
entering the vehicle while driving, have the
cause determined and corrected
immediately. If you must drive under these
conditions, drive only with at least one
window fully open at all times.
Certain engine systems are designed to keep
the level of poisonous components in exhaust
fumes within legal limits.
These systems only work at peak efficiency if
they are serviced exactly in accordance with
the manufacturer's specifications. For this
reason, all work on the engine may only be
carried out by qualified and authorized
Mercedes-Benz technicians.
The engine settings must not be changed
under any circumstances. Furthermore, all
specific service work must be carried out at
regular intervals and in accordance with the
Mercedes-Benz service requirements. Details
can be found in the Maintenance Booklet.
Brakes
Important safety notes
GWARNING
On slippery road surfaces, never downshift in
order to obtain braking action. This could
result in drive wheel slip and reduced vehicle
control. Your vehicle's ABS will not prevent
this type of loss of control.
GWARNING
Make sure that you do not endanger other
road users when you apply the brakes.
Downhill gradients
! On long and steep gradients, you must
reduce the load on the brakes by shifting
early to a lower gear. This allows you to take
advantage of the engine braking effect and
helps avoid overheating and excessive
wear of the brakes.
When you take advantage of the engine
braking effect, a drive wheel may not turn
for some time, e.g. on a slippery road
surface. This could cause damage to the
drive train. This type of damage is not
covered by the Mercedes-Benz warranty.
Heavy and light loads
GWARNING
Depressing the brake pedal constantly results
in excessive and premature wear to the brake
pads.
It may also cause the brakes to overheat,
seriously impairing their effectiveness. It may
then not be possible to stop the vehicle in
sufficient time to avoid an accident.
If the brakes have been subjected to a heavy
load, do not stop the vehicle immediately, but
drive on for a short while. This allows the
airflow to cool the brakes more quickly.
Wet roads
GWARNING
After driving in heavy rain for some time
without applying the brakes or through water
deep enough to wet brake components, the
first braking action may be somewhat
reduced. You have to depress the brake pedal
more firmly. Maintain a safe distance from
vehicles in front.
After driving on a wet road or having the
vehicle washed, brake firmly while paying
Driving tips133Driving and parkingZ
Page 138 of 288
Summer tires
Observe the notes in the "Winter operation"
section ( Y page 252).
Slippery road surfaces
GWARNING
The outside temperature indicator is not
designed to serve as an ice-warning device
and is therefore unsuitable for that purpose.
Indicated temperatures just above the
freezing point do not guarantee that the road
surface is free of ice. The road may still be icy,
especially in wooded areas or on bridges.
GWARNING
On slippery road surfaces, never downshift in
order to obtain braking action. This could
result in drive wheel slip and reduced vehicle
control. Your vehicle's ABS will not prevent
this type of loss of control.
Drive particularly carefully on slippery road
surfaces. Avoid sudden acceleration, steering
and braking maneuvers. Do not use cruise
control.
If the vehicle threatens to skid or cannot be
stopped when moving at low speed:
XShift the transmission to position N.
i
For more information on driving with
snow chains, see ( Y page 252).
GWARNING
Make sure that you do not endanger other
road users when you apply the brakes.
Driving systems
Cruise control
Important safety notes
Cruise control maintains a constant road
speed for you. It brakes automatically in order
to avoid exceeding the set speed. On long and
steep downhill gradients, especially if the
vehicle is laden, you must select shift range
1 , 2 or 3 in good time. By doing so, you will
make use of the braking effect of the engine,
which relieves the load on the brake system
and prevents the brakes from overheating
and wearing too quickly.
Use cruise control only if road and traffic
conditions make it appropriate to maintain a
steady speed for a prolonged period. You can
set any road speed above 20 mph
(30 km/h).GWARNING
The cruise control is a convenience system
designed to assist the driver during vehicle
operation. The driver is and must always
remain responsible for the vehicle's speed
and for safe brake operation.
Only use the cruise control if the road, traffic,
and weather conditions make it advisable to
travel at a constant speed.
R The use of the cruise control can be
dangerous on winding roads or in heavy
traffic because conditions do not allow safe
driving at a constant speed.
R The use of the cruise control can be
dangerous on slippery roads. Rapid
changes in tire traction can result in wheel
spin and loss of control.
R Deactivate the cruise control when driving
in fog.
The "Resume" function should only be
operated if the driver is fully aware of the
previously set speed and wishes to resume
this particular preset speed.
GWARNING
The cruise control brakes automatically so
that the set speed is not exceeded.
136Driving systemsDriving and parking
Page 145 of 288
GWARNING
The rear view camera is only an aid, and may
display obstacles:
R from a distorted perspective
R incorrectly
R not at all.
The rear view camera does not relieve you of
the responsibility to take care. Take all
necessary care and pay particular attention to
the traffic conditions. The rear view camera
may not show objects that:
R are very near to the rear bumper
R are underneath the rear bumper
You are responsible for safety at all times and
must continue to pay attention to your
immediate surroundings when parking and
maneuvering. This includes the area behind,
in front of, and next to the vehicle. You could
otherwise put yourself and/or others in
danger.
GWARNING
The rear view camera does not work or does
not work properly if:
R it is raining heavily or if it is snowing or
foggy.
R it is night or if you are parking/
maneuvering your vehicle in a very dark
area.
R very bright white light is shining on the
camera.
R the immediate vicinity is illuminated with
fluorescent light (the display of the
COMAND system can flicker).
R the temperature changes abruptly, for
example if you drive out of the cold into a
heated garage (condensation on the lens).
R the camera lens is dirty or covered.
R the rear of your vehicle is damaged.
In this case, have the position and the
setting of the camera checked at a
specialist workshop. Mercedes-Benz
recommends that you consult a Mercedes-
Benz Center for this purpose.
Do not use the rear view camera in these
situations. You could otherwise injure
yourself and other people and/or cause
damage - including damage to your vehicle -
while parking/maneuvering.
Activating the rear view cameraXEnsure that key position 2 has been
selected with the Start/Stop button.XMake sure that the "rear view camera"
function is selected in COMAND (see the
separate operating instructions for
COMAND).XEngage reverse gear.
The COMAND display shows the area
behind the vehicle.
You can also switch off the display of the area
behind the vehicle in the COMAND display.
Blind Spot Assist
Important safety notes
Blind Spot Assist uses a radar sensor system
to monitor the areas on both sides of your
vehicle. It assists you from a speed of
approximately 20 mph(30 km/h). A warning
display in the exterior mirrors draws your
attention to vehicles detected in the
monitored area. If you then switch on the
corresponding turn signal to change lane, you
will also receive an optical and audible
collision warning. For this purpose, Blind Spot
Assist uses sensors in the rear bumper.
GWARNING
Blind Spot Assist is only an aid designed to
assist driving. It may fail to detect some
vehicles and is no substitute for attentive
driving.
Blind Spot Assist cannot detect road and
traffic conditions. It may fail to detect narrow
vehicles, such as motorcycles or bicycles, or
may only detect them too late.
Monitoring may be affected by dirty sensors,
strong spray or poor visibility caused by snow,
Driving systems143Driving and parkingZ
Page 159 of 288
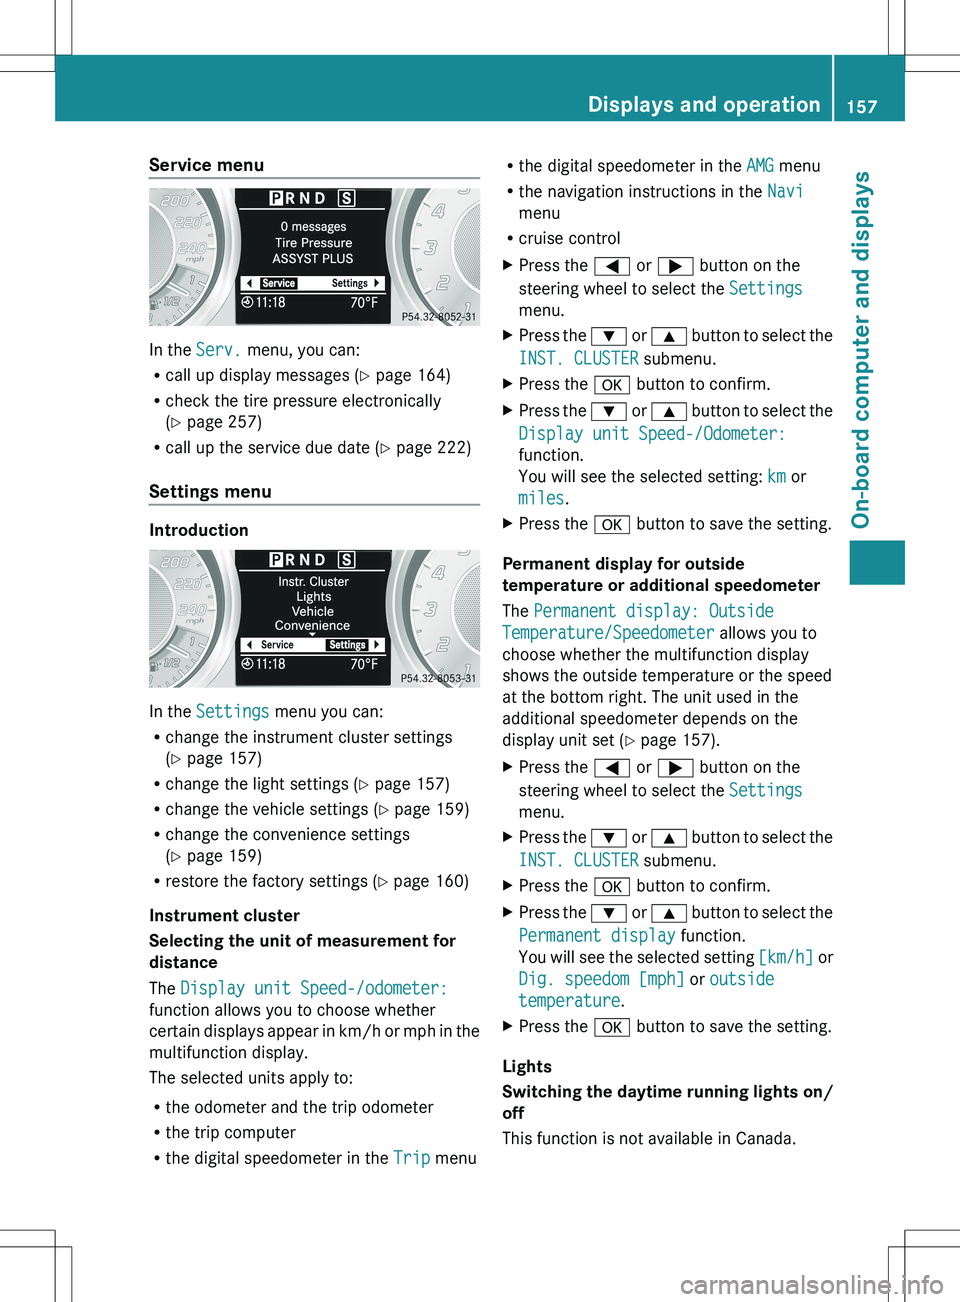
Service menu
In the Serv. menu, you can:
R call up display messages ( Y page 164)
R check the tire pressure electronically
( Y page 257)
R call up the service due date ( Y page 222)
Settings menu
Introduction
In the Settings menu you can:
R change the instrument cluster settings
( Y page 157)
R change the light settings ( Y page 157)
R change the vehicle settings ( Y page 159)
R change the convenience settings
( Y page 159)
R restore the factory settings ( Y page 160)
Instrument cluster
Selecting the unit of measurement for
distance
The Display unit Speed-/odometer:
function allows you to choose whether
certain displays appear in km/h or mph in the
multifunction display.
The selected units apply to:
R the odometer and the trip odometer
R the trip computer
R the digital speedometer in the Trip menu
R
the digital speedometer in the AMG menu
R the navigation instructions in the Navi
menu
R cruise controlXPress the = or ; button on the
steering wheel to select the Settings
menu.XPress the : or 9 button to select the
INST. CLUSTER submenu.XPress the a button to confirm.XPress the : or 9 button to select the
Display unit Speed-/Odometer:
function.
You will see the selected setting: km or
miles .XPress the a button to save the setting.
Permanent display for outside
temperature or additional speedometer
The Permanent display: Outside
Temperature/Speedometer allows you to
choose whether the multifunction display
shows the outside temperature or the speed
at the bottom right. The unit used in the
additional speedometer depends on the
display unit set ( Y page 157).
XPress the = or ; button on the
steering wheel to select the Settings
menu.XPress the : or 9 button to select the
INST. CLUSTER submenu.XPress the a button to confirm.XPress the : or 9 button to select the
Permanent display function.
You will see the selected setting [km/h] or
Dig. speedom [mph] or outside
temperature .XPress the a button to save the setting.
Lights
Switching the daytime running lights on/
off
This function is not available in Canada.
Displays and operation157On-board computer and displaysZ
Page 198 of 288
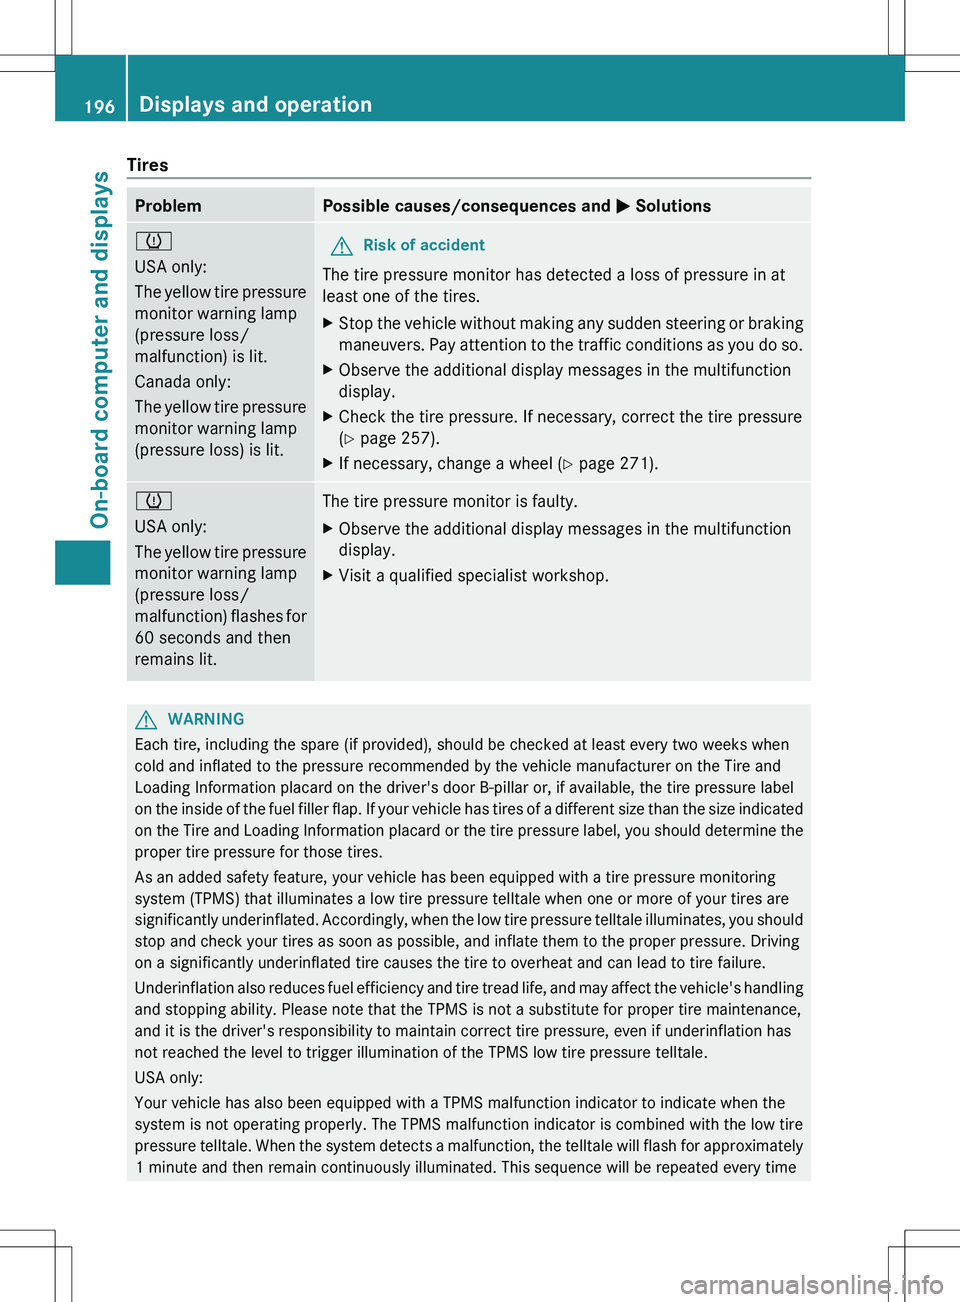
TiresProblemPossible causes/consequences and M Solutionsh
USA only:
The yellow tire pressure
monitor warning lamp
(pressure loss/
malfunction) is lit.
Canada only:
The yellow tire pressure
monitor warning lamp
(pressure loss) is lit.GRisk of accident
The tire pressure monitor has detected a loss of pressure in at
least one of the tires.
XStop the vehicle without making any sudden steering or braking
maneuvers. Pay attention to the traffic conditions as you do so.XObserve the additional display messages in the multifunction
display.XCheck the tire pressure. If necessary, correct the tire pressure
( Y page 257).XIf necessary, change a wheel ( Y page 271).h
USA only:
The yellow tire pressure
monitor warning lamp
(pressure loss/
malfunction) flashes for
60 seconds and then
remains lit.The tire pressure monitor is faulty.XObserve the additional display messages in the multifunction
display.XVisit a qualified specialist workshop.GWARNING
Each tire, including the spare (if provided), should be checked at least every two weeks when
cold and inflated to the pressure recommended by the vehicle manufacturer on the Tire and
Loading Information placard on the driver's door B-pillar or, if available, the tire pressure label
on the inside of the fuel filler flap. If your vehicle has tires of a different size than the size indicated
on the Tire and Loading Information placard or the tire pressure label, you should determine the
proper tire pressure for those tires.
As an added safety feature, your vehicle has been equipped with a tire pressure monitoring
system (TPMS) that illuminates a low tire pressure telltale when one or more of your tires are
significantly underinflated. Accordingly, when the low tire pressure telltale illuminates, you should
stop and check your tires as soon as possible, and inflate them to the proper pressure. Driving
on a significantly underinflated tire causes the tire to overheat and can lead to tire failure.
Underinflation also reduces fuel efficiency and tire tread life, and may affect the vehicle's handling
and stopping ability. Please note that the TPMS is not a substitute for proper tire maintenance,
and it is the driver's responsibility to maintain correct tire pressure, even if underinflation has
not reached the level to trigger illumination of the TPMS low tire pressure telltale.
USA only:
Your vehicle has also been equipped with a TPMS malfunction indicator to indicate when the
system is not operating properly. The TPMS malfunction indicator is combined with the low tire
pressure telltale. When the system detects a malfunction, the telltale will flash for approximately
1 minute and then remain continuously illuminated. This sequence will be repeated every time
196Displays and operationOn-board computer and displays
Page 217 of 288
Problems when programming
If you are experiencing problems
programming the integrated garage door
opener on the rear-view mirror, take note of
the following instructions:
R Check remote control frequency of garage
door drive remote control A. This is
usually located on the back of the remote
control.
The integrated garage door opener is
compatible with devices that have units
which operate in the frequency range of
280 to 390 MHz.
R Change the batteries in garage door remote
control A. This increases the likelihood
that garage door remote control A will
send a strong and precise signal to the
integrated garage door opener in the rear-
view mirror.
R When programming, hold remote control
A at varying distances and angles from the
button which you are programming. Try
various angles at a distance of between 2
to 12 inches (5 to 30 cm) or at the same
angle but at varying distances.
R if another remote control for the same
garage door drive is available, repeat the
same programming steps with this remote
control. Before performing these steps,
make sure that new batteries have been
installed in garage door drive remote
control A.
R note that some remote controls only
transmit for a limited amount of time (the
indicator lamp on the remote control goes
out). Press button B on remote control
A before transmission ends.
R align the antenna cable of the garage door
opener unit. This can improve signal
reception/transmission.
Opening/closing the garage door
After it has been programmed, the integrated
garage door opener performs the function of
the garage door system remote control.
Please also read the operating instructions
for the garage door system.XTurn the SmartKey to position 2 in the
ignition lock.XPress one of the buttons ;, = or ?;
whichever one is programmed to operate
the garage door.
Garage door system with a fixed code:
indicator lamp : lights up green.
Garage door system with a rolling code:
indicator lamp : flashes green.
i
The transmitter will transmit a signal for
as long as the button is pressed. The
transmission is halted after a maximum of
ten seconds and indicator lamp : flashes
yellow. Press button ;, = or ? again if
necessary.
Clearing the memory of the integrated
garage door opener on the rear-view
mirror
XTurn the SmartKey to position 2 in the
ignition lock.XPress buttons ; and ?.
The indicator lamp lights up yellow.XPress and hold buttons ; and ? until the
indicator lamp turns green.
i Make sure that you clear the memory of
the integrated garage door opener before
selling the vehicle.
Charge maintenance socket
The battery may drain if the vehicle is left
stationary for long periods. In this case,
Mercedes-Benz recommends attaching the
trickle charger to the charge maintenance
socket.
The charge maintenance socket is designed
solely for connecting a trickle charger. A
trickle charger can be obtained from an
authorized Mercedes-Benz Center, for
example.
Features215Stowage and featuresZ