2012 MERCEDES-BENZ SLK350 ESP
[x] Cancel search: ESPPage 258 of 334

X
Point remote control 0020at a distance of
2 to 8 inches (5 to 20 cm) at buttons 0003
to 0022 on the rear-view mirror.
i The required distance between remote
control 0020and the integrated garage door
opener depends on the garage door drive
system. Several attempts might be
necessary. You should test every position
for at least 25 seconds before trying
another position.
X Press and hold button 0021on remot econtrol
0020 until indicator lamp 0002lights up green.
If indicator lamp 0002lights up green or
flashes, then programming has been
successful.
X Release button 0021on remote control 0020for
the garage door drive system.
If indicator lamp 0002lights up red:
X Repeat the programming procedure for the
corresponding button on the rear-view
mirror. When doing so, vary the distance
between remote control 0020and the rear-
view mirror.
i If the indicator lamp flashes green after
successful programming, the garage door
system is operating on arolling code. After
programming, you must synchronize the
garage door opener integrated in the rear-
view mirror with the receiver of the garage
door system.
Synchronizing the rolling code
Your vehicle must be within reach of the
garage door or exterior gate drive. Make sure
that neither your vehicle nor any persons/
objects are present within the sweep of the
door or gate.
Observe the safety notes when performing
the rolling code synchronization
(Y page 254).
X Turn the SmartKey to position 2in the
ignition lock.
X Press the programming button of the door
or gate drive (see the door or gate drive operating instructions, e.g. under
"Programming of additional remote
controls").
i Usually, you now have 30seconds to
initiate the next step.
X Press previously programmed button 0003,
0023 or0022 of the integrated garage door
opener until the door starts to move.
The rolling code synchronization is then
complete.
Notes on programming the remote
control
Canadia nradio frequency laws require a
"break" (or interruption) of the transmission
signals after broadcasting for a few seconds.
Therefore, these signals may no tlast long
enough for the integrated garage door
opener. The signal is no trecognized during
programming. Comparable with Canadian
law, some U.S.g arage door openers are
designed to "time-out" in the same manner.
Proceed as follows:
R if you live in Canada
R if you have difficulties programming the
garage door opener (regardless of where
you live) when using the programming
steps
X Press and hold one of buttons 0003to0022 on
the integrated garage door opener.
Afte rashort time, indicator lamp 0002starts
flashing yellow.
X Release the button.
X Press button 0021of garage door remote
control 0020for two seconds, then release it
for two seconds.
X Press button 0021againf or two seconds.
X Repeat this sequence on button 0021of
remote control 0020until indicator lamp 0002
lights up green.
If indicator lamp 0002turns red, repeat the
process.
X Continue with the other programming
steps (see above). 256
FeaturesStowage and features
Page 267 of 334

!
If the service interval display has been
reset unintentionally, have the setting
corrected at a Mercedes-Benz Center.
Have service work carried out as described
in the Maintenance Booklet. This may
otherwise lead to increased wear and
damage to the major assemblies or the
vehicle.
Driving abroad
An extensive Mercedes-Benz Service network
is also available in other countries. You can
obtain further information from any
authorized Mercedes-Benz Center. Care
Notes on care
Regular care of your vehicle is a condition for
retaining the quality in the long term.
Use care products and cleaning agents
recommended and approved by Mercedes-
Benz. G
WARNING
Many cleaning products can be hazardous.
Some are poisonous, others are flammable.
Always follow the instructions on the
particular container. Always open your
vehicle's doors or windows when cleaning the
inside.
Never use fluids or solvents that are not
designed for cleaning your vehicle.
Always lock away cleaning products and keep
them out of reach of children.
! For cleaning your vehicle, do not use any
of the following:
R dry, rough or hard cloths
R abrasive cleaning agents
R solvents
R cleaning agents containing solvents
Do not scrub. Do not touch the surfaces or protective
films with hard objects, e.g. a ring or ice
scraper. You could otherwise scratch or
damage the surfaces and protective film. H
Environmental note
Dispose of empty packaging and cleaning
cloths in an environmentally responsible
manner.
! Do not park the vehicle for an extended
period straight after cleaning it, particularly
after having cleaned the wheels with wheel
cleaner. Wheel cleaners could cause
increased corrosion of the brake discs and
brake pads/linings. For this reason, you
should drive for a few minutes after
cleaning. Braking heats the brake discs and
the brake pads/linings, thus drying them.
The vehicle can then be parked. Exterior care
Automatic car wash G
WARNING
Braking efficiency is reduced after washing
the vehicle. This could cause an accident. For
this reason, you must drive particularly
carefully after washing the vehicle until the
brakes have dried.
You can wash the vehicle in an automatic car
wash from the very start.
! Lock the car if you wash it in an automatic
car wash. Otherwise, the vehicle might be
damaged.
! It is preferable to use car washes with
adjustable 19
high-pressure precleaning. In
car washes that use high water pressures,
there is a risk that asmall amount of water
may leaki nto the vehicle.
! Never clean your vehicle in a Touchless
Automatic Ca rWash as these use special
19 Corresponds to the specificatio nfor the Cabriolet program. Care
265Maintenance and care Z
Page 271 of 334

shampoo. Cleaning cloths may be used as
well.
Cleaning the sensors X
Cleans ensors0002of the driving systems
with water, car shampoo and a soft cloth.
! If you clean the sensor swith a power
washer, make sure that you keep a
distance of at least 11. 8in(30 cm) between
the vehicle and the power washer nozzle.
Information about the correct distance is
available from the equipment
manufacturer.
Cleaning the exhaus tpipes Impurities combined with the effects of road
grit and corrosive environmental factors may
cause flash rust to form on the surface. You
can restore the original shine of the exhaust
tail pipe by cleaning it regularly, especially in
winter and after washing.
! Do not clean the exhaust tail pipes with
alkaline-based cleaning agents, such as
wheel cleaner.
X Clean the exhaust tail pipes with a chrome
care produc ttested and approved by
Mercedes-Benz. Interior care
Cleaning the display X
Before cleaning the display, make sure that
it is switched off and has cooled down.
X Clean the display surface using a
commercially-available microfiber cloth
and TFT/LCD display cleaner.
X Dry the display surface using a dry
microfiber cloth.
! For cleaning, do not use any of the
following:
R alcohol-based thinner or gasoline
R abrasive cleaning agents
R commercially-available household
cleaning agents
These may damage the display surface. Do
not put pressure on the display surface
when cleaning. This could lead to
irreparable damage to the display.
Cleaning the plastic trim G
WARNING
When cleaning the steering wheel boss and
dashboard, do not use cockpit sprays or
cleaning agents containing solvents. Cleaning
agents containing solvents cause the surface
to become porous, and as aresult, plastic
parts may break away and be thrown around
the interior when an air bag is deployed, which
may result in severe injuries.
! Do not affix the following to plastic
surfaces:
R stickers
R films
R scented oil bottles or similar items
You can otherwise damage the plastic.
! Do not allow cosmetics, insect repellent
or sunscreen to come into contact with the
plastic trim .This maintains the high-quality
look of the surfaces. Care
269Maintenance and care Z
Page 278 of 334

X
Apply the electri cparking brake manually
(Y page 150).
X Bring the fron twheels into the straight-
ahead position.
X Move the selector lever to position P.
X Switch off the engine.
X Vehicles without KEYLESS-GO: remove
the SmartKey from the ignition lock.
X Vehicles with KEYLESS-GO: open the
driver's door.
The on-board electronics have status 0,
which is the same as the SmartKey having
been removed.
X Vehicles with KEYLESS-GO: remove the
Start/Stop button from the ignition lock
(Y page 131).
X All occupants must get out of the vehicle.
Make sure that they are not endangered as
they do so.
X Make sure that no one is near the danger
area while a wheel is being changed.
Anyone who is not directly assisting in the
wheel change should, for example, stand
behind the barrier.
X Get out of the vehicle. Pay attention to
traffic conditions when doing so.
X Close the driver's door. Changing
awheel and mounting the
spare wheel
Preparing the vehicle When using a different size spare wheel or
emergency spare wheel, do not exceed the
maximum road speed of 50 mph (80 km/h)
G
WARNING
The wheel or tire size as well as the tire type
of the spare wheel or emergency spare wheel
and the wheel to be replaced may differ.
Mounting an emergency spare wheel may
severely impair the driving characteristics.
There is a risk of an accident. To avoid hazardous situations:
R
adapt you rdriving style accordingly and
drive carefully.
R never install more than one spare wheel or
emergency spare wheel that differs in size.
R only use a spare wheel or emergency spare
wheel of a different size briefly.
R do not switch ESP ®
off.
R have a spare wheel or emergency spare
wheel of a different size replaced at the
nearest qualified specialist workshop.
Observe that the wheel and tire dimensions
as well as the tire type must be correct.
i Vehicles withou taspare wheel or
emergency spare wheel are not equipped
with a tire-change tool kit at the factory. For
more information on which tools are
required to perform a wheel change on your
vehicle, e.g. wheel chock, lug wrench or
alignment bolt, consult an authorized
Mercedes-Benz Center.
X Prepare the vehicle as described
(Y page 275).
X Remove the following items (depending on
the vehicle's equipment) from the stowage
well under the trunk floor:
R
emergency spare wheel
R lug wrench
R folding wheel chock
R jack
R alignment bolt
R tire inflation compressor
X Secure the vehicle to prevent it from rolling
away.
Securing the vehicle to prevent it from
rolling away If your vehicle is equipped with a wheel chock,
it can be found in the vehicle tool kit
(Y
page 274).
The folding wheel chock is an additional
securing measure to prevent the vehicle from 276
Flat tireBreakdown assistance
Page 281 of 334

X
Make sure that the base of the jack is
positioned directly under the jacking point.
X Turn crank 0020clockwise until jack 0022sits
completely on jacking point 0023and the
base of the jack lies evenly on the ground.
X Turn handle 0020until the tire is 1.2 in
(3 cm) from the ground at most.
Removing awheel X
Unscrew the uppermost wheel bolt
completely.
X Screw alignment bolt 0002into the thread
instead of the wheel bolt.
X Unscrew the remaining wheel bolts fully.
! Do not place wheel bolts in sand or on a
dirty surface. The bol tand wheel hub
threads could otherwise be damaged when
you screw them in.
X Remove the wheel.
Mounting anew wheel G
WARNING
Oiled or greased wheel bolts or damaged
wheel bolts/hub threads can cause the wheel
bolts to come loose .As a result, you could
lose a wheel while driving. There is a risk of
accident.
Never oil or grease wheel bolts. In the event
of damage to the threads, contact a qualified
specialist workshop immediately.H ave the
damaged wheel bolts or hub threads
replaced/renewed. Do no tcontinue driving. G
WARNING
If you tighten the wheel bolts or wheel nuts
when the vehicle is raised, the jack could tip
over. There is a risk of injury.
Only tighten the wheel bolts or wheel nuts
when the vehicle is on the ground.
Always pay attention to the instructions and
safety notices in "Changing a wheel"
(Y page 315).
Only use wheel bolts that have been designed
for the wheel and the vehicle. For safety
reasons, Mercedes-Benz recommends that
you only use wheel bolts which have been
approved for Mercedes-Benz vehicles and the
respective wheel.
Be sure to use the original-length wheel bolts
when refitting the original wheel after it has
been repaired.
X Clean the wheel and wheel hub contact
surfaces.
! To prevent damage to the paintwork, hold
the wheel securely against the wheel hub
while screwing in the first wheel bolt. X
Slide the emergency spare wheel onto the
alignment bolt and push it on.
X Tighten the wheel bolts until they are
finger-tight.
X Unscrew the alignment bolt.
X Tighten the last wheel bolt until it is finger-
tight.
X Inflate the collapsible spare wheel
(Y page 280). Flat tire
279Breakdown assistance Z
Page 284 of 334

The maximum permissible distance which
can be driven in run-flat mode is counted from
the moment the tire pressure loss warning
appears in the multifunction display.
Do not exceed a vehicle speed of 50 mph
(80 km/h). G
WARNING
When driving in emergency mode, the driving
characteristics deteriorate, e.g. when
cornering, accelerating quickly and when
braking. There is a risk of an accident.
Do not exceed the stated maximum speed.
Avoid abrupt steering and driving maneuvers,
and driving over obstacles (curbs, potholes,
off-road). This applies in particular to a laden
vehicle.
Stop driving in emergency mode if:
R you hear banging noises.
R the vehicle starts to shake.
R you see smoke and smell rubber.
R ESP ®
is intervening constantly.
R there are tears in the sidewalls of the tire.
After driving in emergency mode, have the
wheel rims checked at a qualified specialist
workshop with regard to their further use. The
defective tire must be replaced in every case.
i When replacing one or all tires, make sure
that you only use tires marked
MOExtended. Also ensure that they are of
the specified size for the vehicle. Battery
Important safety notes
In order for the battery to achieve the
maximum possible service life, it must always
be sufficiently charged.
! Have the battery checked regularly at a
qualified specialist workshop.
Observe the service intervals in the
Maintenance Booklet or contact a qualified
specialist workshop for more information. Have the battery charge level checked more
frequently if you use the vehicle mainly for
short trips or if you leave it standing idle for
a lengthy period.
Only replace a battery with a battery that has
been recommended by Mercedes-Benz.
Consult a qualified specialist workshop if you
wish to leave your vehicle parked for a long
period of time.
G
WARNING
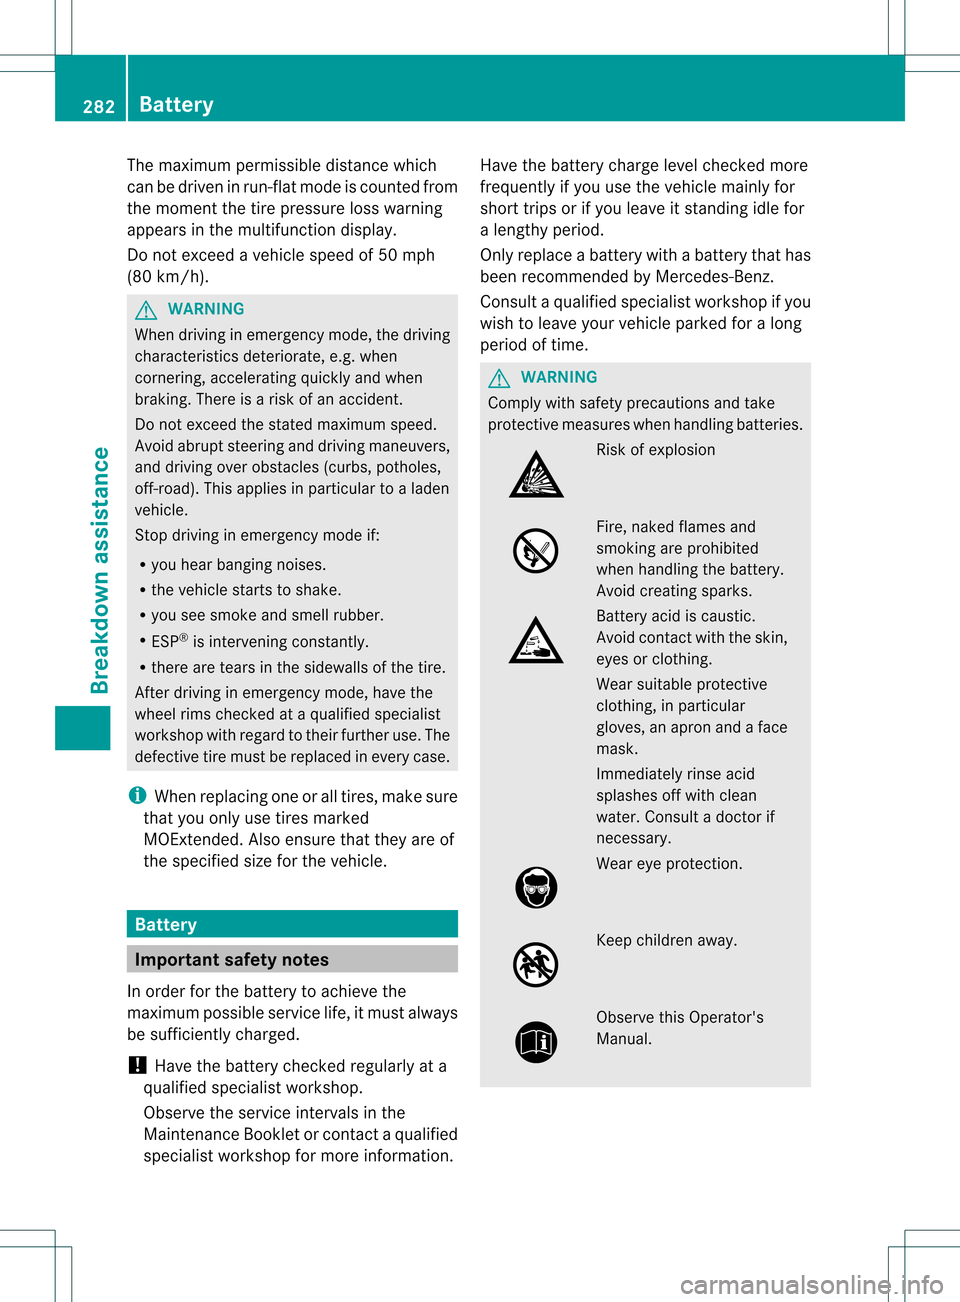
Comply with safety precautions and take
protective measures when handling batteries. Risk of explosion
Fire, naked flames and
smoking are prohibited
when handling the battery.
Avoid creating sparks.
Battery acid is caustic.
Avoid contact with the skin,
eyes or clothing.
Wear suitable protective
clothing, in particular
gloves, an apron and a face
mask.
Immediately rinse acid
splashes off with clean
water. Consult a doctor if
necessary.
Wear eye protection.
Keep children away.
Observe this Operator's
Manual.282
BatteryBreakdown assistance
Page 290 of 334

X
Press the mark on cover 0002inwards in the
direction of the arrow.
X Take cover 0002off the opening.
X Screw the towing eye in clockwise to the
stop and tighten it.
Removing the towing eye X
Loosen the towing eye and unscrew it.
X Attach cover 0002to the bumper and press
until it engages.
X Place the towing eye in the vehicle tool kit. Towing the vehicle with the rear axle
raised
When towing your vehicle with the rear axle
raised, it is importan tthat you observe the
safety instructions (Y page 287).
! The ignition must be switched off if you
are towing the vehicle with the rear axle
raised. Intervention by ESP ®
could
otherwise damage the brake system. X
Switch on the hazard warning lamps
(Y page 108).
X Turn the SmartKey to position 0in the
ignition lock and remove the SmartKey
from the ignition lock.
X When leaving the vehicle, take the
SmartKey or the KEYLESS-GO key with you. Towing
avehicle with both axles on
the ground
When having your vehicle towed, observe the
important safety notes (Y page 287). G
WARNING
The power assistance for the steering and the
brake force booster do not work when the
engine is not running. You will then need
much more effort to brake and steer the
vehicle .Adapt your style of driving
accordingly.
X Switch on the hazard warning lamps
(Y page 108).
i When towing with the hazard warning
lamps switched on, use the combination
switch as usual to signal a change of
direction. In this case, only the turn signals
for the desired direction flash. When the
combination switch is reset, the hazard
warning lamps start flashing again.
X Turn the SmartKey to position 2in the
ignition lock.
X When the vehicle is stationary, depress the
brake pedal and keep it depressed.
X Vehicles with manual transmission:
depress the clutch pedal.
X Shift to neutral.
or
X Vehicles with automatic transmission:
shift the automatic transmission to
position N.
X Release the brake pedal.
X Release the parking brake. 288
Towing and tow-startingBreakdown assistance
Page 298 of 334

R
Do not drive with tires which have too little
tread depth, as this significantly reduces
the tractio nonwet roads (hydroplaning).
R Replace the tires after six years at the
latest, regardless of wear. This also applies
to the spare wheel/emergency spare
wheel.
The service life of tires depends on the
following factors amongst other things:
R driving style
R tire pressure
R distance covered MOExtended tires (tires with run-flat
properties)
MOExtended tires (tires with run-flat
properties) allow you to continue driving your
vehicle even if one or more tires are entirely
deflated.
MOExtended tires may be used only in
conjunction with the activated tire pressure
loss warning system or the activated tire
pressure monitoring system and only on
wheels specifically tested by Mercedes-Benz.
Notes on driving with MOExtended tires in the
event of a flat tire can be found in the
"Breakdown assistance" section
(Y page 281). Winter operation
Please bear the following in mind
Have your vehicle winterproofed at a qualified
specialist workshop at the onset of winter.
Observe the notes in the "Changing a wheel"
section (Y page 315). Driving with summer tires
At temperatures below 45 ‡ (+7 †), the
elasticity of summer tires and therefore also
the traction and brakin gcapability are
reduced considerably. Moun tM+S tires on you
rvehicle. Using summer tires at very cold
temperatures could cause cracks to form,
thereby damaging the tires permanently.
Mercedes-Benzc annot accept responsibility
for this type of damage. M+S tires
At temperatures below 45 ‡ (+7 †), use
winter tires or all-season tires. Both types of
tire are identified by th eM+S marking.
Only winter tires bearing the 0003snowflake
symbol in addition to the M+S marking
provide the best possible grip in wintry road
conditions. Only these tires will allow driving
safety systems such as ABS and ESP ®
to
function optimally in winter. These tires have
bee ndeveloped specifically for driving in
snow.
Use M+S tires of the same make and tread on
all wheels to maintain safe handling
characteristics. G
WARNING
M+S tires with a tire tread depth of less than
000A in (4 mm) are not suitable for use in winter
and do not provide sufficient traction. There
is a risk of an accident.
M+S tires with a tread depth of less than 000A
in (4 mm) must be replaced immediately.
Always observe the maximum permissible
speed specified for the M+S tires you have
mounted.
When you have mounted M+S tires:
X Check the tire pressures (Y page 301).
X Vehicles for USA: restart the tire pressure
monitor (Y page 301).
Drive no faster than 50 mph (80 km/h) with
the spare wheel or emergency spare wheel
mounted. G
WARNING
The wheel or tire size as well as the tire type
of the spare wheel or emergency spare wheel
and the wheel to be replaced may differ. 296
Winter operationWheels and tires