2012 MERCEDES-BENZ SLK250 center console
[x] Cancel search: center consolePage 82 of 334

Side windows
Important safety notes
G
WARNING
When opening or closing the door windows,
make sure that there is no danger of anyone
being harmed by the opening/closing
procedure.
The front door windows are equipped with
automatic operation and the anti-entrapment
feature. If in automatic mode a front door
window encounters an obstruction that
blocks its path, the anti-entrapment feature
will stop the door window and open it slightly.
The door windows operate differently when
the switch is pulled.S ee the "Problems with
door windows" section for more details.
The closing of the door windows can be
immediately halted by releasing the switch or,
if the switch was pulled past the resistance
point and released, by pressing or pulling the
respective switch.
If a door window encounters an obstruction
that blocks its path in a circumstance where
you are closing the windows by pressing and
holding 000Fbutton on the SmartKey or by
pressing and holding the lock button (vehicles
with KEYLESS-GO) on an outside door handle,
the anti-entrapment feature will not operate. Opening and closing the side
windows in the front
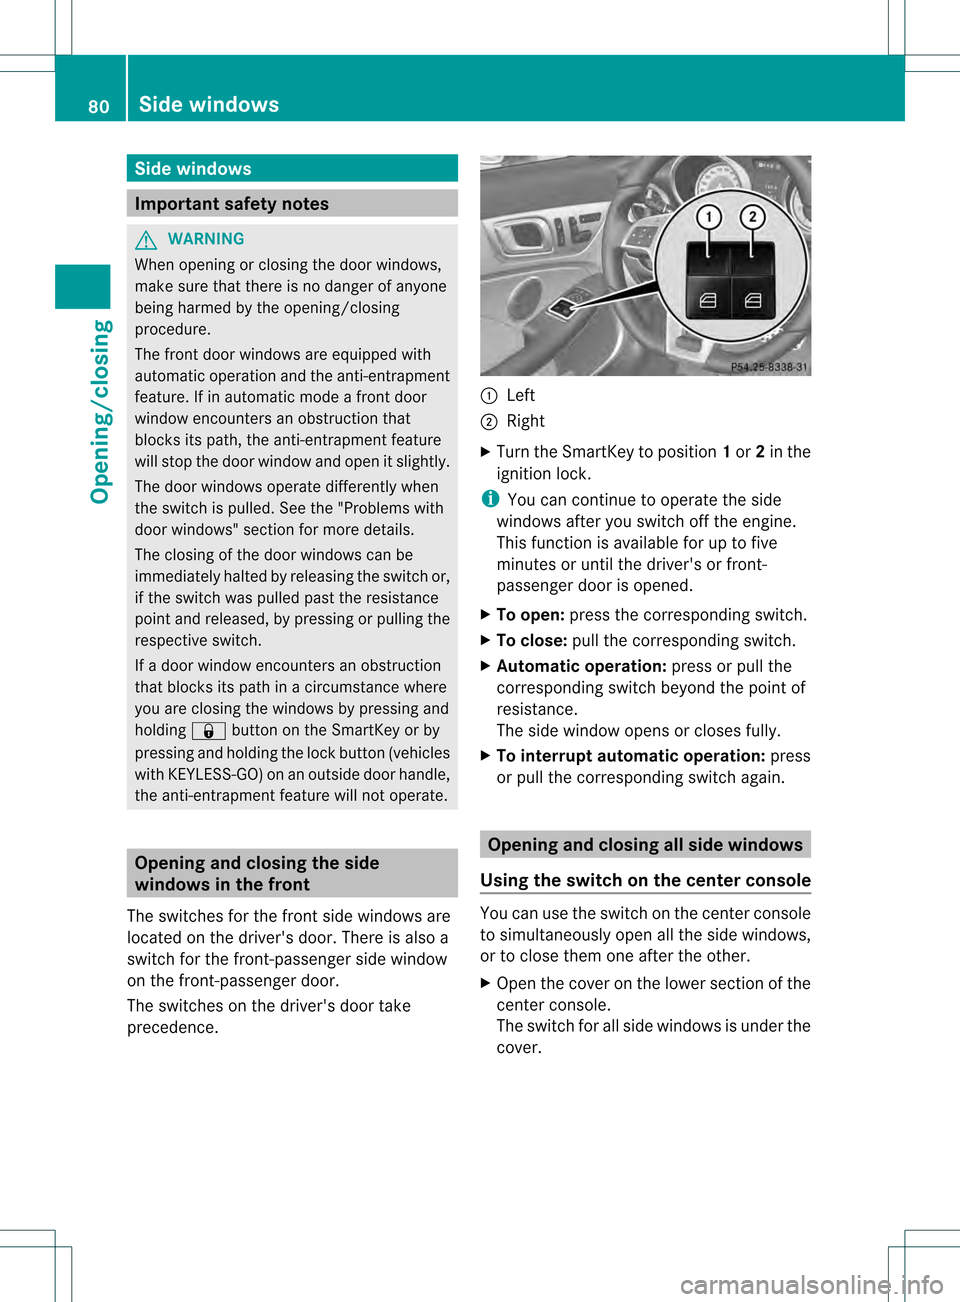
The switches for the fron tside windows are
located on the driver's door. There is also a
switch for the front-passenger side window
on the front-passenger door.
The switches on the driver's door take
precedence. 0002
Left
0003 Right
X Turn the SmartKey to position 1or 2in the
ignition lock.
i You can continue to operate the side
windows after you switch off the engine.
This function is available for up to five
minutes or until the driver's or front-
passenger door is opened.
X To open: press the corresponding switch.
X To close: pull the corresponding switch.
X Automatic operation: press or pull the
corresponding switch beyond the point of
resistance.
The side window opens or closes fully.
X To interrupt automatic operation: press
or pull the corresponding switch again. Opening and closing all side windows
Using the switch on the center console You can use the switch on the center console
to simultaneously open all the side windows,
or to close them one after the other.
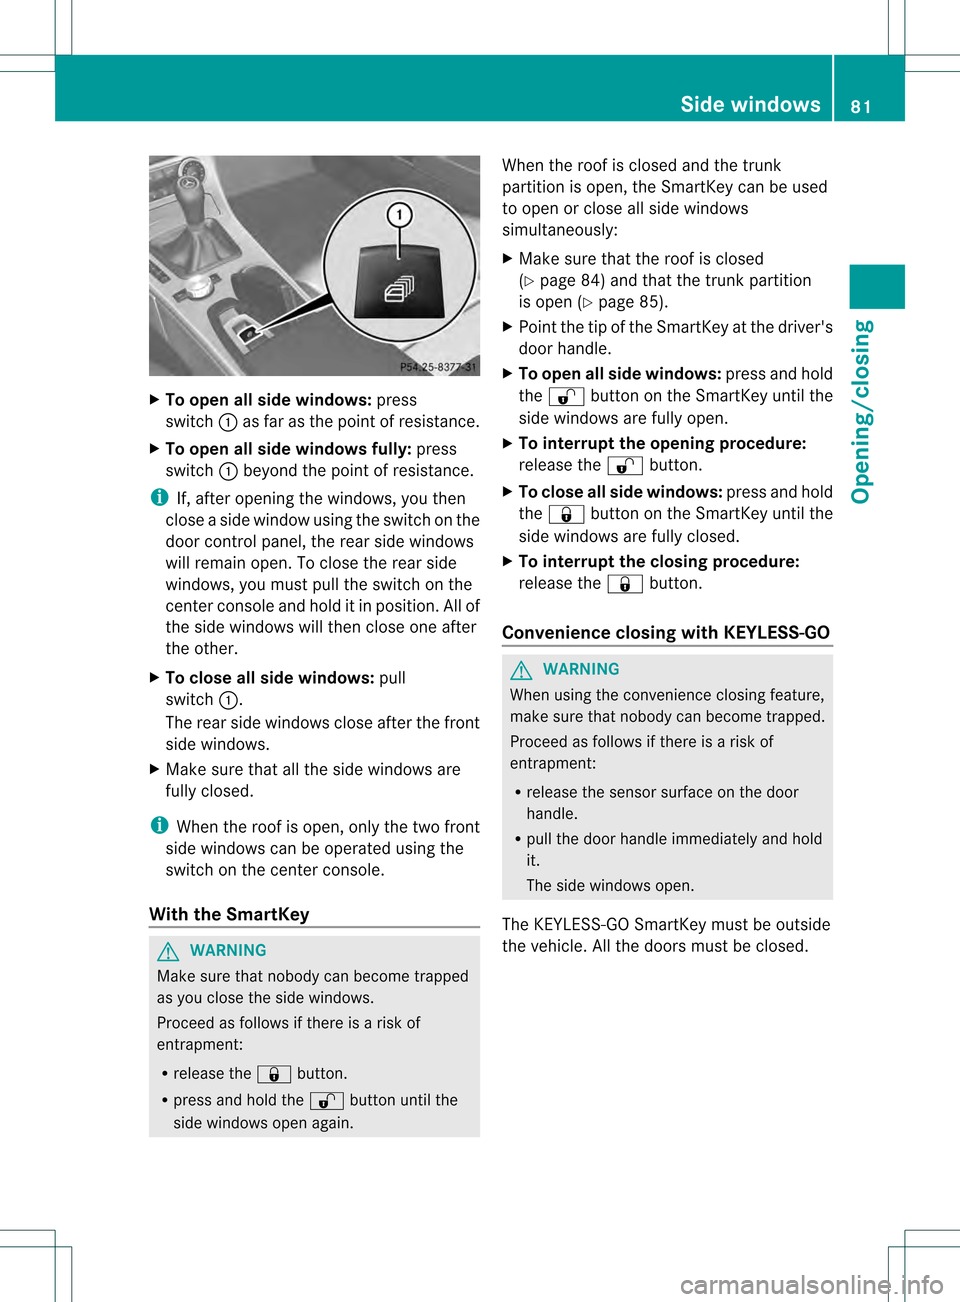
X Open the cover on the lower section of the
center console.
The switch for all side windows is under the
cover. 80
Side windowsOpening/closing
Page 83 of 334

X
To open all side windows: press
switch 0002as fa ras the point of resistance.
X To open all side windows fully: press
switch 0002beyond the point of resistance.
i If, after opening the windows, you then
close a side window using the switch on the
door control panel, the rear side windows
will remain open. To close the rear side
windows, you must pull the switch on the
center console and hold it in position. All of
the side windows will then close one after
the other.
X To close all side windows: pull
switch 0002.
The rear side windows close after the front
side windows.
X Make sure that all the side windows are
fully closed.
i When the roof is open, only the two front
side windows can be operated using the
switch on the center console.
With the SmartKey G
WARNING
Make sure that nobody can become trapped
as you close the side windows.
Proceed as follows if there is a risk of
entrapment:
R release the 000Fbutton.
R press and hold the 0010button until the
side windows open again. When the roof is closed and the trunk
partition is open, the SmartKey can be used
to open or close all side windows
simultaneously:
X
Make sure that the roof is closed
(Y page 84) and that the trunk partition
is open (Y page 85).
X Point the tip of the SmartKey at the driver's
door handle.
X To open all side windows: press and hold
the 0010 button on the SmartKey until the
side windows are fully open.
X To interrupt the opening procedure:
release the 0010button.
X To close all side windows: press and hold
the 000F button on the SmartKey until the
side windows are fully closed.
X To interrupt the closing procedure:
release the 000Fbutton.
Convenience closing with KEYLESS-GO G
WARNING
When using the convenience closing feature,
make sure that nobody can become trapped.
Proceed as follows if there is a risk of
entrapment:
R release the sensor surface on the door
handle.
R pull the door handle immediately and hold
it.
The side windows open.
The KEYLESS-GO SmartKey must be outside
the vehicle. All the doors must be closed. Side windows
81Opening/closing Z
Page 86 of 334

Opening and closing
X
Close the trun kpartition (Y page 85).
X Close the trunk lid.
X Turn the SmartKey to position 2in the
ignition lock.
X Open the cover on the lower sectio nofthe
center console.
Roof switch 0002is located under the cover.
X To open: pull roof switch 0002until the roof
has been fully retracted into the trunk and
the Vario-Roof in Operation message
disappears from the multifunction display.
All of the side windows open.
X To close: press roof switch 0002until the roof
is fully closed and the Vario-Roof inOperation message disappears from the
multifunction display.
All of the side windows open.
X To close all side windows, pull the switch
under the cover on the center console
(Y page 80).
i If you operate the roof switch and the
Trunk partition Open message appears
in the multifunction display, the trunk
partition has not been closed correctly. Opening and closing with the
SmartKey
Important safety notes G
WARNING
Before operating the retractable hardtop
(vario-roof), make sure there is no danger of
anyone being injured by the moving parts
(retractable hardtop, roof frame, and trunk
lid).
Hands must never be placed near the roof
frame, upper windshield area, hardtop, shelf
behind roll bars, or trunk lid while the
retractable hardtop is being raised or
lowered. Serious personal injury may occur.
If potential danger exists, release the
retractable hardtop switch or the 0010or
000F button on the SmartKey. This
immediately interrupts the raising or lowering
procedure. You can then operate the
retractable hardtop switch or press the
0010 or000F button on the SmartKey to raise
or lower the retractable hardtop away from
the danger zone.
Opening and closing i
The SmartKey must be close to the
driver's door handle.
X Close the trunk partition (Y page 85).
X Close the trunk lid.
X Point the tip of the SmartKey at the driver's
door handle.
X To open: press and hold the 0010button
on the SmartKey until the roof is fully
opened.
The roof and the rear side windows open.
The front side windows close.
X To interrupt the opening procedure:
release the 0010button.
X To open the front side windows: press
and hold the 0010button on the SmartKey
again. 84
RoofOpening/closing
Page 148 of 334

Problems with the transmission
Problem Possible causes/consequences and
0001 Solutions
The transmission has
problems shifting gear. The transmission is losing oil.
X
Have the transmission checked at a qualified specialist
workshop immediately. The acceleration ability
is deteriorating.
The transmission no
longer changes gear. The transmission is in emergency mode.
It is only possible to shift into
secondgear and reverse gear.
X Stop the vehicle.
X Shift the transmission to position P.
X Switch off the engine.
X Wait at least 10seconds before restarting the engine.
X Shift the transmission to position Dor R.
If D is selected, the transmission shifts into secondgear; ifRis
selected, the transmission shifts into reverse gear.
X Have the transmission checked at a qualified specialist
workshop immediately. Releasing the parking lock manually
In the event of an electrical malfunction, it is
possible to release the selector lever lock
manually to move it out of position P, e.g. if
you wish to tow the vehicle away. !
Do not use any sharp-edged objects to
remove the selector lever gaiter from the
center console. This could damage the
selector lever gaiter. X
Apply the electric parking brake.
X Press the frame of selector level gaiter 0002
together somewhat on the side edge at the
back and hold with one hand 0003.
X With the other hand, pry off the frame of
selector level gaiter 0002with a flat, blunt
object (e.g. a screwdriver wrapped in cloth)
at rear edge 0023, pulling it up and out at the
same time.
X Press release buttons 0022down and
simultaneously move the selector lever out
of position P.
The selector lever can now be moved freely
until it is returned to position P. Refueling
Important safety notes
G
WARNING
Gasoline is highly flammable and poisonous.
It burns violently and can cause serious
personal injury. 146
RefuelingDriving and parking
Page 178 of 334

until the arrow is white and a warning tone
sounds.
X To reverse into the parking space:
maintai nthe steering wheel angle and
reverse carefully.
X Stop as soon as you hear a warning tone,
The vehicle has reached the position in
which you need to countersteer.
The Please steer to the left or
Please steer to the right message
appears in the multifunction display.
X Countersteering: while the vehicle is
stationary, turn the steering wheel in the
specified direction until the arrow is white
and a warning tone sounds.
X To reverse into the parking space:
maintain the steering wheel angle and
reverse carefully.
X Stop as soon as you hear a warning tone,
at the latest when PARKTRONIC sounds the
continuous warning tone.
The Parking Guidance finished message appears in the multifunction
display and a warning tone sounds. You
may be asked to steer in a different
direction and then change gear. In this
case, further displays in the multifunction
display will direct you to the final position.
X Maneuver if necessary.
X Always observe the warning messages
displayed by PARKTRONIC (Y page 171).
Canceling Parking Guidance X
Press the PARKTRONIC button on the
center console (Y page 172).
Parking Guidance is canceled immediately
and PARKTRONIC is deactivated.
Parking Guidance is canceled automatically if
it is no longer possible to guide you into the
parking space, or if a malfunction occurs.
The parking space symbol goes out and a
warning tone sounds. The ParkingGuidance Canceled message appears in the
multifunction display. ATTENTION ASSIST
Important safety notes ATTENTION ASSIST helps you during long,
monotonous journeys such as on freeways
and interstate highways. It is active in the
range between 50 mph (80 km/h) and
112 mph (180 km/h).
If ATTENTION ASSIST detects typical
indicators of fatigue or increasing lapses in
concentration on the part of the driver, it
suggests you take a break.
G
WARNING
ATTENTION ASSIST is only an aid and may
detect your tiredness or lapses in
concentration too late or not at all. It is not a
substitute for a well-rested and attentive
driver.
Fatigue may cause you to recognize
hazardous situations too late, misjudge a
situation or react more slowly.F or this
reason, make sure you feel rested before you
begin driving and during your journey. Make
sure that you take regular breaks in time,
particularly on long journeys. Otherwise, you
may fail to recognize dangers in time, cause
an accident and injure yourself and others.
ATTENTION ASSIST assesses your level of
fatigue or lapses in concentration by taking
the following criteria into account:
R your personal driving style, e.g. steering
characteristics
R driving conditions, e.g. time, driving time
The functionality of ATTENTION ASSIST is
restricted and warnings may be delayed or
not occur at all:
R if the road condition is poor, e.g. if the
surface is uneven or if there are potholes
R if there is a strong side wind
R if you have adopted a sporty driving style
with high cornering speeds or high rates of
acceleration 176
Driving systemsDriving and parking
Page 245 of 334

Eyeglasses compartment
X
To open: press marking 0002.
Stowage compartment in the center
console X
To open: briefly press the lower sectio nof
cover 0002.
X To remove the insert: pull the left-hand
side of the insert up and out.
X To install the insert: press the insert into
the housing.
i Depending on the vehicle equipment,
there may be an ashtray in the center
console instead of a storage compartment. Stowage compartment in front of the
armrest X
To open: slide cover 0002back.
Stowage compartment under the armrest
i Depending on the vehicle's equipment, a
12 V socket, a USB socket, and an AUX IN
connection or Media Interface are installed
in the stowage compartment. AMedia
Interface is a universal interface for mobile
audio equipment, e.g. for an iPod ®
or MP3
player (see the separate COMAND
operating instructions).
i The stowage compartment can be locked
and unlocked centrally using the SmartKey
(Y page 68). X
To open: press button 0002and raise
armrest 0003. Stowage areas
243Stowage and features Z
Page 247 of 334

Attached to the reversible floor panel are two
flexible straps 0003thatyou can use to secure
objects, for example draft stop 0023when
reversible floor panel 0002has been turned
over. Roof carrier
Important safety notes !
This vehicle is not designed to transport
items on the roof. Roof carriers and other
devices which are mounted on the roof that
have not been specifically approved for this
model by Mercedes-Benz must not be used
as they could damage the vehicle and the
retractable hardtop (vario-roof).
At the time of going to print, Mercedes-
Benz does not offer any roof carrier or other
roof-installed devices for this model.
! This vehicle is not designed to transport
any items on the trunk lid or to allow
luggage carriers or equipment of any kind
to be installed to the trunk lid. Otherwise
the vehicle and the retractable hardtop
could be damaged. Features
Cup holders
Important safety notes G
WARNING
In order to help prevent spilling liquids on
vehicle occupants and/or vehicle equipment,
only use containers that fit into the cup
holder. Use lids on open containers and do
not fill containers to aheight where the
contents, especially hot liquids, could spill
during braking, vehicle maneuvers, or in an
accident. Liquids spilled on vehicle occupants
may cause serious personal injury. Liquids
spilled on vehicle equipment may cause
damage not covered by the Mercedes-Benz
Limited Warranty.
When not in use, keep the cup holder closed.
An open cup holder may cause injury to you
or others when contacted during braking,
vehicle maneuvers, or in an accident.
Keep in mind that objects placed in the cup
holder may come loose during braking,
vehicle maneuvers, or in an accident and be
thrown around in the vehicle interior. Objects
thrown around in the vehicle interior may
cause an acciden tand/o rserious personal
injury.
Cup holder in the front-compartment
center console You can remove the cup holder insert for
cleaning. Clean with clear, lukewarm water
only. Features
245Stowage and features Z
Page 249 of 334

Ashtray
Ashtray in the front-compartment
center console X
To open: press the lower area of cover 0002.
The cover opens.
X To remove the insert: lift insert0023
up 0003 and out.
X To re-install the insert: press insert0023
into the holder until it engages. Cigarette lighter
G
WARNING
When leaving the vehicle, always remove the
SmartKey from the ignition lock. Always take
the SmartKey with you and loc kthe vehicle.
Do not leave children unattended in the
vehicle, even if they are secured in a child
restraint system, or with access to an
unlocked vehicle. Achild's unsupervised
access to a vehicle could result in an accident
and/or serious personal injury. The children
could:
R injure themselves on parts of the vehicle
R be seriously or fatally injured through
excessive exposure to extreme heat or cold
R injure themselves or cause an accident with
vehicle equipment that can be operated
even if the SmartKey is removed from the
ignition lock or removed from the vehicle,
such as seat adjustment, steering wheel
adjustment, or the memory function If children open a door, they could injure other
persons or get out of the vehicle and injure
themselves or be injured by following traffic.
Do not expose the child restraint system to
direct sunlight. The child restraint system's
metal parts, for example, could become very
hot, and the child could be burned on these
parts. G
WARNING
Never touch the heating element or sides of
the lighter; they are extremely hot. Hold the
knob only.
Make sure any children traveling with you do
not injure themselves or start a fire with the
hot cigarette lighter. X
Turn the SmartKey to position 2in the
ignition lock.
X To open: push the lower section of
cover 0002.
The ashtray opens.
X Press in cigarette lighter 0003.
Cigarette lighter 0003will pop out
automatically when the heating element is
red-hot. 12
Vsockets
Points to observe before use !
If you are using all sockets in the vehicle,
make sure that you do no texceed the
maximum current dra wof 55 A. Otherwise,
you will overload the fuses. Features
247Stowage and features Z