2012 MERCEDES-BENZ SLK250 set clock
[x] Cancel search: set clockPage 78 of 334

X
To deactivate: press and hold button 0002
for abou tfive seconds until a tone sounds.
X To activate: press and hold button 0003for
about five seconds until a tone sounds.
i If you press one of the two buttons and
do not hear a tone, the relevant setting has
already been selected.
You can also switch the automatic locking
function on and off using the on-board
computer (Y page 193). Unlocking the driver's door
(mechanical key)
If the vehicle can no longer be unlocked with
the SmartKey, use the mechanical key.
If you use the mechanical key to unloc kand
open the driver's door, the anti-thef talarm
system will be triggered ( Ypage 65).
X Take the mechanical key out of the
SmartKey (Y page 70).
X Insert the mechanical key into the lock of
the driver's door as far as it will go. X
Turn the mechanical key counter-clockwise
to position 0005.
The door is unlocked.
X Turn the mechanical key back and remove
it.
X Insert the mechanical key into the
SmartKey. Locking the vehicle (mechanical key)
If the vehicle can no longer be locked with the
SmartKey, use the mechanical key.
X Open the driver's door.
X Close the front-passenger door and the
trunk lid.
X Press the locking button (Y page 75).
X Check whether the locking knob on the
front-passenger door is still visible. Press
down the locking knob by hand, if
necessary.
X Close the driver's door.
X Take the mechanical key out of the
SmartKey (Y page 70).
X Insert the mechanical key into the lock of
the driver's door as far as it will go. X
Turn the mechanical key clockwise as far
as it will go to position 0005.
X Turn the mechanical key back and remove
it.
X Make sure that the doors and the trunk lid
are locked.
X Insert the mechanical key into the
SmartKey. 76
DoorsOpening/closing
Page 123 of 334

compartment as well
.The indicator lamp in
the 0003 button goes out.
R Use the residual heat function if you want
to heat or ventilate the vehicle interior
when the ignition is switched off. The
"residual heat" function can only be
activated or deactivated with the ignition
switched off. Operating the climate control
systems
Activating/deactivating climate
control
Important information G
WARNING
When the climate control system is switched
off, the outside air supply and circulation are
also switched off. Only choose this setting for
a short time when the retractable hardtop
(vario-roof) is closed. Otherwise, the windows
could fog up, impairing visibility and
endangering you and others.
i Activate climate control primarily using
the 0005 button (Y page 122).
Activating/deactivating Air-conditioning system
X
To activate: turn airflow control 0014
(Y page 117) clockwise to the desired
position (except position 0).
X To deactivate: turn airflow control 0014
(Y page 117) counter-clockwise to position
0. Dual-zone automatic climate control
X
Turn the SmartKey to position 2in the
ignition lock.
X To activate: press the0005button.
The indicator lamp in the 0005button lights
up. Airflow and air distribution are set to
automatic mode.
or
X Press the 000Dbutton.
The indicator lamp in the 000Dbutton goes
out. The previously selected settings come
into effect again.
X To deactivate: press the000Dbutton.
The indicator lamp in the 000Dbutton lights
up. Activating/deactivating cooling with
air dehumidification
Important information The cooling with air dehumidification function
is only available when the engine is running.
The air inside the vehicle is cooled and
dehumidified according to the temperature
selected.
G
WARNING
If you switch off the cooling function, the
vehicle will not be cooled when weather
conditions are warm. The windows can fog up
more quickly. Window fogging may impair
visibility and endanger you and others.
Condensation may drip from the underside of
the vehicle when it is in cooling mode. This is
normal and not a sign that there is a
malfunction.
Depending on the equipment level, the
control panel has either the 0004button or
0006 button.
i The cooling with air dehumidification
function uses refrigerant R134a. This
coolant does not contain
chlorofluorocarbons, and therefore does
not damage the ozone layer. Operating the climate control systems
121Climate control Z
Page 124 of 334

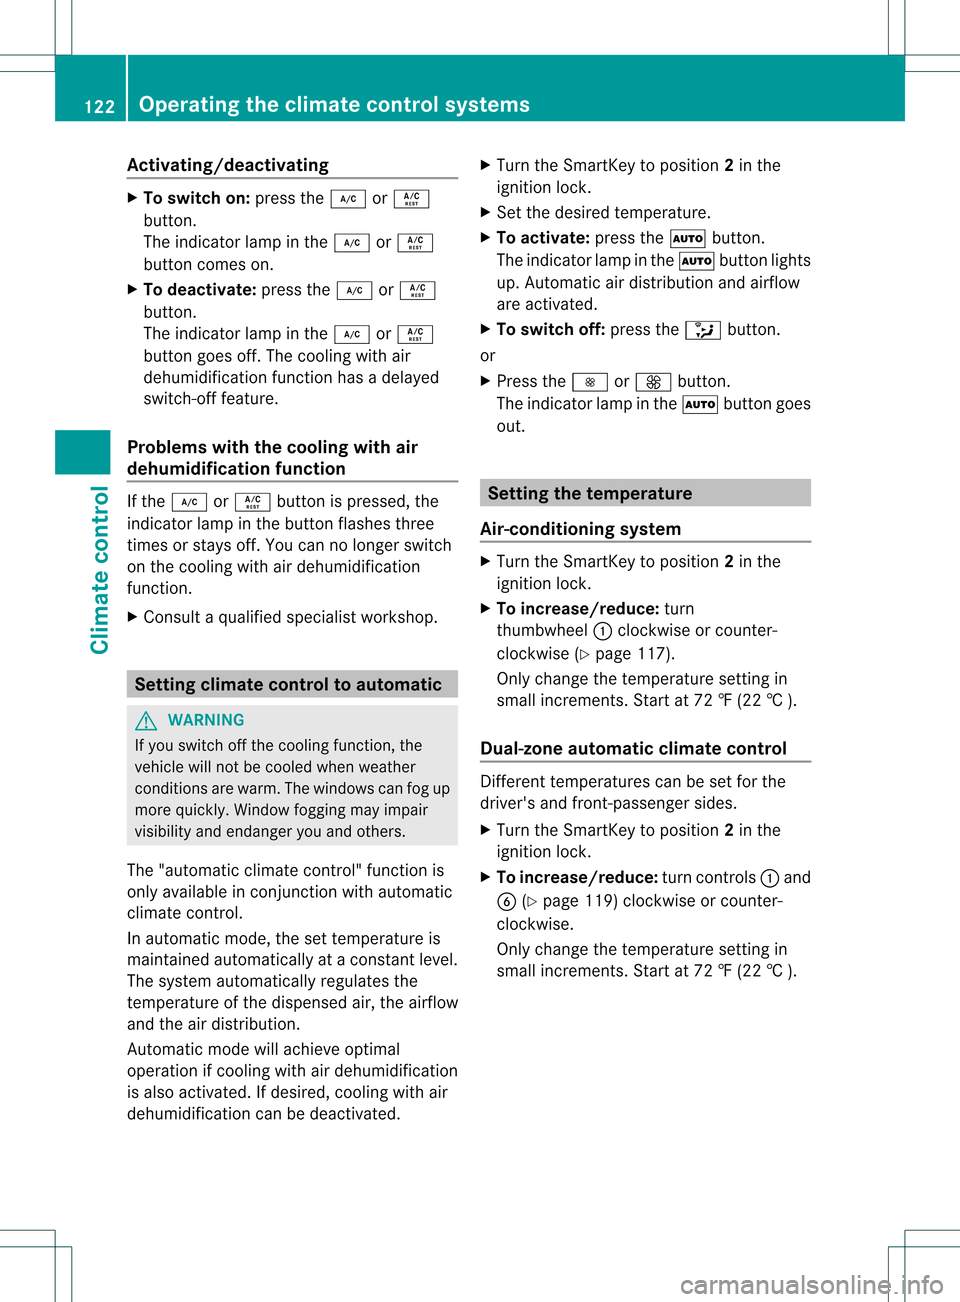
Activating/deactivating
X
To switch on: press the0006or0004
button.
The indicator lamp in the 0006or0004
button comes on.
X To deactivate: press the0006or0004
button.
The indicator lamp in the 0006or0004
butto ngoes off. The cooling with air
dehumidification function has a delayed
switch-off feature.
Problems with the cooling with air
dehumidification function If the
0006 or0004 button is pressed, the
indicator lamp in the button flashes three
times or stays off. You can no longer switch
on the cooling with air dehumidification
function.
X Consult a qualified specialist workshop. Setting climate control to automatic
G
WARNING
If you switch off the cooling function, the
vehicle will not be cooled when weather
conditions are warm. The windows can fog up
more quickly. Window fogging may impair
visibility and endanger you and others.
The "automatic climate control" function is
only available in conjunction with automatic
climate control.
In automatic mode, the set temperature is
maintained automatically at a constant level.
The system automatically regulates the
temperature of the dispensed air, the airflow
and the air distribution.
Automatic mode will achieve optimal
operation if cooling with air dehumidification
is also activated. If desired, cooling with air
dehumidification can be deactivated. X
Turn the SmartKey to position 2in the
ignition lock.
X Set the desired temperature.
X To activate: press the0005button.
The indicator lamp in the 0005button lights
up. Automatic air distribution and airflow
are activated.
X To switch off: press the0015button.
or
X Press the 0016or0017 button.
The indicator lamp in the 0005button goes
out. Setting the temperature
Air-conditioning system X
Turn the SmartKey to position 2in the
ignition lock.
X To increase/reduce: turn
thumbwheel 0002clockwise or counter-
clockwise (Y page 117).
Only change the temperature setting in
small increments. Start at 72 ‡ (22 † ).
Dual-zone automatic climate control Different temperatures can be set for the
driver's and front-passenger sides.
X Turn the SmartKey to position 2in the
ignition lock.
X To increase/reduce: turn controls0002and
0021 (Ypage 119) clockwise or counter-
clockwise.
Only change the temperature setting in
small increments. Start at 72 ‡ (22 † ). 122
Operating the climate control systemsClimate control
Page 125 of 334

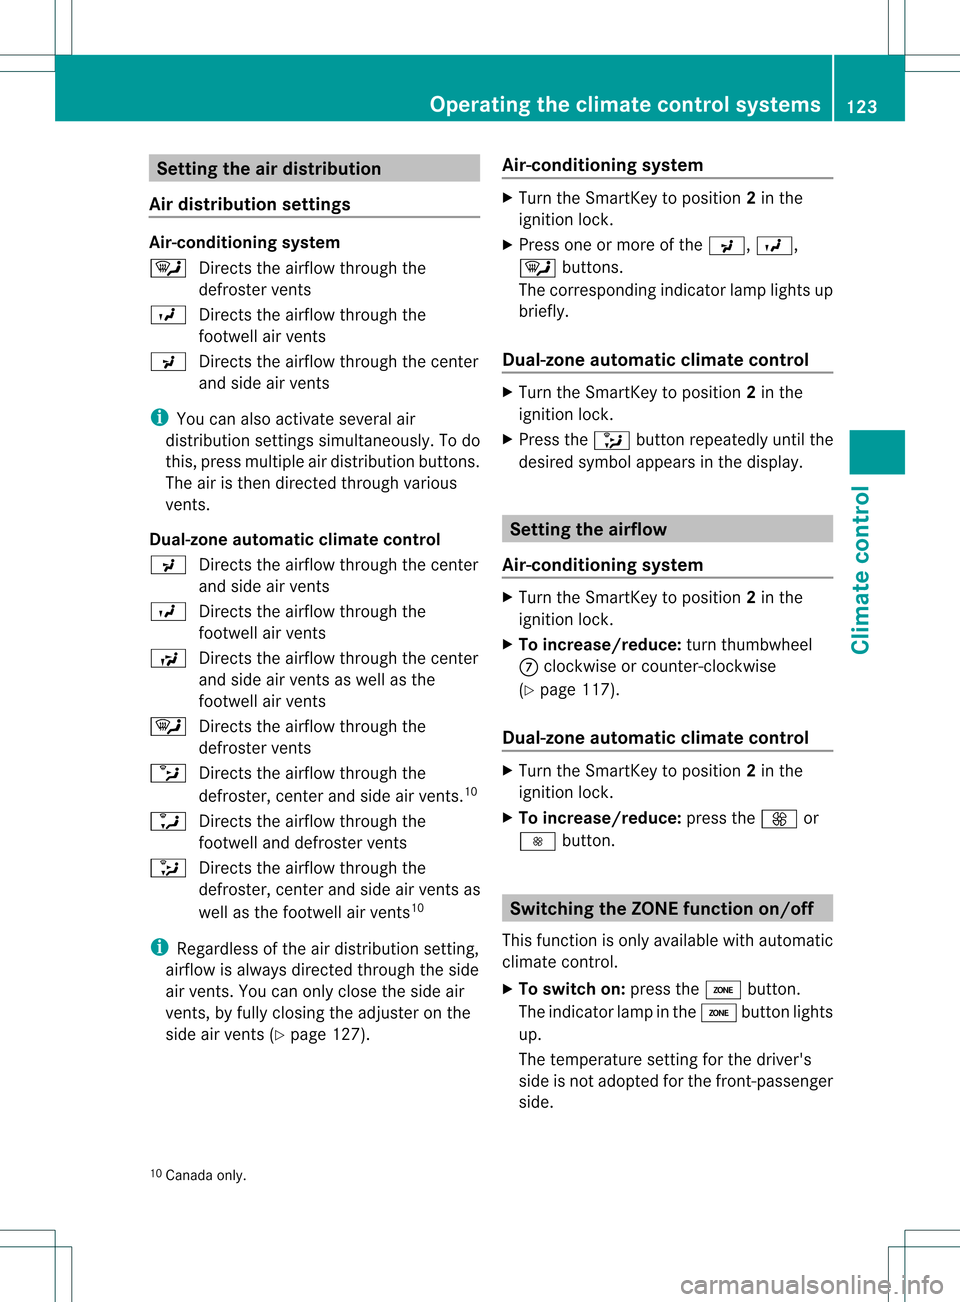
Setting the air distribution
Air distribution settings Air-conditioning system
0007
Directs the airflow through the
defroster vents
0018 Directs the airflow through the
footwell air vents
0019 Directs the airflow through the center
and side air vents
i You can also activate several air
distribution settings simultaneously .To do
this, press multiple air distribution buttons.
The air is then directed through various
vents.
Dual-zone automatic climate control
0019 Directs the airflow through the center
and side air vents
0018 Directs the airflow through the
footwell air vents
001A Directs the airflow through the center
and side air vents as well as the
footwell air vents
0007 Directs the airflow through the
defroster vents
0014 Directs the airflow through the
defroster, center and side air vents. 10
0013 Directs the airflow through the
footwell and defroster vents
0015 Directs the airflow through the
defroster, center and side air vents as
well as the footwell air vents 10
i Regardless of the air distribution setting,
airflow is always directed through the side
air vents. You can only close the side air
vents, by fully closing the adjuster on the
side air vents (Y page 127). Air-conditioning system X
Turn the SmartKey to position 2in the
ignition lock.
X Press one or more of the 0019,0018,
0007 buttons.
The corresponding indicator lamp lights up
briefly.
Dual-zone automatic climate control X
Turn the SmartKey to position 2in the
ignition lock.
X Press the 0015button repeatedly until the
desired symbol appears in the display. Setting the airflow
Air-conditioning system X
Turn the SmartKey to position 2in the
ignition lock.
X To increase/reduce: turn thumbwheel
0014 clockwise or counter-clockwise
(Y page 117).
Dual-zone automatic climate control X
Turn the SmartKey to position 2in the
ignition lock.
X To increase/reduce: press the0017or
0016 button. Switching the ZONE function on/off
This function is only available with automatic
climate control.
X To switch on: press the0003button.
The indicator lamp in the 0003button lights
up.
The temperature setting for the driver's
side is not adopted for the front-passenger
side.
10 Canada only. Operating the climate control systems
123Climate control Z
Page 182 of 334

Useful information
i This Operator's Manual describes all
models and all standard and optional
equipment of your vehicle available at the
time of publication of the Operator's
Manual. Country-specific differences are
possible. Please note that your vehicle may
not be equipped with all features
described. This also applies to safety-
related systems and functions.
i Please read the information on qualified
specialist workshops (Y page 23).Important safety notes
You will find an illustration of the instrument
cluster in the "At a glance" section
(Y page 27). G
WARNING
The driver's concentration must always be
directed primarily at road traffic.
For your safety and the safety of others,
selecting features through the multifunction
steering wheel should only be done by the
driver when traffic and road conditions permit
it to be done safely.
Bear in mind that at a speed of only 30 mph
(approximately 50 km/h), the vehicle covers
a distance of 44 feet (approximately 14 m) per
second. G
WARNING
No messages will be displayed if either the
instrument cluster or the multifunction
display is inoperative.
As a result, you will not be able to see
information about your driving conditions,
such as
R speed
R outside temperature
R warning/indicato rlamps R
malfunction/warning messages
R failure of any systems
Driving characteristics may be impaired.
If you must continue to drive, do so with added
caution .Contactana uthorized Mercedes-
Ben zCenter as soon as possible. G
WARNING
Malfunction and warning messages are only
indicated for certain systems and are
intentionally not very detailed. The
malfunction and warning messages are
simply a reminder with respect to the
operation of certain systems. They do not
replace the owner's and/or driver's
responsibility to maintain the vehicle's
operating safety. Have all required
maintenance and safety checks performed on
the vehicle. Bring the vehicle to an authorized
Mercedes-Benz Center to address the
malfunction and warning messages. Displays and operation
Instrument lighting
The brightness control knob is located on the
bottom left of the instrument cluster
(Y page 27).
X Turn the brightness control knob clockwise
or counter-clockwise.
Instrument cluster: if the light switch is set
to 0005, 0011or0009, brightness control
takes ambient light into account.
i The light sensor in the instrument cluster
automatically controls the brightness of
the multifunction display.
In daylight, the displays in the instrument
cluster are not illuminated.
Displays and switches in the vehicle
interior: if the light switch is set to 0005,
brightness control takes ambient light into
account. If the light switch is set to 0011or
0009, brightness control does not take
ambient light into account. 180
Displays and operationOn-board computer and displays
Page 185 of 334

Back button
0001
Press briefly:
R
Back
R Switches off the Voice Control
System; see the separate
operating instructions
R Hides display messages or calls
up the last Trip menu function
used
R Exits the telephone book/redial
memory 0001
Press and hold:
R
Calls up the standard display in
the Trip menu
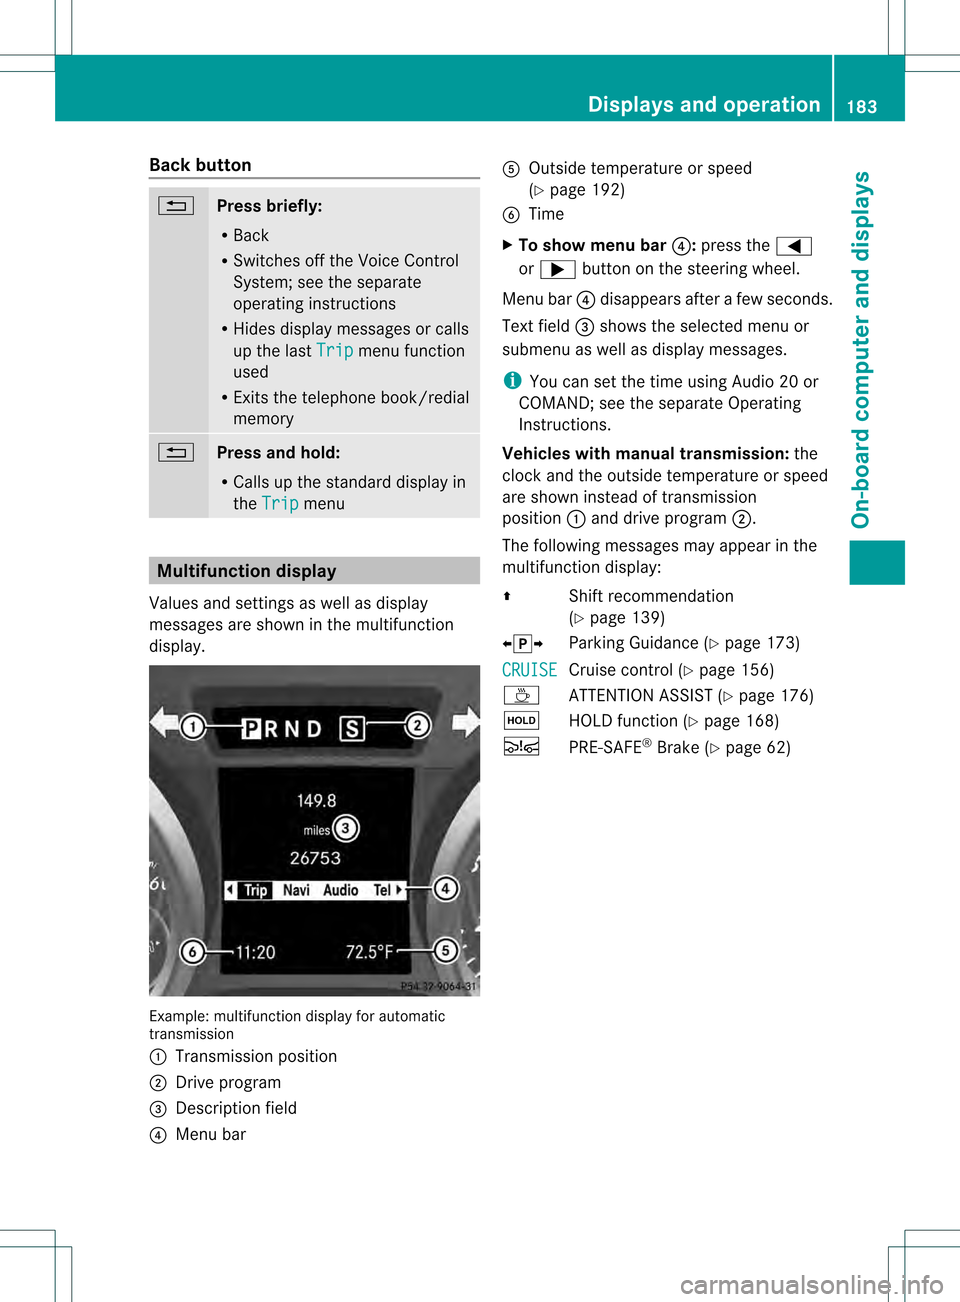
Multifunction display
Values and settings as well as display
messages are shown in the multifunction
display. Example: multifunctio
ndisplay for automatic
transmission
0002 Transmission position
0003 Drive program
0023 Description field
0022 Menu bar 0020
Outside temperature or speed
(Ypage 192)
0021 Time
X To show menu bar 0022:press the 0002
or 0005 button on the steering wheel.
Menu bar 0022disappears afte rafew seconds.
Text field 0023shows the selected menu or
submenu as well as display messages.
i You can set the time using Audio 20 or
COMAND; see the separate Operating
Instructions.
Vehicles with manual transmission: the
clock and the outside temperature or speed
are show ninstead of transmission
position 0002and drive program 0003.
The following messages may appear in the
multifunctio ndisplay:
0008 Shift recommendation
(Ypage 139)
00090013000A Parking Guidance (Y page 173)
CRUISE Cruise control (Y
page 156)
0001 ATTENTION ASSIS T(Ypage 176)
0001 HOLD function (Y page 168)
0001 PRE-SAFE ®
Brake (Y page 62) Displays and operation
183On-board computer and displays Z
Page 290 of 334

X
Press the mark on cover 0002inwards in the
direction of the arrow.
X Take cover 0002off the opening.
X Screw the towing eye in clockwise to the
stop and tighten it.
Removing the towing eye X
Loosen the towing eye and unscrew it.
X Attach cover 0002to the bumper and press
until it engages.
X Place the towing eye in the vehicle tool kit. Towing the vehicle with the rear axle
raised
When towing your vehicle with the rear axle
raised, it is importan tthat you observe the
safety instructions (Y page 287).
! The ignition must be switched off if you
are towing the vehicle with the rear axle
raised. Intervention by ESP ®
could
otherwise damage the brake system. X
Switch on the hazard warning lamps
(Y page 108).
X Turn the SmartKey to position 0in the
ignition lock and remove the SmartKey
from the ignition lock.
X When leaving the vehicle, take the
SmartKey or the KEYLESS-GO key with you. Towing
avehicle with both axles on
the ground
When having your vehicle towed, observe the
important safety notes (Y page 287). G
WARNING
The power assistance for the steering and the
brake force booster do not work when the
engine is not running. You will then need
much more effort to brake and steer the
vehicle .Adapt your style of driving
accordingly.
X Switch on the hazard warning lamps
(Y page 108).
i When towing with the hazard warning
lamps switched on, use the combination
switch as usual to signal a change of
direction. In this case, only the turn signals
for the desired direction flash. When the
combination switch is reset, the hazard
warning lamps start flashing again.
X Turn the SmartKey to position 2in the
ignition lock.
X When the vehicle is stationary, depress the
brake pedal and keep it depressed.
X Vehicles with manual transmission:
depress the clutch pedal.
X Shift to neutral.
or
X Vehicles with automatic transmission:
shift the automatic transmission to
position N.
X Release the brake pedal.
X Release the parking brake. 288
Towing and tow-startingBreakdown assistance