2012 MERCEDES-BENZ SLK ROADSTER washer fluid
[x] Cancel search: washer fluidPage 18 of 321
Refuelling
Fuelgauge ....................................... 28
Important safety notes ..................142
Refuelling proces s......................... 143
see Fuel
Releasing the parking loc kman-
ually (automatic transmission) ........142
Remote control Garage door opene r....................... 243
Programming (garage door
opener) .......................................... 243
Reserve (fuel tank)
see Fuel
Reserve fuel
Display message ............................ 212
Warning lamp ................................. 231
Residual heat (climate control) ........122
Restraint system see SRS (Supplemental Restraint
System)
Rev counter ........................................ 179
Reverse gear Engaging (automatic transmis-
sion) ............................................... 137
Engaging (manual transmission) ....136
Reversible floor (boot) ......................238
Reversing lamp Changing bulbs .............................. 109
Reversing lamps
Display message ............................ 210
Roof
Display message ............................ 221
Important safety notes ....................78
Opening/closing (with key) .............. 80
Opening/closing (with roof
switch) ............................................. 79
Problem (malfunction) .....................82
Relocking ......................................... 80
Roof carrier ........................................ 238
Roof lining and carpets (cleaning
instructions) ...................................... 258
Roof switch .......................................... 79
Route (navigation) see Route guidance (navigation)
Route guidance (navigation) ............184 S
Safety Childre ninthe vehicle ..................... 47
Child restraint systems ....................47
Safety systems
see Driving safety systems
Seat belt
Adjusting the driver's and front-
passenger sea tbelt ......................... 46
Belt force limiter .............................. 46
Belt tensione r.................................. 46
Cleaning ......................................... 258
Fastening ......................................... 45
Important safety guidelines .............44
Releasing ......................................... 46
Switching belt adjustment on/off
(on-board computer) ......................194
Warning lamp ................................. 224
Warning lamp (function) ................... 46
Seats
Adjusting (electrically). ....................90
Adjusting (manually )........................ 89
Adjusting the 4-way lumba rsup-
por t.................................................. 90
Adjusting the head restraint ............90
Cleaning the cover .........................258
Correct driver's seat position ........... 88
Important safety notes ....................89
Seat heating problem ......................91
Storing settings (memory func-
tion) ................................................. 96
Switching AIRSCARF on/off ............91
Switching sea theating on/off .........90
Sensors (cleaning instructions) .......257
Service see ASSYST PLUS service interval
display
Service Centre
see Qualified specialist workshop
Service menu (on-board computer) .190
Service products Brake fluid ..................................... 308
Coolant (engine) ............................ 308
Engine oil ....................................... 307
Fuel ................................................ 303
Important safety notes ..................303
Washer fluid .................................. .309 Index
15
Page 21 of 321
Display message
............................ 217
Grip ................................................ 150
Important safety notes ..................286
Replacing ....................................... 294
Service life ..................................... 287
Storing ........................................... 295
Tyr esize (data) .............................. 295
Tyr etread ...................................... 287
see Flat tyre U
Unladen weight ................................. 310
Unlocking Emergency unlocking .......................73
From inside the vehicle (central
unlocking button) ............................. 72V
Vanity mirror (in sun visor) ..............240
Variable SPEEDTRONIC see SPEEDTRONIC
Vehicle
Correct use ...................................... 22
Data acquisition ............................... 23
Display message ............................ 220
Electronics ..................................... 301
Emergency unlocking .......................73
Equipment ....................................... 20
Implied warranty .............................. 23
Individua lsettings .......................... 190
Leaving parked up .........................148
Locking (in an emergency) ...............73
Locking (key )................................... 66
Lowering ........................................ 271
Pulling away ................................... 129
Raising ........................................... 268
Registration ..................................... 22
Towing away .................................. 278
Tow-starting ................................... 278
Transporting .................................. 281
Unlocking (in an emergency) ...........73
Unlocking (key )................................ 66
Vehicle data ................................... 310
Vehicle battery
see Battery (vehicle)
Vehicle dimensions ...........................310Vehicle emergency locking
................73
Vehicle identification number see VIN
Vehicle identification plate ..............302
Vehicle tool kit .................................. 261
Vehicle weights ................................. 310
Vents see Air vents
Video (DVD) ........................................ 187
Video DVD (on-board computer) ......187
VIN ...................................................... 302 W
Warning and indicator lamps ABS ................................................ 226
Brakes ........................................... 226
Distance warning signa l................. 233
ESP ®
.............................................. 228
ESP ®
OFF ....................................... 228
LIM (cruise control) ........................ 151
LIM (DISTRONIC PLUS) ..................157
LIM (variable SPEEDTRONIC) .........154
Overview .......................................... 30
PASSENGER AIRBAG OFF ................49
Reserve fuel ................................... 231
Seat bel t........................................ 224
SRS ................................................ 230
Tyr ep ressure monitor ...................233
Warning triangle ................................ 260
Washer fluid Display message ............................ 222
Wheel bol ttightening torque ...........271
Wheel chock ...................................... 267
Wheeled draught stop see AIRGUIDE
Wheels
Changing/replacing .......................294
Changing awheel .......................... 266
Checking ........................................ 287
Cleaning ......................................... 255
Fitting awheel ............................... 270
Important safety notes ..................286
Removing awheel .......................... 269
Storing ........................................... 295
Tightening torque ........................... 271
Whee lsize/tyre size ...................... 29518
Index
Page 22 of 321
Windows
Cleaning ......................................... 256
see Side windows
Windscreen
Demisting ...................................... 120
Windscreen washe rfluid
see Windscreen washer system
Windscreen washer system .............252
Notes ............................................. 309
Windscreen wipers
Problem (malfunction) ...................111
Replacing the wiper blades ............110
Switching on/off ........................... 109
Winter operation
Important safety notes ..................288
Radiator cover ............................... 250
Slippery road surfaces ...................151
Snow chains .................................. 289
Winter tyres
Limiting the speed (on-board com-
puter) ............................................. 193
M+S tyres ...................................... 288
Wiper blades
Cleaning ......................................... 256
Important safety notes ..................110
Wooden trim (cleaning instruc-
tions) .................................................. 258
Workshop see Qualified specialist workshop Index
19
Page 105 of 321
wise not be visible and you could endanger
yoursel
fand others.
X To switch on the foglamps: turn the key
in the ignition lock to position 2or start the
engine.
X Turn the light switch to T,Lor
Ã.
X Press the Nbutton.
The green Nindicator lamp in the instru-
ment cluster lights up.
X To switch off the front foglamps: press
the N button.
The green Nindicator lamp in the instru-
ment cluster goes out.
i If you switch the engine off (key in posi-
tion 1in the ignition lock) and then restart
it, the previous foglamp settings are
restored.
Rear foglamp X
To switch on the rear foglamp: turn the
key in the ignition lock to position 2or start
the engine.
X Turn the light switch to LorÃ.
X Press the Rbutton.
The yellow Rindicator lamp in the
instrument cluster lights up.
X To switch off the rear foglamp: press the
R button.
The yellow Rindicator lamp in the
instrument cluster goes out.
Vehicles with front foglamps :when the light
switch is in the Tposition, the rear fog-
lamp can only be switched on if the foglamps
(without dipped-beamh eadlamps) are
switched on.
i If you switch the engin eoff (key in posi-
tion 1in the ignition lock) and then restart
it, the previous rear foglamp settings are
restored. Adjusting the headlamp range (halogen
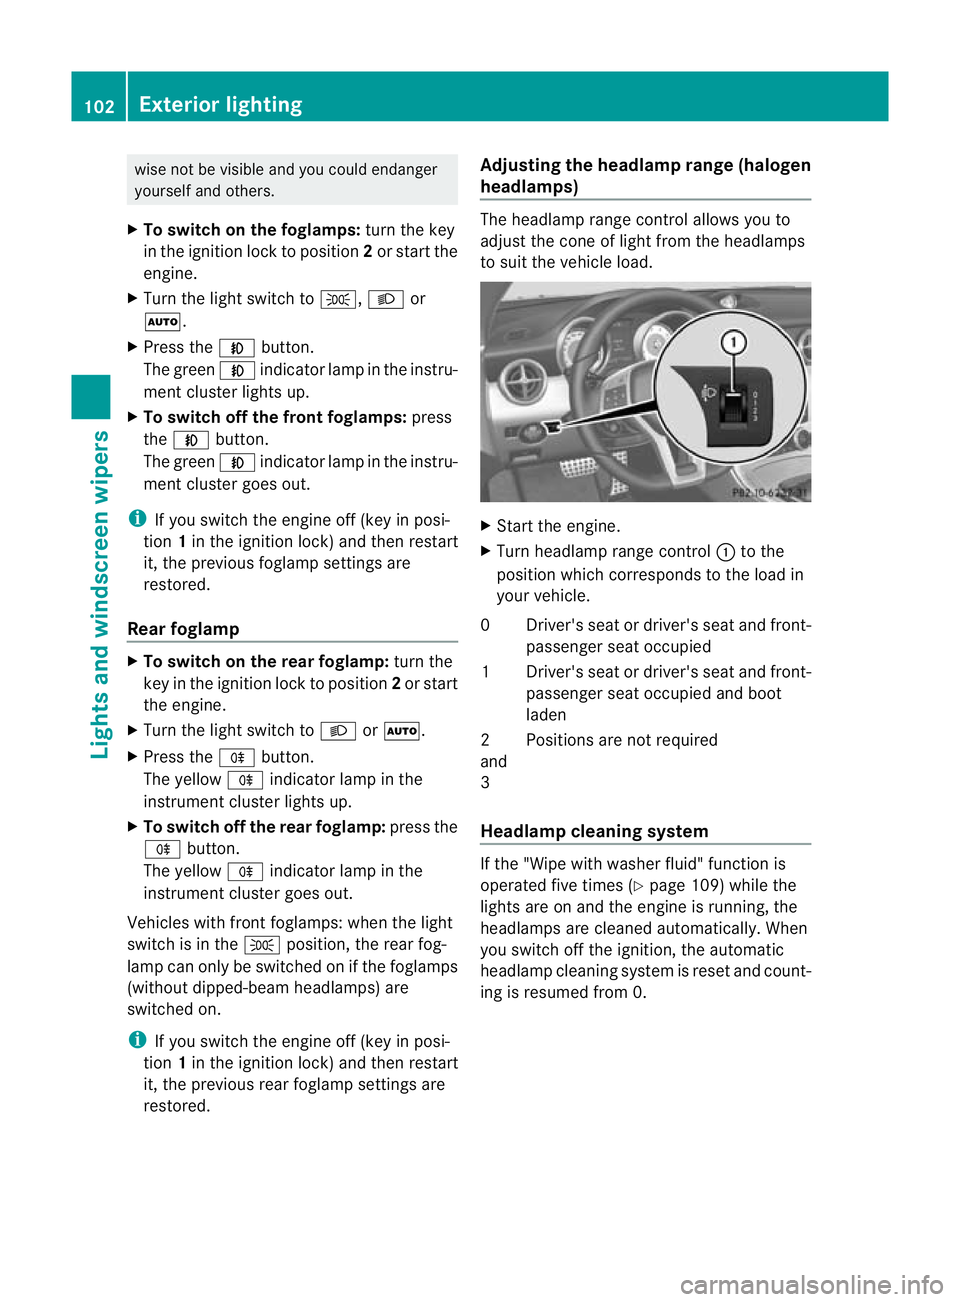
headlamps) The headlamp range control allows you to
adjust the cone of light from the headlamps
to sui
tthe vehicle load. X
Start the engine.
X Turn headlamp range control :to the
position which corresponds to the load in
your vehicle.
0D river's seat or driver's seat and front-
passenger seat occupied
1D river's seat or driver's seat and front-
passenger seat occupied and boot
laden
2
and
3 Positions are not required
Headlamp cleaning system If the "Wipe with washer fluid" function is
operated five times (Y
page 109) while the
lights are on and the engine is running, the
headlamps are cleaned automatically.W hen
you switch off the ignition, the automatic
headlamp cleaning system is reset and count-
ing is resumed from 0. 102
Exterior lightingLights and windscreen wipers
Page 112 of 321
Replacing the rear bulbs
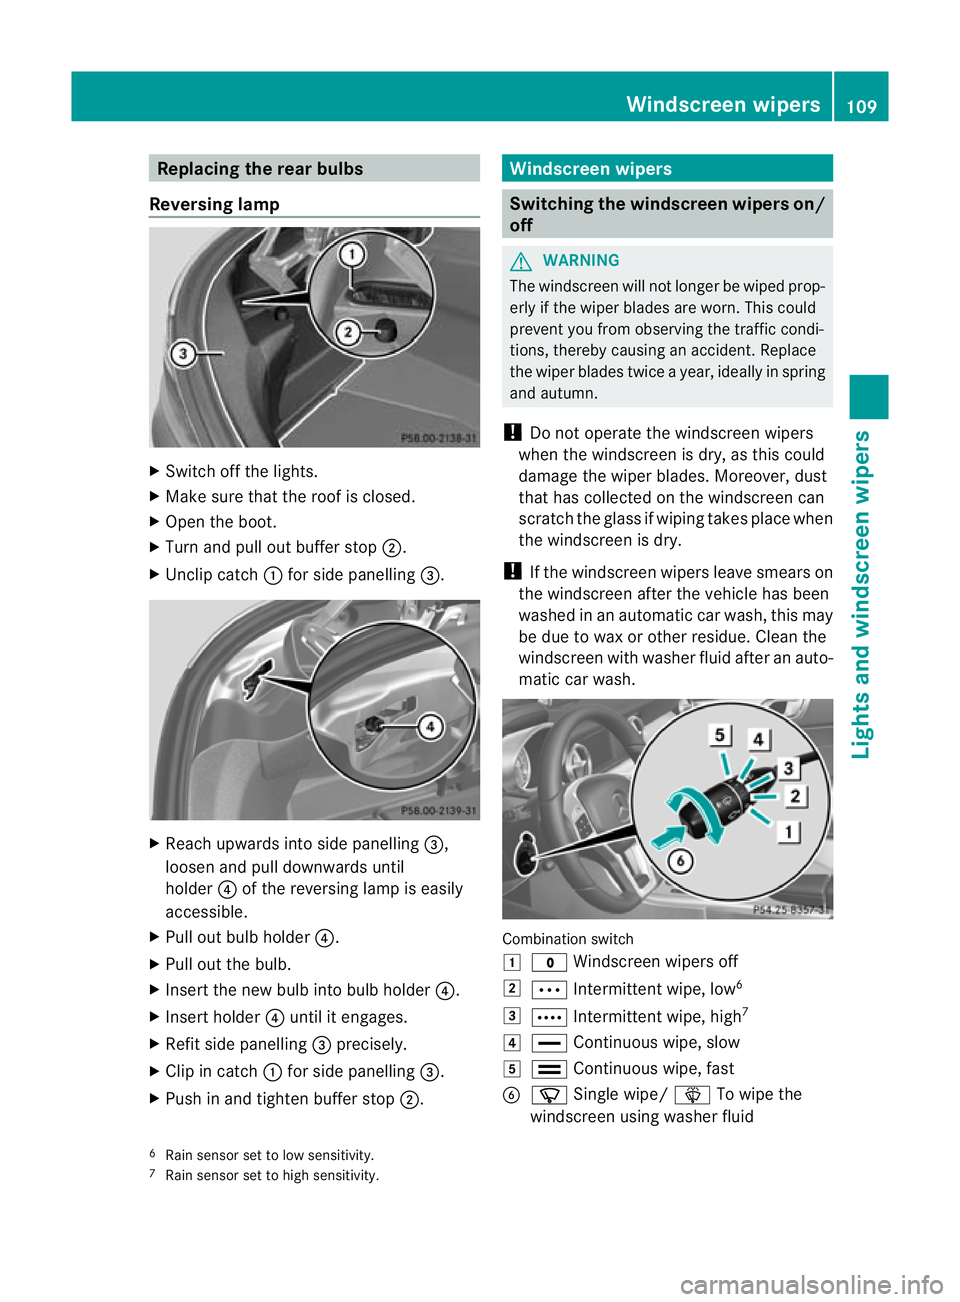
Reversing lamp X
Switch off the lights.
X Make sure that the roo fis closed.
X Open the boot.
X Turn and pull out buffer stop ;.
X Unclip catch :for side panelling =. X
Reach upwards into side panelling =,
loosen and pull downwards until
holder ?of the reversing lamp is easily
accessible.
X Pull out bulb holder ?.
X Pull out the bulb.
X Insert the new bulb into bulb holder ?.
X Insert holder ?until it engages.
X Refit side panelling =precisely.
X Clip in catch :for side panelling =.
X Push in and tighten buffer stop ;. Windscreen wipers
Switching the windscreen wipers on/
off
G
WARNING
The windscreen will not longer be wiped prop-
erly if the wiper blades are worn. This could
prevent you from observing the traffic condi-
tions, thereby causing an accident. Replace
the wiper blades twice a year, ideally in spring
and autumn.
! Do not operate the windscreen wipers
when the windscreen is dry, as this could
damage the wiper blades. Moreover, dust
that has collected on the windscreen can
scratch the glass if wiping takes place when
the windscreen is dry.
! If the windscreen wipers leave smears on
the windscreen after the vehicle has been
washed in an automatic car wash, this may
be due to wax or other residue. Cleant he
windscreen with washer fluid after an auto-
matic car wash. Combination switch
1
$ Windscreen wipers off
2 Ä Intermittent wipe, low 6
3 Å Intermittent wipe, high 7
4 ° Continuous wipe, slow
5 ¯ Continuous wipe, fast
B í Single wipe/ îTo wipe the
windscreen using washer fluid
6 Rain sensor set to low sensitivity.
7 Rain sensor set to high sensitivity. Windscreen wipers
109Lights and windscreen wipers Z
Page 225 of 321
Display messages Possible causes/consequences and
M Solutions
The roo
fhas been opened and closed several times in arow. The
roof drive has been switched off automatically for safety reasons.
You can open and close the roof again after approximately
10 minutes.
X Switch off the ignition and turn it back on.
X Repeat the opening or closing procedure (Y page 79).¥
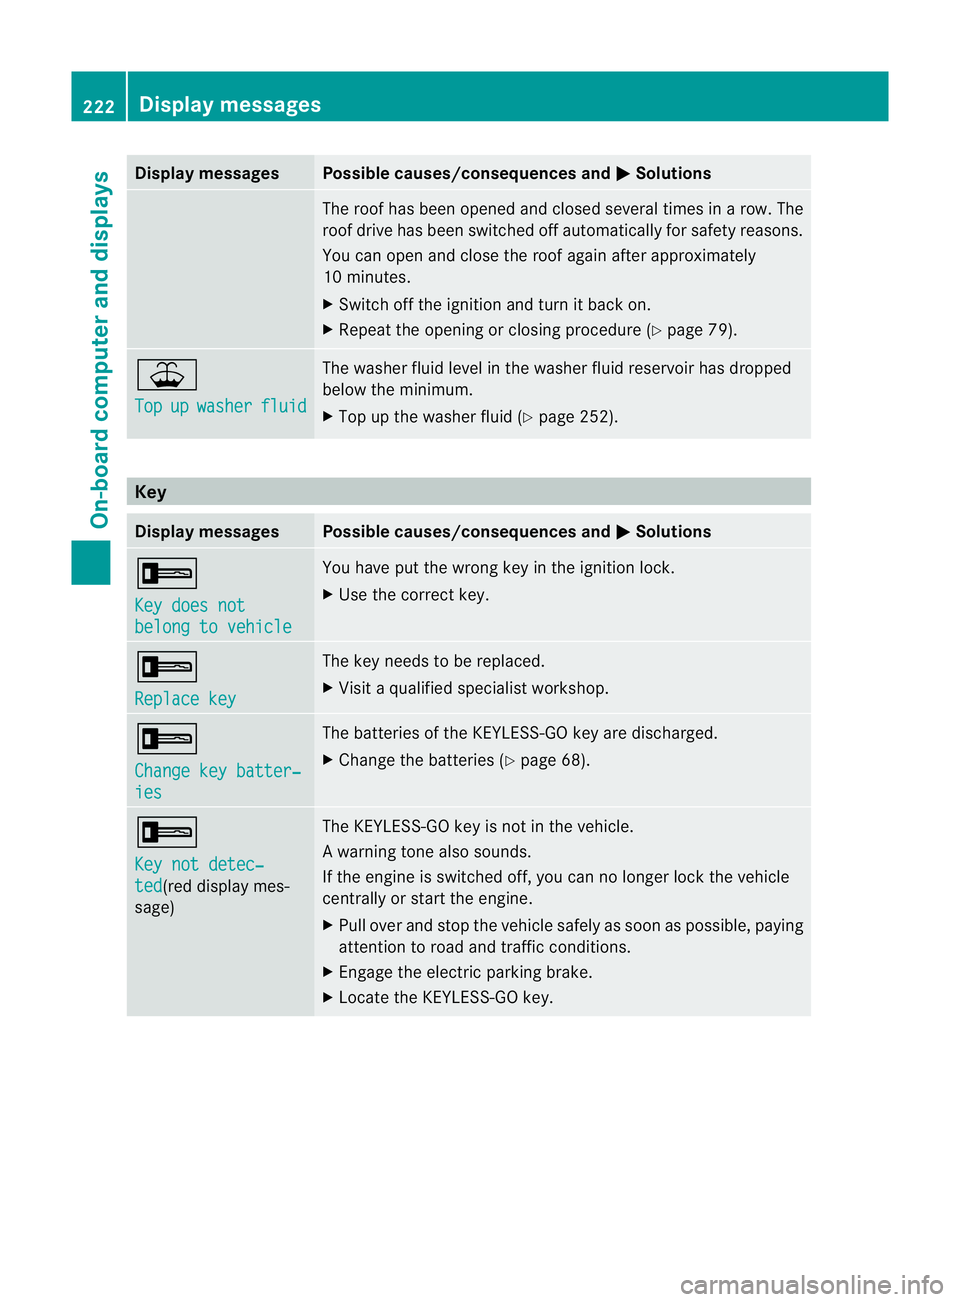
Top
up washer fluid The washer fluid level in the washer fluid reservoir has dropped
below the minimum.
X
Top up the washer fluid (Y page 252).Key
Display messages Possible causes/consequences and
M Solutions
+
Key does not
belong to vehicle You have put the wrong key in the ignition lock.
X
Use the correct key. +
Replace key The key needs to be replaced.
X
Visit a qualified specialist workshop. +
Change key batter‐
ies The batteries of the KEYLESS-GO key are discharged.
X
Change the batteries (Y page 68).+
Key not detec‐
ted (red display mes-
sage) The KEYLESS-GO key is not in the vehicle.
Aw
arning tone also sounds.
If the engine is switched off, you can no longer loc kthe vehicle
centrally or start the engine.
X Pull over and stop the vehicle safely as soon as possible, paying
attention to road and traffic conditions.
X Engage the electric parking brake.
X Locate the KEYLESS-GO key. 222
Display messagesOn-board computer and displays
Page 255 of 321
X
Slowly turn cap ;half a turn anti-clock-
wise to allow excess pressure to escape.
X Turn cap ;further anti-clockwise and
remove it.
If the coolant is at the level of marker bar
= in the fille rneck when cold, there is
enough coolant in coolant expansion
tank :.
If the coolant level is approximately
1.5 cm above marker bar =in the filler
neckw hen warm, there is enough coolant
in coolant expansion tank :.
X If necessary, top up with coolant that has
been tested and approved by Mercedes-
Benz.
X Replace cap ;and turn it clockwise as far
as it will go.
For further information on coolant, see
(Y page 308).
Topping up the windscreen washer sys-
tem/headlampc leaning systemG
WARNING
Windscreen washer fluid/antifreeze is highly
flammable. Avoid spilling windscreen washer
fluid/antifreeze on hot engine components as
it can ignite and burn. Severe burns could be
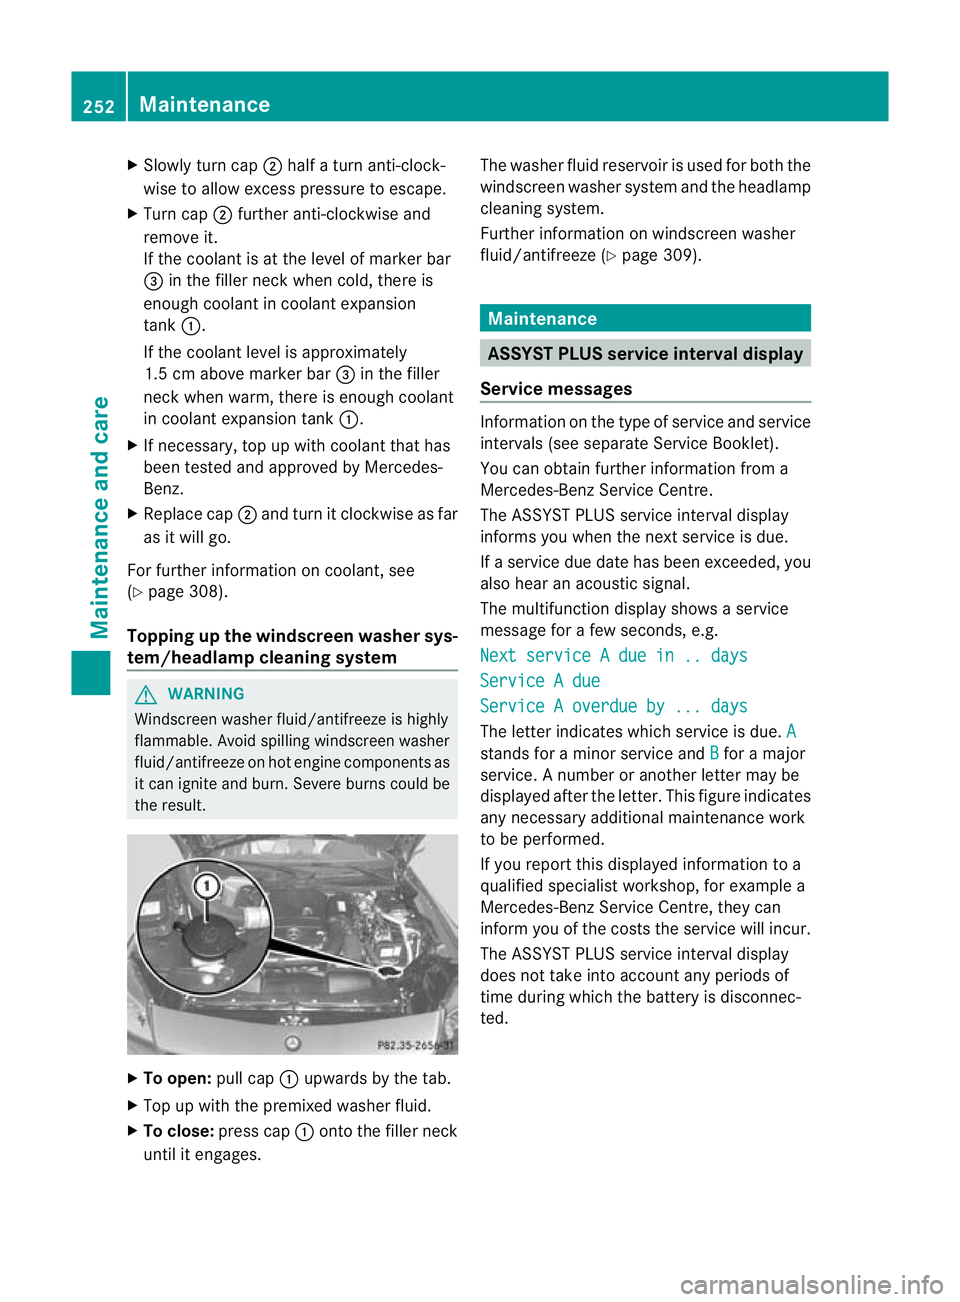
the result. X
To open: pull cap:upwards by the tab.
X Top up with the premixed washer fluid.
X To close: press cap :onto the filler neck
until it engages. The washer fluid reservoir is used for both the
windscreen washer syste mand the headlamp
cleaning system.
Further informatio nonwindscreen washer
fluid/antifreeze (Y page 309). Maintenance
ASSYST PLUS service interval display
Service messages Information on the type of service and service
intervals (see separate Service Booklet).
You can obtain further information from a
Mercedes-Benz Service Centre.
The ASSYST PLUS service interval display
informs you when the nex tservice is due.
If a service due date has been exceeded, you
also hear an acoustic signal.
The multifunction display shows a service
message for a few seconds, e.g.
Next service A due in .. days Service A due
Service A overdue by ... days
The letter indicates which service is due.
A stands for a minor service and
B for a major
service. A number or another letter may be
displayed after the letter. This figure indicates
any necessary additional maintenance work
to be performed.
If you report this displayed information to a
qualified specialist workshop, for example a
Mercedes-Benz Service Centre, they can
infor myou of the costs the service will incur.
The ASSYST PLUS service interval display
does not take into account any periods of
time during which the battery is disconnec-
ted. 252
MaintenanceMaintenance and care
Page 306 of 321
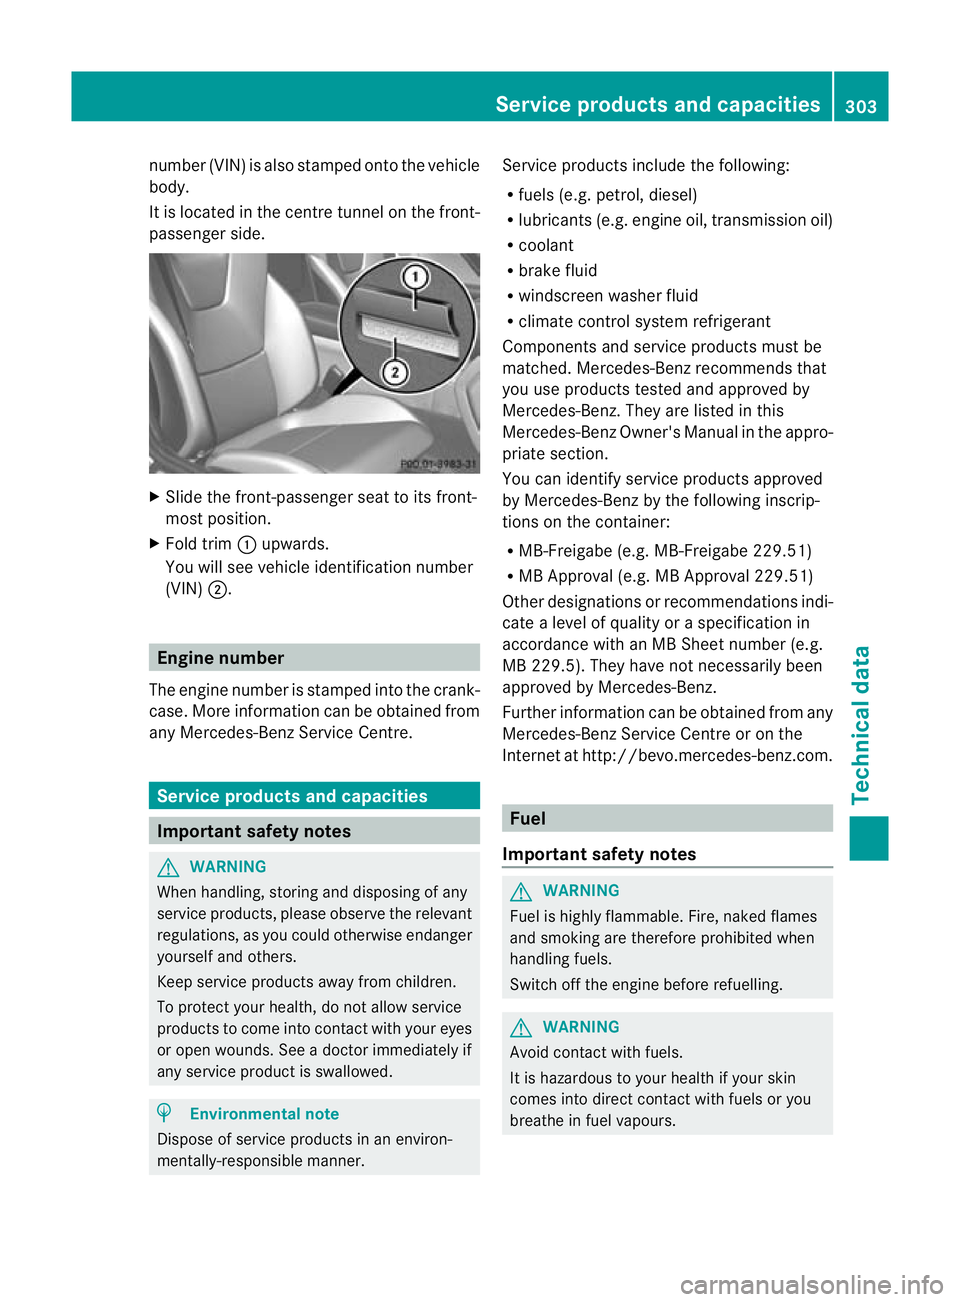
numbe
r(VIN) is also stamped onto the vehicle
body.
It is located in the centre tunnel on the front-
passenger side. X
Slide the front-passenger seat to its front-
most position.
X Fold trim :upwards.
You will see vehicle identification number
(VIN) ;. Engine number
The engine number is stamped into the crank-
case. More information can be obtained from
any Mercedes-Benz Service Centre. Service products and capacities
Important safety notes
G
WARNING
When handling, storing and disposing of any
service products, please observe the relevant
regulations, as you could otherwise endanger
yourself and others.
Keep service products away from children.
To protect yourh ealth, do not allow service
products to come into contact with your eyes
or open wounds. See a doctor immediately if
any service product is swallowed. H
Environmental note
Dispose of service products in an environ-
mentally-responsible manner. Service products include the following:
R
fuels (e.g. petrol, diesel)
R lubricants (e.g. engine oil, transmission oil)
R coolant
R brake fluid
R windscreen washer fluid
R climate control system refrigerant
Components and service products must be
matched. Mercedes-Benz recommends that
you use products tested and approved by
Mercedes-Benz .They are listed in this
Mercedes-Ben zOwner's Manual in the appro-
priate section.
You can identify service products approved
by Mercedes-Ben zby the following inscrip-
tions on the container:
R MB-Freigabe (e.g. MB-Freigabe 229.51)
R MB Approval (e.g. MB Approval 229.51)
Other designations or recommendations indi-
cate a level of quality or a specification in
accordance with an MB Sheet number (e.g.
MB 229.5). The yhave no tnecessarily been
approved by Mercedes-Benz.
Further information can be obtained from any
Mercedes-Benz Service Centre or on the
Internet at http://bevo.mercedes-benz.com. Fuel
Important safety notes G
WARNING
Fuel is highly flammable. Fire, naked flames
and smoking are therefore prohibited when
handling fuels.
Switch off the engine before refuelling. G
WARNING
Avoid contact with fuels.
It is hazardous to your health if your skin
comes into direct contact with fuels or you
breathe in fuel vapours. Service products and capacities
303Technical data Z