2012 MERCEDES-BENZ SLK ROADSTER clutch
[x] Cancel search: clutchPage 130 of 321
not be able to brake, declutch or accelerate
as intended. This could lead to accidents and
injury. G
WARNING
Do not change down for additional engine
braking on a slippery roa dsurface. This could
cause the drive wheels to lose their grip and
the vehicle could skid. This could cause you
to lose control of your vehicle and cause an
accident.
! Warm up the engine quickly. Do no tuse
the engine's full performance until it has
reached operating temperature.
Only set the automatic transmission to the
respective drive positions when the vehicle
is stationary.
Where possible, avoid spinning the drive
wheels when pulling away on slippery
roads. Otherwise, you could damage the
drive train.
! AMG vehicles: at low engine oil temper-
atures (below +20 †), the maximum
engine speed is restricted in order to pro-
tect the engine. To protect the engine and
maintain smooth engine operation, avoid
driving at full throttle when the engine is
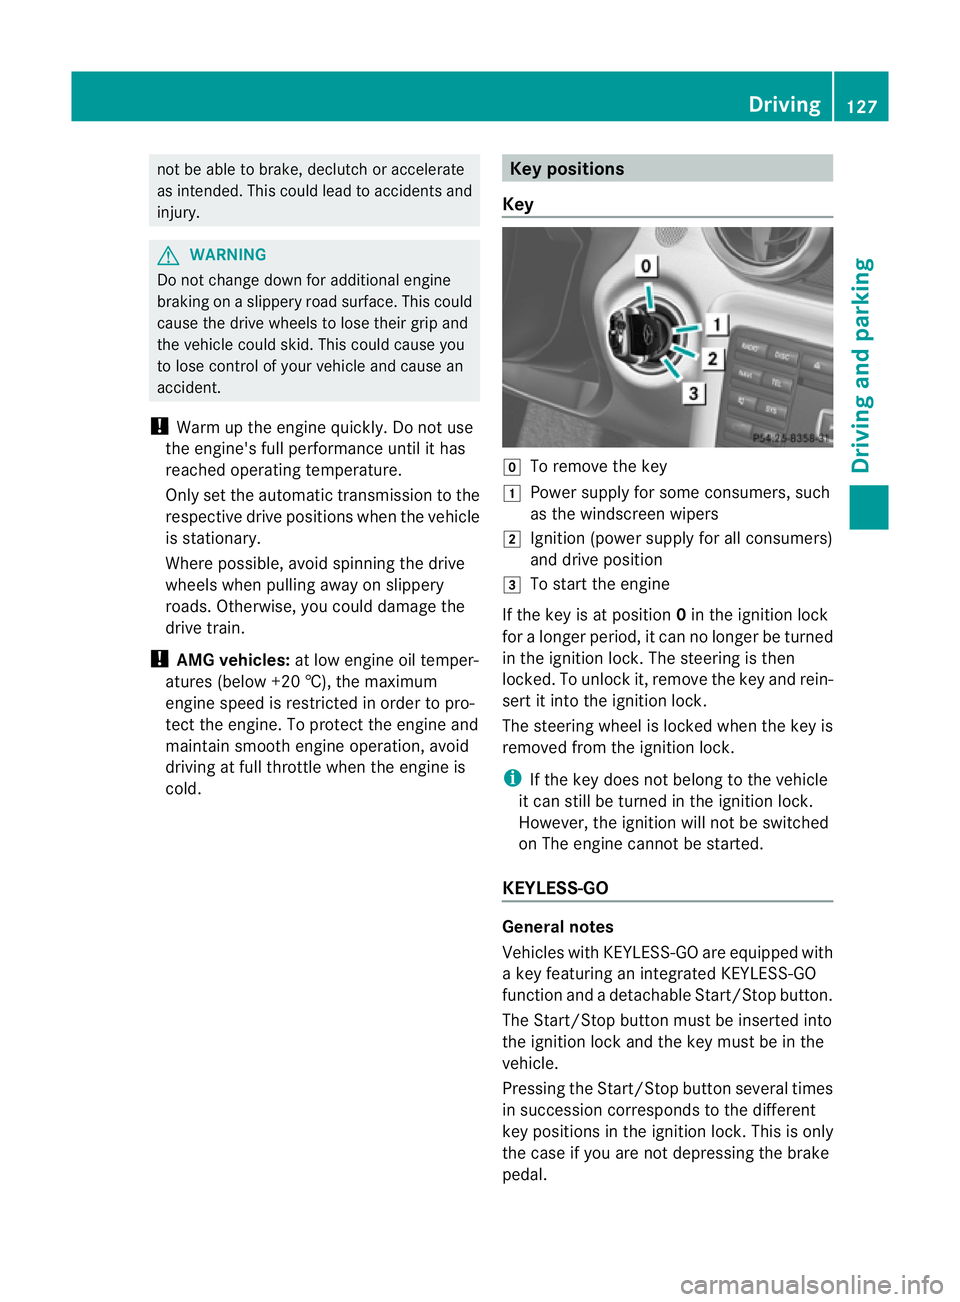
cold. Key positions
Key g
To remove the key
1 Power supply for some consumers, such
as the windscreen wipers
2 Ignition (power supply for all consumers)
and drive position
3 To start the engine
If the key is at position 0in the ignition lock
for a longer period, it can no longer be turned
in the ignition lock. The steering is then
locked. To unlock it, remove the key and rein-
sert it into the ignition lock.
The steering wheel is locked when the key is
removed from the ignition lock.
i If the key does not belong to the vehicle
it can still be turned in the ignition lock.
However, the ignition will not be switched
on The engine cannot be started.
KEYLESS-GO General notes
Vehicles with KEYLESS-GO are equipped with
a key featuring an integrated KEYLESS-GO
function and a detachable Start/Stop button.
The Start/Stop button must be inserted into
the ignition lock and the key must be in the
vehicle.
Pressing the Start/Stop button several times
in succession corresponds to the different
key positions in the ignition lock. This is only
the case if you are not depressing the brake
pedal. Driving
127Driving and parking Z
Page 132 of 321
Manual transmission
X
Depress the brake pedal and keep it
depressed.
X Fully depress the clutch pedal.
X Shift to neutral N.
i You can only start the engine when the
clutch pedal is fully depressed.
Automatic transmission X
Shift the transmission to position P.
The transmission position display in the
multifunction display shows P.
i You can also start the engine when the
transmission is in position N.
Starting procedure with the key i
To start the engine using the key instead
of KEYLESS-GO, pullt he Start/Stop button
out of the ignition lock.
X To start a petrol engine: turn the key to
position 3in the ignition lock
(Y page 127) and release it as soon as the
engine is running.
X To startad iesel engine: turn the key to
position 2in the ignition lock
(Y page 127).
The % preglow indicator lamp in the
instrumen tcluster lights up.
X When the %preglow indicator lamp
goes out, tur nthe key to position 3
(Y page 127) and release it as soon as the
engine is running.
i You can start the engine without preglow
if the engine is warm.
i Vehicles with automatic transmis-
sion: you can also use the touch-start func-
tion. To do this, turn the key to position 3
(Y page 127) and release it immediately.
The engine then starts automatically. Using KEYLESS-GO to startt
he engine G
WARNING
You rvehicle can be started using a valid KEY-
LESS-GO key. For this reason, children should
never be left unsupervised in the vehicle.
Always take the key with you when leaving the
vehicle, even if you are only leaving it for a
short time.
i The Start/Stop button can be used to
start the vehicle manually without inserting
the key into the ignition lock. The key must
be in the vehicle and the Start/Stop button
must be inserted in the ignition lock. This
mode for starting the engine operates inde-
pendently of the ECO start/stop automatic
engine start function.
X Depress the brake pedal and keep it
depressed.
X To star tapetrol engine: press the Start/
Stop button (Y page 127) once.
The engine starts.
X To start adiesel engine: press the Start/
Stop button (Y page 127) once.
Preglow is activated and the engine starts. Pulling away
Manual transmission X
Depress the brake pedal and keep it
depressed.
X Fully depress the clutch pedal.
X Shift to either first gear or reverse gear R.
X Release the electric parking brake
(Y page 147).
X Release the brake pedal.
X Slowly release the clutch pedal and gently
depress the accelerato rpedal.
! Change gear in good time and avoid spin-
ning the wheels. Otherwise, you could dam-
age the vehicle. Driving
129Driving and parking Z
Page 135 of 321
i
AMG vehicles: the engine can be
switched off automatically amaximum of
three times in succession .The automatic
engine switch-off is then available again
after the border of the ECO symbol appears
in the multifunction display.
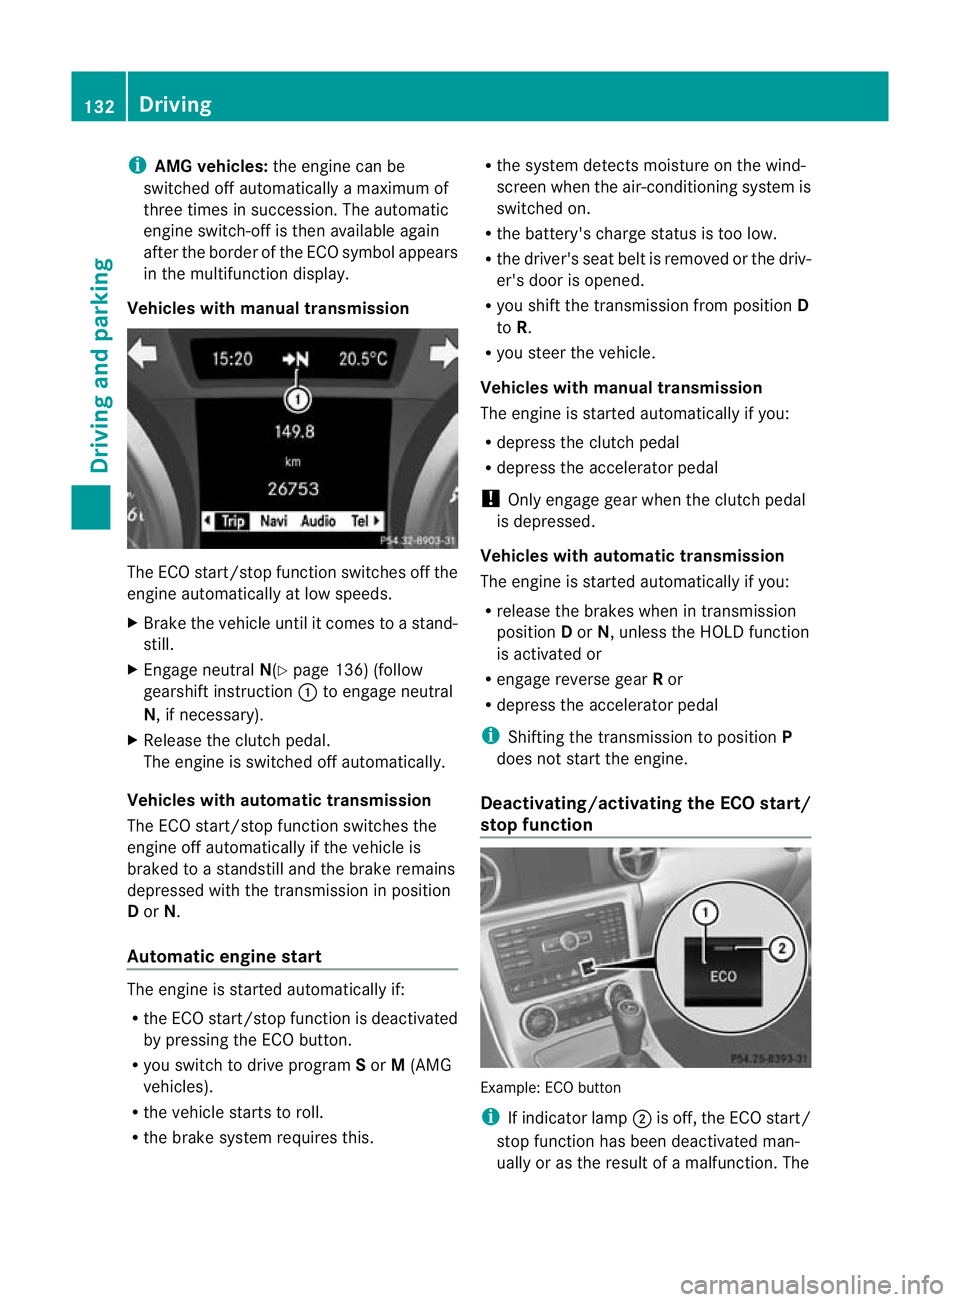
Vehicles with manual transmission The ECO start/stop function switches off the
engine automatically at low speeds.
X Brake the vehicle until it comes to a stand-
still.
X Engage neutral N(Ypage 136) (follow
gearshift instruction :to engage neutral
N, if necessary).
X Release the clutch pedal.
The engine is switched off automatically.
Vehicles with automatic transmission
The ECO start/stop function switches the
engine off automatically if the vehicle is
braked to a standstill and the brake remains
depressed with the transmission in position
D or N.
Automatic engine start The engine is started automatically if:
R
the ECO start/stop function is deactivated
by pressing the ECO button.
R you switch to drive program Sor M(AMG
vehicles).
R the vehicle starts to roll.
R the brake system requires this. R
the system detects moisture on the wind-
screen when the air-conditioning system is
switched on.
R the battery's charge status is too low.
R the driver's seat belt is removed or the driv-
er's door is opened.
R you shift the transmission from position D
to R.
R you steer the vehicle.
Vehicles with manual transmission
The engine is started automatically if you:
R depress the clutch pedal
R depress the accelerator pedal
! Only engage gear when the clutch pedal
is depressed.
Vehicles with automatic transmission
The engine is started automatically if you:
R release the brakes when in transmission
position Dor N, unless the HOLD function
is activated or
R engage reverse gear Ror
R depress the accelerator pedal
i Shifting the transmission to position P
does not start the engine.
Deactivating/activating the ECO start/
stop function Example: ECO button
i
If indicator lamp ;is off, the ECO start/
stop function has been deactivated man-
ually or as the result of a malfunction. The 132
DrivingDriving and parking
Page 138 of 321
Problem Possible causes/consequences and
M Solutions
The coolant tempera-
ture display is showing
more than 120 †. The
coolant warning lamp
may also be lit and a
warning tone may
sound. The coolant level is too low. The coolant is too hot and the engine
is no longer being cooled sufficiently.
X Stop as soon as possible and allow the engine and the coolant
to cool down.
X Check the coolant level (Y page 251). Observe the warning
notes as you do so and top up the coolant if necessary. If the coolant level is correct, the engine radiator fan may be faulty.
The coolant is too hot and the engine is no longer being cooled
sufficiently.
X If the coolant temperature is less than 120 †, you can continue
driving to the nearest qualified specialist workshop.
X Avoid heavy loads on the engine as you do so, e.g. driving on
mountain roads and stop-start traffic. Manual transmission
Important safety notes
G
WARNING
The movement of the pedals must not be
impaired in any way. Do not keep any objects
in the driver's footwell. Make sure that floor-
mats or carpets are correctly secured and
that there is sufficient clearance for the ped-
als.
Do not place several floormats on top of one
another. G
WARNING
Do not change down for additional engine
braking on a slippery road surface. This could
cause the drive wheels to lose their grip and
the vehicle could skid. This could cause you
to lose control of your vehicle and cause an
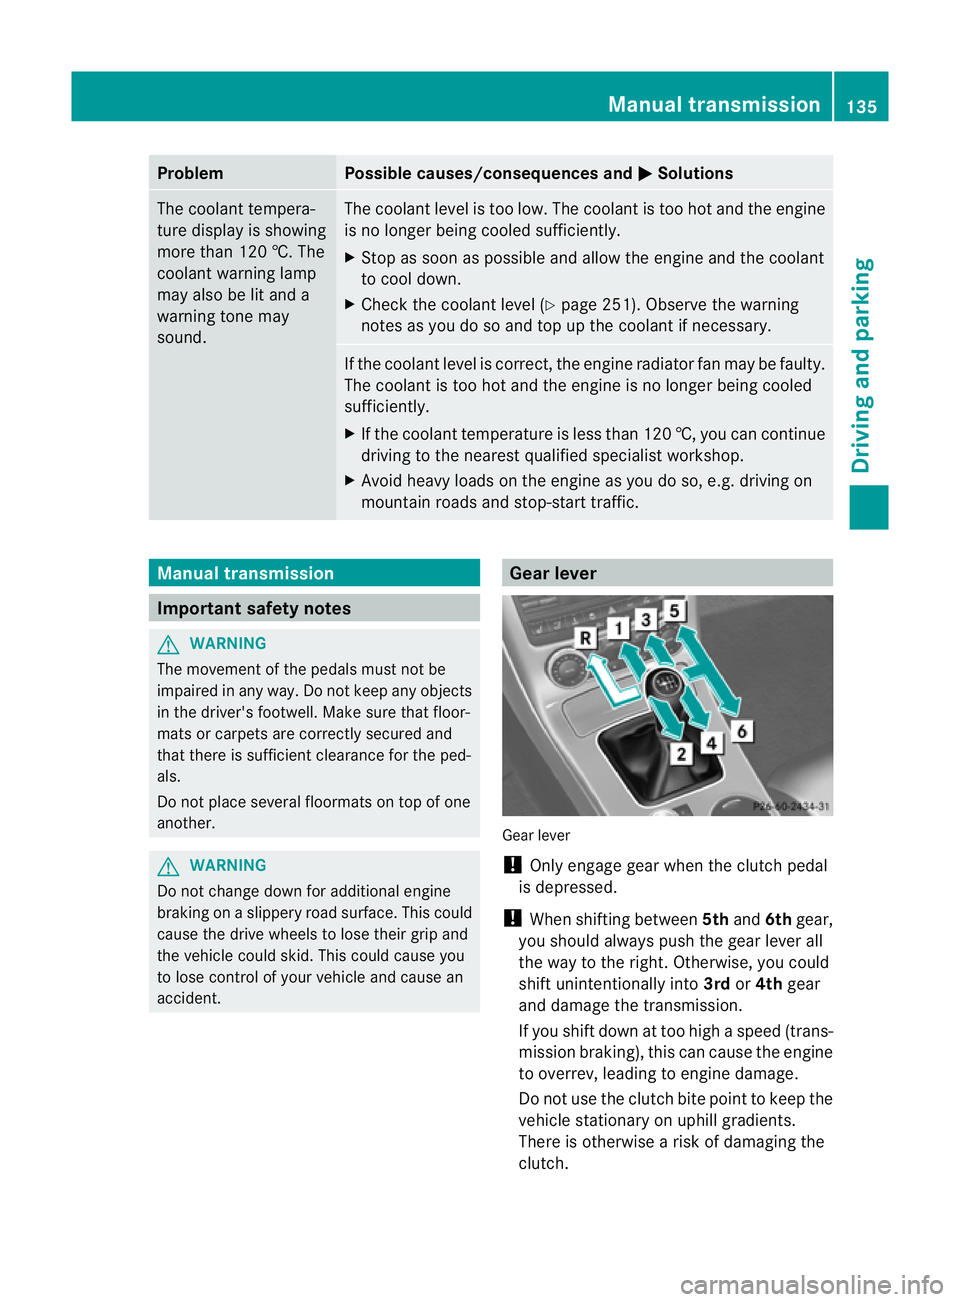
accident. Gear lever
Gear lever
!
Only engage gear when the clutch pedal
is depressed.
! When shifting between 5thand 6thgear,
you should always push the gear lever all
the way to the right. Otherwise, you could
shift unintentionally into 3rdor4th gear
and damage the transmission.
If you shift down at too high a speed (trans-
mission braking), this can cause the engine
to overrev, leading to engine damage.
Do not use the clutch bite point to keep the
vehicle stationary on uphill gradients.
There is otherwise a risk of damaging the
clutch. Manual transmission
135Driving and parking Z
Page 139 of 321
Neutral N with ECO start/stop func-
tion activated
In neutral N, the engine is switched off if the
vehicle speed is below a certai nthreshold and
the clutch pedal is not depressed.
For further information on the ECO start/stop
function, see (Y page 131). Engaging reverse gear
! Only shift into reverse gear Rwhen the
vehicle is stationary. Otherwise, you could
damage the transmission.
i The ECO start/stop function is not avail-
able when reverse gear is engaged.
For further information on the ECO start/
stop function, see (Y page 131).
X Move the gear lever firmly to the left
beyond the point of resistance and then
forwards. Shift recommendation
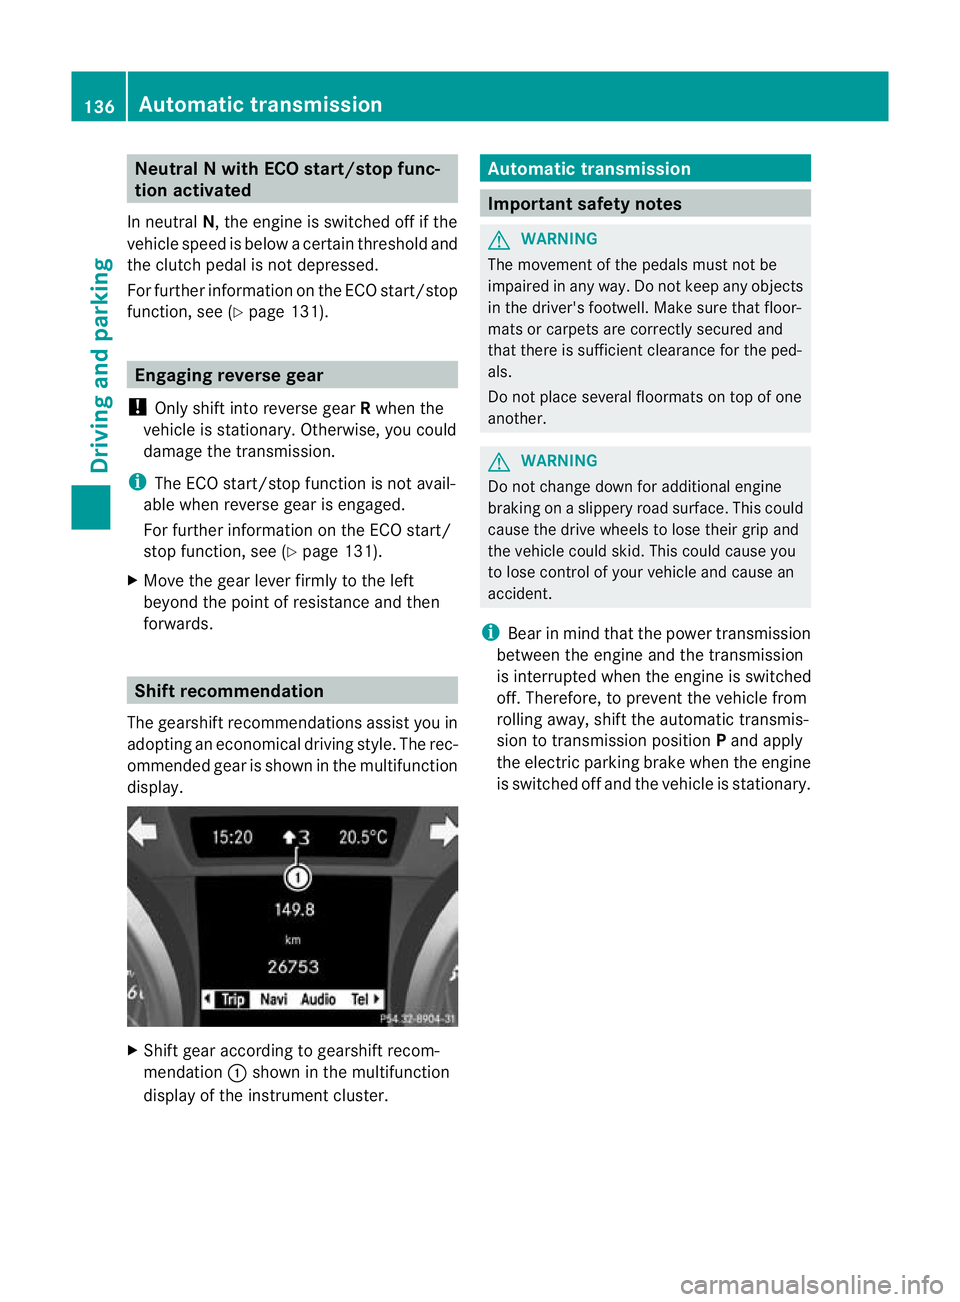
The gearshift recommendations assist you in
adopting an economical driving style. The rec-
ommended gear is shown in the multifunction
display. X
Shift gear according to gearshift recom-
mendation :shown in the multifunction
display of the instrumentc luster. Automatic transmission
Important safety notes
G
WARNING
The movemen tofthe pedals must not be
impaired in any way.D o not keep any objects
in the driver's footwell. Make sure that floor-
mats or carpets are correctly secured and
that there is sufficient clearance for the ped-
als.
Do not place several floormats on top of one
another. G
WARNING
Do not change down for additional engine
braking on a slippery road surface. This could
cause the drive wheels to lose their grip and
the vehicle could skid. This could cause you
to lose control of your vehicle and cause an
accident.
i Bear in mind that the power transmission
between the engine and the transmission
is interrupted when the engine is switched
off. Therefore, to prevent the vehicle from
rolling away, shift the automatic transmis-
sion to transmission position Pand apply
the electric parking brake when the engine
is switched off and the vehicle is stationary. 136
Automatic transmissionDriving and parking
Page 141 of 321
R
the positio nofthe accelerator pedal
R the road speed Driving tips
Accelerator pedal position Your style of driving influences how the auto-
matic transmission shifts gear:
R
little throttle: early upshifts
R more throttle: late upshifts
Double-clutch function When shifting down, the double-clutch func-
tion is active regardless of the currently selec-
ted drive program. The double-clutch function
reduces load change reactions and is condu-
cive to a sporty driving style. The sound gen-
erated by the double-clutchf
unction depends
on the drive program selected.
Kickdown Use kickdown for maximum acceleration.
X
Depress the accelerato rpedal beyond the
pressure point.
The transmission shifts to a lower gear
depending on the engine speed.
X Ease off the accelerator pedal once the
desired speed is reached.
The automatic transmission shifts back up. Program selector button
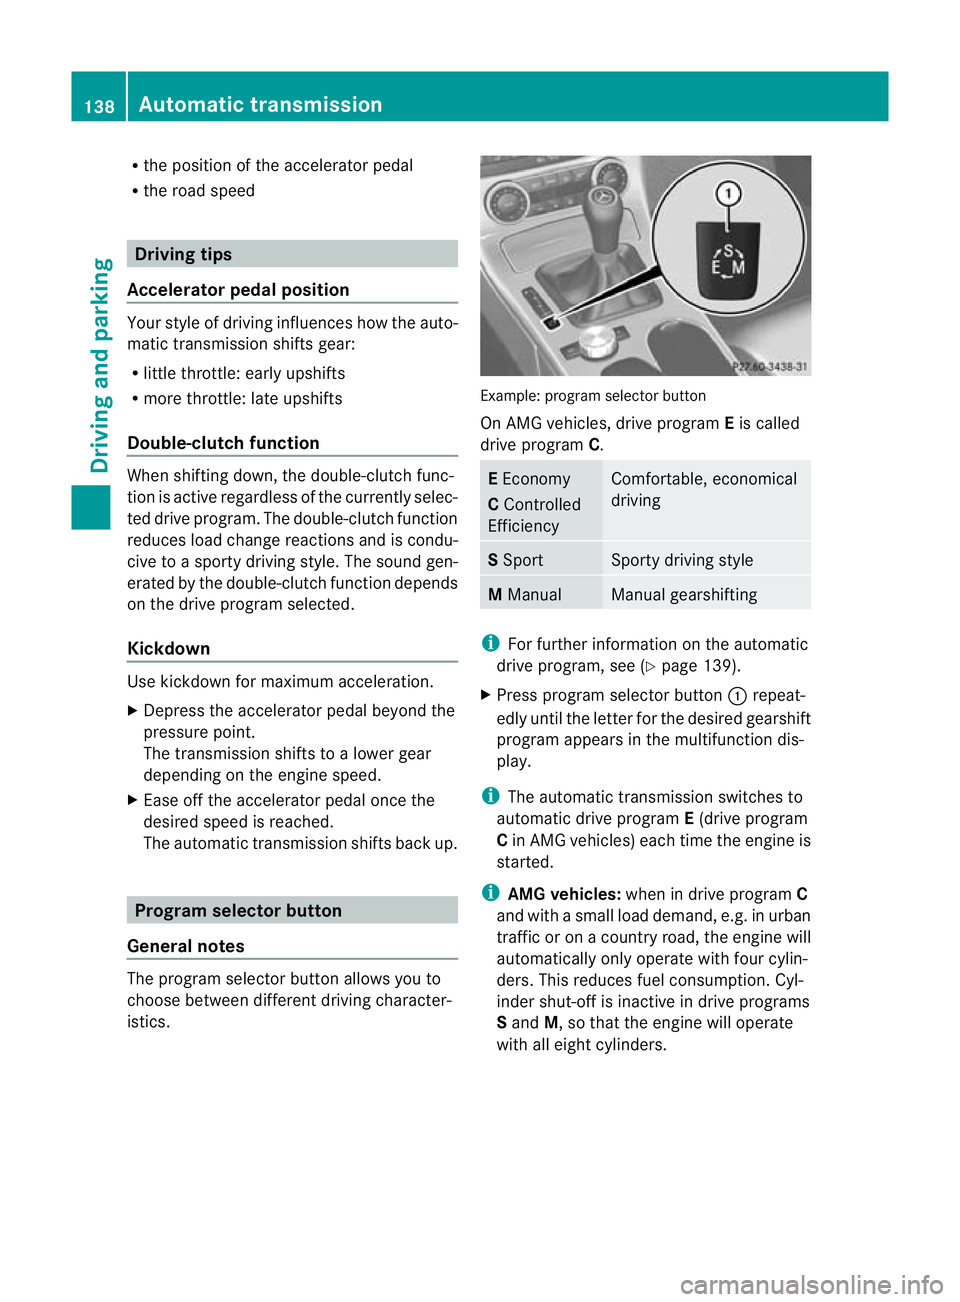
General notes The program selector button allows you to
choose between differen tdriving character-
istics. Example
:program selector button
On AMG vehicles, drive program Eis called
drive program C. E
Economy
C Controlled
Efficiency Comfortable, economical
driving
S
Sport Sporty driving style
M
Manual Manual gearshifting
i
For further information on the automatic
drive program, see (Y page 139).
X Press progra mselecto rbutton :repeat-
edly until the lette rfor the desired gearshift
program appears in the multifunction dis-
play.
i The automatic transmission switches to
automatic drive program E(drive program
C in AMG vehicles) each time the engine is
started.
i AMG vehicles: when in drive program C
and with a small load demand, e.g. in urban
traffic or on a country road, the engine will
automatically only operate with four cylin-
ders. This reduces fuel consumption. Cyl-
inder shut-off is inactive in drive programs
S and M, so that the engine will operate
with all eight cylinders. 138
Automatic transmissionDriving and parking
Page 156 of 321
Setting
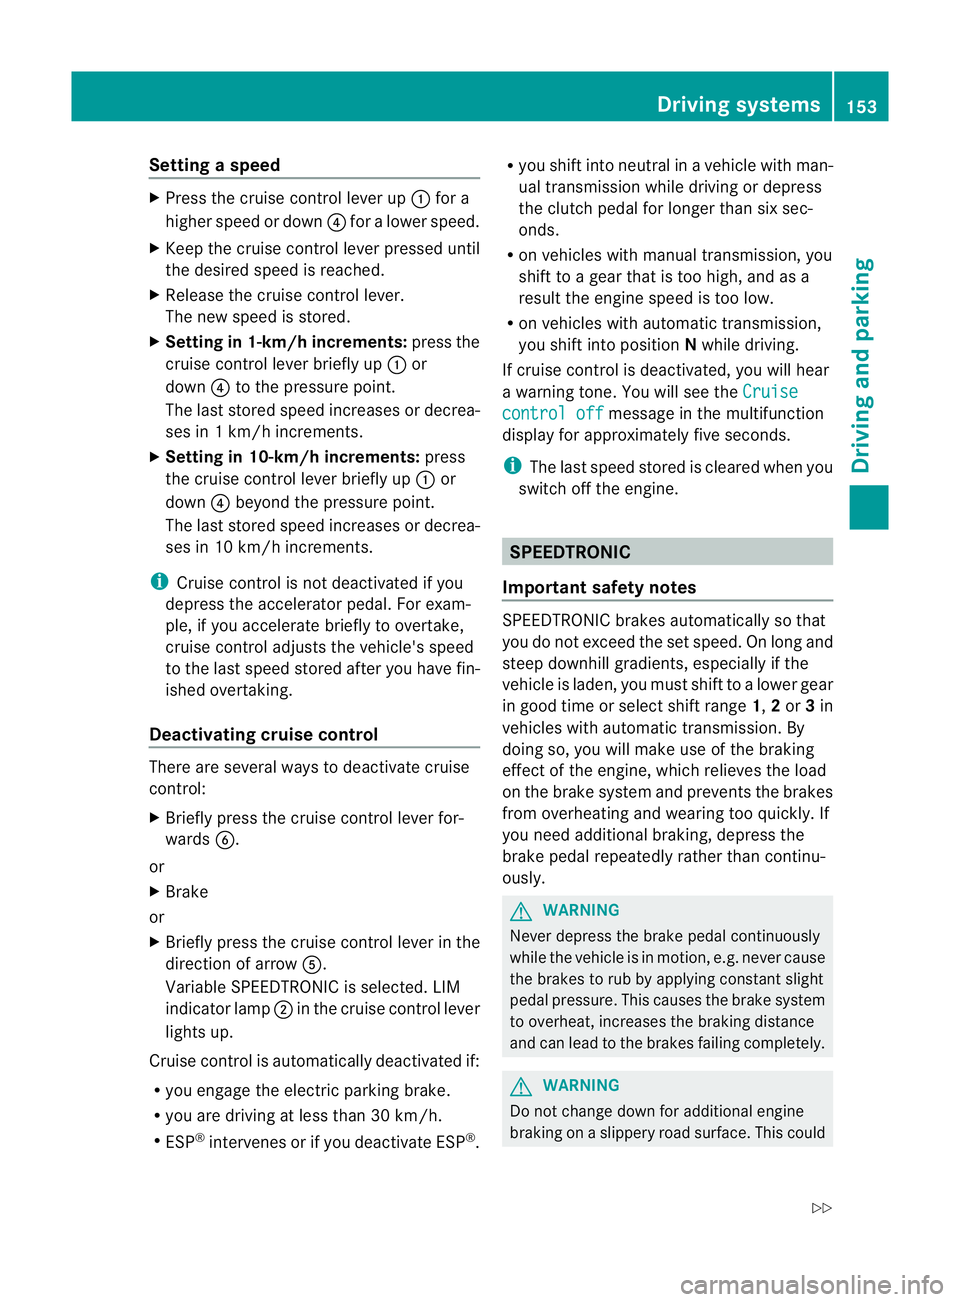
aspeed X
Press the cruise control lever up :for a
highe rspeed or down ?for a lower speed.
X Keep the cruise control lever pressed until
the desired speed is reached.
X Release the cruise control lever.
The new speed is stored.
X Setting in 1-km/h increments: press the
cruise control lever briefly up :or
down ?to the pressure point.
The last stored speed increases or decrea-
ses in 1 km/h increments.
X Setting in 10-km/h increments: press
the cruise control lever briefly up :or
down ?beyond the pressure point.
The last stored speed increases or decrea-
ses in 10 km/h increments.
i Cruise control is not deactivated if you
depress the accelerator pedal. For exam-
ple, if you accelerate briefly to overtake,
cruise control adjusts the vehicle's speed
to the last speed stored after you have fin-
ished overtaking.
Deactivating cruise control There are several ways to deactivate cruise
control:
X Briefly press the cruise control lever for-
wards B.
or
X Brake
or
X Briefly press the cruise control lever in the
direction of arrow A.
Variable SPEEDTRONIC is selected. LIM
indicator lamp ;in the cruise contro llever
lights up.
Cruise control is automatically deactivated if:
R you engage the electric parking brake.
R you are driving at less than 30 km/h.
R ESP ®
intervenes or if you deactivate ESP ®
. R
you shift into neutral in a vehicle with man-
ual transmission while driving or depress
the clutch pedal for longer than six sec-
onds.
R on vehicles with manual transmission, you
shift to a gear that is too high, and as a
result the engine speed is too low.
R on vehicles with automatic transmission,
you shift into position Nwhile driving.
If cruise control is deactivated, you will hear
a warning tone. You will see the Cruise control off message in the multifunction
display for approximately five seconds.
i The last speed stored is cleared when you
switch off the engine. SPEEDTRONIC
Important safety notes SPEEDTRONIC brakes automatically so that
you do not exceed the set speed. On long and
steep downhill gradients, especially if the
vehicle is laden, you must shift to a lower gear
in good time or select shift range
1,2or 3in
vehicles with automatic transmission .By
doing so, you will make use of the braking
effec tofthe engine, which relieves the load
on the brake system and prevents the brakes
from overheating and wearing too quickly. If
you need additional braking, depress the
brake pedal repeatedly rather than continu-
ously. G
WARNING
Never depress the brake pedal continuously
while the vehicle is in motion, e.g. never cause
the brakes to rub by applying constant slight
pedal pressure. This causes the brake system
to overheat, increases the braking distance
and can lead to the brakes failing completely. G
WARNING
Do not change down for additional engine
braking on a slippery road surface. This could Driving systems
153Driving and parking
Z
Page 283 of 321
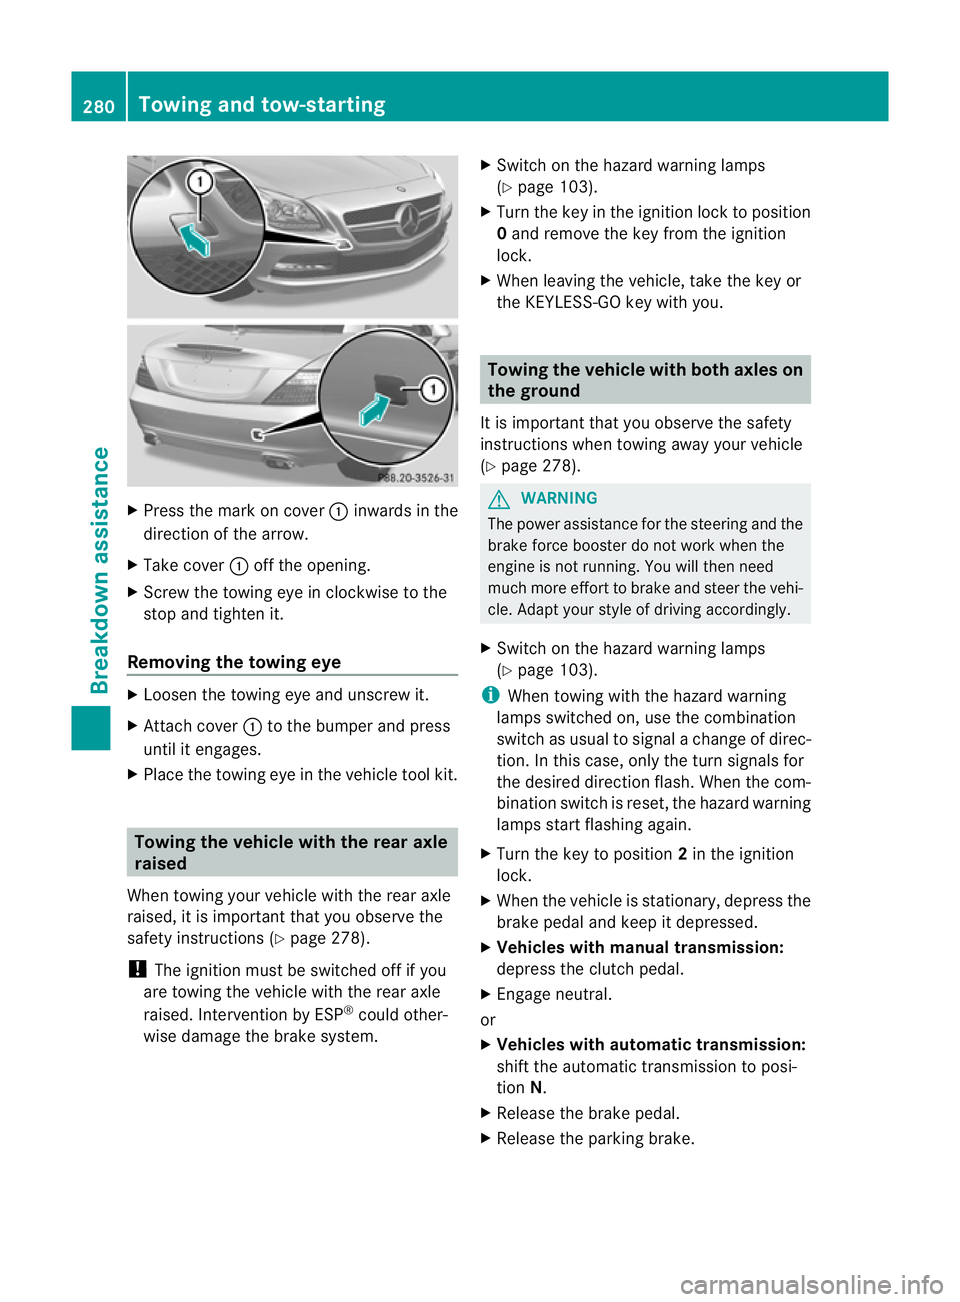
X
Press the mark on cover :inwards in the
direction of the arrow.
X Take cover :off the opening.
X Screw the towing eye in clockwise to the
stop and tighten it.
Removing the towing eye X
Loosen the towing eye and unscrew it.
X Attach cover :to the bumper and press
until it engages.
X Place the towing eye in the vehicle tool kit. Towing the vehicle with the rear axle
raised
When towing your vehicle with the rear axle
raised, it is importan tthat you observe the
safety instructions (Y page 278).
! The ignition must be switched off if you
are towing the vehicle with the rear axle
raised. Intervention by ESP ®
could other-
wise damage the brake system. X
Switch on the hazard warning lamps
(Y page 103).
X Turn the key in the ignition lock to position
0and remove the key from the ignition
lock.
X When leaving the vehicle, take the key or
the KEYLESS-GO key with you. Towing the vehicle with both axles on
the ground
It is important that you observe the safety
instructions when towing away your vehicle
(Y page 278). G
WARNING
The power assistance for the steering and the
brake force booster do not work when the
engine is not running. You will then need
much more effort to brake and steer the vehi-
cle. Adapt your style of driving accordingly.
X Switch on the hazard warning lamps
(Y page 103).
i When towing with the hazard warning
lamps switched on, use the combination
switch as usual to signal achange of direc-
tion. In this case, only the turn signals for
the desired direction flash. When the com-
bination switch is reset, the hazard warning
lamps start flashing again.
X Turn the key to position 2in the ignition
lock.
X When the vehicle is stationary, depress the
brake pedal and keep it depressed.
X Vehicles with manual transmission:
depress the clutch pedal.
X Engage neutral.
or
X Vehicles with automatic transmission:
shift the automatic transmission to posi-
tion N.
X Release the brake pedal.
X Release the parking brake. 280
Towing and tow-startingBreakdown assistance