2012 MERCEDES-BENZ SLK ROADSTER air condition
[x] Cancel search: air conditionPage 7 of 321
1, 2, 3 ...
12 Vsocket
see Socket A
ABS (Anti-lock Braking System) Display message ............................ 200
Function/notes ................................ 54
Important safety notes ....................54
Warning lamp ................................. 226
Activating/deactivating air-recir-
culation mode .................................... 121
Activating/deactivating cooling
with air dehumidification .................117
Active light function .........................104
Active Service Syste mPLUS
see ASSYS TPLUS service interval
display
ADAPTIVE BRAKE .................................59
Adaptive brake lamps .........................56
Additional speedometer ...................191
Additives (engine oil) ........................308
Adjusting the headlamp range .........102
Airbag Headbag .......................................... 43
Airbags
Front airbag (driver, front
passenger )....................................... 41
Important safety guidelines .............40
Sidebag ............................................ 42
Triggering ......................................... 39
Air-conditioning system
see Climate control
AIRGUIDE ............................................. 84
Air pressure see Tyre pressure
AIRSCARF
Problem (malfunction) .....................92
Setting the vents ........................... 123
Switching on/off .............................. 91
Airv ents
Important safet ynotes .................. 122
Setting ........................................... 122
Setting the AIRSCARF vents ..........123
Setting the centre air vents ...........123 Setting the side air vents
...............123
Switching AIRSCARF on/off ............91
Alarm system
see ATA (Anti-Theft Alarm system)
Alertness Assistant
see ATTENTION ASSIST
Ambient lighting (on-board com-
puter) ................................................. .192
AMG menu (on-board computer) .....195
Anti-glare film .................................... 246
Anti-loc kBraking System
see ABS (Anti-lock Braking System)
Anti-Theft Alarm system
see ATA (Anti-Theft Alarm system)
Aquaplaning ....................................... 150
Ashtray ............................................... 240
Assistance menu (on-board com-
puter) ................................................. .189
ASSYST PLUS see ASSYST PLUS service interval
display
ASSYST PLUS service interval dis-
play
Displaying service messages .........253
Hiding service messages ...............253
Notes ............................................. 253
Service messages ..........................252
ATA (Anti-Theft Alarm system)
Activating/deactivating ...................61
Function .......................................... .61
Interior motion sensor .....................62
Switching off the alarm ....................61
Tow-away protection ........................ 62
ATTENTIO NASSIST
Activating/deactivating .................190
Display message ............................ 213
Function/notes ............................. 173
Audio menu (on-board computer) ....186
Authorised workshop see Qualified specialist workshop
AUTO lights
Display message ............................ 211
see Lights
Automatic engine start (ECO start/
stop function) .................................... 132
Automatic engine switch-off (ECO
start/stop function) ..........................1314
Index
Page 9 of 321
C
Calling up a fault see Display messages
Capacities
see Technical data
Car
see Vehicle
Care
Automatic car wash .......................254
Carpets .......................................... 258
Display ........................................... 257
Exterior lighting ............................. 256
Gea rors electo rlever .................... 258
High-pressure cleaner .................... 254
Interior ........................................... 257
Matt paintwork .............................. 255
Notes ............................................. 253
Paint .............................................. 255
Plastic trim .................................... 257
Roof lining ...................................... 258
Seat bel t........................................ 258
Seat cover ..................................... 258
Sensors ......................................... 257
Steering wheel ............................... 258
Tai lpipes ....................................... 257
Trim pieces .................................... 258
Washing by hand ........................... 254
Wheels ........................................... 255
Windows ........................................ 256
Wiper blades .................................. 256
Wooden trim .................................. 258
Car key
see Key
Car wash (care) ................................. 254
CD player/CD changer(on-board
computer) .......................................... 186
Cell phone see Mobile phone
Central locking
Automatic locking (on-board com-
puter) ............................................. 193
Locking/unlocking (key ).................. 66
Centre console
Lowe rsection .................................. 33
Uppe rsection .................................. 32Changing bulbs
Dipped-bea mheadlamps ............... 108
Important safety notes ..................106
Main-beam headlamps ................... 108
Overview of bul btypes .................. 107
Parking lamps (front) .....................108
Removing/replacing the cover
(front wheel arch) .......................... 107
Reversing lamps ............................ 109
Standing lamps .............................. 108
Turn signals (front) ......................... 108
Children
In the vehicle ................................... 47
Restraint systems ............................ 47
Child seat
Automatic recognition .....................49
On the front-passenger sea t............ 48
Problem (malfunction) .....................51
Recommendations ...........................52
Suitable positions ............................ 51
Cigarette lighter ................................ 240
Cleaning Mirro rturn signal ........................... 256
Climate control
Air conditioning ............................. 115
Controlling automatically ...............118
Convenience opening/closing
(air-recirculatio nmode) ................. 121
Cooling with aird ehumidification..117
Demisting the windows .................. 120
Demisting the windscreen .............120
Important safety notes ..................114
Indicator lamp ................................ 118
Notes on using the air-condition-
ing system ..................................... 115
Notes on using THERMOTRONIC
automatic climate control ..............116
Overview of systems ......................114
Problems with cooling with air
dehumidification ............................ 118
Problem with the rear window
heating .......................................... 121
Setting the aird istribution.............119
Setting the airflow .........................119
Setting the airv ents...................... 122
Setting the temperature ................118
Switching air-recirculation mode
on/off ............................................ 1216
Index
Page 44 of 321
AIRBAG OFF indicator lamp must be con-
tinuously lit.
If you secure a forward-facing child
restraint system to the front-passenger
seat, you must move the front-passenger
sea tas far back as possible.
R make sure there are no heavy or sharp-
edged objects in the pockets of clothing.
R do not lean forwards, e.g. over the cover of
the driver's/front-passenger front airbag,
particularly when the vehicle is in motion.
R do not put your feet on the dashboard.
R only hold the steering wheel on the outside.
This allows the airbag to be fully deployed.
You could be injured if the airbag is
deployed and you are holding the inside of
the steering wheel.
R do not lean on the doors from inside the
vehicle.
R make sure that there are no people, ani-
mals or objects between the vehicle occu-
pants and the area where the airbags are
deployed.
R do not place any objects between the seat
backrest and the door.
R do not hang any hard objects, for example,
coat hangers, on the grab handles or coat
hooks.
R do not attach accessories, e.g. cup holders,
to the doors.
It is not possible to rule out a risk of injury
being caused by an airbag, due to the high
speed at which the airbag must be deployed. G
WARNING
Airbag functionality can only be assured if the
following parts are not covered and no badges
or stickers are attached to them:
R padded steering wheel boss
R front-passenger airbag cover
R door trim
R outer side of seat bolsters G
WARNING
When an airbag deploys, a small amount of
powder is released.T he powder may cause
short-term breathing difficulties to persons
suffering from asthma or other pulmonary
conditions.
In order to prevent potential breathing diffi-
culties, you should leave the vehicle as soon
as it is safe to do so. You can also open the
window to allow fresh air to enter the vehicle
interior. The powder does not constitute a
health hazard and does not indicate that there
is a fire in the vehicle. G
WARNING
The airbag parts are hot after the airbag has
been deployed. Do not touch them as you
could burn yourself.
Have the airbags replaced at a qualified spe-
cialist workshop. Otherwise, occupants are
not protected by the airbags in the event of
another accident.
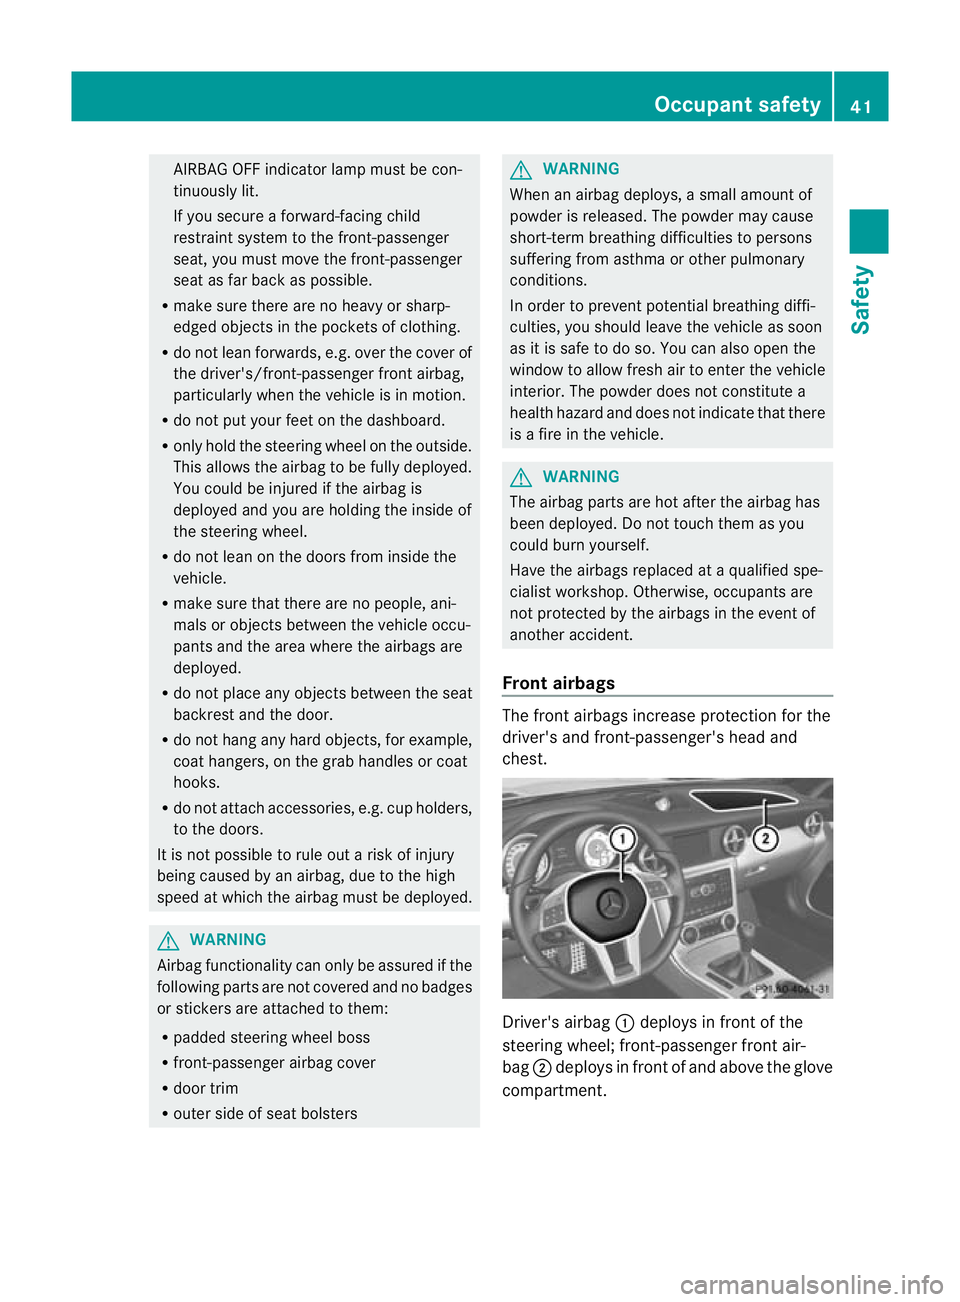
Front airbags The front airbags increase protection for the
driver's and front-passenger's head and
chest.
Driver's airbag
:deploys in front of the
steering wheel; front-passenger front air-
bag ;deploys in front of and above the glove
compartment. Occupant safety
41Safety Z
Page 58 of 321
i
Observe the "Important safety notes" sec-
tion (Y page 53).
BAS PLUS assists you in braking during haz-
ardous situations at speeds above 30 km/h
and uses the radar sensor system to evaluate
the traffic situation.
With the help of the radar sensor system, BAS
PLUS can detect obstacles that are in the
path of your vehicle for an extended period of
time.
At speeds up to approximately 70 km/h, BAS
PLUS may also detect stationary obstacles,
for example, stopped or parked vehicles.
Should you approach an obstacle and BAS
PLUS has detected a risk of collision, BAS
PLUS calculates the braking force necessary
to avoid a rear-end collision. Should you
depress the brake sharply, BAS PLUS can
automatically increase the braking force to a
level suitable for the traffic conditions.
If BAS PLUS demands particularly high brak-
ing force, preventative passenger protection
measures (PRE-SAFE ®
) are activated simul-
taneously.
X Keep the brake pedal depressed until the
emergency braking situation is over.
ABS prevents the wheels from locking.
The brakes will work normally againi f:
R you release the brake pedal.
R there is no longe rany dange rofarear-end
collision.
R no obstacle is detected in front of your
vehicle.
BAS PLUS is then deactivated.
Vehicles with COMAND and anavigation sys-
tem: the radar sensor system is switched off
automatically in the vicinity of radio telescope
facilities ( Ypage 312).
Vehicles without COMAND and a navigation
system and vehicles for Australia: the radar
sensor system and on-board computer must
be switched off in the vicinity of radio tele-
scope facilities ( Ypage 194). For BA
SPLUS to assist you when driving, the
radars ensor system must be switched on and
operational; see "Rada rsensor system" in the
index. G
WARNING
BAS PLUS cannot always clearly identify
objects and complex traffic situations. BAS
PLUS cannot intervene in these cases.
There is a risk of an accident. Always pay
careful attention to the traffic situation and be
ready to brake.
In particular, the detection of obstacles can
be impaired if there is:
R dirt on the sensors or anything else cover-
ing the sensors
R snow or heavy rain
R interference by other radar sources
R the possibility of strong radar reflections,
for example, in multi-storey car parks
R a narrow vehicle travelling in front, e.g. a
motorbike
R a vehicle travelling in front on a different
line G
WARNING
BAS PLUS does not react:
R to people or animals
R to oncoming vehicles
R to crossing traffic
R when cornering
As a result, BAS PLUS may not intervene in
critical situations. There is a risk of an acci-
dent .Always pay careful attention to the traf-
fic situation and be ready to brake.
Following damage to the front end of the vehi-
cle, have the configuration and operation of
the radar sensors checked at a qualified spe-
cialist workshop. This also applies to colli-
sions at slow speeds where there is no visible
damage to the front of the vehicle.
If BA SPLUS is not available due to a malfunc-
tion in the radars ensor system, the brake Driving safet
ysystems
55Safety Z
Page 63 of 321
several seconds. The
·distance warn-
ing lamp then lights up in the instrument
cluster.
R you are rapidly approaching the vehicle in
front. An intermittent warning tone will
then sound and the ·distance warning
lamp will light up in the instrument cluster.
X Brake immediately in order to increase the
distance from the vehicle in front.
or
X Take evasive action provided it is safe to do
so.
If the driver and passengers have fastened
their seat belts, PRE-SAFE ®
Brake can also
can also perform the following at speeds of
above approximately 30 km/h:
R brake the vehicle automatically from a
speed of up to approximately 200 km/h
R trigger preventative passenger protection
measures (PRE-SAFE ®
) (Y page 43)
Due to the nature of the system, particularly
complicated driving conditions may cause
unnecessary warnings or the unnecessary
intervention of PRE-SAFE ®
Brake. To end this,
you can either depress the accelerator pedal
further, activate kickdown or release the
brake pedal.
The braking action of PRE-SAFE ®
Brake is
ended automatically if:
R you drive slower than approximately
15 km/h.
R you manoeuvre to avoid the obstacle.
R there is no longer any danger of a rear-end
collision.
R there is no longer an obstacle detected in
front of your vehicle.
With the help of the radar sensor system,
PRE-SAFE ®
Brake can detect obstacles that
are in front of your vehicle for an extended
period of time.
At speeds up to approximately 70 km/h, PRE-
SAFE ®
Brake can also detect stationary
obstacles, for example, stopped or parked
vehicles. If you approach an obstacle and PRE-SAFE
®
Brake detects a risk of a collision, the system
will initially alert you both visually and acous-
tically. If you do not brake or take evasive
action, the system will warn you by automat-
ically braking the vehicle gently. If there is an
increased risk of collision, preventative
passenger protection measures (PRE-SAFE ®
)
are activated (Y page 43). If the risk of colli-
sion remains and you do not brake, take eva-
sive action or accelerate significantly, the
vehicle may perform automatic emergency
braking. Automatic emergency braking is not
performed until immediately prior to an acci-
dent that can no longer be avoided. G
WARNING
Even if PRE-SAFE ®
Brake slows the vehicle
before an imminent rear-end collision, the
system cannot avert a collision without the
intervention of the driver. There is a risk of an
accident. Brake according to the situation or
take evasive action. Delayed intervention by
the driver can lead to an accident. G
WARNING
PRE-SAFE ®
Brake cannot always clearly iden-
tify objects and complex traffic conditions.
In these cases, PRE-SAFE ®
Brake may:
R give an unnecessary warning and then
brake the vehicle
R not give a warning or intervene
There is a risk of an accident. Always pay par-
ticular attention to the traffic situation and be
ready to brake, especially if PRE-SAFE ®
Brake
warns you. Terminate the intervention in a
non-critical driving situation.
In particular, the detection of obstacles can
be impaired if there is:
R dirt on the sensors or anything else cover-
ing the sensors
R snow or heavy rain
R interference by other radar sources
R the possibility of strong radar reflections,
for example, in multi-storey car parks 60
Driving safety systemsSafety
Page 85 of 321
Problems with the roof
Problem Possible causes/consequences and
M Solutions
The roof will not open or
close. The boot separator is not closed and not properly engaged.
X
Close the boot separator (Y page 81). The boot lid is open.
X
Close the boot lid (Y page 73). The on-board voltage is too low.
X
Leave the engine running. The roof has been opened and closed several times in
arow. The
roof drive has been automatically deactivated.
You can open and close the roof again after approximately ten
minutes.
X Switch off the ignition and turn it back on.
X Repeat the opening or closing procedure. The automatic roof mechanism is faulty.
X
Consult a qualified specialist workshop. Draught stop
General notes The draught stop offers protection from the
wind when driving with the roof down.
G
WARNING
You could lose control of the vehicle and
injure yourself or others if you operate the
draught stop while driving.
Fit or remove AIRGUIDE only when the vehicle
is stationary. G
WARNING
If you use the draught stop in darkness or in
other conditions offering poor visibility, your
view to the rear is further impaired. As a result
of the visibility impairment, you could cause
an accident and injure yourself or others.
For this reason, remove the draught stop as
soon as it is dark or if your vision is otherwise
restricted. G
WARNING
If the draught stop is not correctly engaged,
it may break free and obstruct traffic behind
you or lead to an accident.
Each time before driving with the roof down,
check that the draught stop is properly
engaged.
! Fit or remove the draught stop only when
the roof is open. You could otherwise dam-
age the draught stop or the vehicle interior.
The draught stop can be fitted or removed
from the driver's side or passenger side.
Perform operations involving the draught
stop preferably on the side facing away from
traffic, after you have stopped the vehicle,
paying attention to road and traffic condi-
tions. 82
RoofOpening and closing
Page 87 of 321
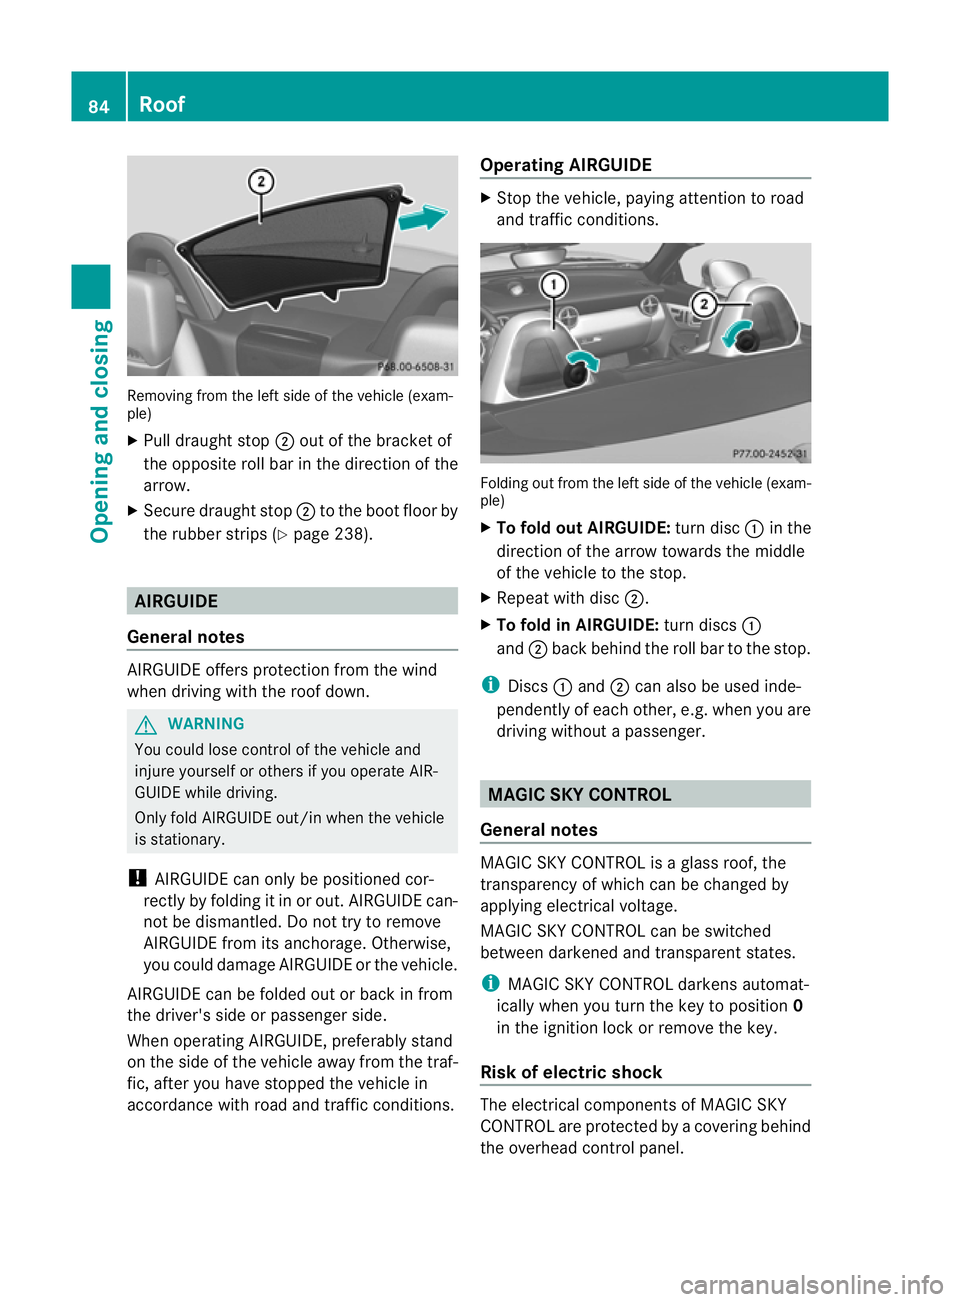
Removing from the left side of the vehicle (exam-
ple)
X
Pull draught stop ;out of the bracket of
the opposite roll bar in the direction of the
arrow.
X Secure draught stop ;to the boot floor by
the rubbe rstrips (Y page 238). AIRGUIDE
General notes AIRGUIDE offers protection from the wind
when driving with the roo fdown. G
WARNING
You could lose control of the vehicle and
injure yourself or others if you operate AIR-
GUIDE while driving.
Only fold AIRGUIDE out/in when the vehicle
is stationary.
! AIRGUIDE can only be positioned cor-
rectly by folding it in or out. AIRGUIDE can-
not be dismantled. Do not try to remove
AIRGUIDE from its anchorage. Otherwise,
you could damage AIRGUIDE or the vehicle.
AIRGUIDE can be folded out or back in from
the driver's side or passenger side.
When operating AIRGUIDE ,preferably stand
on the side of the vehicle away from the traf-
fic, after you have stopped the vehicle in
accordance with road and traffic conditions. Operating AIRGUIDE X
Stop the vehicle, paying attention to road
and traffic conditions. Folding out from the left side of the vehicle (exam-
ple)
X
To fold out AIRGUIDE: turn disc:in the
direction of the arrow towards the middle
of the vehicle to the stop.
X Repeat with disc ;.
X To fold in AIRGUIDE: turn discs:
and ;back behind the roll bar to the stop.
i Discs :and ;can also be used inde-
pendently of each other, e.g. when you are
driving without a passenger. MAGIC SKY CONTROL
General notes MAGIC SKY CONTROL is a glass roof, the
transparency of which can be changed by
applying electrical voltage.
MAGIC SKY CONTROL can be switched
between darkened and transparent states.
i
MAGIC SKY CONTROL darkens automat-
ically when you turn the key to position 0
in the ignition lock or remove the key.
Risk of electric shock The electrical components of MAGIC SKY
CONTROL are protected by a covering behind
the overhead control panel.84
RoofOpening and closing
Page 91 of 321
Useful information
i This Owner's Manual describes all models
and all standard and optional equipment
available to your vehicle at the time of pub-
lication of the Owner's Manual. Country-
specific deviations are possible. Please
note that your vehicle may not be equipped
with all features described. This also
applies to safety-relevan tsystems and
functions.
i Please read the information on qualified
specialist workshops (Y page 22).Correct driver's sea
tposition Observe the safety guidelines on
(Y
page 89).
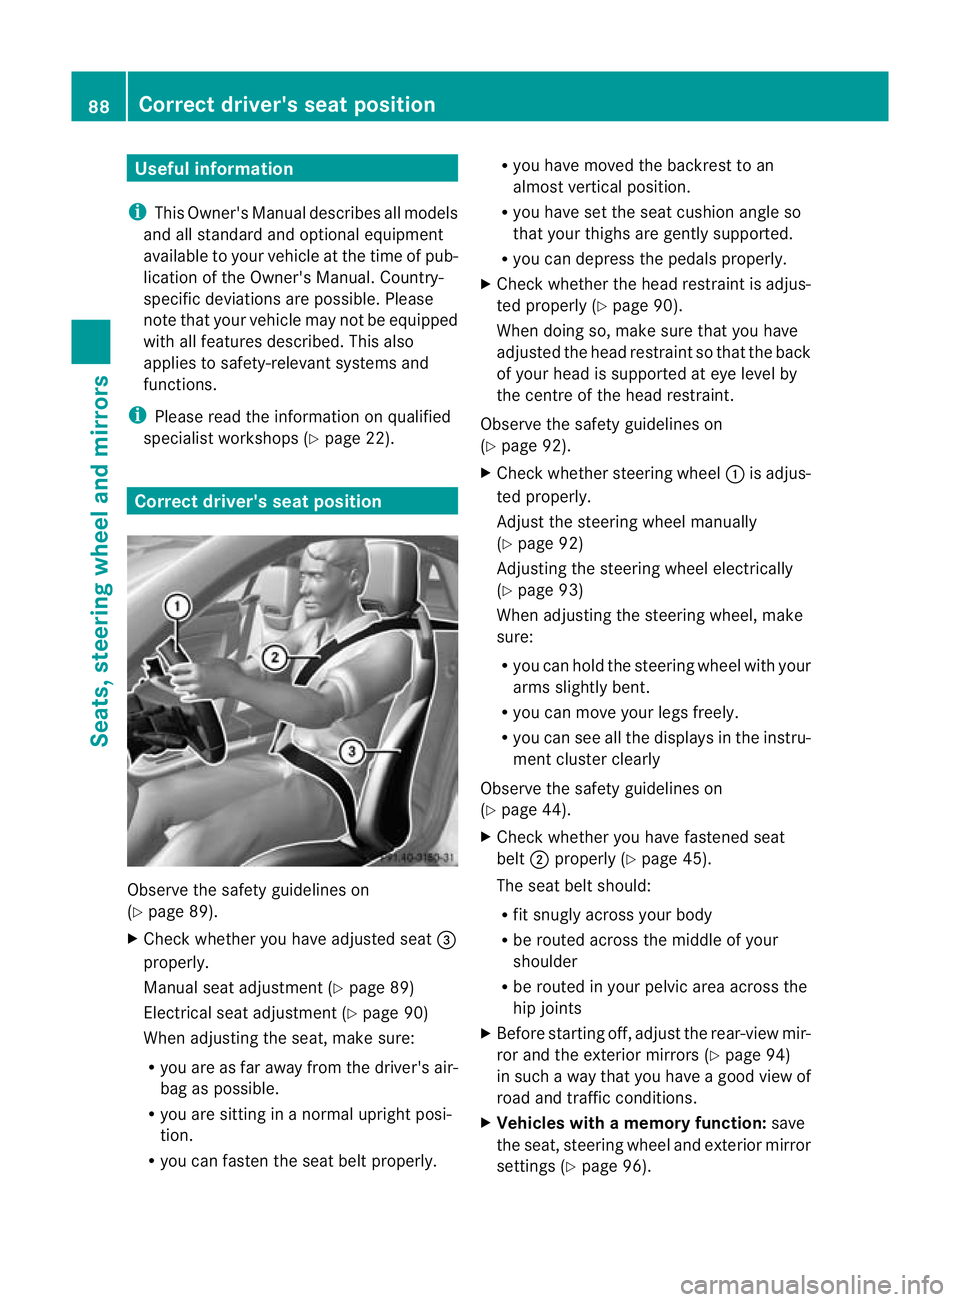
X Chec kwhether you have adjusted seat =
properly.
Manual seat adjustment (Y page 89)
Electrical seat adjustment (Y page 90)
When adjusting the seat, make sure:
R you are as far away from the driver's air-
bag as possible.
R you are sitting in a normal upright posi-
tion.
R you can fasten the seat belt properly. R
you have moved the backrest to an
almost vertical position.
R you have set the seat cushion angle so
that your thighs are gently supported.
R you can depress the pedals properly.
X Check whether the head restraint is adjus-
ted properly (Y page 90).
When doing so, make sure that you have
adjusted the head restraint so that the back
of your head is supported at eye level by
the centre of the head restraint.
Observe the safety guidelines on
(Y page 92).
X Check whether steering wheel :is adjus-
ted properly.
Adjust the steering wheel manually
(Y page 92)
Adjusting the steering wheel electrically
(Y page 93)
When adjusting the steering wheel, make
sure:
R you can hold the steering wheel with your
arms slightly bent.
R you can move your legs freely.
R you can see all the displays in the instru-
ment cluster clearly
Observe the safety guidelines on
(Y page 44).
X Check whether you have fastened seat
belt ;properly (Y page 45).
The seat belt should:
R fit snugly across your body
R be routed across the middle of your
shoulder
R be routed in your pelvic area across the
hip joints
X Before starting off, adjust the rear-view mir-
ror and the exterior mirrors (Y page 94)
in such a way that you have a good view of
road and traffic conditions.
X Vehicles with a memory function: save
the seat, steering wheel and exterior mirror
settings (Y page 96). 88
Correct driver's seat positionSeats, steering wheel and mirrors