2012 MERCEDES-BENZ SLK-CLASS ROADSTER oil level
[x] Cancel search: oil levelPage 11 of 336
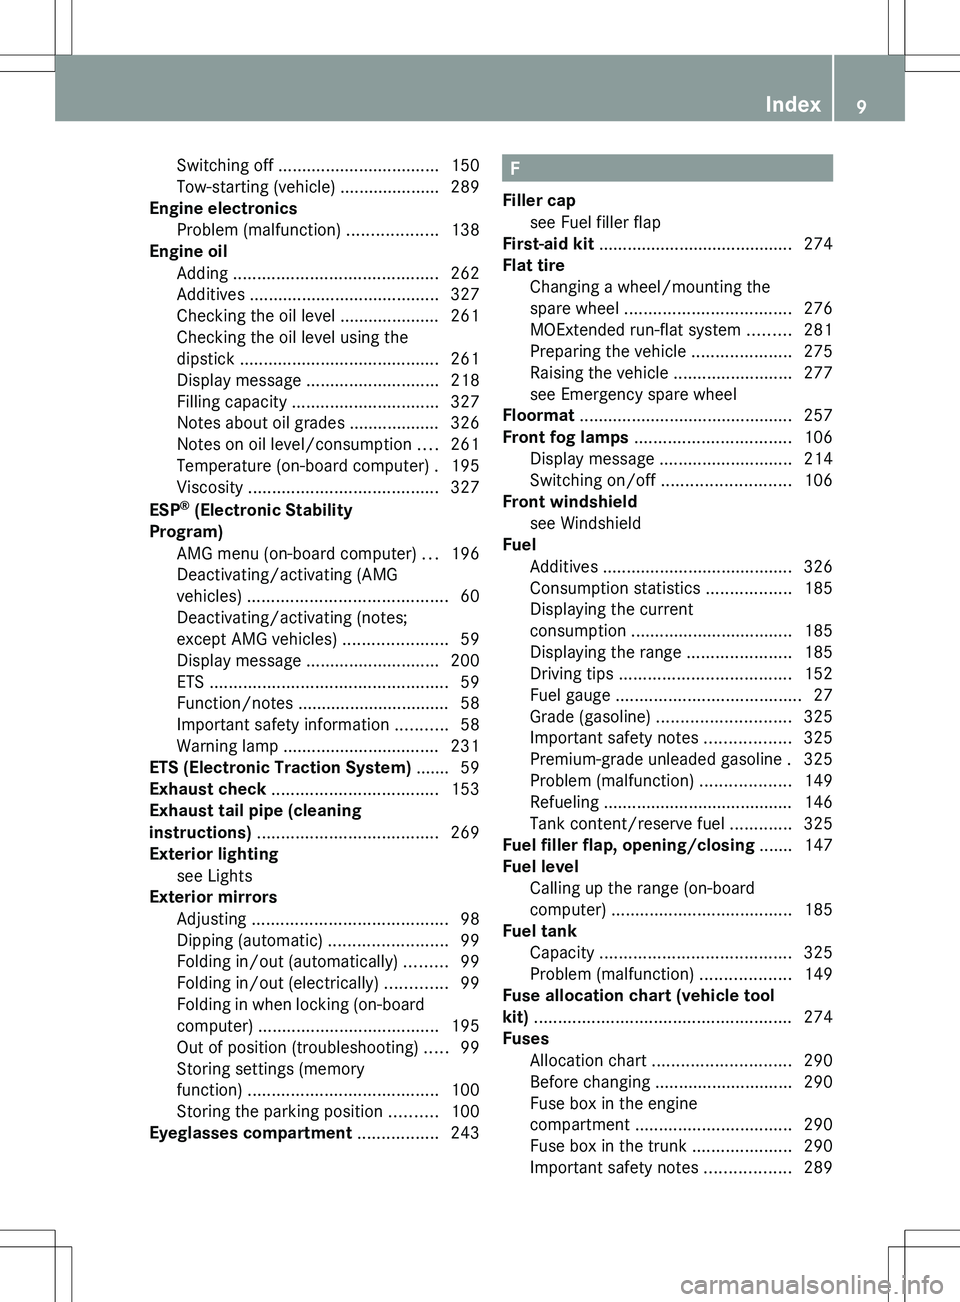
Switching off .................................. 150
Tow-starting (vehicle) ..................... 289
Engine electronics
Problem (malfunction) ...................138
Engine oil
Adding ........................................... 262
Additives ........................................ 327
Checking the oil level ..................... 261
Checking the oil level using the
dipstick .......................................... 261
Display message ............................ 218
Filling capacity ............................... 327
Notes about oil grades ................... 326
Notes on oil level/consumption ....261
Temperature (on-board computer) . 195
Viscosity ........................................ 327
ESP ®
(Electronic Stability
Program) AMG menu (on-board computer) ...196
Deactivating/activating (AMG
vehicles) .......................................... 60
Deactivating/activating (notes;
except AMG vehicles) ......................59
Display message ............................ 200
ETS .................................................. 59
Function/notes ................................ 58
Important safety information ...........58
Warning lamp ................................. 231
ETS (Electronic Traction System) ....... 59
Exhaust check ................................... 153
Exhaust tail pipe (cleaning
instructions) ...................................... 269
Exterior lighting see Lights
Exterior mirrors
Adjusting ......................................... 98
Dipping (automatic) .........................99
Folding in/out (automatically) .........99
Folding in/out (electrically) .............99
Folding in when locking (on-board
computer) ...................................... 195
Out of position (troubleshooting) .....99
Storing settings (memory
function) ........................................ 100
Storing the parking position ..........100
Eyeglasses compartment ................. 243F
Filler cap see Fuel filler flap
First-aid kit ......................................... 274
Flat tire Changing a wheel/mounting the
spare wheel ................................... 276
MOExtended run-flat system .........281
Preparing the vehicle .....................275
Raising the vehicle .........................277
see Emergency spare wheel
Floormat ............................................. 257
Front fog lamps ................................. 106
Display message ............................ 214
Switching on/off ........................... 106
Front windshield
see Windshield
Fuel
Additives ........................................ 326
Consumption statistics ..................185
Displaying the current
consumption .................................. 185
Displaying the range ......................185
Driving tips .................................... 152
Fuel gauge ....................................... 27
Grade (gasoline) ............................ 325
Important safety notes ..................325
Premium-grade unleaded gasoline . 325
Problem (malfunction) ...................149
Refueling ........................................ 146
Tank content/reserve fuel .............325
Fuel filler flap, opening/closing ....... 147
Fuel level Calling up the range (on-board
computer) ...................................... 185
Fuel tank
Capacity ........................................ 325
Problem (malfunction) ...................149
Fuse allocation chart (vehicle tool
kit) ...................................................... 274
Fuses Allocation chart ............................. 290
Before changing ............................. 290
Fuse box in the engine
compartment ................................. 290
Fuse box in the trunk .....................290
Important safety notes ..................289Index9
Page 14 of 336
Downloading destinations
(COMAND) ..................................... 252
Emergency call .............................. 249
Important safety notes ..................248
Locating a stolen vehicle ...............254
MB info call button ........................251
Remote vehicle locking ..................254
Roadside Assistance button ..........251
Search & Send ............................... 253
Self-test ......................................... 249
System .......................................... 249
Vehicle remote unlocking ..............253
Mechanical key
Function/notes ................................ 70
Locking vehicle ................................ 76
Unlocking the driver's door ..............76
Memory card (audio) ......................... 188
Memory function ............................... 100
Message memory (on-board
computer) .......................................... 199
Messages see Display messages
Mirrors
see Exterior mirrors
see Rear-view mirror
see Vanity mirror
Mobile phone
Menu (on-board computer) ............189
see Phone
Modifying the programming
(SmartKey) ........................................... 70
MOExtended run-flat system ........... 281
MP3 Operation ....................................... 188
see separate operating instructions
Multifunction display
Function/notes ............................. 183
Permanent display .........................192
Multifunction steering wheel
Operating the on-board computer . 181
Overview .......................................... 29N
Navigation Menu (on-board computer) ............186
On-board computer .......................186
see separate operating instructions
Neck level heating
see AIRSCARF
NECK-PRO head restraints
Operation ......................................... 47
Resetting after being triggered ........48
Notes on breaking-in a new
vehicle ................................................ 130
O
Occupant Classification System
(OCS) Faults ............................................... 46
Operation ......................................... 42
System self-test ............................... 45
Occupant safety
Children in the vehicle .....................53
System overview .............................. 36
OCS
Faults ............................................... 46
Operation ......................................... 42
System self-test ............................... 45
Odometer ........................................... 185
see Trip odometer
Oil
see Engine oil
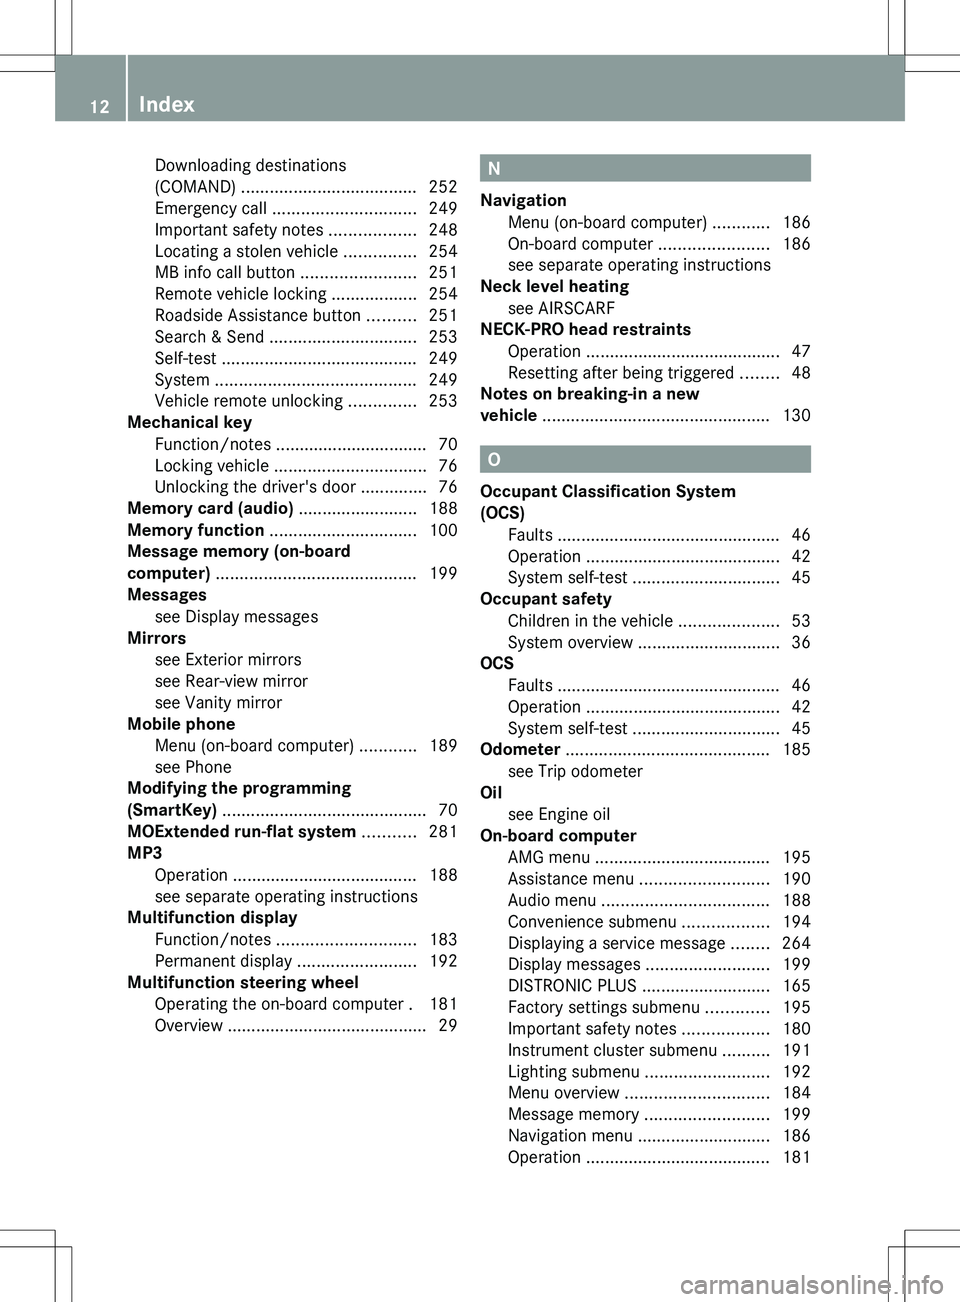
On-board computer
AMG menu ..................................... 195
Assistance menu ........................... 190
Audio menu ................................... 188
Convenience submenu ..................194
Displaying a service message ........264
Display messages ..........................199
DISTRONIC PLUS ........................... 165
Factory settings submenu .............195
Important safety notes ..................180
Instrument cluster submenu ..........191
Lighting submenu .......................... 192
Menu overview .............................. 184
Message memory .......................... 199
Navigation menu ............................ 186
Operation ....................................... 181
12Index
Page 148 of 336
Problems with the transmissionProblemPossible causes/consequences and M SolutionsThe transmission has
problems shifting gear.The transmission is losing oil.XHave the transmission checked at a qualified specialist
workshop immediately.The acceleration ability
is deteriorating.
The transmission no
longer changes gear.The transmission is in emergency mode.
It is only possible to shift into second gear and reverse gear.XStop the vehicle.XShift the transmission to position P.XSwitch off the engine.XWait at least 10seconds before restarting the engine.XShift the transmission to position D or R.
If D is selected, the transmission shifts into second gear; if R is
selected, the transmission shifts into reverse gear.XHave the transmission checked at a qualified specialist
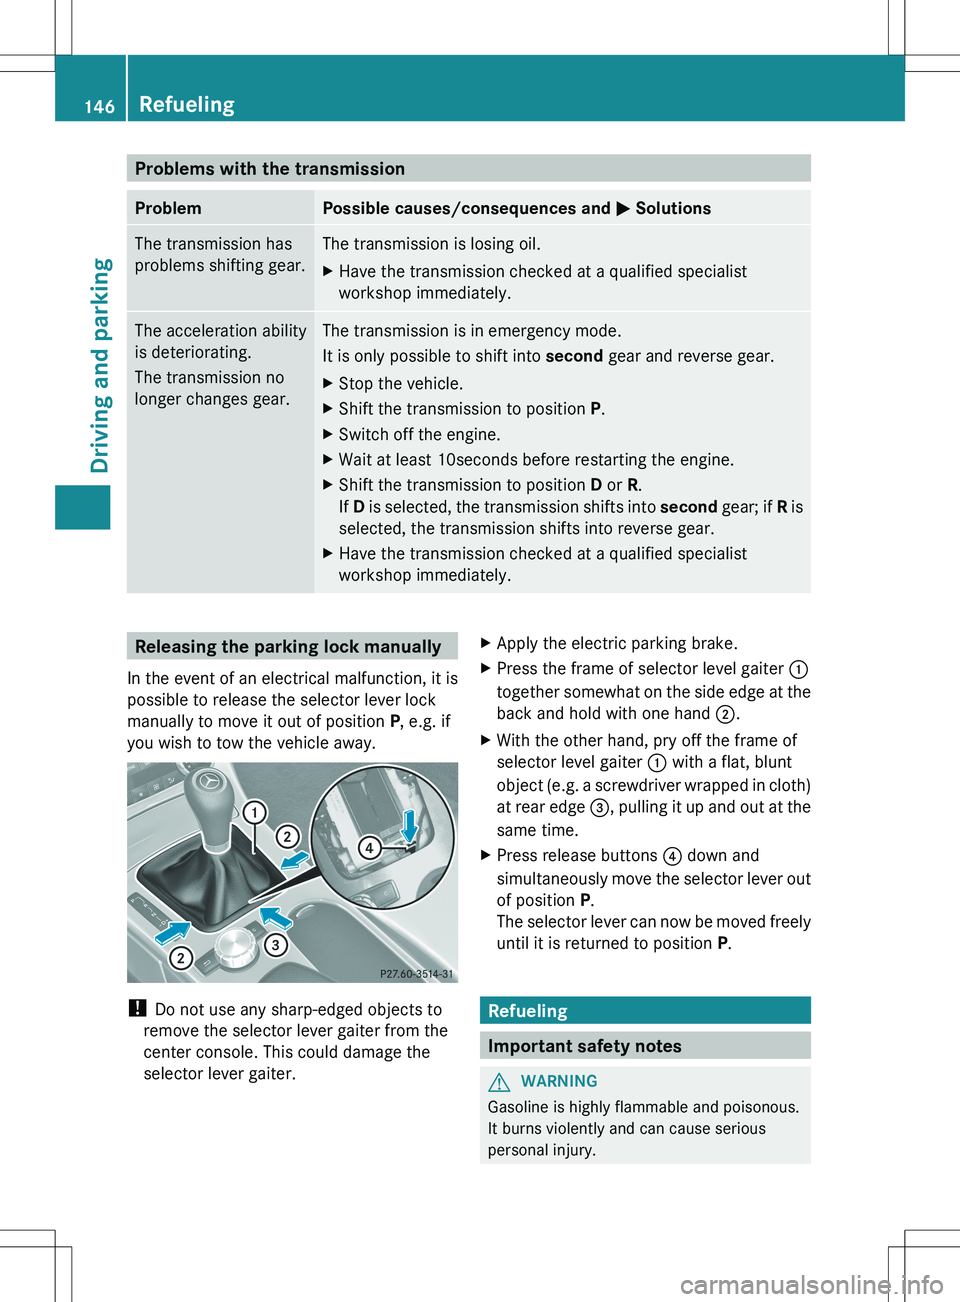
workshop immediately.Releasing the parking lock manually
In the event of an electrical malfunction, it is
possible to release the selector lever lock
manually to move it out of position P, e.g. if
you wish to tow the vehicle away.
! Do not use any sharp-edged objects to
remove the selector lever gaiter from the
center console. This could damage the
selector lever gaiter.
XApply the electric parking brake.XPress the frame of selector level gaiter :
together somewhat on the side edge at the
back and hold with one hand ;.XWith the other hand, pry off the frame of
selector level gaiter : with a flat, blunt
object (e.g. a screwdriver wrapped in cloth)
at rear edge =, pulling it up and out at the
same time.XPress release buttons ? down and
simultaneously move the selector lever out
of position P.
The selector lever can now be moved freely
until it is returned to position P.
Refueling
Important safety notes
GWARNING
Gasoline is highly flammable and poisonous.
It burns violently and can cause serious
personal injury.
146RefuelingDriving and parking
Page 220 of 336
Display messagesPossible causes/consequences and M Solutions#The battery is not being charged.
Possible causes are:
R a defective alternator
R a torn poly-V-belt
R a malfunction in the electronicsXPull over and stop the vehicle safely and switch off the engine,
paying attention to road and traffic conditions.XOpen the hood.XCheck whether the poly-V-belt is torn.
If the poly-V-belt is torn:
! Do not continue driving. The engine could otherwise overheat.
XConsult a qualified specialist workshop.
If the poly-V-belt is not damaged:
XVisit a qualified specialist workshop.4
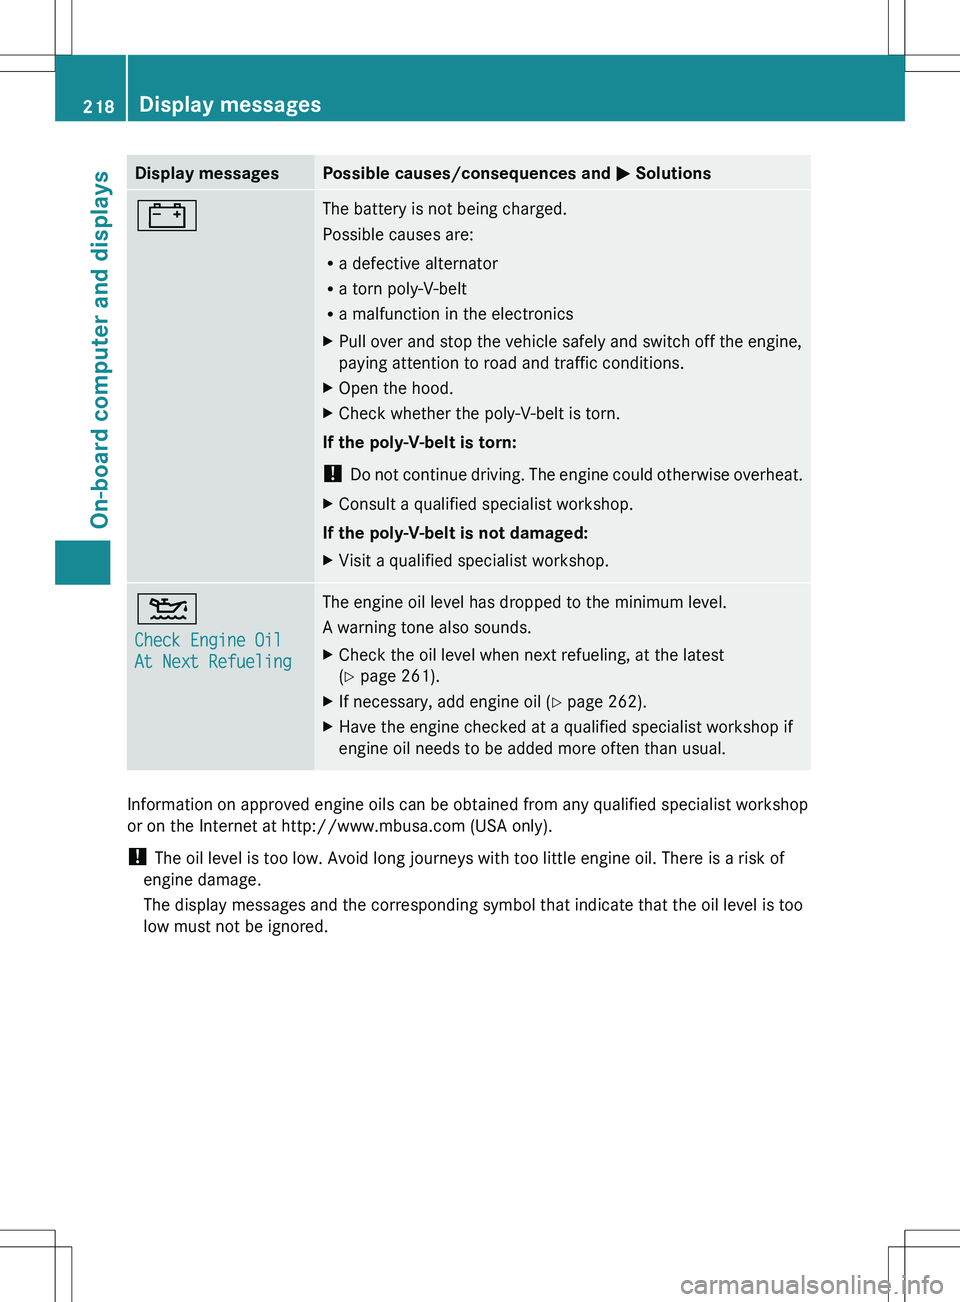
Check Engine Oil
At Next RefuelingThe engine oil level has dropped to the minimum level.
A warning tone also sounds.XCheck the oil level when next refueling, at the latest
( Y page 261).XIf necessary, add engine oil ( Y page 262).XHave the engine checked at a qualified specialist workshop if
engine oil needs to be added more often than usual.
Information on approved engine oils can be obtained from any qualified specialist workshop
or on the Internet at http://www.mbusa.com (USA only).
! The oil level is too low. Avoid long journeys with too little engine oil. There is a risk of
engine damage.
The display messages and the corresponding symbol that indicate that the oil level is too
low must not be ignored.
218Display messagesOn-board computer and displays
Page 263 of 336
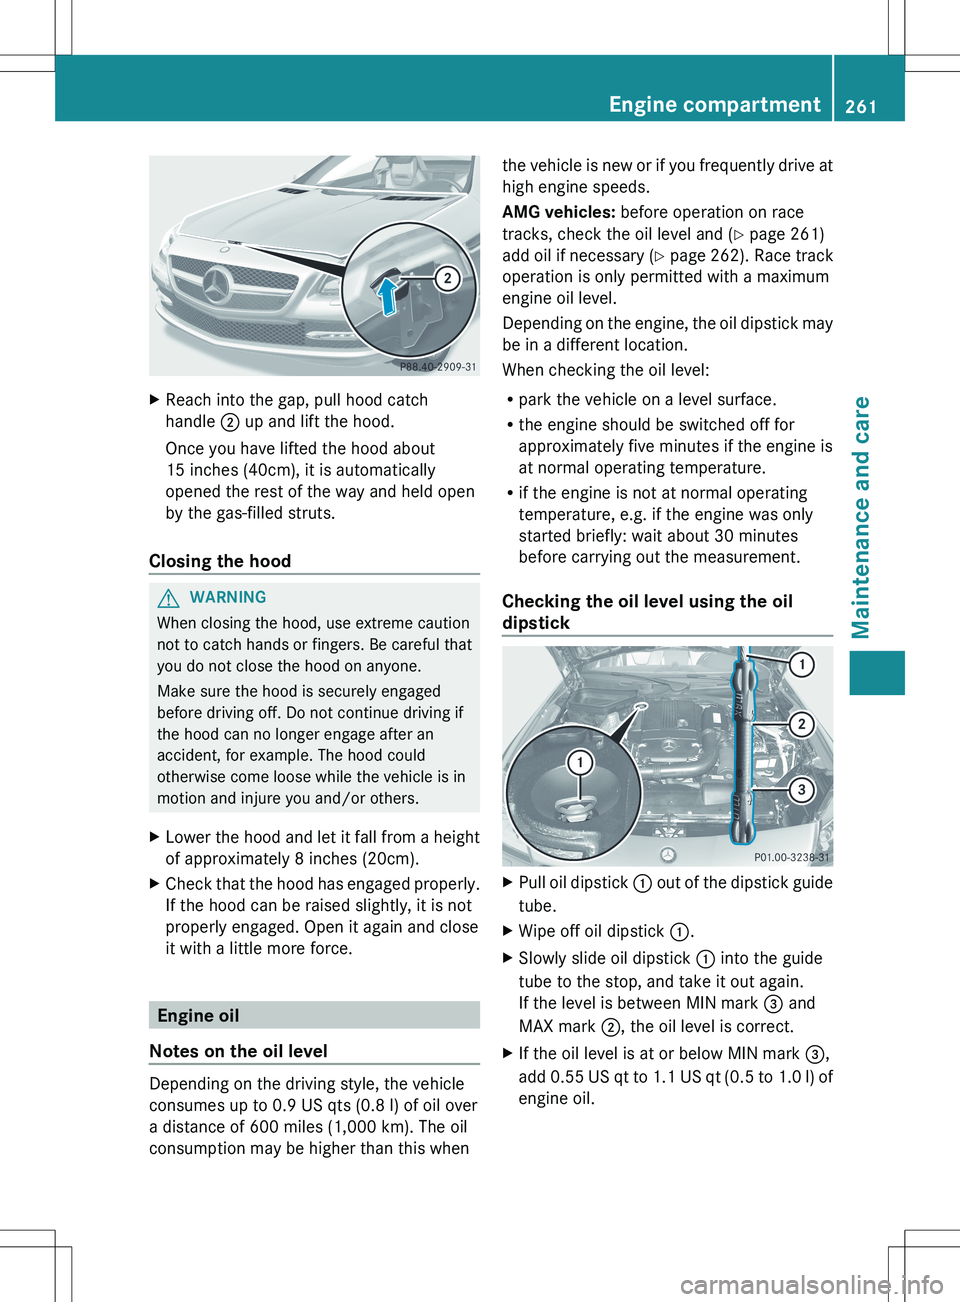
XReach into the gap, pull hood catch
handle ; up and lift the hood.
Once you have lifted the hood about
15 inches (40cm), it is automatically
opened the rest of the way and held open
by the gas-filled struts.
Closing the hood
GWARNING
When closing the hood, use extreme caution
not to catch hands or fingers. Be careful that
you do not close the hood on anyone.
Make sure the hood is securely engaged
before driving off. Do not continue driving if
the hood can no longer engage after an
accident, for example. The hood could
otherwise come loose while the vehicle is in
motion and injure you and/or others.
XLower the hood and let it fall from a height
of approximately 8 inches (20cm).XCheck that the hood has engaged properly.
If the hood can be raised slightly, it is not
properly engaged. Open it again and close
it with a little more force.
Engine oil
Notes on the oil level
Depending on the driving style, the vehicle
consumes up to 0.9 US qts (0.8 l) of oil over
a distance of 600 miles (1,000 km). The oil
consumption may be higher than this when
the vehicle is new or if you frequently drive at
high engine speeds.
AMG vehicles: before operation on race
tracks, check the oil level and ( Y page 261)
add oil if necessary (Y page 262). Race track
operation is only permitted with a maximum
engine oil level.
Depending on the engine, the oil dipstick may
be in a different location.
When checking the oil level:
R park the vehicle on a level surface.
R the engine should be switched off for
approximately five minutes if the engine is
at normal operating temperature.
R if the engine is not at normal operating
temperature, e.g. if the engine was only
started briefly: wait about 30 minutes
before carrying out the measurement.
Checking the oil level using the oil
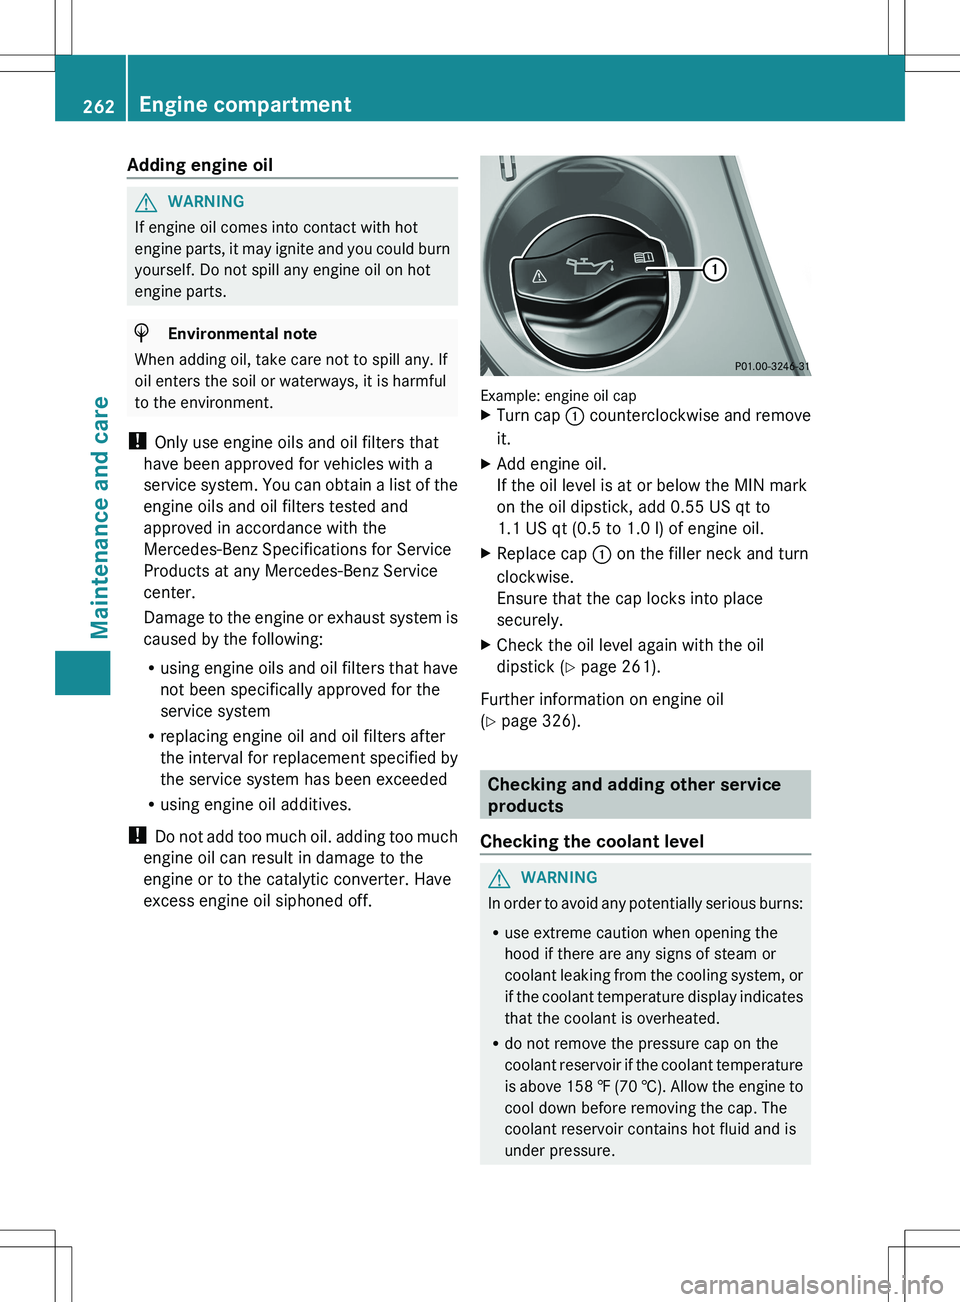
dipstickXPull oil dipstick : out of the dipstick guide
tube.XWipe off oil dipstick :.XSlowly slide oil dipstick : into the guide
tube to the stop, and take it out again.
If the level is between MIN mark = and
MAX mark ;, the oil level is correct.XIf the oil level is at or below MIN mark =,
add 0.55 US qt to 1.1 US qt ( 0.5 to 1.0 l) of
engine oil.Engine compartment261Maintenance and careZ
Page 264 of 336
Adding engine oilGWARNING
If engine oil comes into contact with hot
engine parts, it may ignite and you could burn
yourself. Do not spill any engine oil on hot
engine parts.
HEnvironmental note
When adding oil, take care not to spill any. If
oil enters the soil or waterways, it is harmful
to the environment.
! Only use engine oils and oil filters that
have been approved for vehicles with a
service system. You can obtain a list of the
engine oils and oil filters tested and
approved in accordance with the
Mercedes-Benz Specifications for Service
Products at any Mercedes-Benz Service
center.
Damage to the engine or exhaust system is
caused by the following:
R using engine oils and oil filters that have
not been specifically approved for the
service system
R replacing engine oil and oil filters after
the interval for replacement specified by
the service system has been exceeded
R using engine oil additives.
! Do not add too much oil. adding too much
engine oil can result in damage to the
engine or to the catalytic converter. Have
excess engine oil siphoned off.
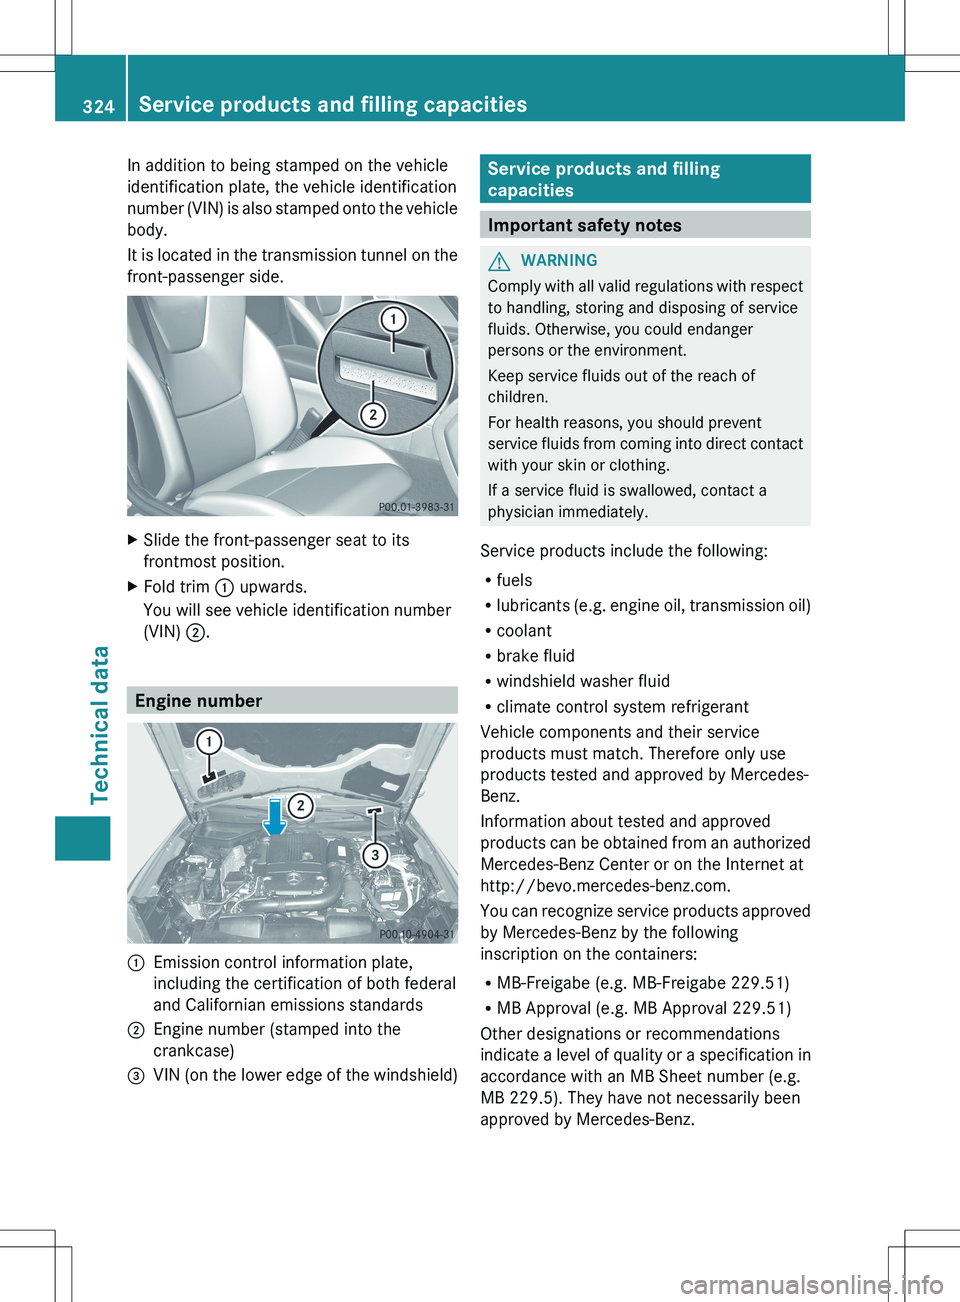
Example: engine oil cap
XTurn cap : counterclockwise and remove
it.XAdd engine oil.
If the oil level is at or below the MIN mark
on the oil dipstick, add 0.55 US qt to
1.1 US qt (0.5 to 1.0 l) of engine oil.XReplace cap : on the filler neck and turn
clockwise.
Ensure that the cap locks into place
securely.XCheck the oil level again with the oil
dipstick ( Y page 261).
Further information on engine oil
( Y page 326).
Checking and adding other service
products
Checking the coolant level
GWARNING
In order to avoid any potentially serious burns:
R use extreme caution when opening the
hood if there are any signs of steam or
coolant leaking from the cooling system, or
if the coolant temperature display indicates
that the coolant is overheated.
R do not remove the pressure cap on the
coolant reservoir if the coolant temperature
is above 158 ‡ (70 †). Allow the engine to
cool down before removing the cap. The
coolant reservoir contains hot fluid and is
under pressure.
262Engine compartmentMaintenance and care
Page 326 of 336
In addition to being stamped on the vehicle
identification plate, the vehicle identification
number (VIN) is also stamped onto the vehicle
body.
It is located in the transmission tunnel on the
front-passenger side.XSlide the front-passenger seat to its
frontmost position.XFold trim : upwards.
You will see vehicle identification number
(VIN) ;.
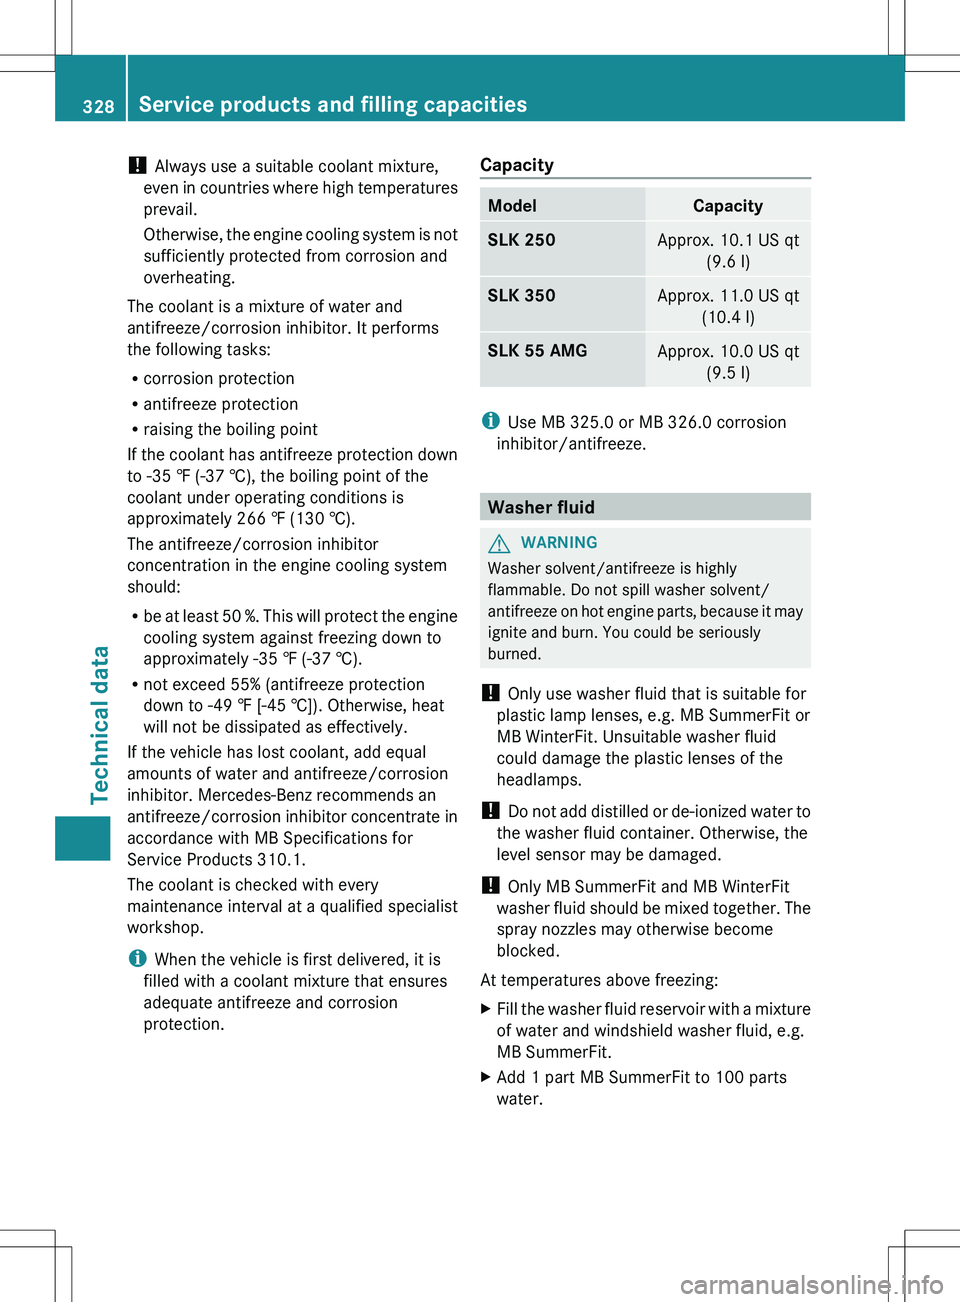
Engine number
:Emission control information plate,
including the certification of both federal
and Californian emissions standards;Engine number (stamped into the
crankcase)=VIN (on the lower edge of the windshield)Service products and filling
capacities
Important safety notes
GWARNING
Comply with all valid regulations with respect
to handling, storing and disposing of service
fluids. Otherwise, you could endanger
persons or the environment.
Keep service fluids out of the reach of
children.
For health reasons, you should prevent
service fluids from coming into direct contact
with your skin or clothing.
If a service fluid is swallowed, contact a
physician immediately.
Service products include the following:
R fuels
R lubricants (e.g. engine oil, transmission oil)
R coolant
R brake fluid
R windshield washer fluid
R climate control system refrigerant
Vehicle components and their service
products must match. Therefore only use
products tested and approved by Mercedes-
Benz.
Information about tested and approved
products can be obtained from an authorized
Mercedes-Benz Center or on the Internet at
http://bevo.mercedes-benz.com.
You can recognize service products approved
by Mercedes-Benz by the following
inscription on the containers:
R MB-Freigabe (e.g. MB-Freigabe 229.51)
R MB Approval (e.g. MB Approval 229.51)
Other designations or recommendations
indicate a level of quality or a specification in
accordance with an MB Sheet number (e.g.
MB 229.5). They have not necessarily been
approved by Mercedes-Benz.
324Service products and filling capacitiesTechnical data
Page 330 of 336
! Always use a suitable coolant mixture,
even in countries where high temperatures
prevail.
Otherwise, the engine cooling system is not
sufficiently protected from corrosion and
overheating.
The coolant is a mixture of water and
antifreeze/corrosion inhibitor. It performs
the following tasks:
R corrosion protection
R antifreeze protection
R raising the boiling point
If the coolant has antifreeze protection down
to -35 ‡ (-37 †), the boiling point of the
coolant under operating conditions is
approximately 266 ‡ (130 †).
The antifreeze/corrosion inhibitor
concentration in the engine cooling system
should:
R be at least 50 %. This will protect the engine
cooling system against freezing down to
approximately -35 ‡ (-37 †).
R not exceed 55% (antifreeze protection
down to -49 ‡ [-45 †]). Otherwise, heat
will not be dissipated as effectively.
If the vehicle has lost coolant, add equal
amounts of water and antifreeze/corrosion
inhibitor. Mercedes-Benz recommends an
antifreeze/corrosion inhibitor concentrate in
accordance with MB Specifications for
Service Products 310.1.
The coolant is checked with every
maintenance interval at a qualified specialist
workshop.
i When the vehicle is first delivered, it is
filled with a coolant mixture that ensures
adequate antifreeze and corrosion
protection.CapacityModelCapacitySLK 250Approx. 10.1 US qt (9.6 l)SLK 350Approx. 11.0 US qt(10.4 l)SLK 55 AMGApprox. 10.0 US qt (9.5 l)
iUse MB 325.0 or MB 326.0 corrosion
inhibitor/antifreeze.
Washer fluid
GWARNING
Washer solvent/antifreeze is highly
flammable. Do not spill washer solvent/
antifreeze on hot engine parts, because it may
ignite and burn. You could be seriously
burned.
! Only use washer fluid that is suitable for
plastic lamp lenses, e.g. MB SummerFit or
MB WinterFit. Unsuitable washer fluid
could damage the plastic lenses of the
headlamps.
! Do not add distilled or de-ionized water to
the washer fluid container. Otherwise, the
level sensor may be damaged.
! Only MB SummerFit and MB WinterFit
washer fluid should be mixed together. The
spray nozzles may otherwise become
blocked.
At temperatures above freezing:
XFill the washer fluid reservoir with a mixture
of water and windshield washer fluid, e.g.
MB SummerFit.XAdd 1 part MB SummerFit to 100 parts
water.328Service products and filling capacitiesTechnical data